2.1.2 Micro Switch
Introduction
In this project, we will learn how to use Micro Switch. A Micro Switch is a small, very sensitive switch which requires minimum compression to activate. Because they are reliable and sensitive, micro switches are often used as a safety device.
They are used to prevent doors from closing if something or someone is in the way and other applications similar.
Required Components
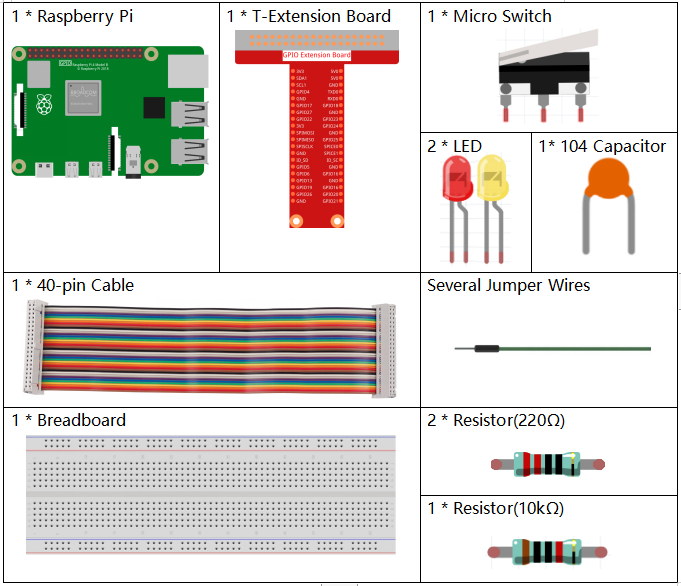
In this project, we need the following components.

It’s definitely convenient to buy a whole kit, here’s the link:
Name |
ITEMS IN THIS KIT |
LINK |
|---|---|---|
Raphael Kit |
337 |
You can also buy them separately from the links below.
COMPONENT INTRODUCTION |
PURCHASE LINK |
|---|---|
- |
|
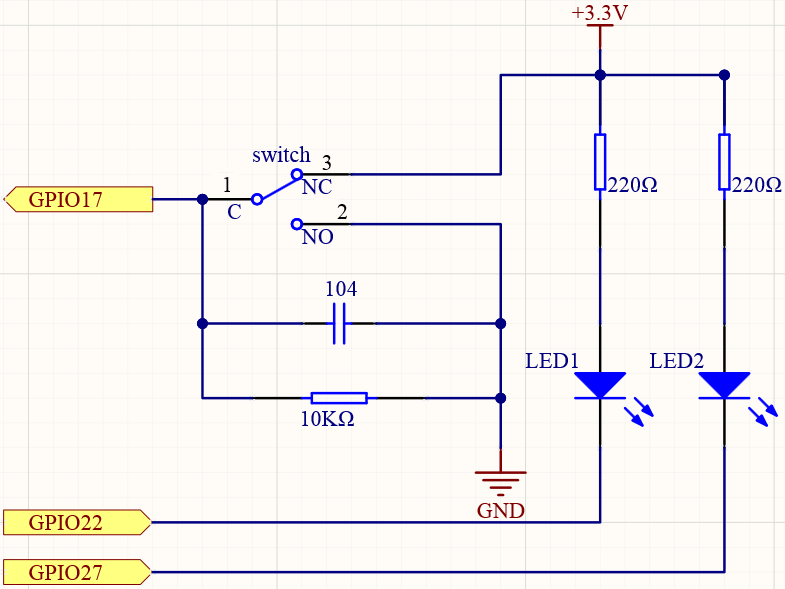
Schematic Diagram
Connect the left pin of the Micro Switch to GPIO17, and two LEDs to pin GPIO22 and GPIO27 respectively. Then when you press and release the move arm of the Micro Switch, you can see the two LEDs light up alternately.


Experimental Procedures
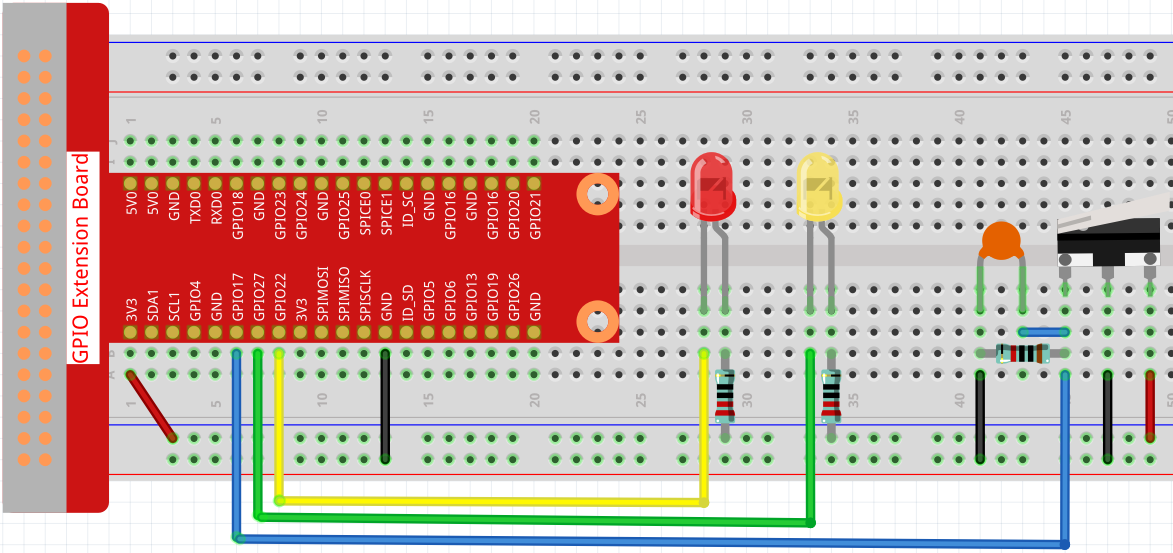
Step 1: Build the circuit.

Step 2: Go to the folder of the code.
cd ~/raphael-kit/nodejs/
Step 3: Run the code.
sudo node micro_switch.js
While the code is running, press the Micro Switch, then the yellow LED lights up; release the moving arm, the red LED turns on.
Code
const Gpio = require('pigpio').Gpio;

const led1 = new Gpio(22, {mode: Gpio.OUTPUT});
const led2 = new Gpio(27, {mode: Gpio.OUTPUT});

const microSwitch = new Gpio(17, {
    mode: Gpio.INPUT,
    pullUpDown: Gpio.PUD_DOWN,
    edge: Gpio.EITHER_EDGE
});

microSwitch.on('interrupt', (level) => {
    led1.digitalWrite(level);
    led2.digitalWrite(!level);
});
Code Explanation
const Gpio = require('pigpio').Gpio;

const led1 = new Gpio(22, {mode: Gpio.OUTPUT});
const led2 = new Gpio(27, {mode: Gpio.OUTPUT});

const microSwitch = new Gpio(17, {
    mode: Gpio.INPUT,
    pullUpDown: Gpio.PUD_DOWN,
    edge: Gpio.EITHER_EDGE
});
Import the pigpio module and create three objects led1, led2, micro,
By reading the level of the micro IO port, the on and off of led1 and led2 are controlled.
microSwitch.on('interrupt', (level) => {
    led1.digitalWrite(level);
    led2.digitalWrite(!level);
});
When the level of the read micro IO port changes, Write the same level to led1 and the opposite level to led2.