Note
Hello, welcome to the SunFounder Raspberry Pi & Arduino & ESP32 Enthusiasts Community on Facebook! Dive deeper into Raspberry Pi, Arduino, and ESP32 with fellow enthusiasts.
Why Join?
Expert Support: Solve post-sale issues and technical challenges with help from our community and team.
Learn & Share: Exchange tips and tutorials to enhance your skills.
Exclusive Previews: Get early access to new product announcements and sneak peeks.
Special Discounts: Enjoy exclusive discounts on our newest products.
Festive Promotions and Giveaways: Take part in giveaways and holiday promotions.
👉 Ready to explore and create with us? Click [here] and join today!
1.1.1 Blinking LED
Introduction
In this project, we will learn how to make a blinking LED by programming. Through your settings, your LED can produce a series of interesting phenomena. Now, go for it.
Required Components
In this project, we need the following components.
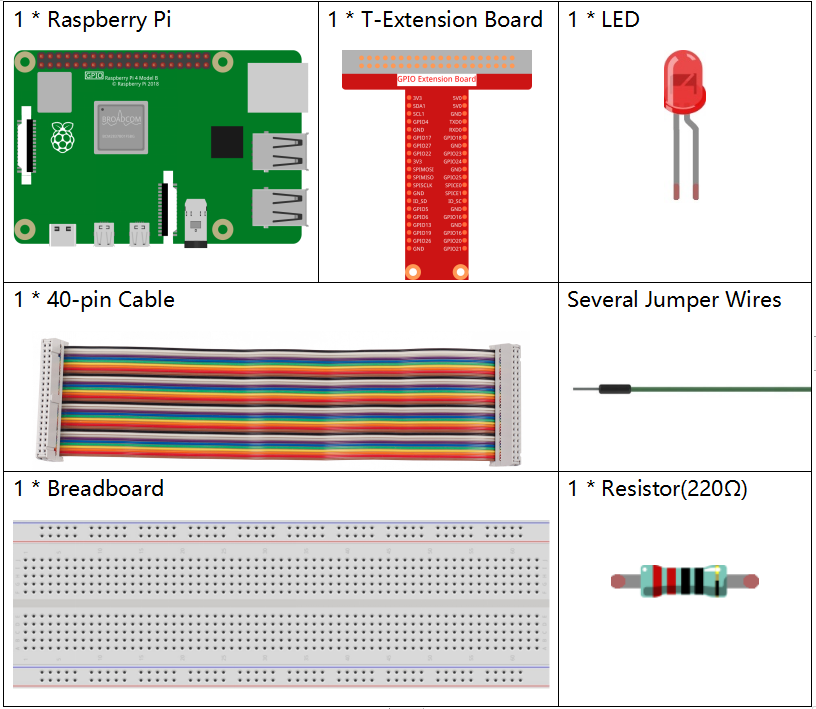
It’s definitely convenient to buy a whole kit, here’s the link:
Name |
ITEMS IN THIS KIT |
LINK |
|---|---|---|
Raphael Kit |
337 |
You can also buy them separately from the links below.
COMPONENT INTRODUCTION |
PURCHASE LINK |
|---|---|
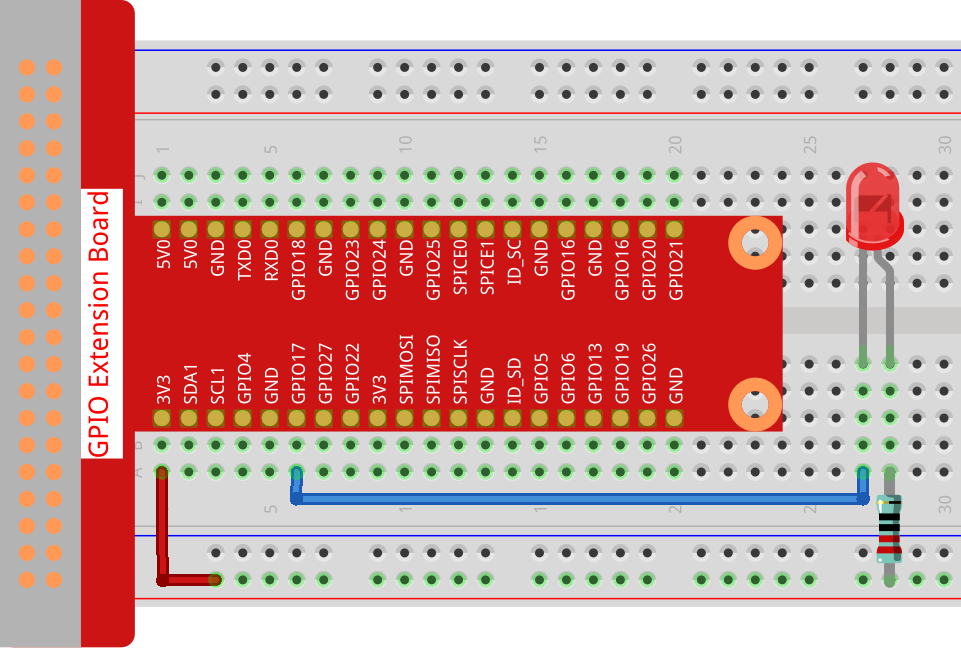
Schematic Diagram
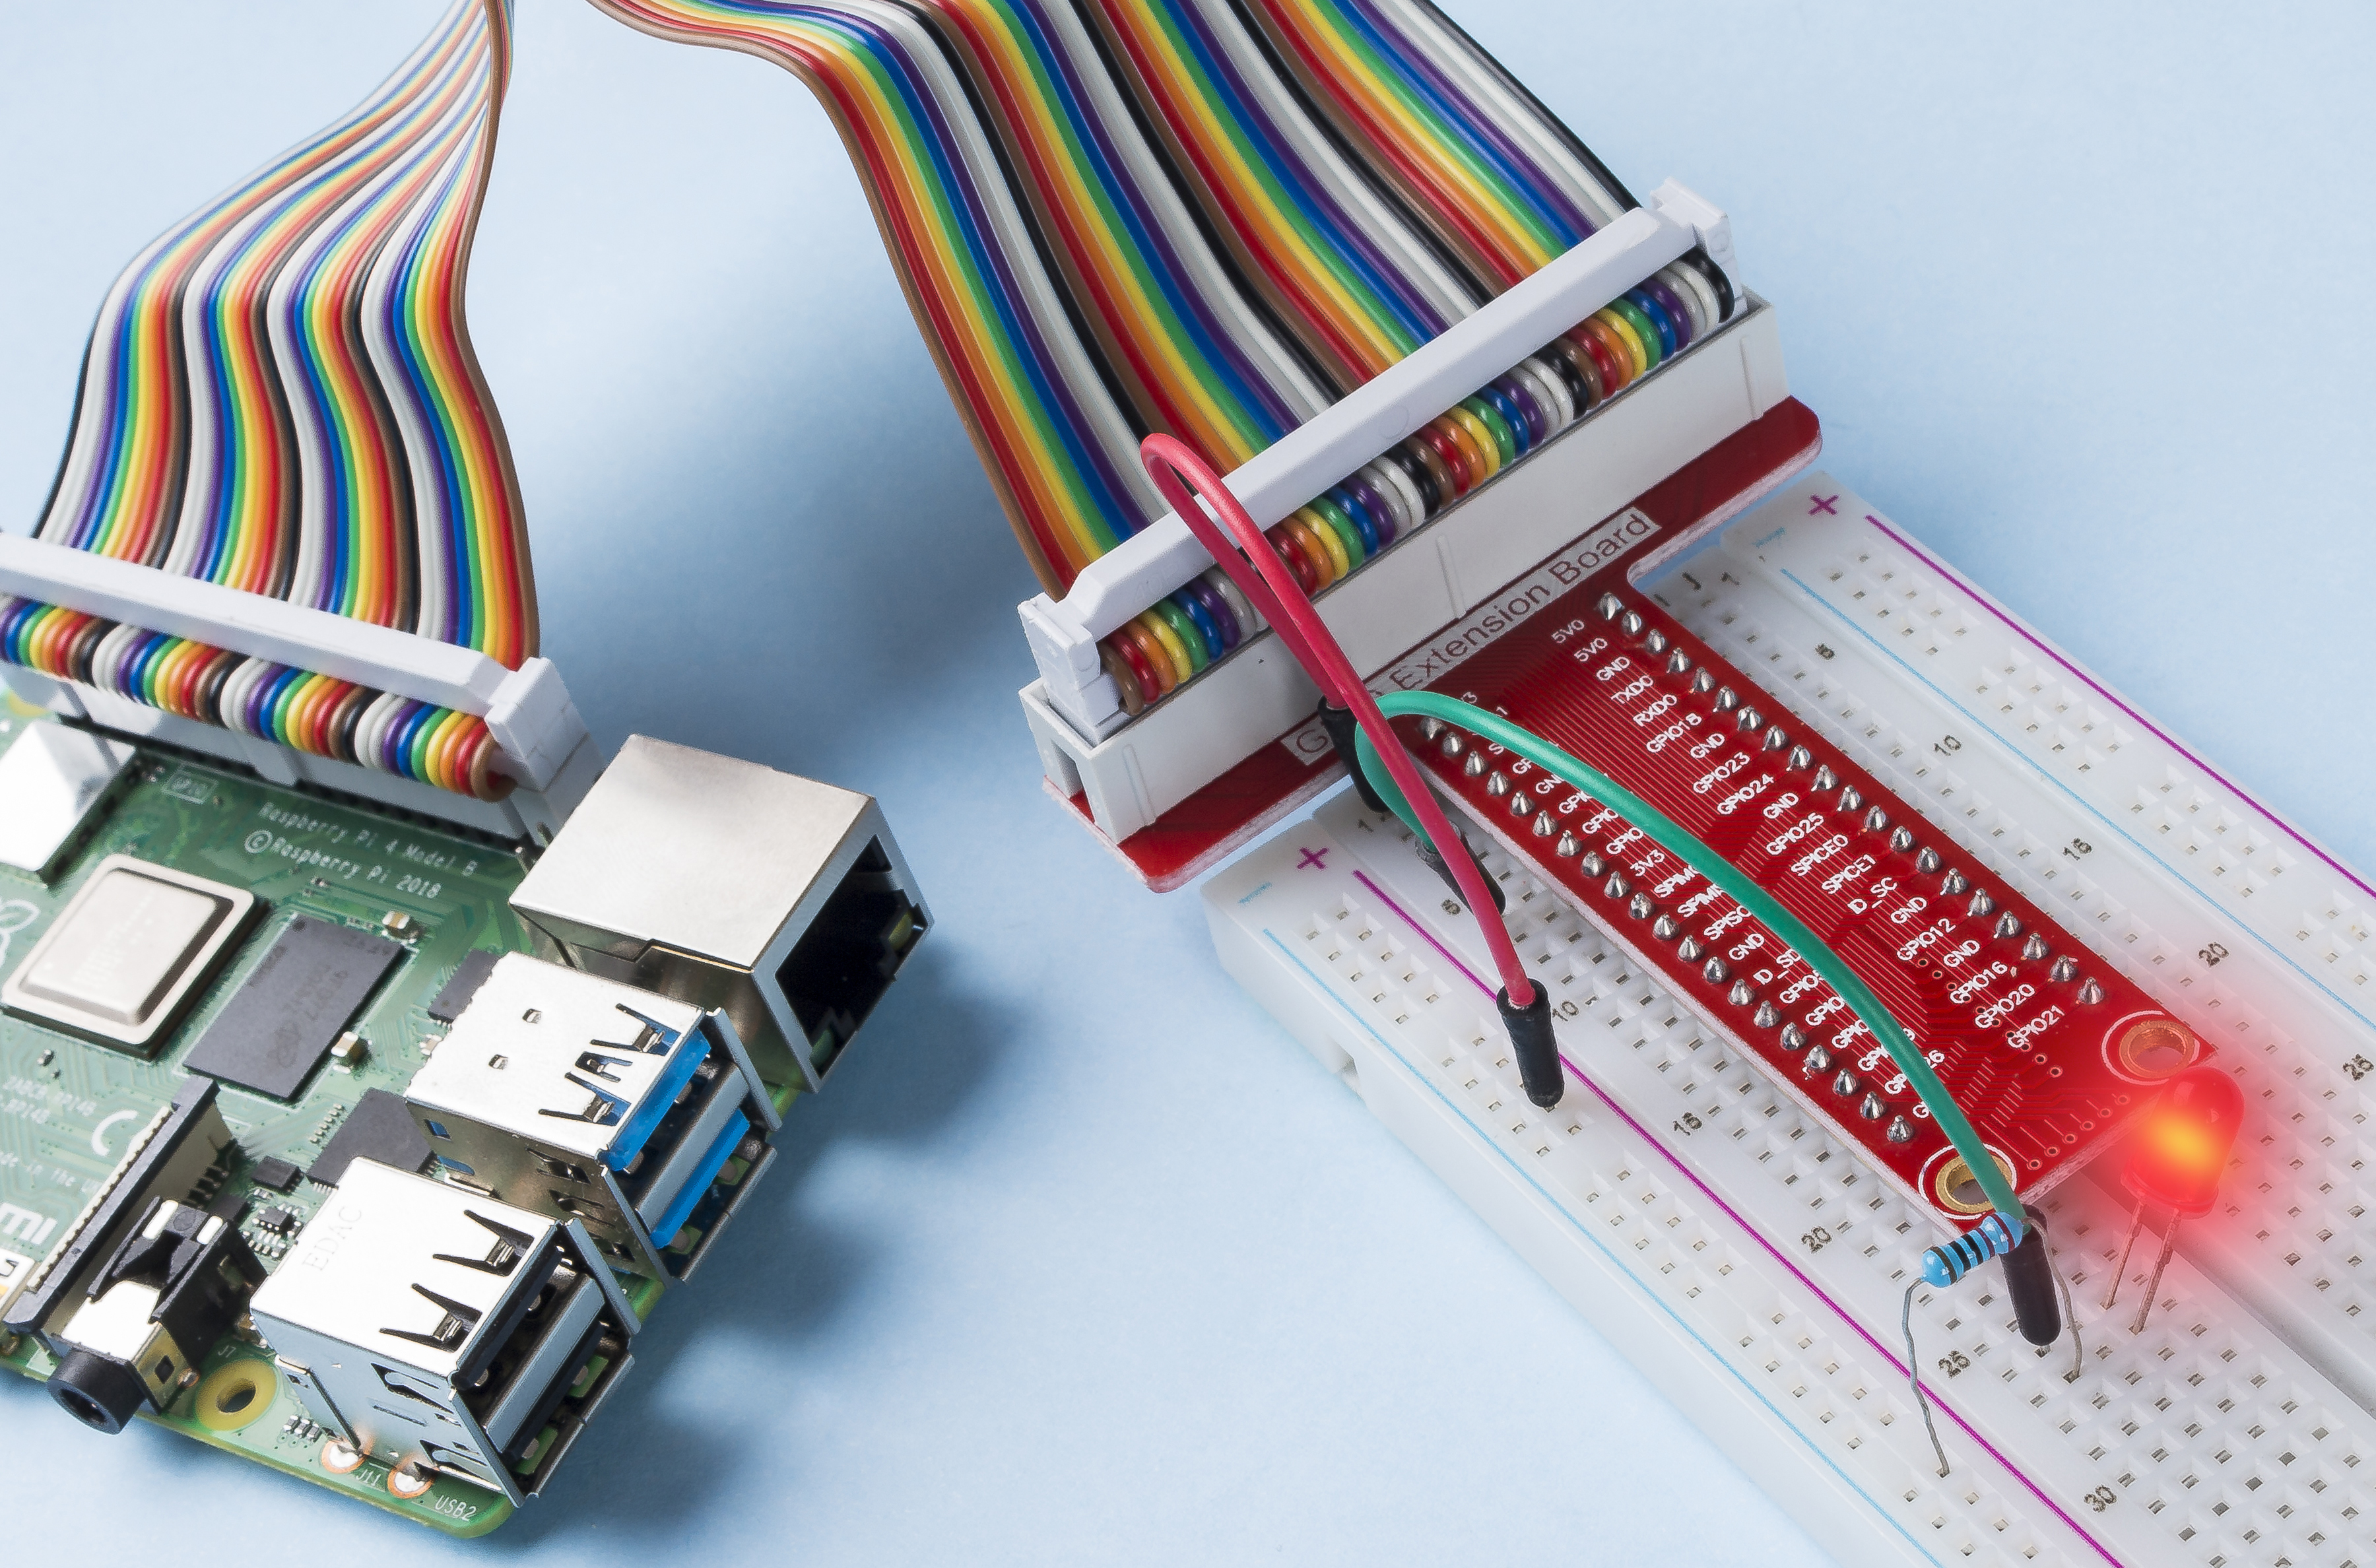
In this experiment, connect a 220Ω resistor to the anode (the long pin of the LED), then the resistor to 3.3 V, and connect the cathode (the short pin) of the LED to GPIO17 of Raspberry Pi. Therefore, to turn on an LED, we need to make GPIO17 low (0V) level. We can get this phenomenon by programming.

Experimental Procedures
Step 1: Build the circuit.
Step 2: Go to the folder of the code.
cd ~/raphael-kit/nodejs/
Note
Change directory to the path of the code in this experiment via cd.
Step 3: Run the code
sudo node blink.js
Note
Here sudo - superuser do, and python means to run the file by Python.
After the code runs, you will see the LED flashing.
Step 4: If you want to edit the code file blink.js,
press Ctrl + C to stop running the code. Then type the following
command to open blink.js:
nano blink.js
Note
nano is a text editor tool. The command is used to open the code file blink.js by this tool.
Press Ctrl+X to exit. If you have modified the code, there will be a
prompt asking whether to save the changes or not. Type in Y (save)
or N (don’t save).
Then press Enter to exit. Type in nano blink.js again to
see the effect after the change.
Code
The following is the program code:
const Gpio = require('pigpio').Gpio;
const led = new Gpio(17,{mode: Gpio.OUTPUT});

var led_state = 0;

function blink_led(){
   led.digitalWrite(led_state);
   led_state = !led_state;
}

setInterval(blink_led,300);
Alternatively, write the code as a more js-specific arrow function:
const Gpio = require('pigpio').Gpio;
const led = new Gpio(17,{mode: Gpio.OUTPUT});

var led_state = 0;

setInterval(() => {
   led.digitalWrite(led_state);
   led_state = !led_state;
}, 300);
Code Explanation
const Gpio = require('pigpio').Gpio;
Import the Gpio constructor in the pigpio package in this way,
and then define a constant Gpio to represent this constructor.
With a variety of constructor, we can use js to control electronic devices.
pigpio can be used to implement fast GPIO, PWM, servo control, state change notification and interrupt handling.
const led = new Gpio(17,{mode: Gpio.OUTPUT});
The new keyword is used to construct instantiated objects of the class.
Connect the LED to the GPIO17 of the T-shaped expansion board,
set the LedPin mode to output and assign it to the constant led,
that is, construct a GPIO17 object led, and its mode is the output mode.
There are two ways to number the IO pins on the Raspberry Pi: BOARD number and BCM number. In our project, we use the BCM number. You need to set each channel used as input or output.
function blink_led(){
   led.digitalWrite(led_state);
   led_state = !led_state;
}

setInterval(blink_led,300);
The setInterval() method can call functions or compute expressions with a specified period (in milliseconds).
Here we change the operating state of the LED with a period of 300ms.
The gpio.digitalWrite(level) method sets the gpio level to 1 or 0.
var led_state = 0;

setInterval(() => {
   led.digitalWrite(led_state);
   led_state = !led_state;
}, 300);
Rewrite the code as an arrow function to make the code shorter.
Phenomenon Picture