Note
Welcome to the SunFounder Raspberry Pi, Arduino & ESP32 Community on Facebook!
Get technical support and troubleshooting help.
Learn and share projects, tips, and tutorials.
Access early product previews and updates.
Enjoy exclusive discounts and giveaways.
👉 Join us here: [here]
Copying the OS from a Micro SD Card to an NVMe SSD
If you do not have an NVMe adapter, you can first install the OS on a Micro SD card, then copy it to the NVMe SSD after the Pironman 5 boots successfully.
First, complete Installing the Operating System.
Then, boot and log in to your Raspberry Pi. For login help, see: Getting Started with Raspberry Pi.
Complete the steps above before continuing.
1. Enabling PCIe
By default the PCIe connector is not enabled.
To enable it you should open the
/boot/firmware/config.txtfile.sudo nano /boot/firmware/config.txt
Then add the following line to the file.
# Enable the PCIe External connector.
dtparam=pciex1
A more memorable alias for
pciex1exists, so you can alternatively adddtparam=nvmeto the/boot/firmware/config.txtfile.dtparam=nvme
The connection is certified for Gen 2.0 speeds (5 GT/sec), but you can force it to Gen 3.0 (10 GT/sec) if you add the following lines to your
/boot/firmware/config.txt.# Force Gen 3.0 speeds dtparam=pciex1_gen=3
Warning
The Raspberry Pi 5 is not certified for Gen 3.0 speeds, and connections to PCIe devices at these speeds may be unstable.
Press
Ctrl + X,YandEnterto save the changes.
2. Install the OS on the SSD
There are two ways to install an operating system on the SSD:
Copying the System from the Micro SD Card to the SSD
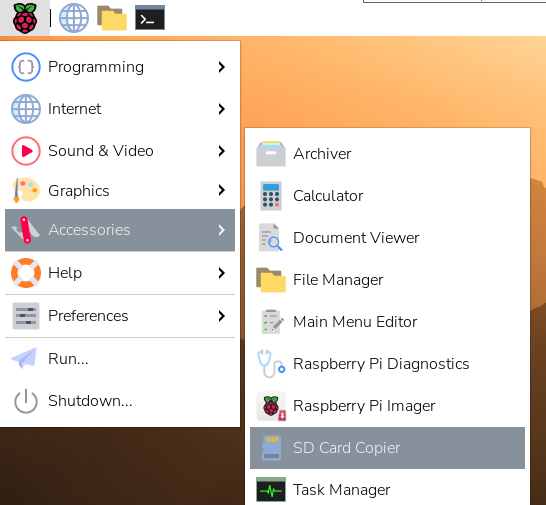
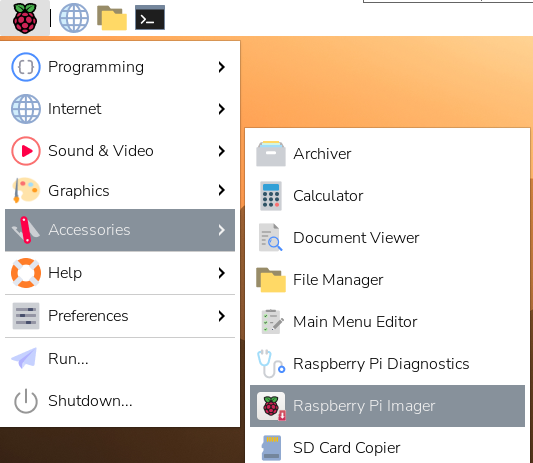
Connect a display or access the Raspberry Pi desktop through VNC Viewer. Then click Raspberry Pi logo -> Accessories -> SD Card Copier.
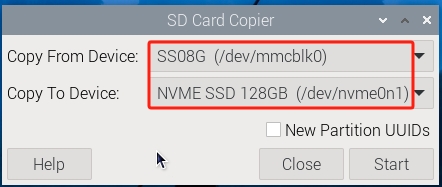
Make sure to select the correct Copy From and Copy To devices. Be careful not to mix them up.
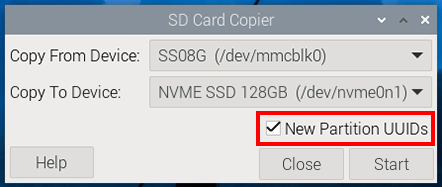
Remember to select “NEW Partition UUIDs” to ensure the system can correctly distinguish devices, avoiding mounting conflicts and boot issues.
After selection, click Start.
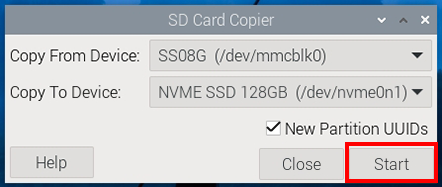
You will be prompted that the content on the SSD will be erased. Make sure to back up your data before clicking Yes. Wait for some time, and the copying will be completed.
Installing the System with Raspberry Pi Imager
If your Micro SD card has a desktop version of the system installed, you can use an imaging tool (like Raspberry Pi Imager) to burn the system to the SSD. This example uses Raspberry Pi OS bookworm, but other systems might require installing the imaging tool first.
Connect a display or access the Raspberry Pi desktop through VNC Viewer. Then click Raspberry Pi logo -> Accessories -> Raspberry Pi Imager.
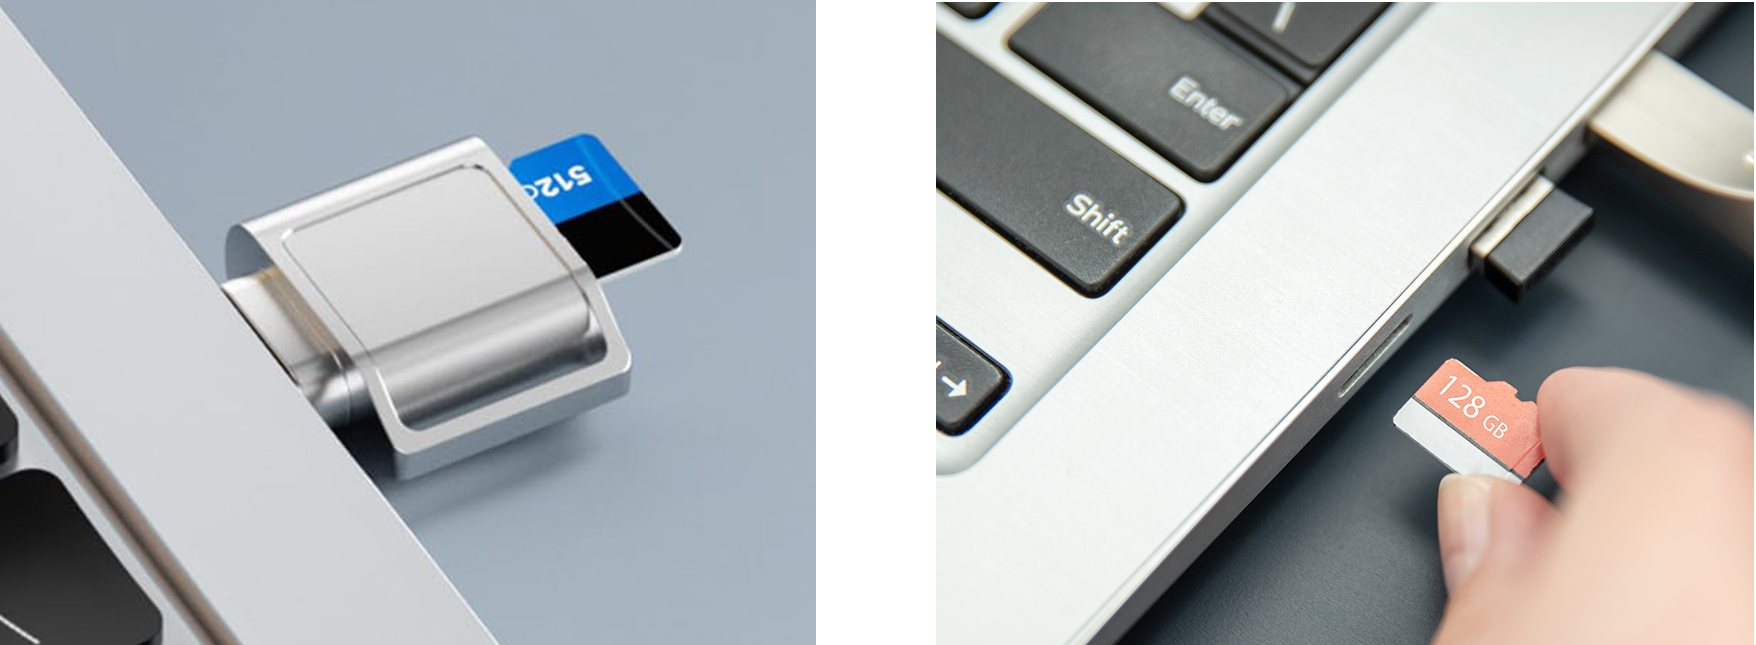
Insert your microSD card into your computer using a card reader. Back up any important data before proceeding.
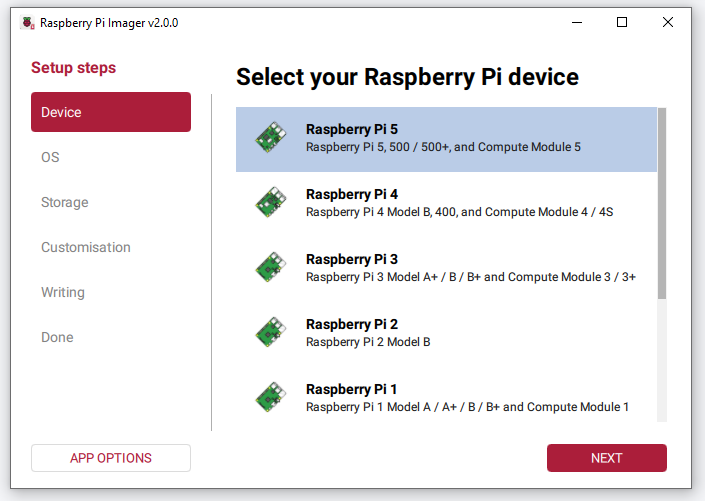
When Raspberry Pi Imager opens, you will see the Device page. Select your Raspberry Pi 5 model from the list.
Go to the OS section and choose the recommended Raspberry Pi OS (64-bit) option.
Warning
Be sure to choose a 64-bit version. If you install a 32-bit system, some packages are only available for
aarch64(64-bit), and certain features may fail to install or work properly.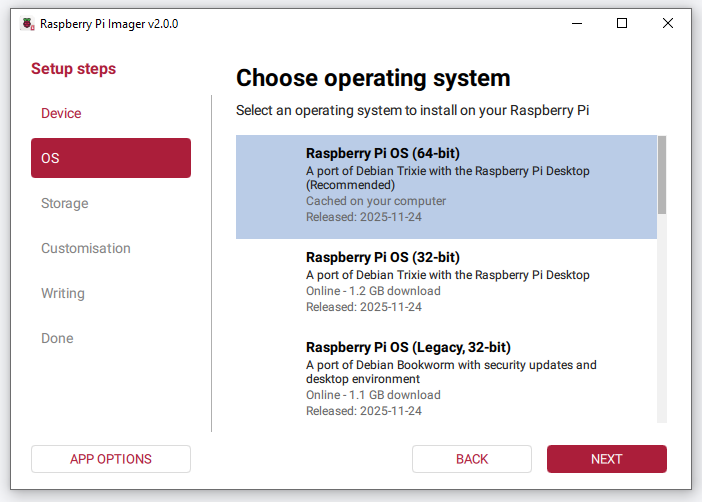
In the Storage section, select your NVMe SSD.
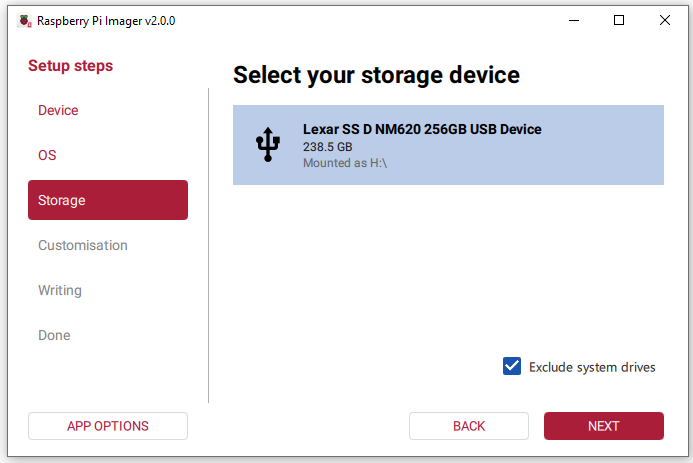
Click Next to continue to the customization step.
Note
If you will connect a monitor, keyboard, and mouse directly to your Raspberry Pi, you may click SKIP CUSTOMISATION.
If you plan to set up the Raspberry Pi headless (Wi-Fi remote access), you must complete the customization settings.
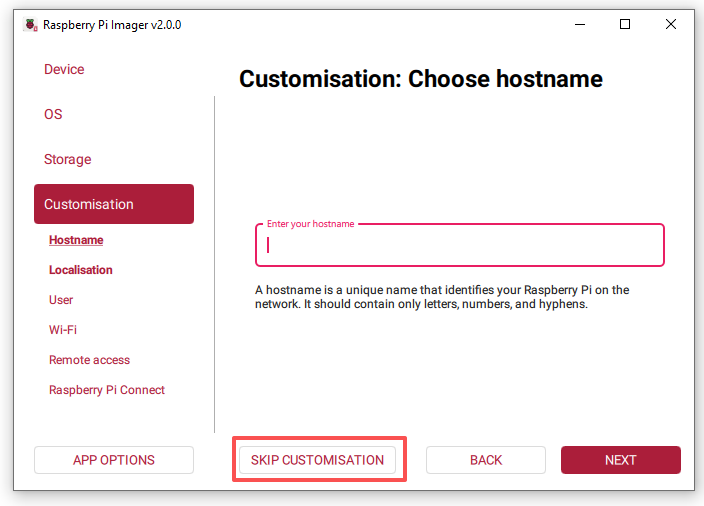
Set Hostname
Give your Raspberry Pi a unique hostname.
You can connect to it later using
hostname.local.

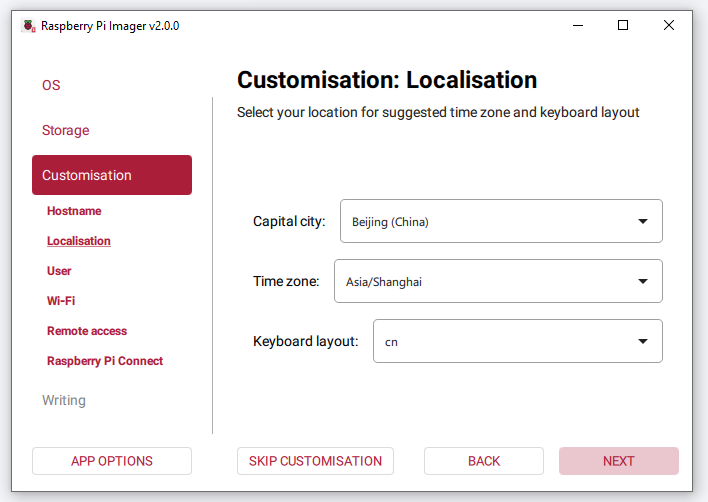
Set Localisation
Choose your capital city.
Imager will auto-complete the time zone and keyboard layout based on your selection, though you can adjust them if needed. Select Next.
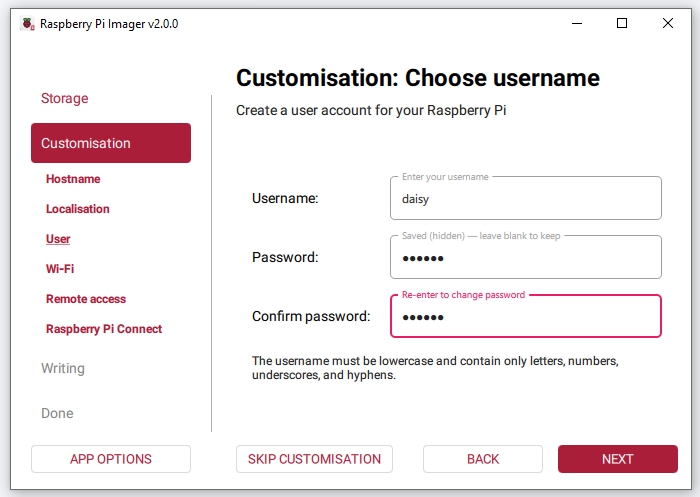
Set Username & Password
Create a user account for your Raspberry Pi.
Configure Wi-Fi
Enter your Wi-Fi SSID (network name) and password.
Your Raspberry Pi will automatically connect on first boot.

Enable SSH (Optional but Recommended)
Enabling SSH allows you to remotely log in from your computer.
You may log in using your username/password or configure SSH keys.

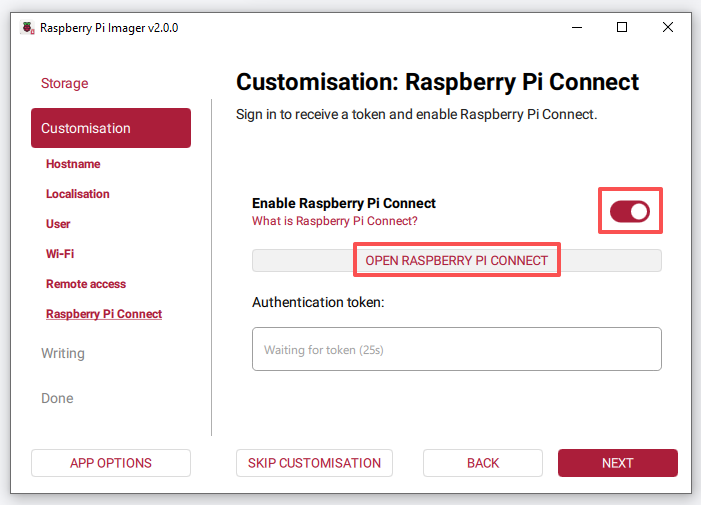
Enable Raspberry Pi Connect (Optional)
Raspberry Pi Connect allows you to access your Raspberry Pi desktop from a web browser.
Turn on Raspberry Pi Connect, then click OPEN RASPBERRY PI CONNECT.
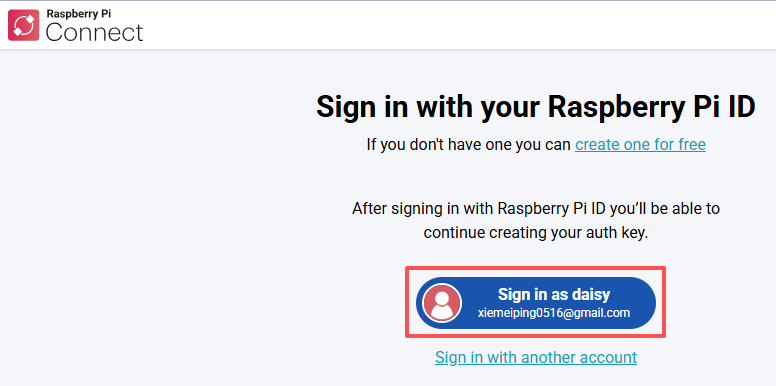
The Raspberry Pi Connect website will open in your default browser. Log in to your Raspberry Pi ID account, or sign up if you don’t have one yet.
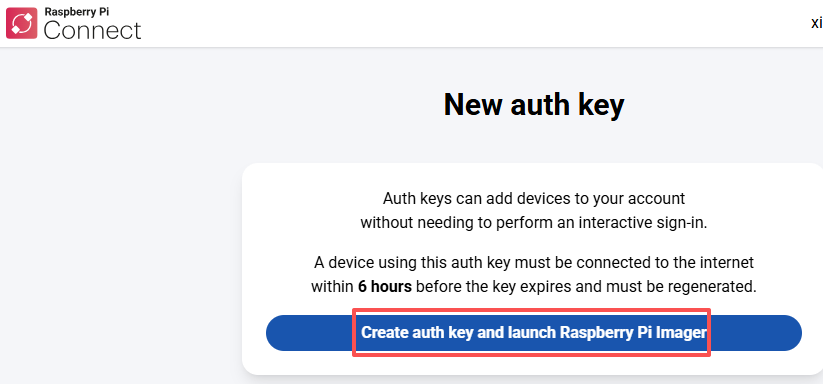
On the New auth key page, create your one-time auth key.
If your Raspberry Pi ID account isn’t part of any organisation, select Create auth key and launch Raspberry Pi Imager.
If you belong to one or more organisations, choose one, then create the key and launch Imager.
Make sure to power on your Raspberry Pi and connect it to the internet before the key expires.
Your browser may ask to open Raspberry Pi Imager — allow it.
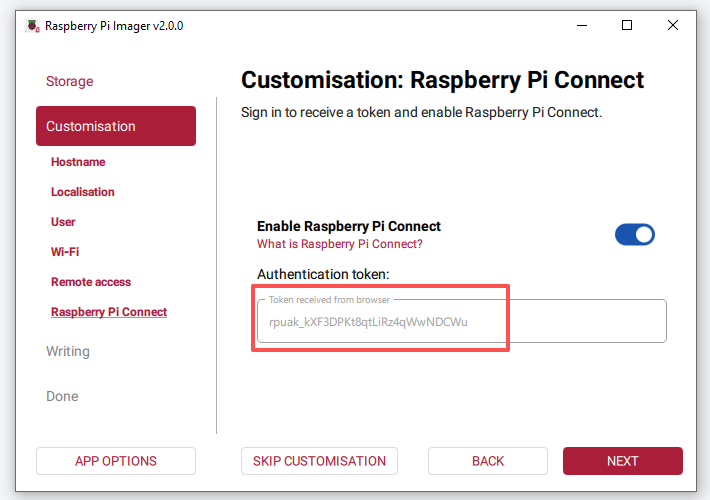
Imager will open on the Raspberry Pi Connect tab, showing the authentication token.
If the token doesn’t transfer automatically, open the Having trouble? section on the Raspberry Pi Connect page, copy the token, and paste it into Imager manually.
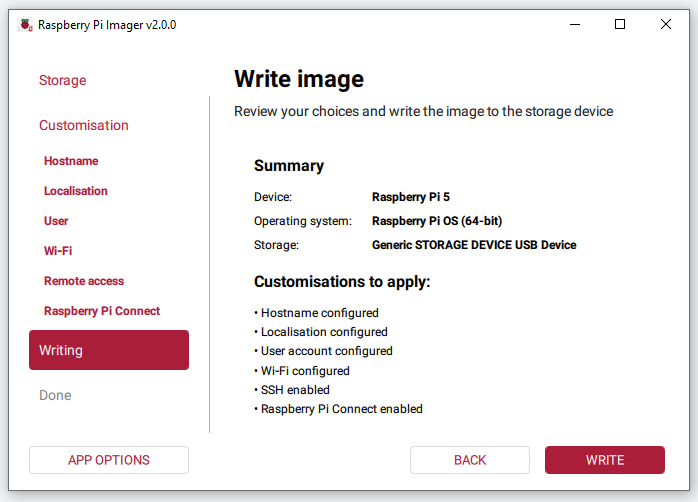
Review all settings and click WRITE.
If the card already contains data, Raspberry Pi Imager will show a warning that all data on the device will be erased. Double-check that you selected the correct drive, then click I UNDERSTAND, ERASE AND WRITE to continue.

Wait for the writing and verification to finish. When it is done, Raspberry Pi Imager will show Write complete! and a summary of your choices. The storage device will be ejected automatically so you can remove it safely.

3. Configure boot from the SSD
In this section, we’ll configure your Raspberry Pi to boot directly from an NVMe SSD, providing faster boot times and improved performance over an SD card. Follow these steps carefully:
First, open a terminal on your Raspberry Pi and run the following command to access the configuration interface:.
sudo raspi-configIn the
raspi-configmenu, use the arrow keys to navigate and select Advanced Options. PressEnterto access the advanced settings.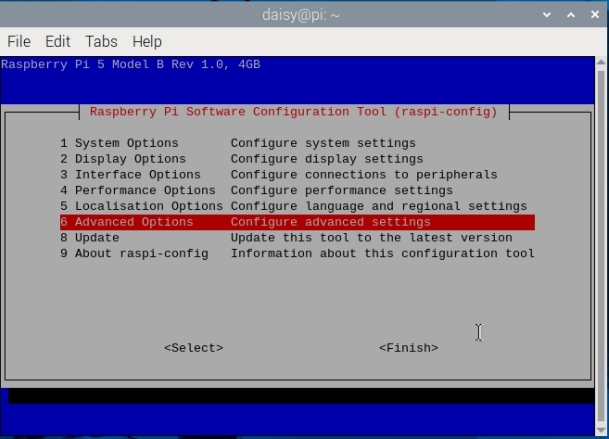
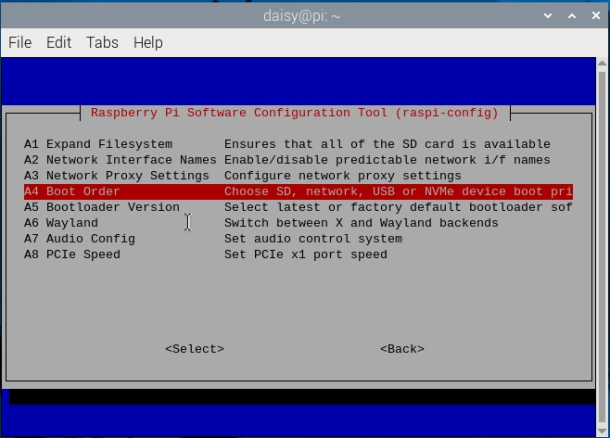
Inside Advanced Options, select Boot Order. This setting allows you to specify the order in which your Raspberry Pi looks for bootable devices.
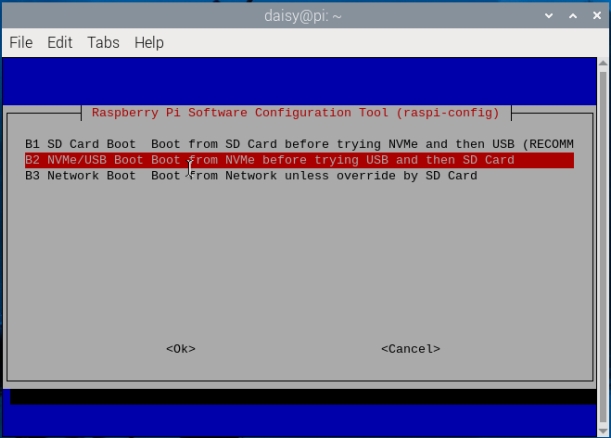
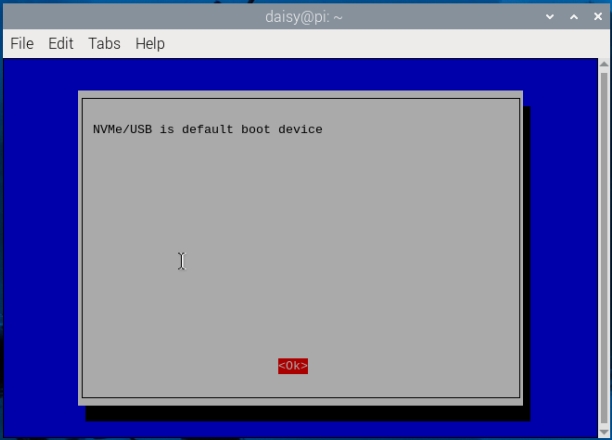
Then, choose NVMe/USB boot. This tells the Raspberry Pi to prioritize booting from USB-connected SSDs or NVMe drives over other options, such as the SD card.
After selecting the boot order, press Finish to exit raspi-config. You may also use the Escape key to close the configuration tool.
To apply the new boot settings, reboot your Raspberry Pi by running
sudo reboot.sudo raspi-config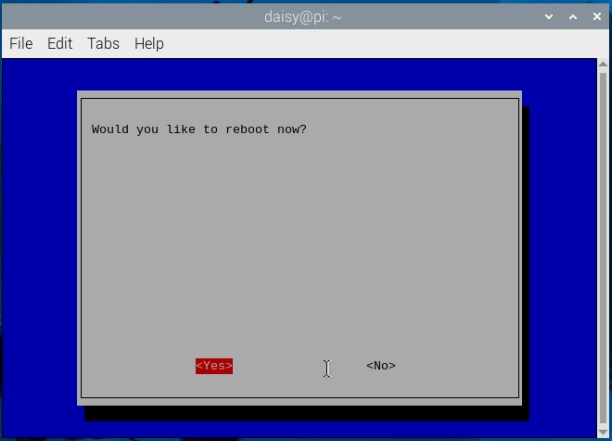
After rebooting, the Raspberry Pi should now attempt to boot from your connected NVMe SSD, providing you with enhanced performance and durability for your system.