Note
Welcome to the SunFounder Raspberry Pi, Arduino & ESP32 Community on Facebook!
Get technical support and troubleshooting help.
Learn and share projects, tips, and tutorials.
Access early product previews and updates.
Enjoy exclusive discounts and giveaways.
👉 Join us here: [here]
Setting Up OpenMediaVault
Warning
OpenMediaVault does not support installation on the Raspberry Pi OS desktop.
⚠️ Only Raspberry Pi OS Lite versions 11 (Bullseye) and 12 (Bookworm) are supported.
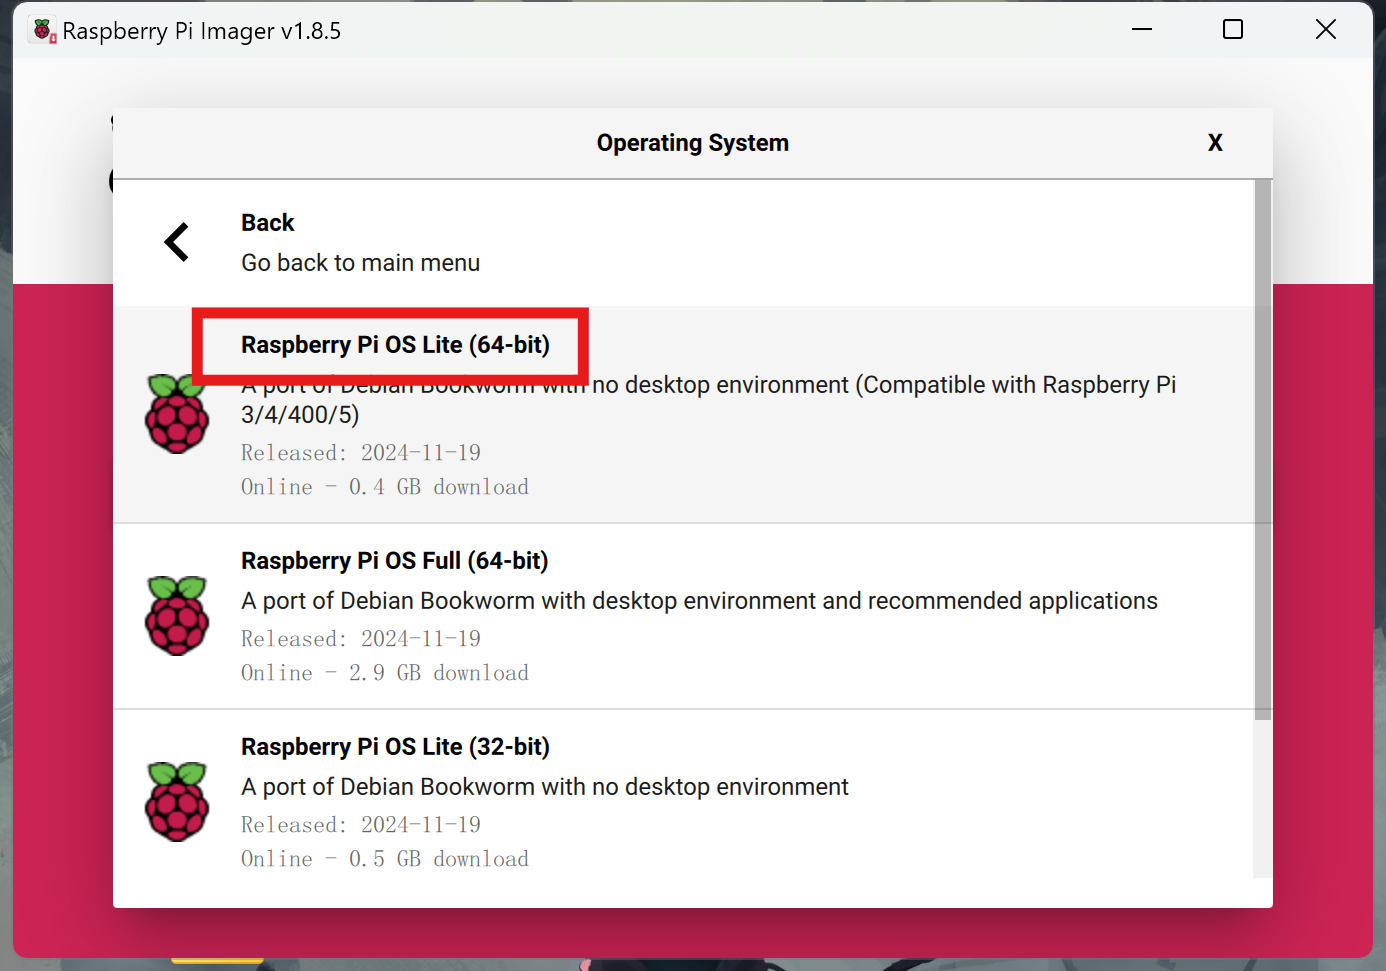
Please make sure you have installed the correct operating system and configured the network. The procedure here is consistent with Installing the Operating System, but when selecting an image, please choose Raspberry Pi OS Lite from Raspberry Pi OS (other).
OpenMediaVault (abbreviated as OMV) is an open-source Network Attached Storage (NAS) operating system based on Debian Linux, designed for home users and small office environments, aiming to simplify storage management and provide rich network service features.
Please follow these steps to install OpenMediaVault on your Raspberry Pi:
1. Connect to Your Raspberry Pi Using SSH
Enter the following command in the terminal:
ssh pi@raspberrypi.localIf you are using Windows, use PuTTY or another SSH client to connect to your Raspberry Pi.
2. Install OpenMediaVault
Enter the following command in the terminal:
wget https://github.com/OpenMediaVault-Plugin-Developers/installScript/raw/master/install
chmod +x install
sudo ./install -n
This will download and run the installation script for OpenMediaVault. Do not restart your Raspberry Pi after installation.
3. Access OpenMediaVault
Enter the following URL in your browser to access OpenMediaVault:
http://raspberrypi.localNote
If you cannot access the above URL, try using the IP address instead, for example, http://192.168.1.100.
You will see a login page, log in using the default username and password. The default username is
admin, and the password isopenmediavault.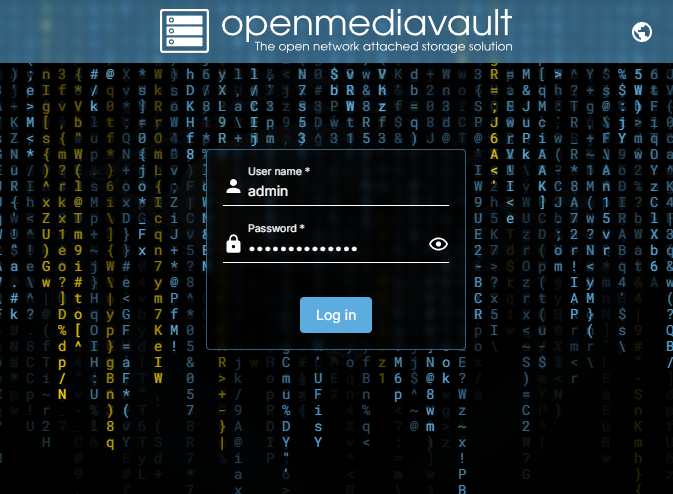
After logging in, you will see the main interface of OpenMediaVault.
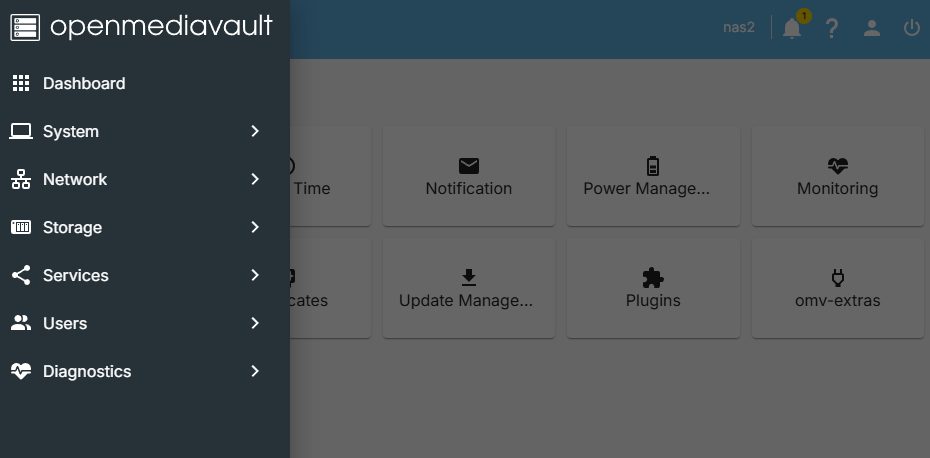
Now that you have successfully installed and accessed OpenMediaVault, you can start configuring and managing your storage.
4. Set Up RAID (Optional)
NVMe RAID is a storage solution that combines multiple NVMe Solid State Drives (SSDs) using RAID technology, aimed at maximizing the high-speed performance of the NVMe protocol and the redundancy/performance enhancement features of RAID. Common modes include RAID 0, 1, 5, 10, etc. For dual NVMe SSDs, RAID 0 and RAID 1 are the most commonly used modes.
RAID 0 is a striping technology that divides data into multiple stripes and distributes these stripes across multiple hard drives, thus achieving higher read/write speeds. RAID 0 does not provide redundancy protection, so if any one of the hard drives fails, all data will be lost.
RAID 1 is a mirroring technology that copies data across multiple hard drives, thus providing redundancy protection. The read/write speeds of RAID 1 depend on the speed of a single hard drive, as data needs to be read from multiple hard drives. If any one of the hard drives fails, the others can continue to provide data.
Note
At least mount 2 disks for RAID 0 or RAID 1. In RAID 0, the capacity of the RAID volume will be the sum of the capacities of all disks. In RAID 1,the capacity of the RAID volume will be the same as the capacity of the smallest disk.
In the
Systemmenu click on thePluginsoption, search for theopenmediavault-mdplugin, and install it.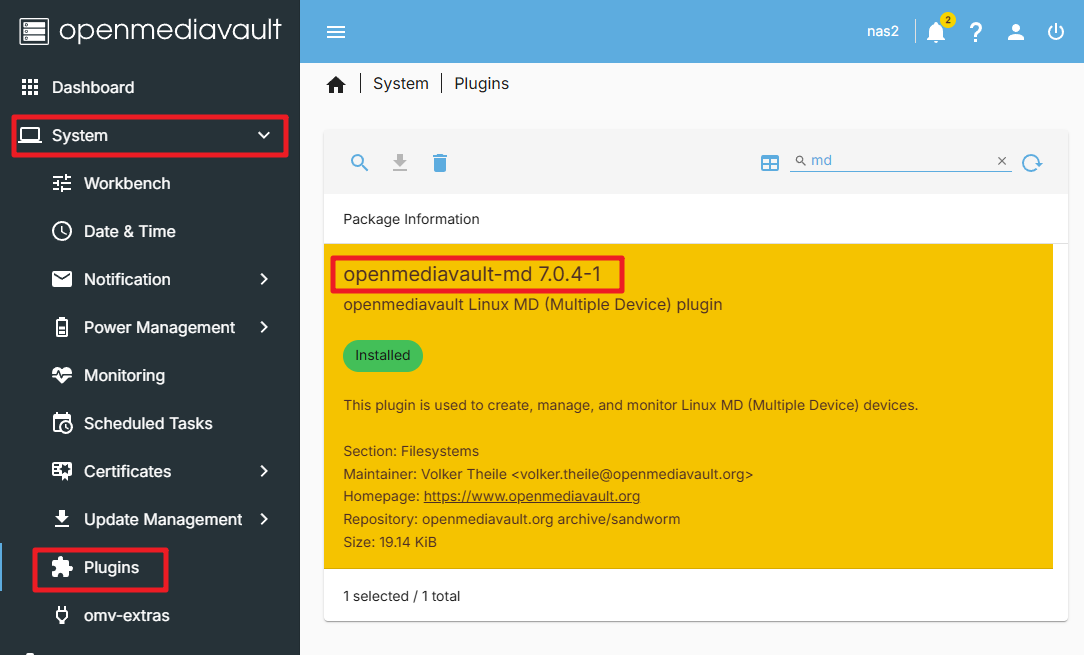
In the
Storagemenu click on theDisksoption, erase two SSDs.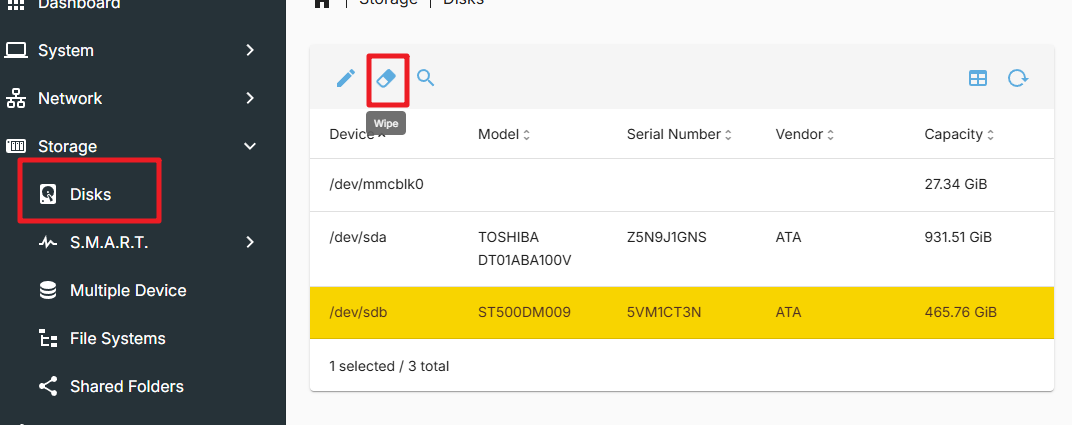
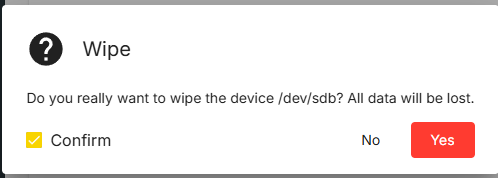
Please note that this action will erase all data on the hard drives, make sure you have backed up all important data.
Erase mode select
QUICKis sufficient.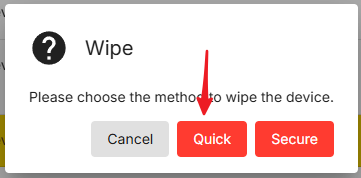
Enter the
Multiple Devicetab, clickCreate.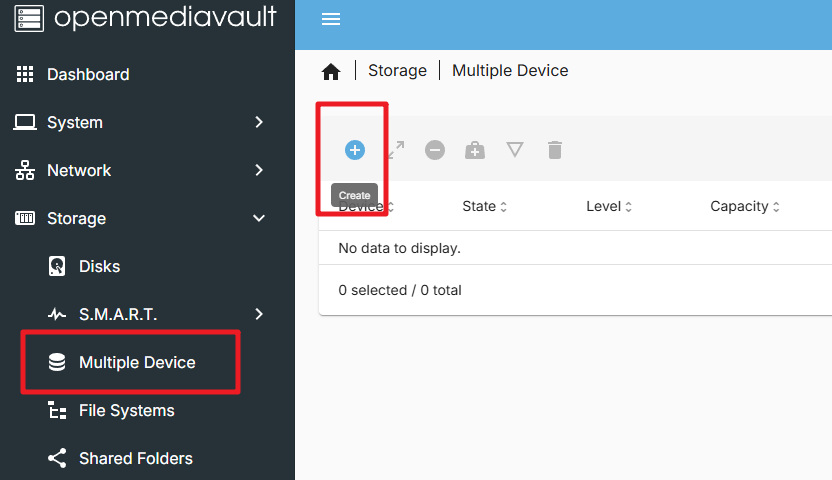
In the Level option, you can choose Stripe (RAID 0) or Mirror (RAID 1). In the Devices option, select the hard drives you just erased. Click
Saveand wait for the RAID configuration to complete.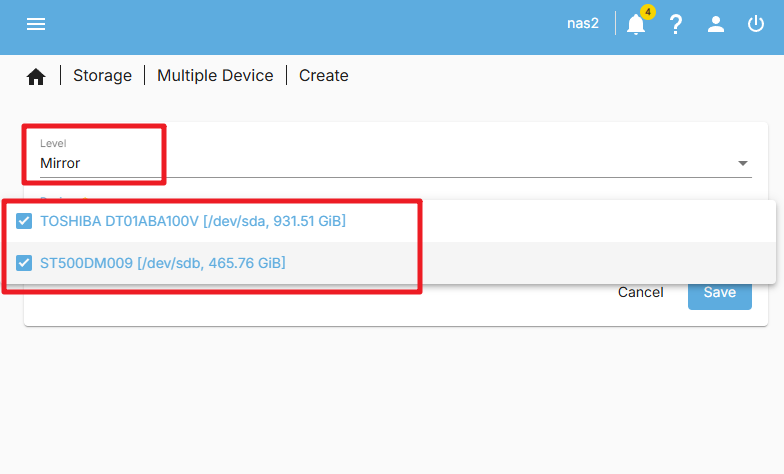
Note
If an error report (500 - Internal Server Error) pops up, try restarting the OMV system.
Apply the configuration by clicking on the
Applybutton.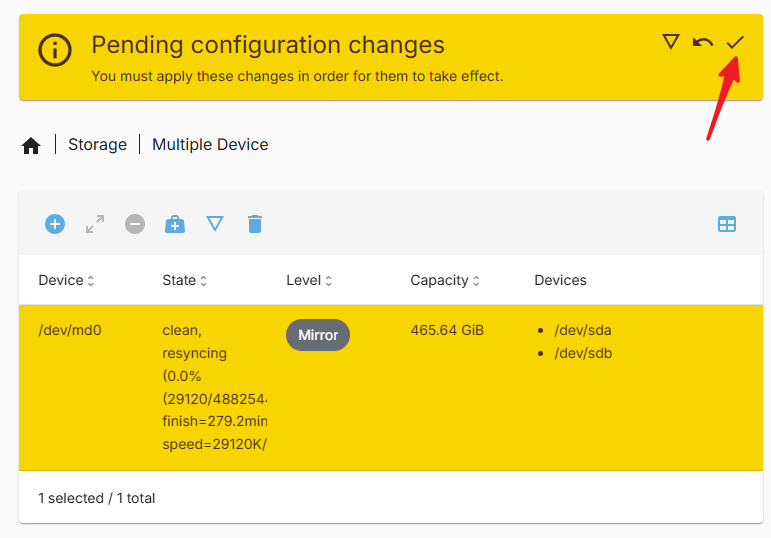
After the RAID configuration is complete, you have to wait the state of the RAID to be
100%.
After the RAID configuration is complete, your hard drives are now in a RAID 0 or RAID 1 configuration, and you can use them as a single storage device.
5. Configure Storage
In the main interface of OpenMediaVault, click on the
Storageoption in the left-side menu. In theStoragepage, click on theDiskstab. On theDiskspage, you will see all the disks on your Raspberry Pi. Ensure your NVMe PIP has a connected hard drive.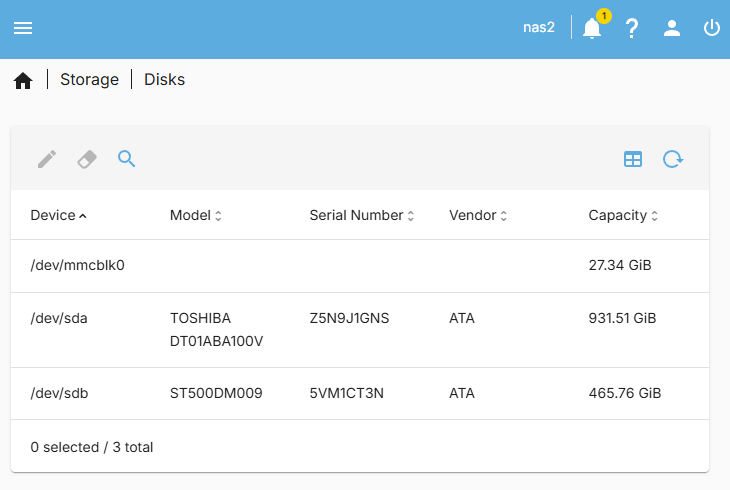
In the sidebar, click the
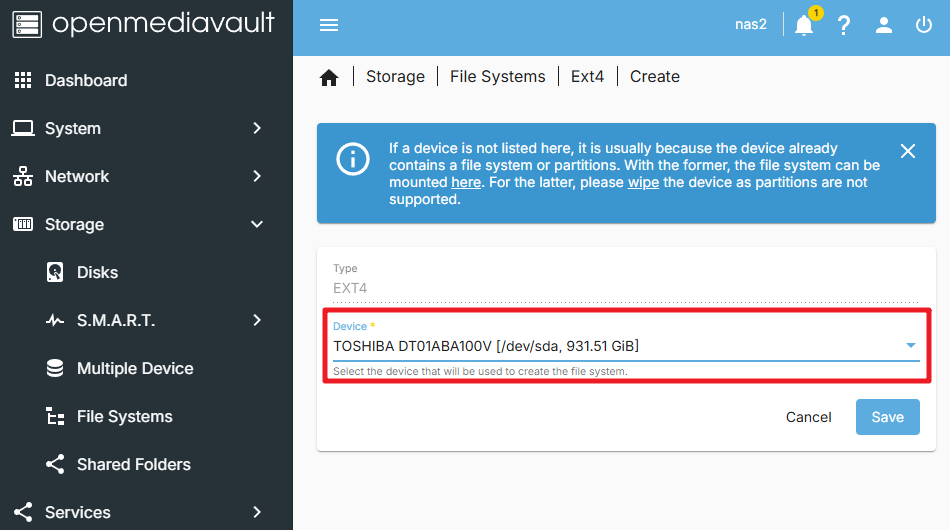
File Systemoption. Then create and mount a file system. Chooseext4as the file system type.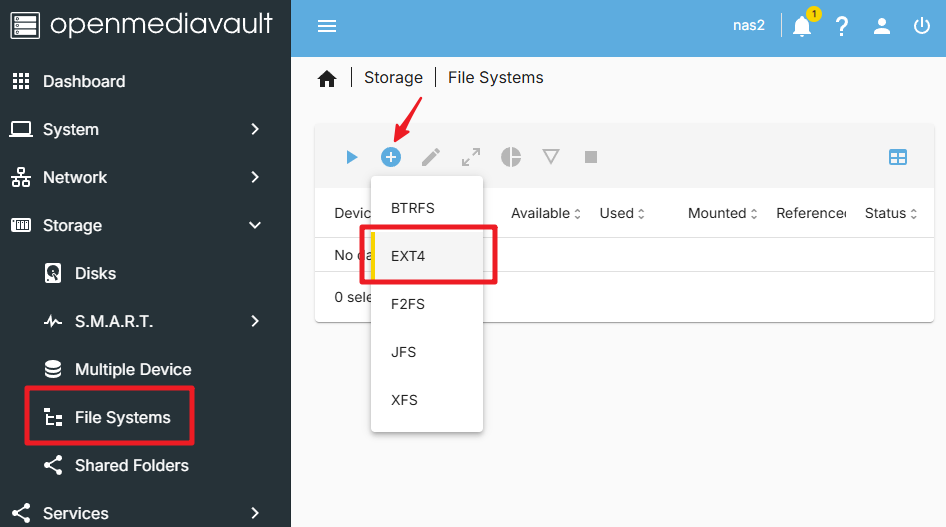
Select Device, and save.
Note
If you have set up the RAID, you will see the RAID device in the list. Just select it and save.
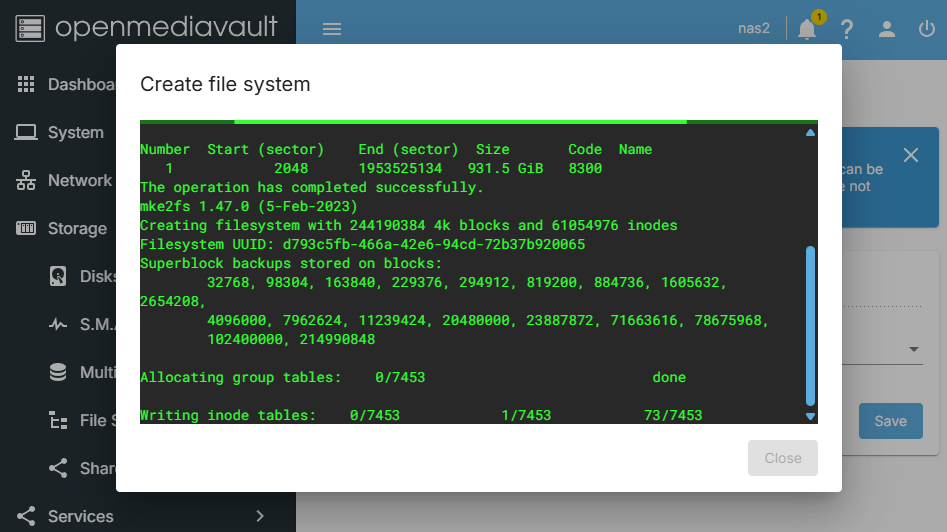
A window will appear, informing you that the file system is being created, please wait a moment.
Once done, you will enter the
Mountinterface, select the file system you just created, and mount it to your Raspberry Pi.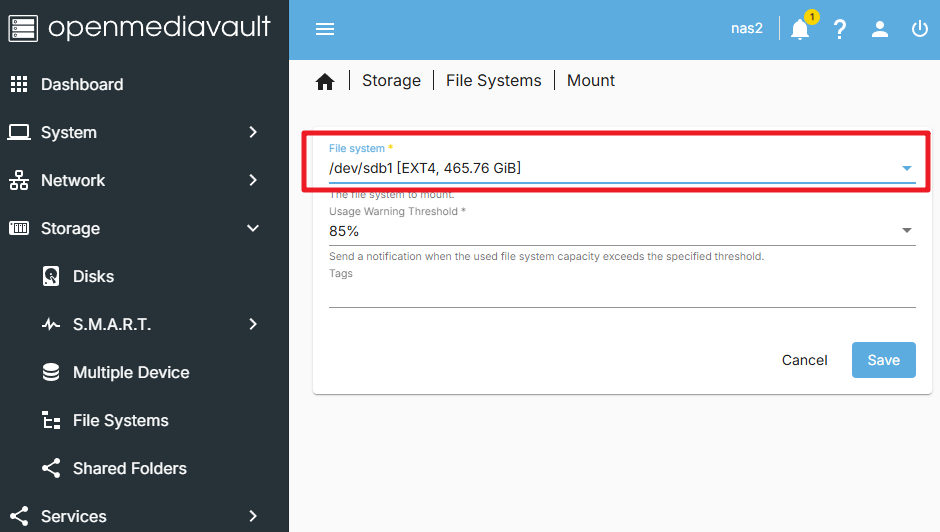
Note
If you are using dual hard drives (and not RAID), you should repeat the above steps to also mount the second hard drive to your Raspberry Pi.
After mounting, please Apply, and then you can see the data on your hard drives in the file system.
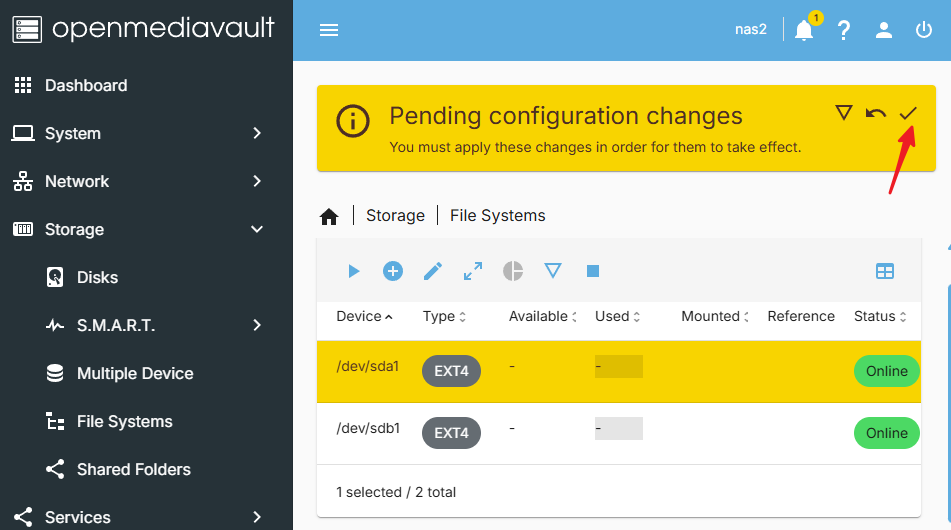
At this point, you have successfully configured OpenMediaVault and mounted your hard drives. You can now use OpenMediaVault to manage your storage.
6. Create a Shared Folder
In the
Storagepage, go to theShared Folderstab. And click theCreatebutton.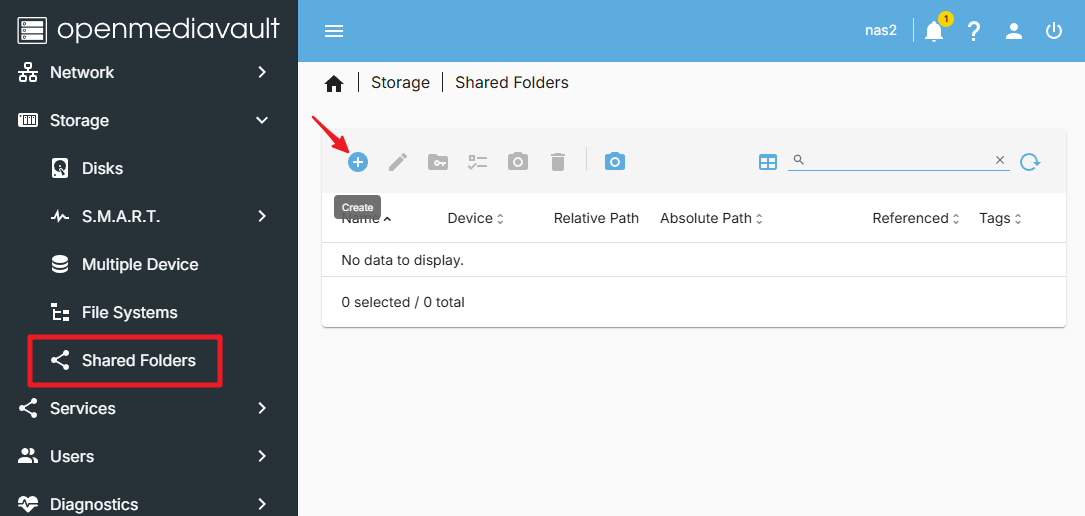
In the
Create Shared Folderpage, enter the name of the shared folder, select the hard drive you want to share, the path of the shared folder, and set the permissions of the shared folder. Then click theSavebutton.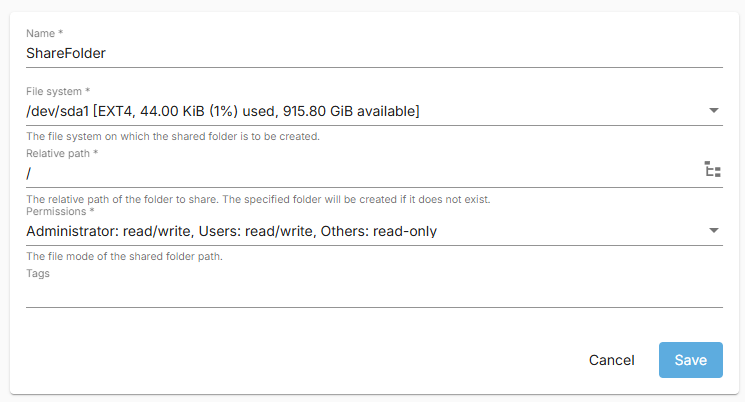
Now you can see the shared folder you just created. Confirm it is correct, then apply.
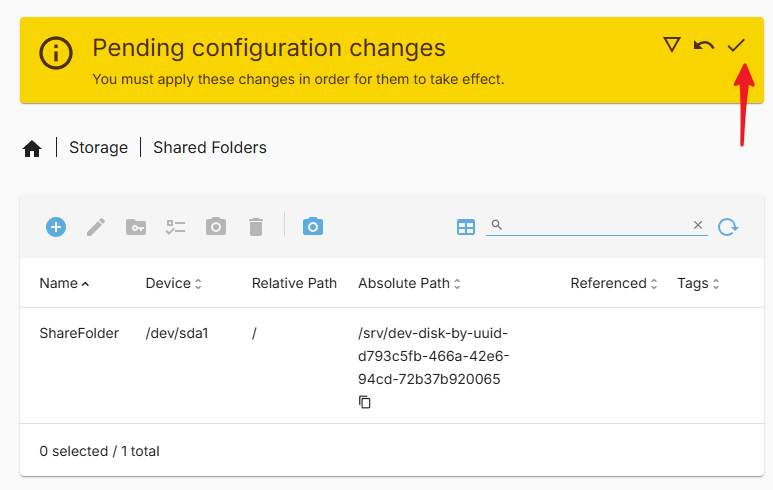
You have now successfully created a shared folder.
7. Create a New User
To access the folder, we need to create a new user, please follow these steps:
In the
Userpage, click theCreatebutton.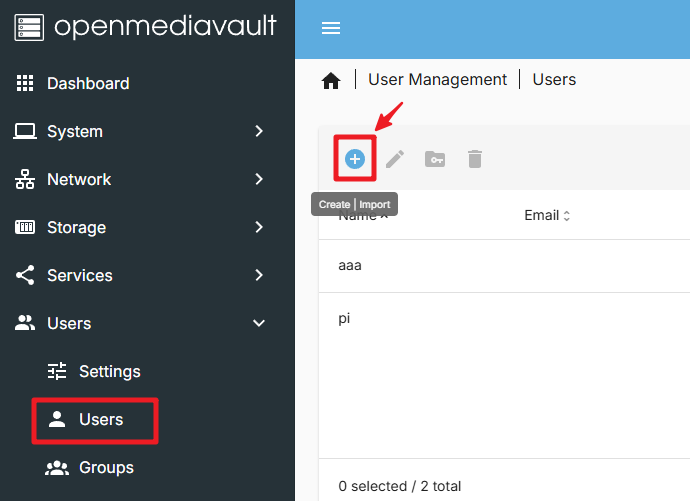
In the
Create Userpage, enter the new user’s username and password, then click theSavebutton.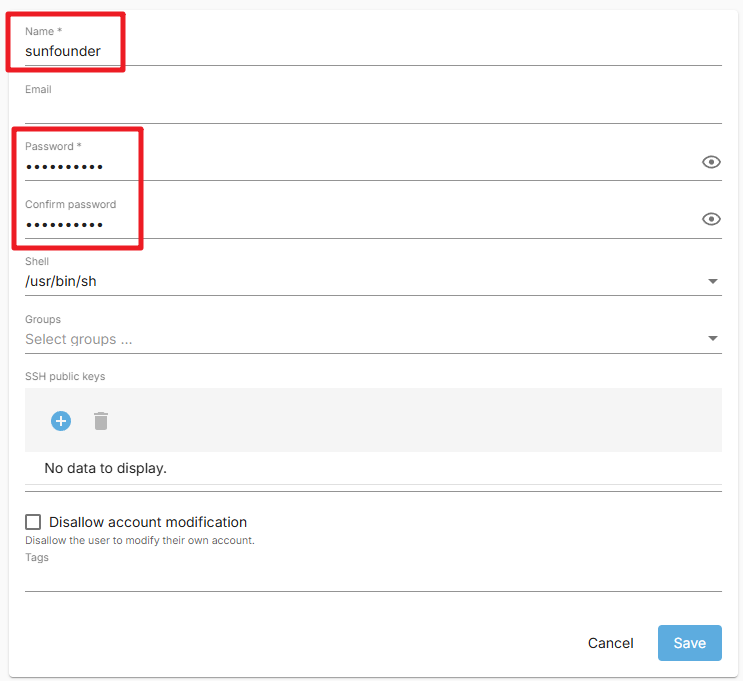
You have now successfully created a new user.
8. Set Permissions for the New User
In the
Shared Folderspage, click on the shared folder you just created. Then click thePermissionsbutton.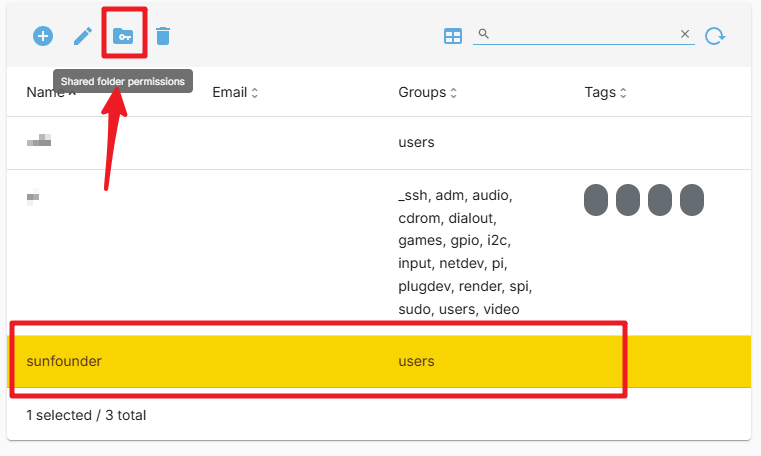
In the
Permissionspage, set the permissions. Then click theSavebutton.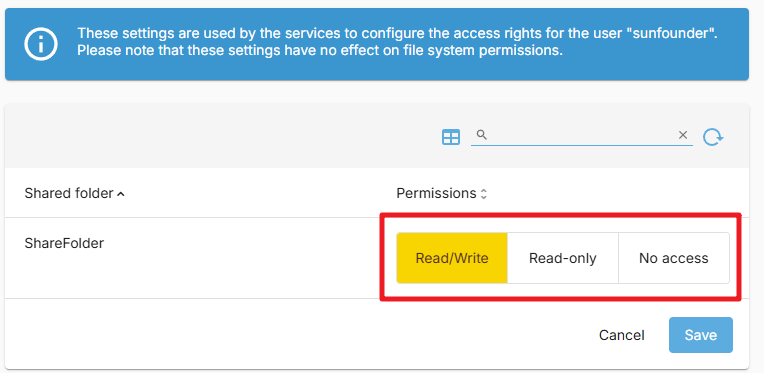
After completing, click the
Applybutton.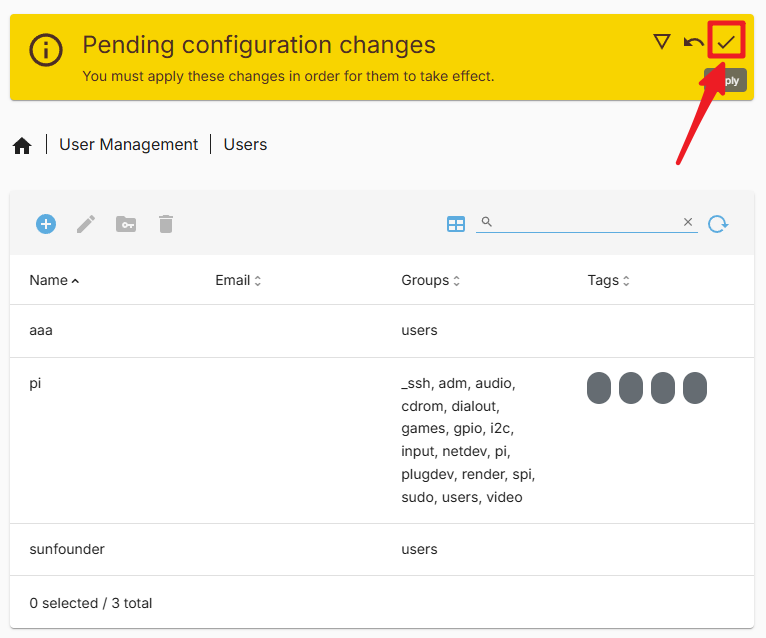
You can now use this new user to access your shared folder.
9. Configure the SMB Service
In the
Servicespage, find theSMB/CIFS>Settingtab. And check theEnableoption. Then click theSavebutton.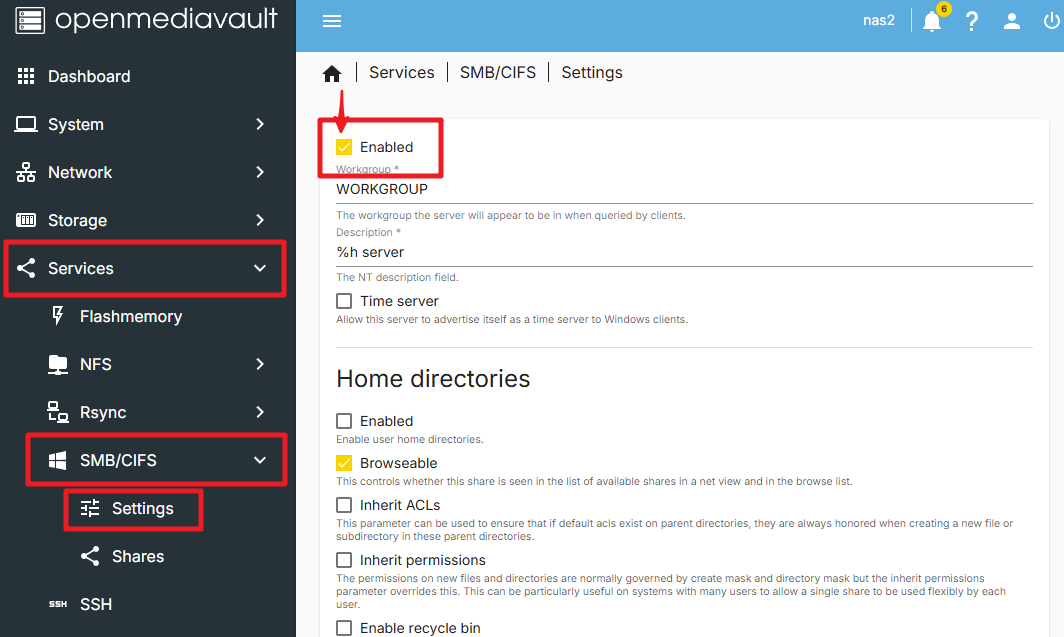
Apply the changes by clicking the
Applybutton.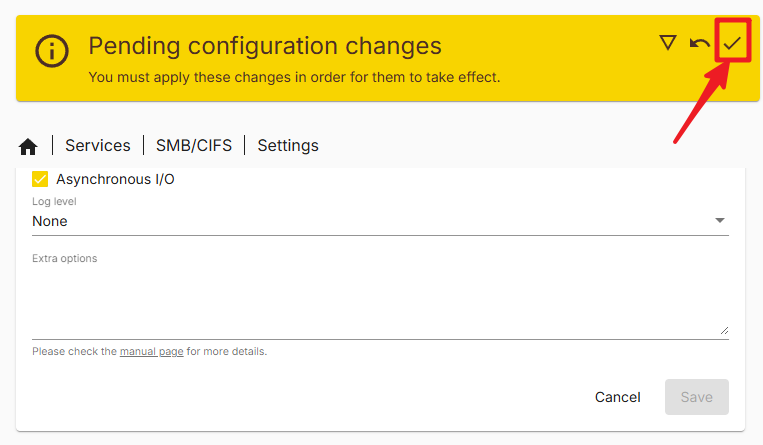
Enter the
Sharespage, click theCreatebutton.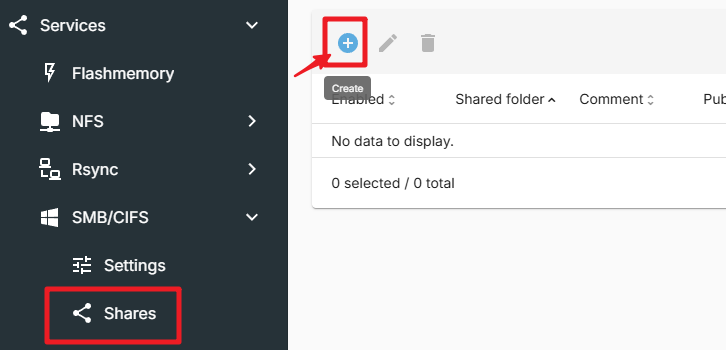
In the
Create Sharepage, select the path of the shared folder. Then click theSavebutton. Incidentally, there are many options on this page that you can configure as needed.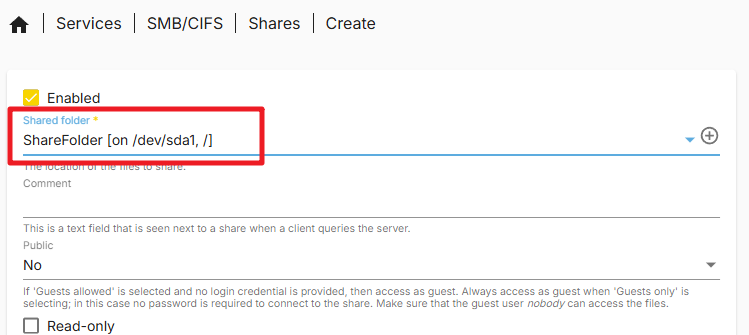
Click
Apply.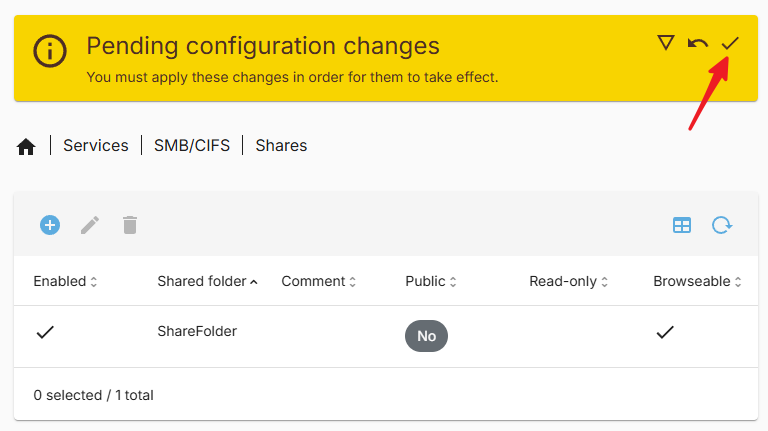
You have now successfully configured the SMB service. You can now use the SMB protocol to access your shared folder.
10. Access the Shared Folder on Windows
Open
This PC, then clickMap network drive.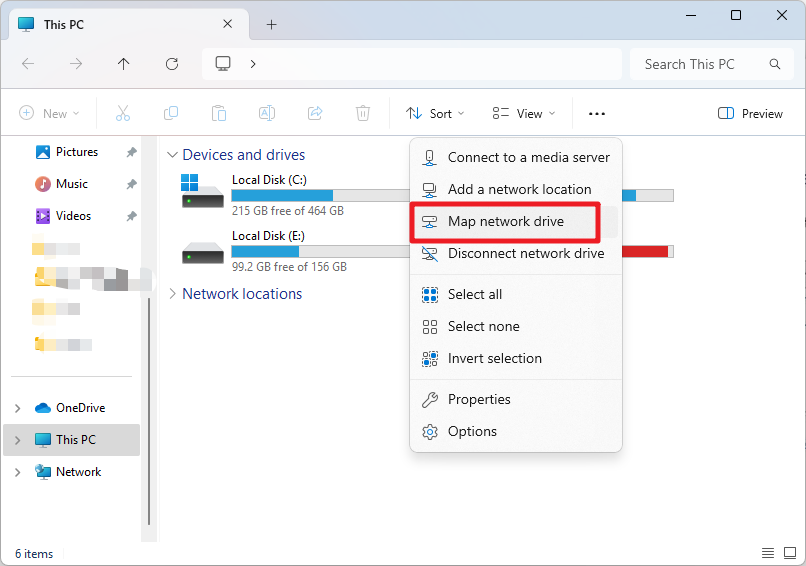
In the pop-up dialog box, enter the IP of the Raspberry Pi in the
Folderfield, for example,\\192.168.1.100\, or the Raspberry Pi’s hostname, for example,\\pi.local\.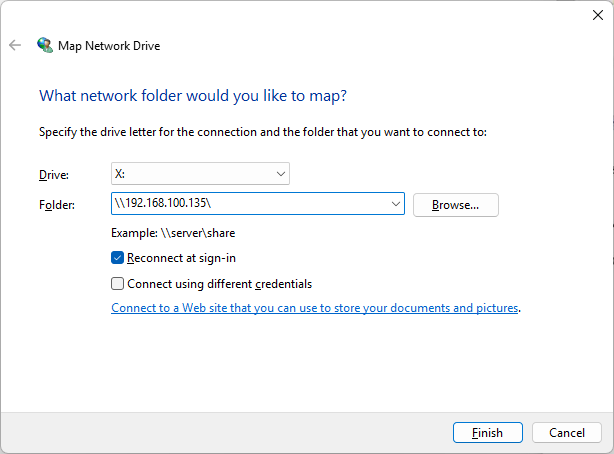
Click the browse button, then select the shared folder you want to access. During this process, you will need to enter the username and password you created earlier.
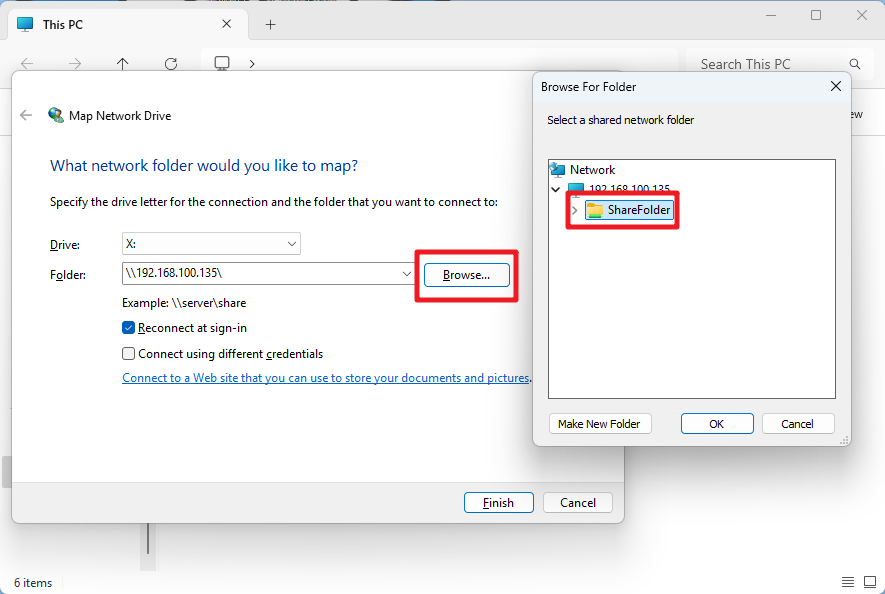
Check “Reconnect at sign-in”, and click the
Finishbutton.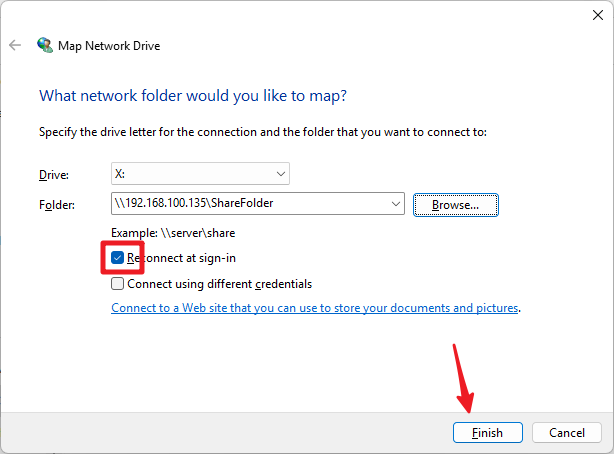
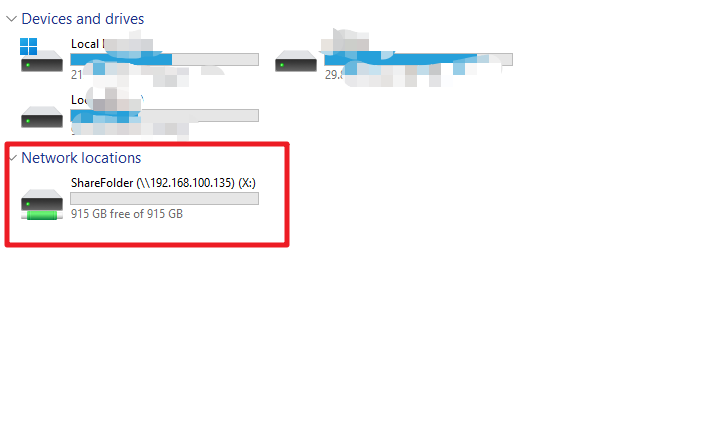
You can now access the NAS shared folder.
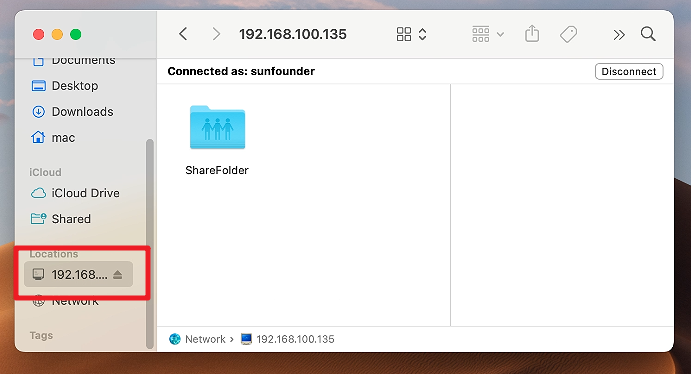
10. Access the Shared Folder on Mac
In the
Gomenu, clickConnect to Server.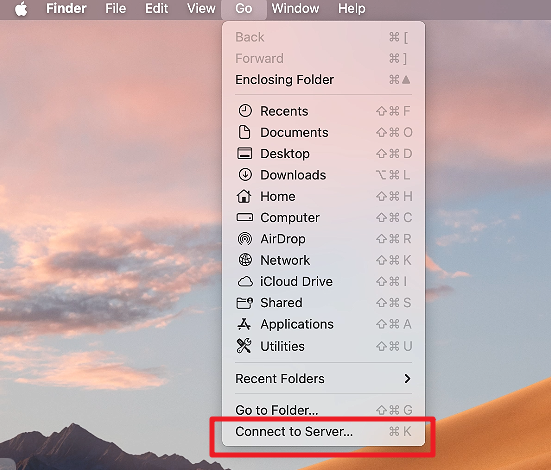
In the pop-up dialog box, enter the IP of the Raspberry Pi, such as
smb://192.168.1.100, or the Raspberry Pi’s hostname, such assmb://pi.local.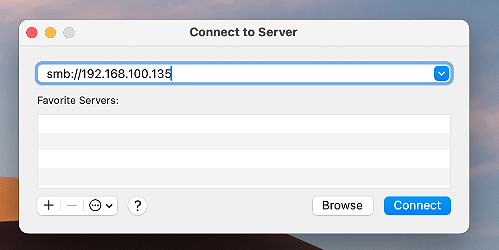
Click the
Connectbutton.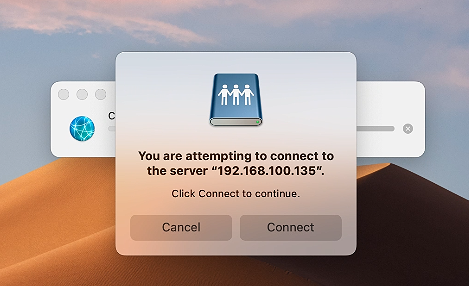
In the pop-up dialog box, enter the username and password you created earlier. Click the
Connectbutton.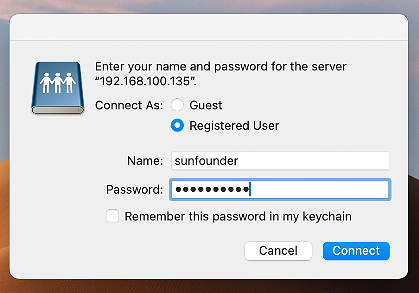
You can now access the NAS shared folder.