Add PiPower Pro in Home Assistant
Step 1
Install the battery.
Step 2
Connect the USB-C charger until all four battery indicators are lit (this means the battery is fully charged). Press the power button to turn it on.
Step 3
Configure the network for PiPower Pro.
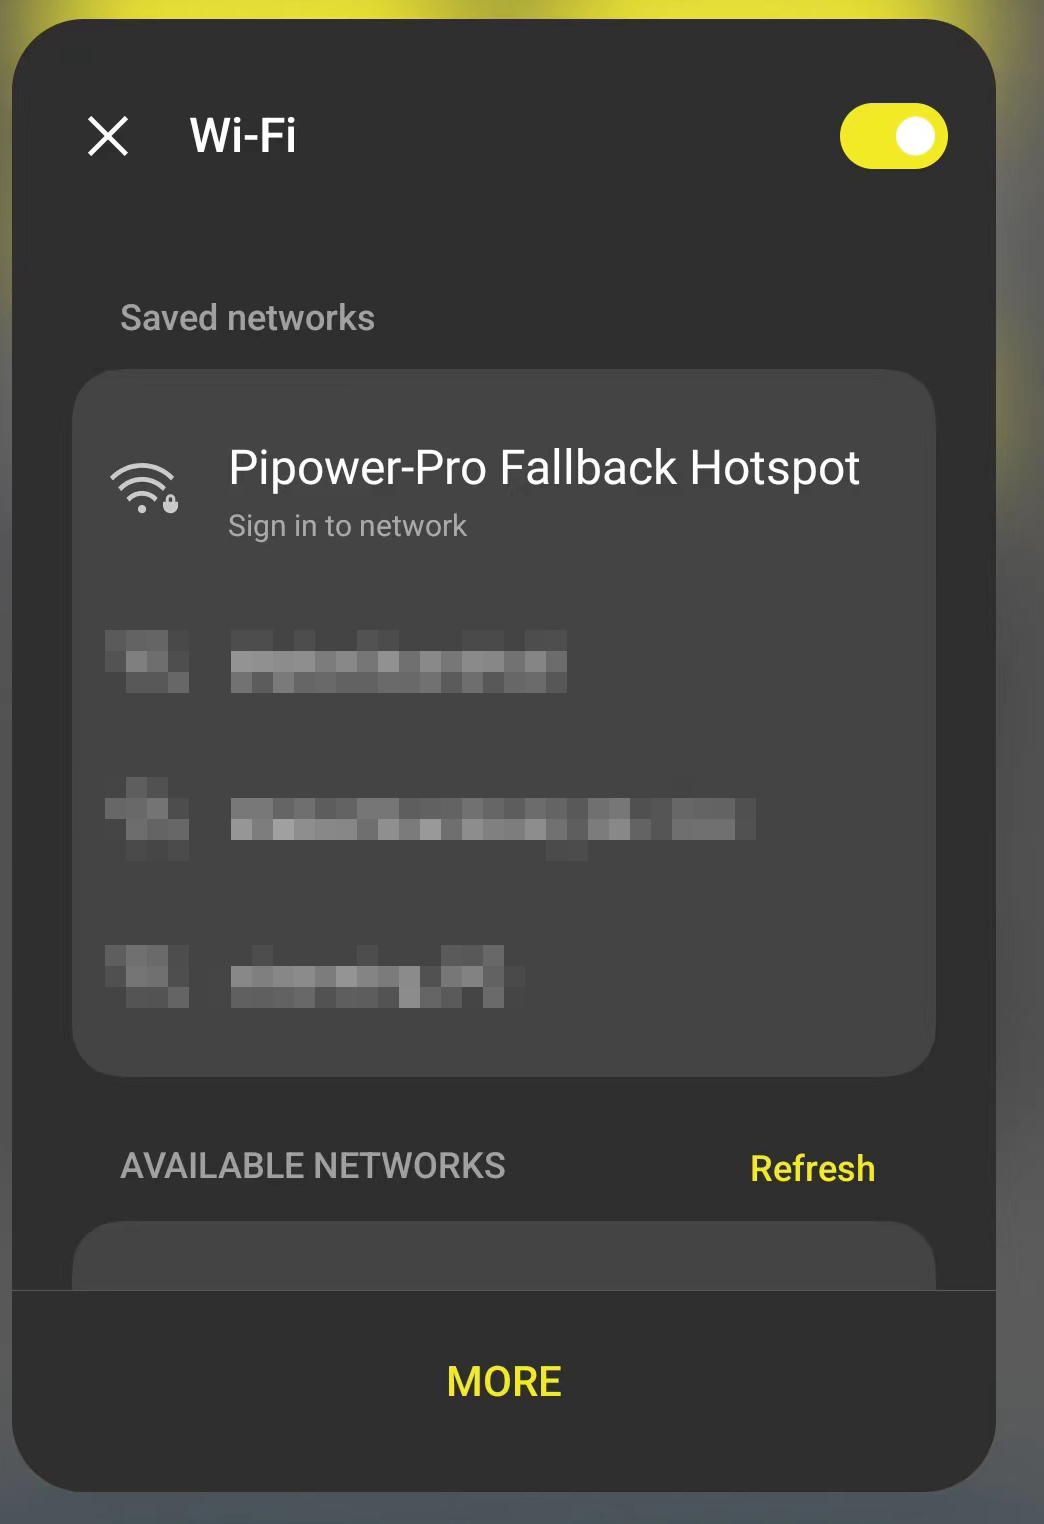
Search for Wi-Fi on your phone (or other device)
and connect to PiPower Pro Fallback Hotspot. The password is 12345678.
Step 4
Once connected, a configuration page will pop up on your phone. Complete the Wi-Fi configuration for PiPower here.
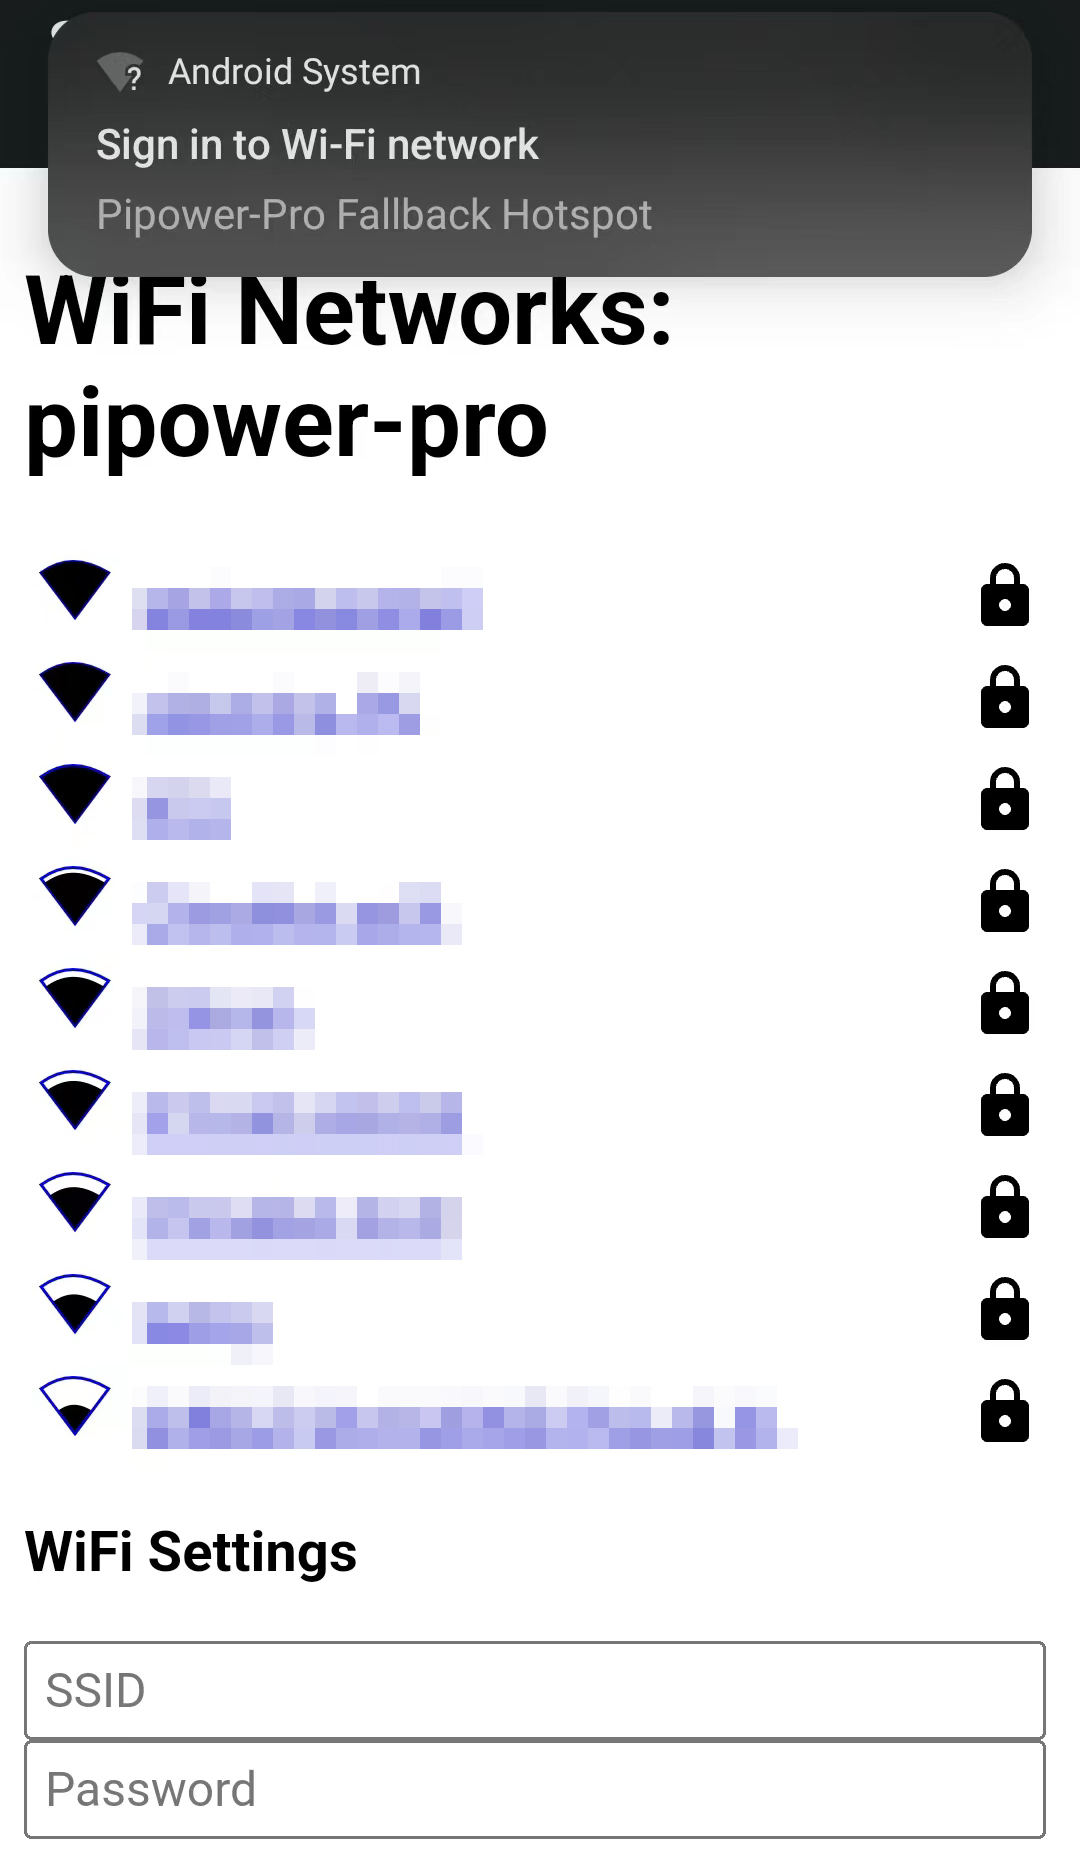
If the configuration page doesn’t automatically pop up, you can open a browser and visit pipower-pro.local.
Step 5
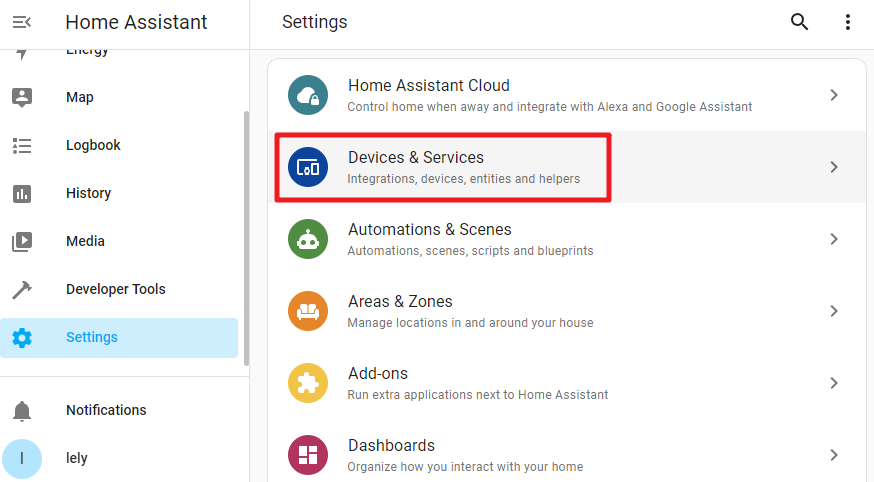
Open your Home Assistant page, select Configuration from the left sidebar, then select Devices and Services.
Step 6
Click on + ADD INTEGRATION at the bottom right.

Step 7
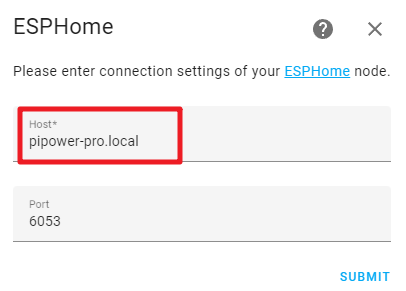
Select ESPHome.

Step 8
Enter pipower-pro.local and submit.
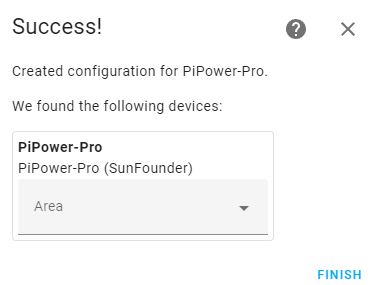
Step 9
Choose an area for it and complete the setup.
Step 10
You have now successfully added PiPower Pro. You can add the PiPower Pro configurations you need on the dashboard.