Note
Hello, welcome to the SunFounder Raspberry Pi, Arduino, and ESP32 Enthusiasts Community on Facebook! Join fellow makers to explore, learn, and create together.
Why Join?
Expert Support — Get help with post-sale issues and technical challenges.
Learn & Share — Exchange tutorials, tips, and hands-on experiences.
Exclusive Previews — Get early access to new product announcements.
Special Discounts — Enjoy members-only offers on new products.
Giveaways & Events — Join festive promotions and prize draws.
👉 Click here to join the community!
SPI Configuration
Follow the steps below to enable and verify the SPI interface on your Raspberry Pi. These instructions apply to Raspberry Pi 5, 4, 3, and Zero 2W.
Enable the SPI Interface
Open a terminal on your computer (Windows: PowerShell; macOS/Linux: Terminal) and connect to your Raspberry Pi:
ssh <username>@<hostname>.localor:
ssh <username>@<ip_address>Open the Raspberry Pi configuration tool:
sudo raspi-configSelect Interfacing Options and press Enter.

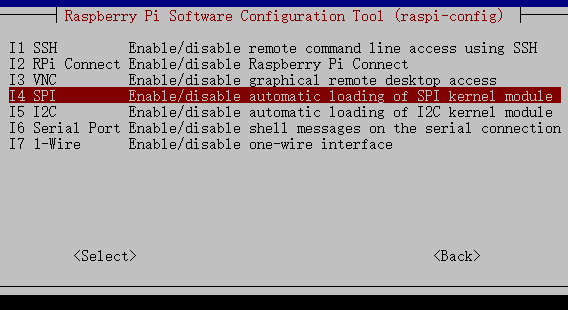
Select SPI.
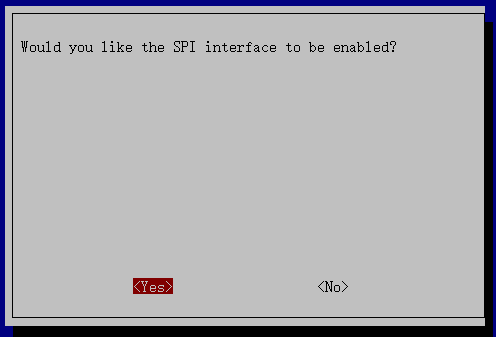
Choose <Yes>, then <Ok> → <Finish> to apply the changes. If prompted, reboot your Raspberry Pi.
Verify SPI Interface
Check whether the SPI device nodes exist:
ls /dev/sp*If the SPI interface is enabled, the output will include:
/dev/spidev0.0
/dev/spidev0.1
If these devices appear, SPI is active and ready to use.
If not, reboot your Raspberry Pi and check again.
Install spidev (Python SPI Library)
Install the
spidevpackage to use SPI in Python:sudo apt install python3-spidev
The
spidevlibrary provides access to SPI devices through the/dev/spidevX.Yinterface.
Your Raspberry Pi is now configured to communicate with SPI devices using both command-line tools and Python.