3.1 Beep
The active buzzer is a typical digital output device that is as easy to use as lighting up an LED!
Required Components
In this project, we need the following components.
It’s definitely convenient to buy a whole kit, here’s the link:
Name |
ITEMS IN THIS KIT |
LINK |
|---|---|---|
Kepler Kit |
450+ |
You can also buy them separately from the links below.
SN |
COMPONENT |
QUANTITY |
LINK |
|---|---|---|---|
1 |
1 |
||
2 |
Micro USB Cable |
1 |
|
3 |
1 |
||
4 |
Several |
||
5 |
1(S8050) |
||
6 |
1(1KΩ) |
||
7 |
Active Buzzer |
1 |
Schematic

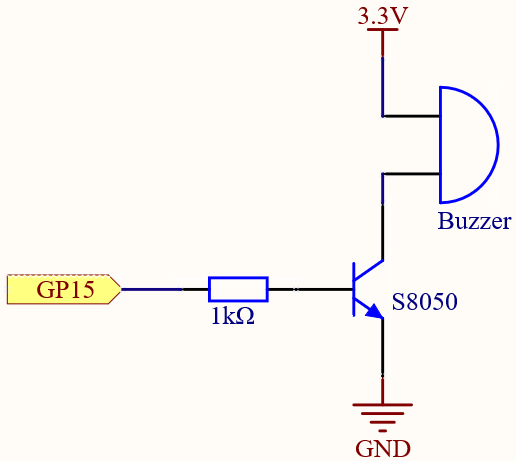
When the GP15 output is high, after the 1K current limiting resistor (to protect the transistor), the S8050 (NPN transistor) will conduct, so that the buzzer will sound.
The role of S8050 (NPN transistor) is to amplify the current and make the buzzer sound louder. In fact, you can also connect the buzzer directly to GP15, but you will find that the buzzer sound is smaller.
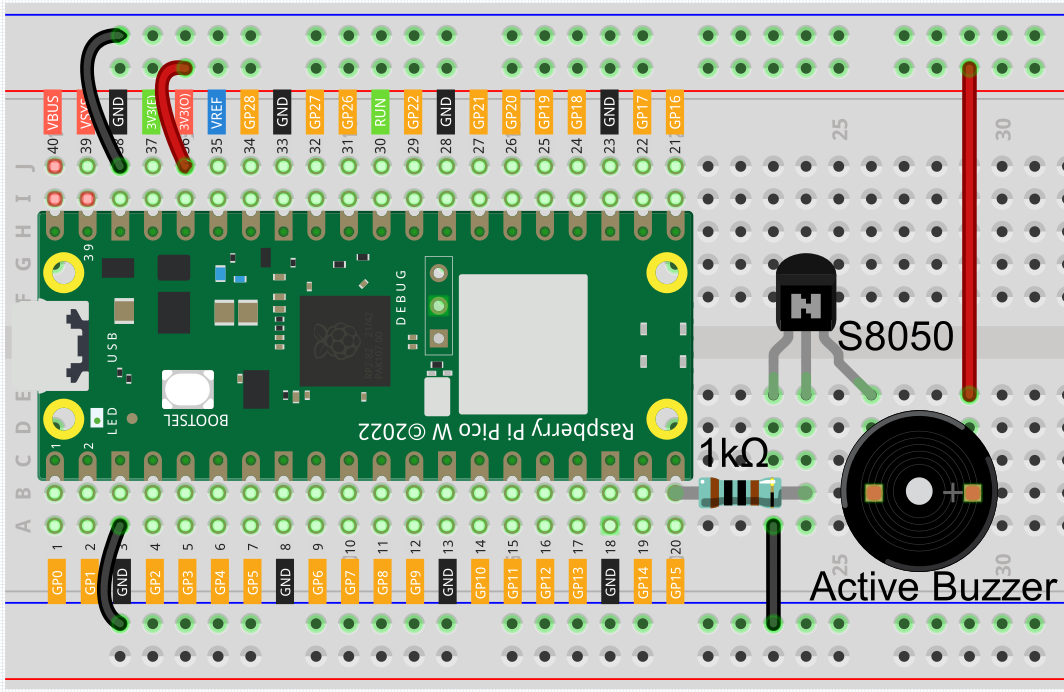
Wiring
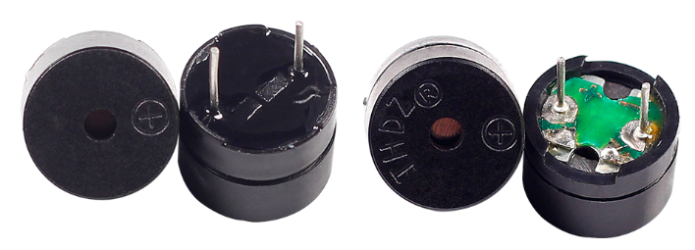
Two types of buzzers are included in the kit. We need to use active buzzer. Turn them around, the sealed back (not the exposed PCB) is the one we want.
The buzzer needs to use a transistor when working, here we use S8050 (NPN Transistor).
Code
Note
Open the
3.1_beep.pyfile under the path ofkepler-kit-main/micropythonor copy this code into Thonny, then click “Run Current Script” or simply press F5 to run it.Don’t forget to click on the “MicroPython (Raspberry Pi Pico)” interpreter in the bottom right corner.
For detailed tutorials, please refer to Open and Run Code Directly.
import machine
import utime

buzzer = machine.Pin(15, machine.Pin.OUT)
while True:
    for i in range(4):
        buzzer.value(1)
        utime.sleep(0.3)
        buzzer.value(0)
        utime.sleep(0.3)
    utime.sleep(1)
After the code runs, you will hear a beep every second.

