Note
Hello, welcome to the SunFounder Raspberry Pi & Arduino & ESP32 Enthusiasts Community on Facebook! Dive deeper into Raspberry Pi, Arduino, and ESP32 with fellow enthusiasts.
Why Join?
Expert Support: Solve post-sale issues and technical challenges with help from our community and team.
Learn & Share: Exchange tips and tutorials to enhance your skills.
Exclusive Previews: Get early access to new product announcements and sneak peeks.
Special Discounts: Enjoy exclusive discounts on our newest products.
Festive Promotions and Giveaways: Take part in giveaways and holiday promotions.
👉 Ready to explore and create with us? Click [here] and join today!
2.8 Read Temperature and Humidity
Previous projects have been using stage mode, but some functions are only available in upload mode, such as serial communication function. In this project, we will print the temperature and humidity of the DHT11 using the Serial Monitor in Upload Mode.

Required Components
In this project, we need the following components.
It’s definitely convenient to buy a whole kit, here’s the link:
Name |
ITEMS IN THIS KIT |
LINK |
|---|---|---|
ESP32 Starter Kit |
320+ |
You can also buy them separately from the links below.
COMPONENT INTRODUCTION |
PURCHASE LINK |
|---|---|
You Will Learn
Get the temperature and humidity from the DHT11 module
Serial Monitor for Upload Mode
Add extension
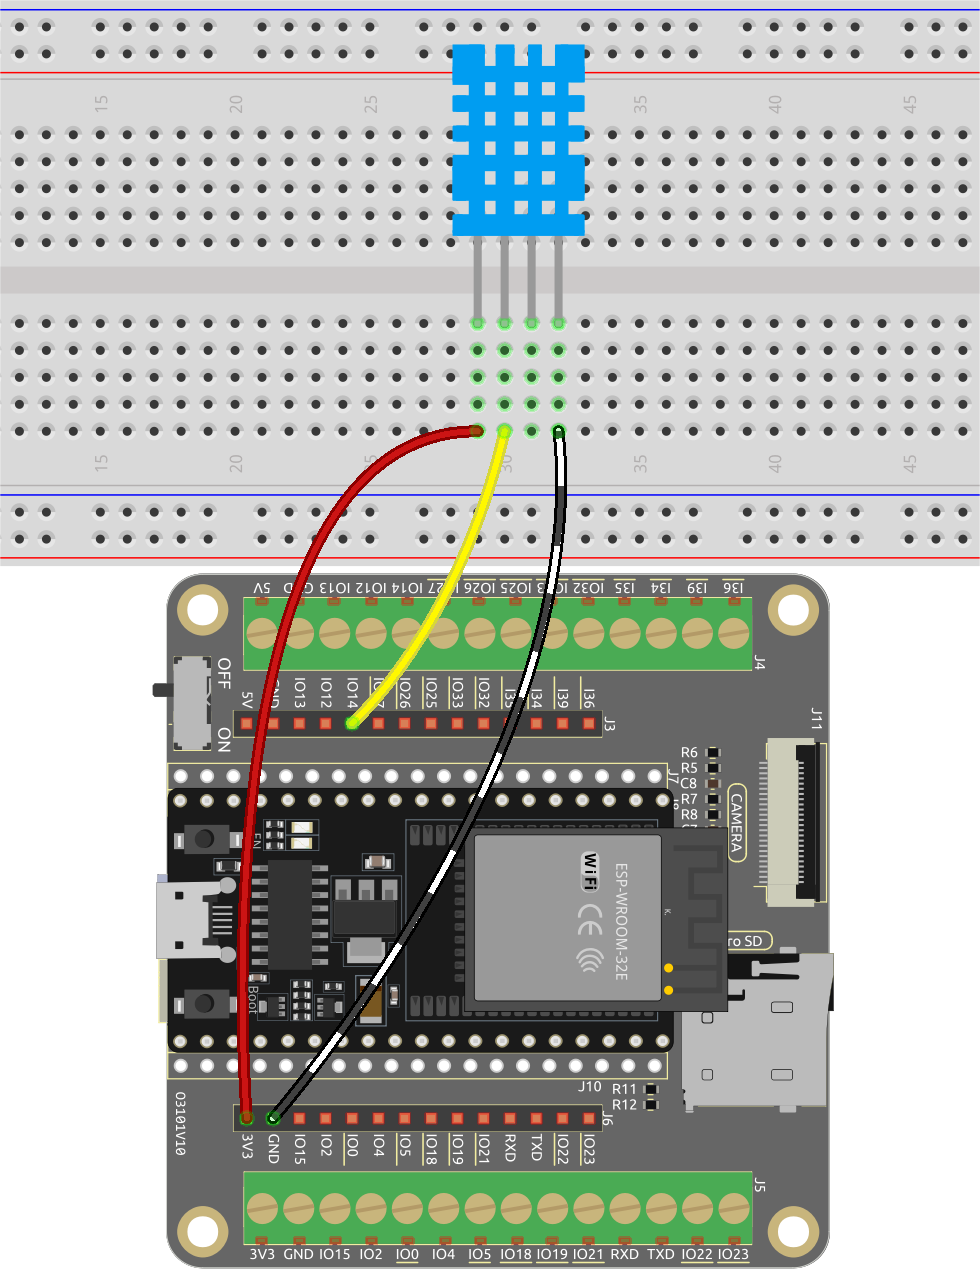
Build the Circuit
The digital temperature and humidity sensor DHT11 is a composite sensor that contains a calibrated digital signal output of temperature and humidity.
Now build the circuit according to the following diagram.
Programming
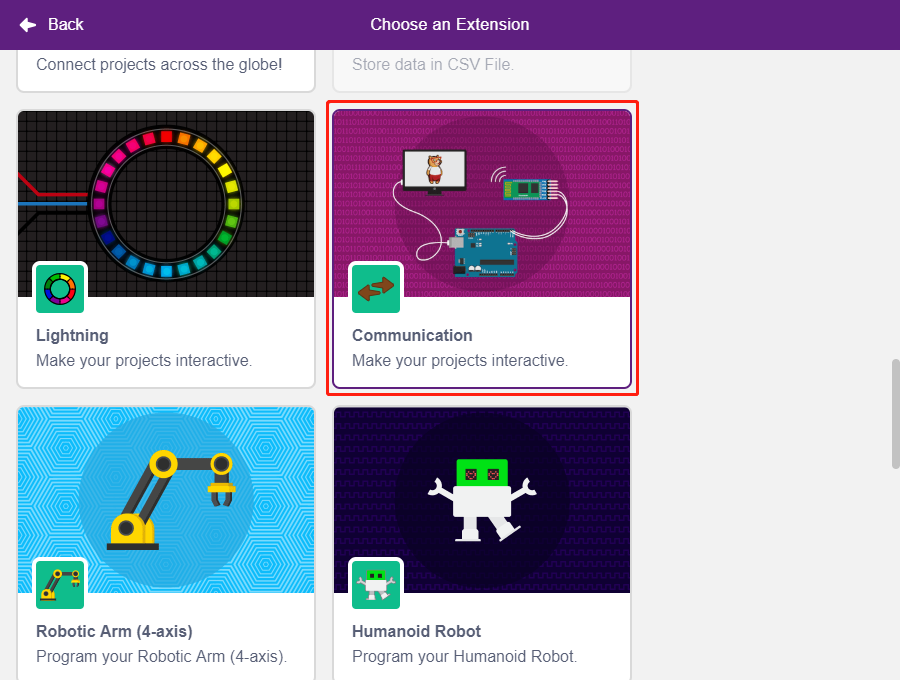
1. Adding Extensions
Switch to Upload mode, click the Add Extension button in the bottom left corner, then select Communication to add it, and it will appear at the end of the palette area.
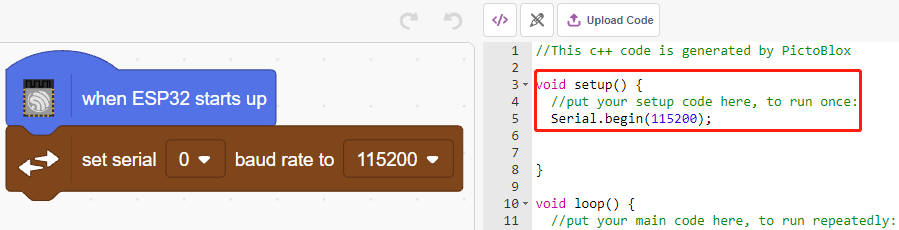
2. Initializing the ESP32 and Serial Monitor
In Upload mode, start ESP32 and then set the serial port baud rate.
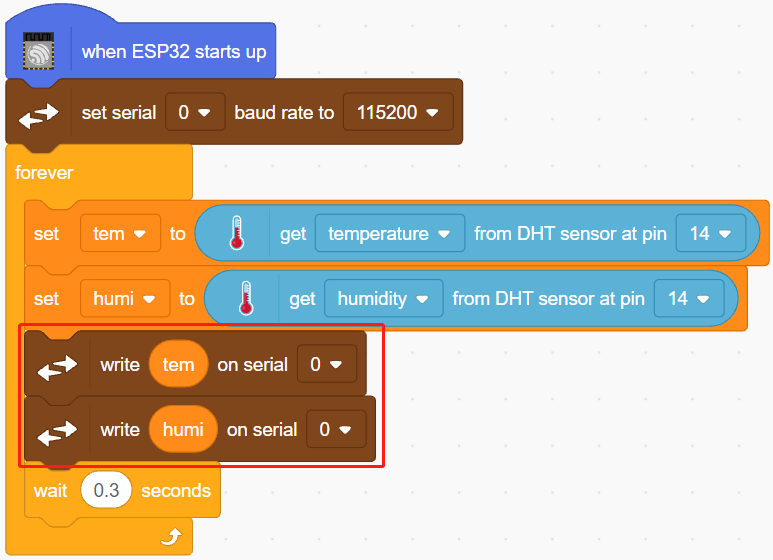
[when ESP32 Starts up]: In Upload mode, start ESP32.
[set serial baud rate to]: From the Communications palette, used to set the baud rate of serial port 0, default is 115200. If you are using Mega2560, then you can choose to set baud rate in serial port 0~2.
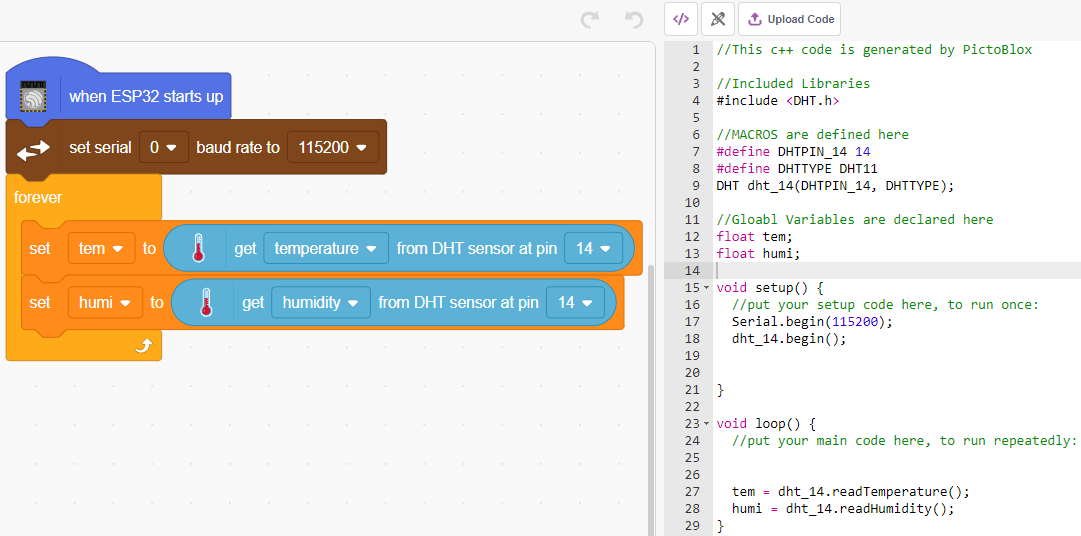
3. Read temperature and humidity
Create 2 variables tem and humi to store the temperature and humidity respectively, the code will appear on the right side while you drag and drop the block.
4. Print them on the Serial Monitor
Write the read temperature and humidity to the Serial Monitor. To avoid transferring too fast and causing PictoBlox to jam, use the [wait seconds] block, to add some time interval for the next print.
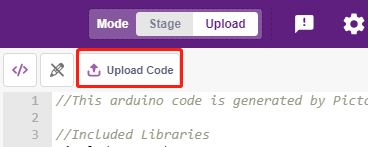
5. Uploading code
Unlike the Stage mode, the code in Upload mode needs to be uploaded to the ESP32 board using the Upload Code button to see the effect. This also allows you to unplug the USB cable and still have the program running.
6. Turn on the serial monitor
Now open the Serial Monitor to see the temperature and humidity.