Note
Hello, welcome to the SunFounder Raspberry Pi & Arduino & ESP32 Enthusiasts Community on Facebook! Dive deeper into Raspberry Pi, Arduino, and ESP32 with fellow enthusiasts.
Why Join?
Expert Support: Solve post-sale issues and technical challenges with help from our community and team.
Learn & Share: Exchange tips and tutorials to enhance your skills.
Exclusive Previews: Get early access to new product announcements and sneak peeks.
Special Discounts: Enjoy exclusive discounts on our newest products.
Festive Promotions and Giveaways: Take part in giveaways and holiday promotions.
👉 Ready to explore and create with us? Click [here] and join today!
Install the Required Libraries
What is a Library?
A library is a collection of predefined functions and headers that make programming easier and more efficient. Libraries typically consist of two main files:
.h (Header File): Contains function declarations, macro definitions, and constructor definitions.
.cpp (Source File): Includes function implementations, variable definitions, and other executable components.
By including a library in your project, you can directly call the functions it provides (e.g., #include <dht.h>) instead of writing your own definitions from scratch. This keeps your code concise and easier to read.
While it’s possible to write the function definitions yourself, using a library saves time and reduces complexity.
Some libraries are pre-installed with the Arduino IDE, while others need to be installed manually. Here’s how to install the required libraries for this project.
How to Install a Library
Note
The following instructions are for Arduino IDE 2.0. If you are using Arduino IDE 1.x, refer to Installing Libraries.
Here are steps to install a library:
Click on the Library Manager icon in the left column of the Arduino IDE.
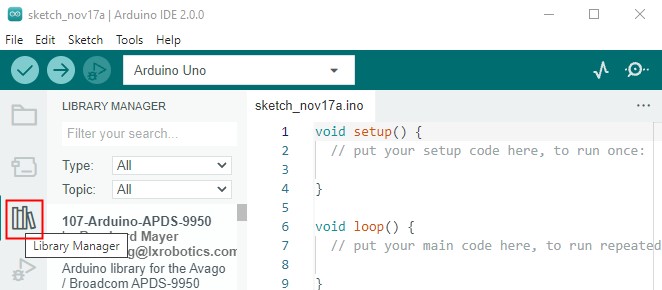
Search for the library:
A list of available libraries will appear. Use the search bar to find the library you want to install.
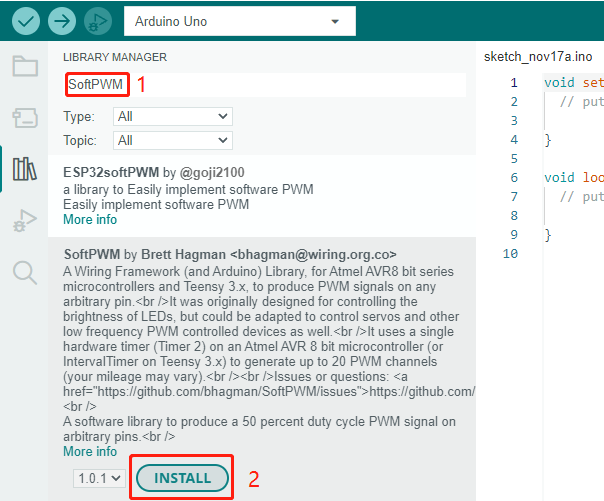
For example, to install the
SoftPWMlibrary, type the library name and click the INSTALL button.
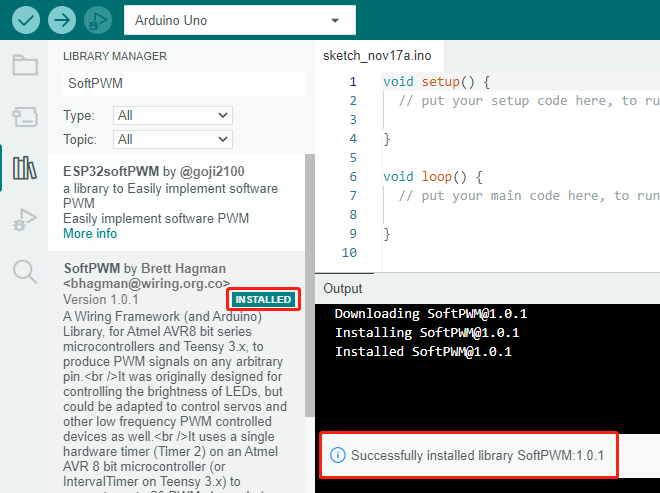
The installation process usually takes less than a minute. Once completed, the library will display INSTALLED in the Library Manager.
Follow the same steps as above to install the
IRLremoteLibrary, ensuring you spell the library name correctly.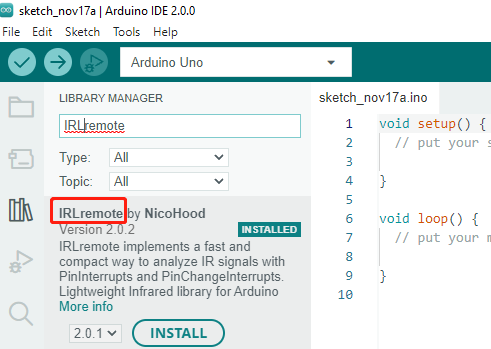
Then, install the
ArduinoJsonlibrary.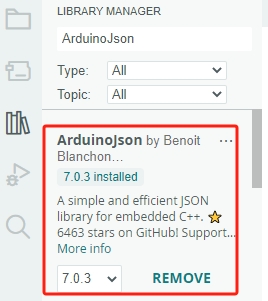
Search for and install the
SunFounder AI Cameralibrary, the final library needed for this project.
By following these steps, you’ll have all the necessary libraries installed and ready to use for your project.