Note
Hello, welcome to the SunFounder Raspberry Pi & Arduino & ESP32 Enthusiasts Community on Facebook! Dive deeper into Raspberry Pi, Arduino, and ESP32 with fellow enthusiasts.
Why Join?
Expert Support: Solve post-sale issues and technical challenges with help from our community and team.
Learn & Share: Exchange tips and tutorials to enhance your skills.
Exclusive Previews: Get early access to new product announcements and sneak peeks.
Special Discounts: Enjoy exclusive discounts on our newest products.
Festive Promotions and Giveaways: Take part in giveaways and holiday promotions.
👉 Ready to explore and create with us? Click [here] and join today!
FAQ
How to Change Wi-Fi Channel?
The 2.4GHz Wi-Fi band has channels ranging from 1 to 13. ESP32 supports channels 1 to 11. Other devices operating on the same channel may cause interference, leading to connection issues. To mitigate this, you can try changing the channel. By default, the channel is set to 1. When selecting a new channel, it’s recommended to skip 1-2 channels at a time. For example, if the current channel is 1, try channel 3 first, and if the signal is still poor, proceed to channel 5.
Note
ESP32 CAM firmware version 1.4.1 or above is required to change channels. Refer to How to Update Firmware for ESP32 CAM for more details.
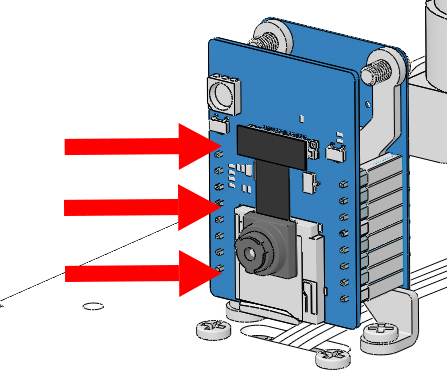
Keep the ESP32 CAM inserted into the adapter, then power on the Zeus Car.
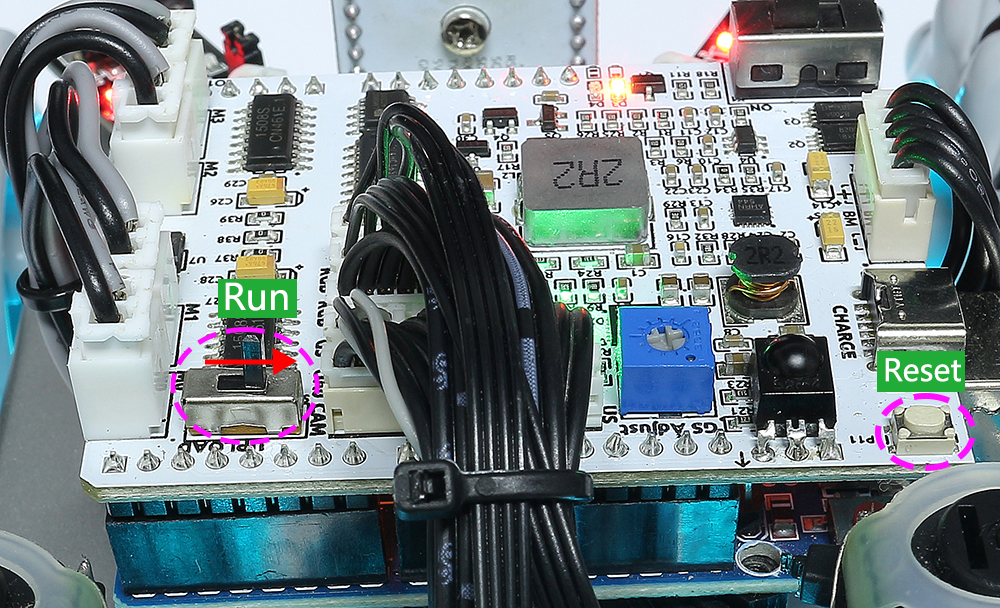
To activate the ESP32 CAM, move the mode switch to the Run position, and press the Reset button to reboot the R3 board.
Find
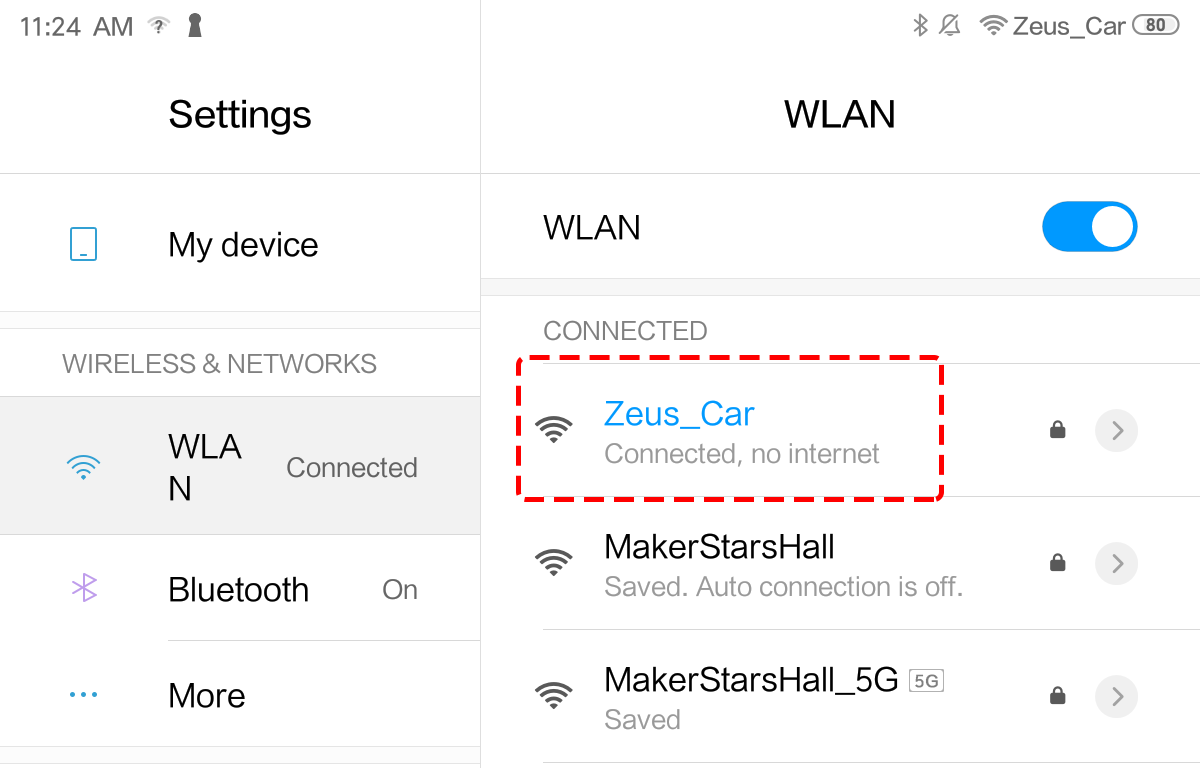
Zeus Caron the list of available networks on your mobile device (tablet or smartphone), enter the password12345678, and connect to it.Note
The current connection is to the Zeus Car hotspot, so there is no internet access. If prompted to switch networks, please choose “Stay connected”.
Open a web browser on your mobile device and navigate to
http://192.168.4.1to access the ESP32 CAM OTA update page.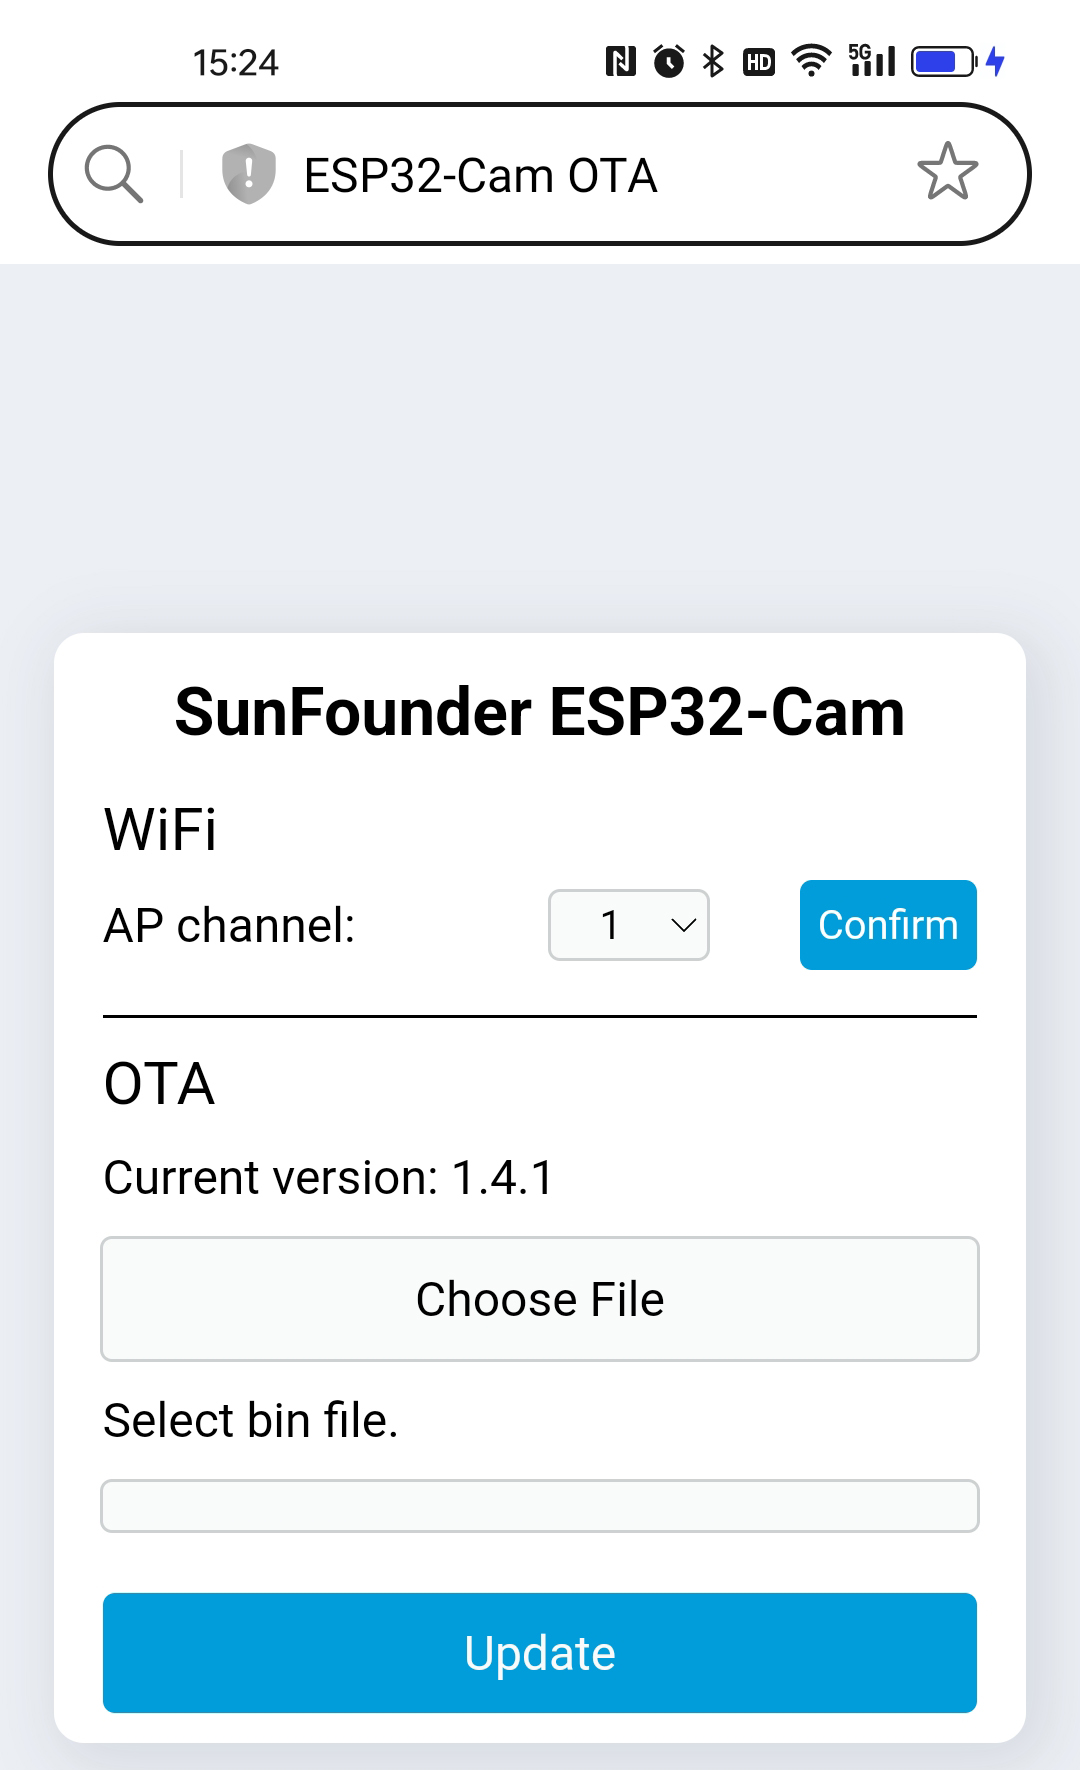
Under the Wi-Fi AP Channel section, select a different channel.
The default channel is 1. When selecting a new channel, skip 1-2 channels at a time (e.g., from channel 1 to 3, and if needed, to 5).
Click the Confirm button to save the changes.

A confirmation popup will appear, prompting you to reset the device. Click Confirm.

Press the Reset button to reboot the device. The Zeus Car is now ready for normal operation.
How to Update Firmware for ESP32 CAM
Follow these detailed steps to update the firmware for your ESP32 CAM:
Keep the ESP32 CAM inserted into the adapter, then power on the Zeus Car.
To activate the ESP32 CAM, move the mode switch to the Run position, and press the Reset button to reboot the R3 board.
Find
Zeus Caron the list of available networks on your mobile device (tablet or smartphone), enter the password12345678, and connect to it.Note
The current connection is to the Zeus Car hotspot, so there is no internet access. If prompted to switch networks, please choose “Stay connected”.
Click the link below to download the firmware file
ai-camera-firmware-v1.4.1-ota.binand save it to your mobile device.Open a web browser on your mobile device and navigate to
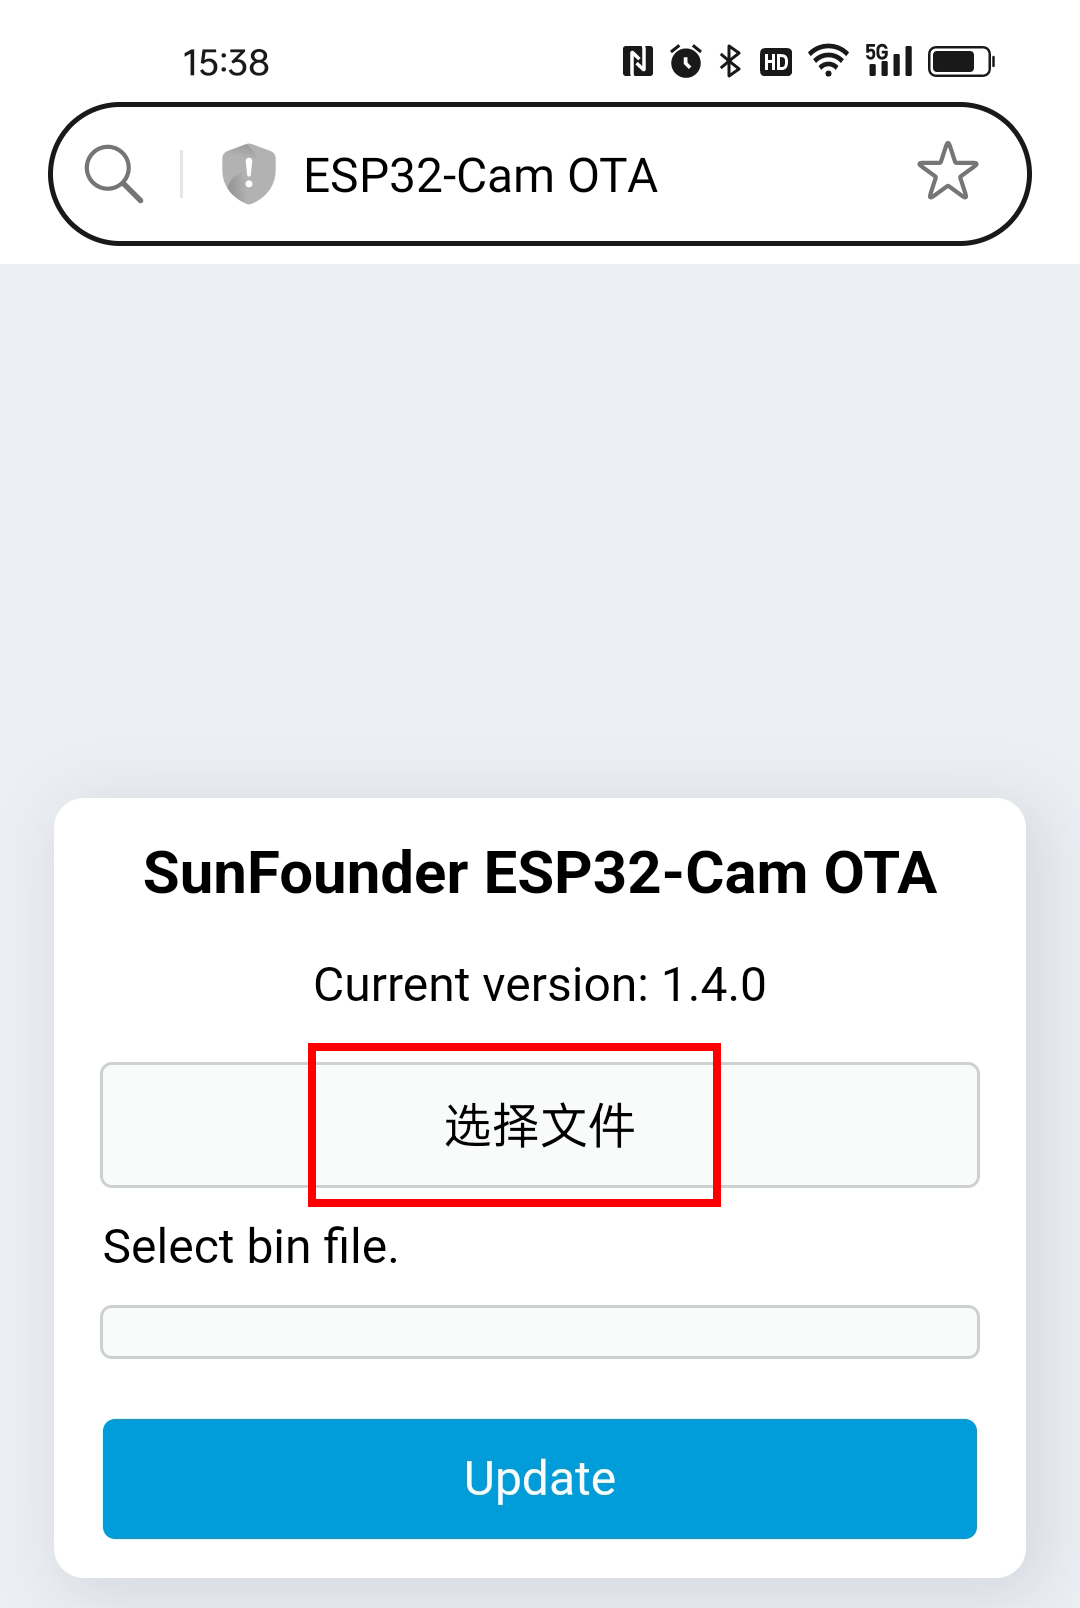
http://192.168.4.1to access the ESP32 CAM OTA update page.
On the OTA page, click the button to select the firmware file.
Choose the previously downloaded
ai-camera-firmware-v1.4.1-ota.binfile from your device and click OK.
Click the Update button to start the firmware update process.

Wait for the update to complete. Once the displayed version number changes to
1.4.1, the update is successful.
After the update is complete, you can close the web browser. Press the Reset button to reboot the device. The ESP32 CAM is now ready for normal operation.
How to Upload the zeus-car.ino Code?
By default, the Zeus Car’s Uno R3 board comes preloaded with the necessary firmware, allowing you to control it via APP. If your R3 board has been overwritten with other code, but you’d like to return to the default firmware and continue with the Quick Play with APP or IR Remote Control process, follow these steps to re-upload the code to your R3 board:
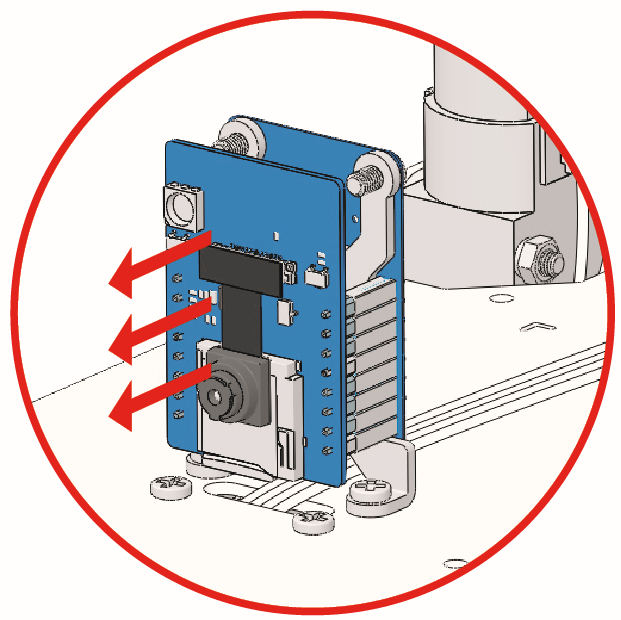
Use a USB cable to connect the Arduino to your computer. The ESP32-CAM and the Arduino board share the same RX (receive) and TX (transmit) pins. So, when you’re uploading code, you’ll need to first disconnect the ESP32-CAM to avoid any conflicts or potential issues.
Download the required firmware from the link below:
Extract the downloaded zip file, then double-click the
update-arduino-firmware.batfile to run it.
Type the corresponding number for your Zeus Car’s Arduino Uno (e.g.,
1) and press Enter to begin the update.Note
If the correct COM port does not appear, or if you’re unsure which one it is, disconnect other USB devices from your computer, leaving only the rover connected.
If you encounter an error like
avrdude.exe: stk500_getsync() attempt 1 of 10: not in sync: resp=0xXX, make sure to disconnect the ESP32-CAM as the first step.

After a short while, the new code will be successfully uploaded to the Uno R3 board on Zeus Car. If you fail to upload successfully after multiple attempts, you can run
update-arduino-firmware-with-bootloader.bat.
How to Control the Zeus Car Using Your Home WiFi?
By default, the Uno R3 is preloaded with code configured in APP mode. This means the Zeus Car will broadcast a hotspot, allowing you to connect your mobile device to control it via the SunFounder Controller APP.
If you prefer to control the rover using your home WiFi, follow these steps to upload the modified code to the Uno board:
Download the required files from the following link:
Refer to the installation guide: Download and Install Arduino IDE 2.0.
Use the Library Manager to install the
SoftPWMandSunFounder AI Cameralibraries. For detailed steps, see Install the Required Libraries.Navigate to the
zeus-car-main\zeus-cardirectory and open thezeus-car.inofile.
Comment out lines of AP mode, uncomment lines of STA mode, replace
SSIDandPASSWORDwith your home WiFi credentials./** Configure Wifi mode, SSID, password*/ // #define WIFI_MODE WIFI_MODE_AP // #define SSID "Zeus_Car" // #define PASSWORD "12345678" #define WIFI_MODE WIFI_MODE_STA #define SSID "xxxxxxxxxx" #define PASSWORD "xxxxxxxxxx"
Use a USB cable to connect the Arduino to your computer. The ESP32-CAM and the Arduino board share the same RX (receive) and TX (transmit) pins. So, when you’re uploading code, you’ll need to first disconnect the ESP32-CAM to avoid any conflicts or potential issues.
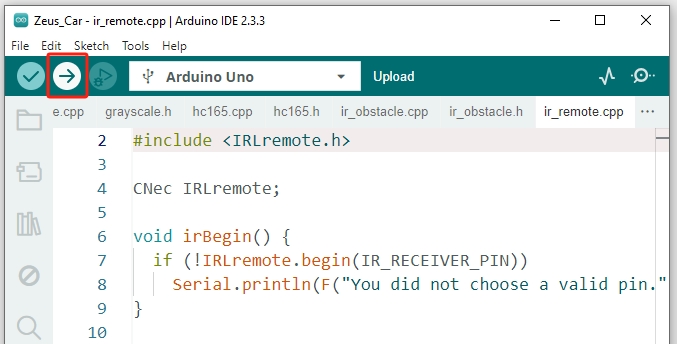
Click the Upload button in the Arduino IDE to upload the modified code to the Uno board.
After the code is uploaded successfully, you can plug in the ESP32-CAM and then slide the power switch to ON to start the Zeus Car.
To activate the ESP32 CAM, move the mode switch to the Run position, and press the Reset button to reboot the R3 board.
Ensure your mobile device (tablet or smartphone) is connected to your home WiFi network.

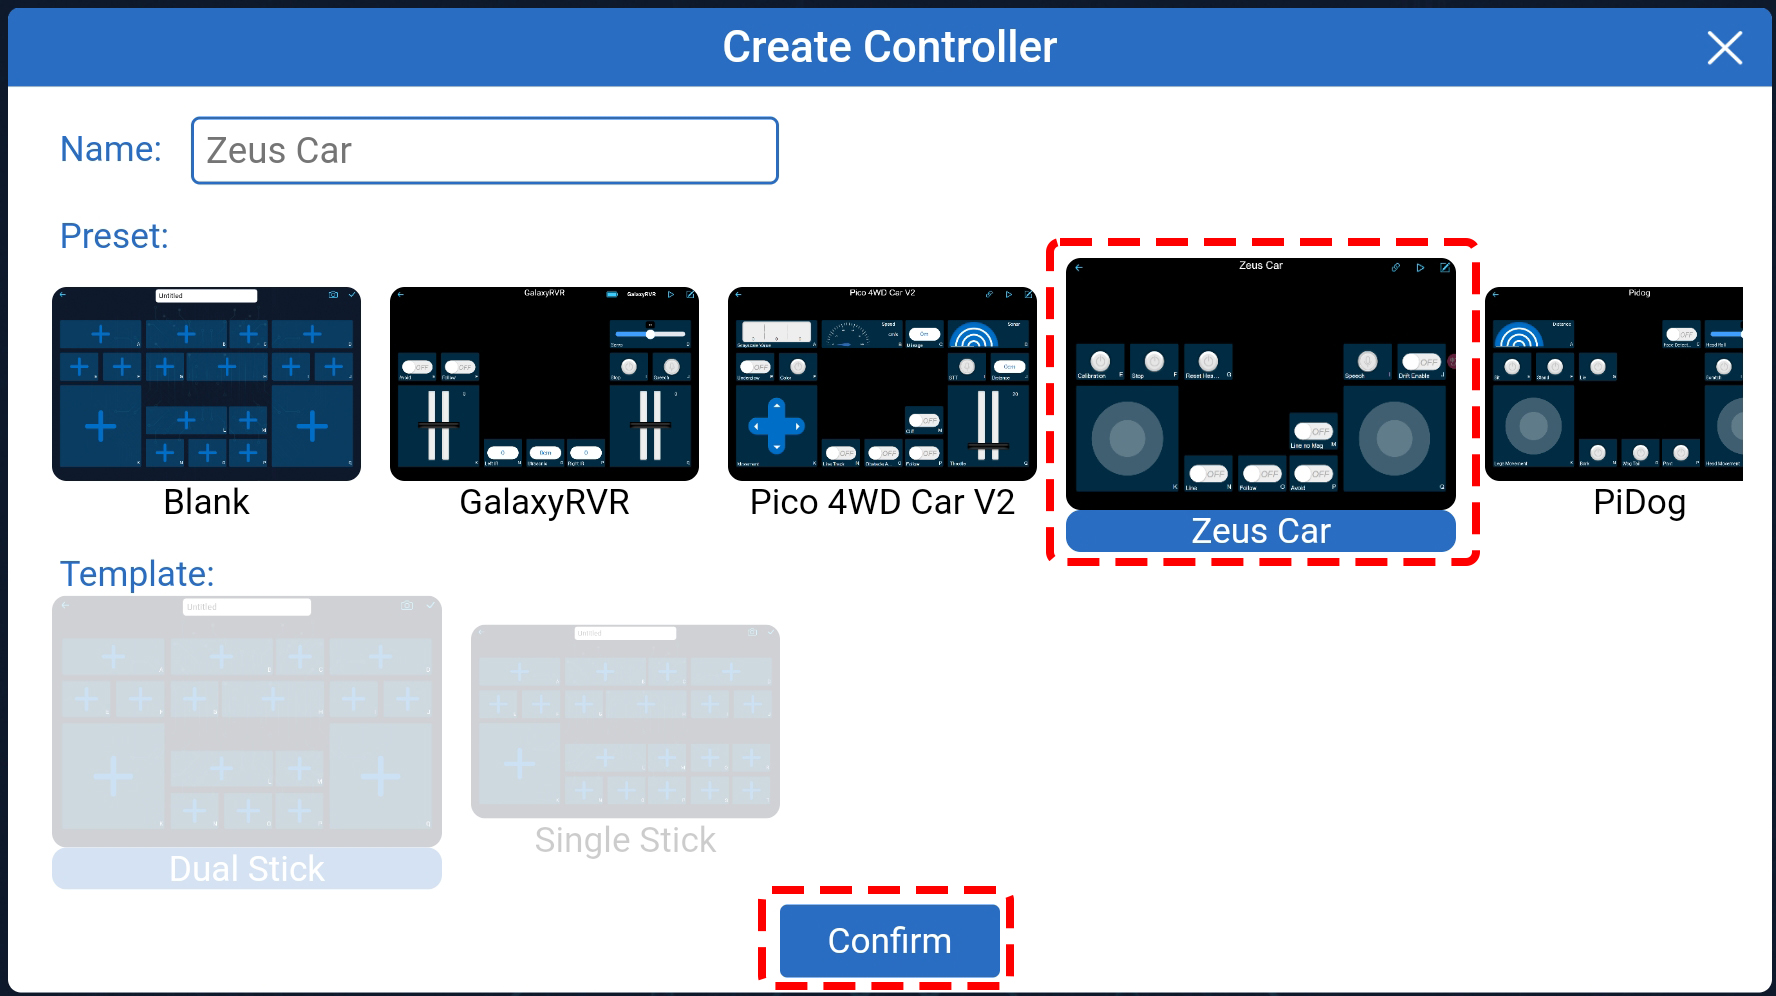
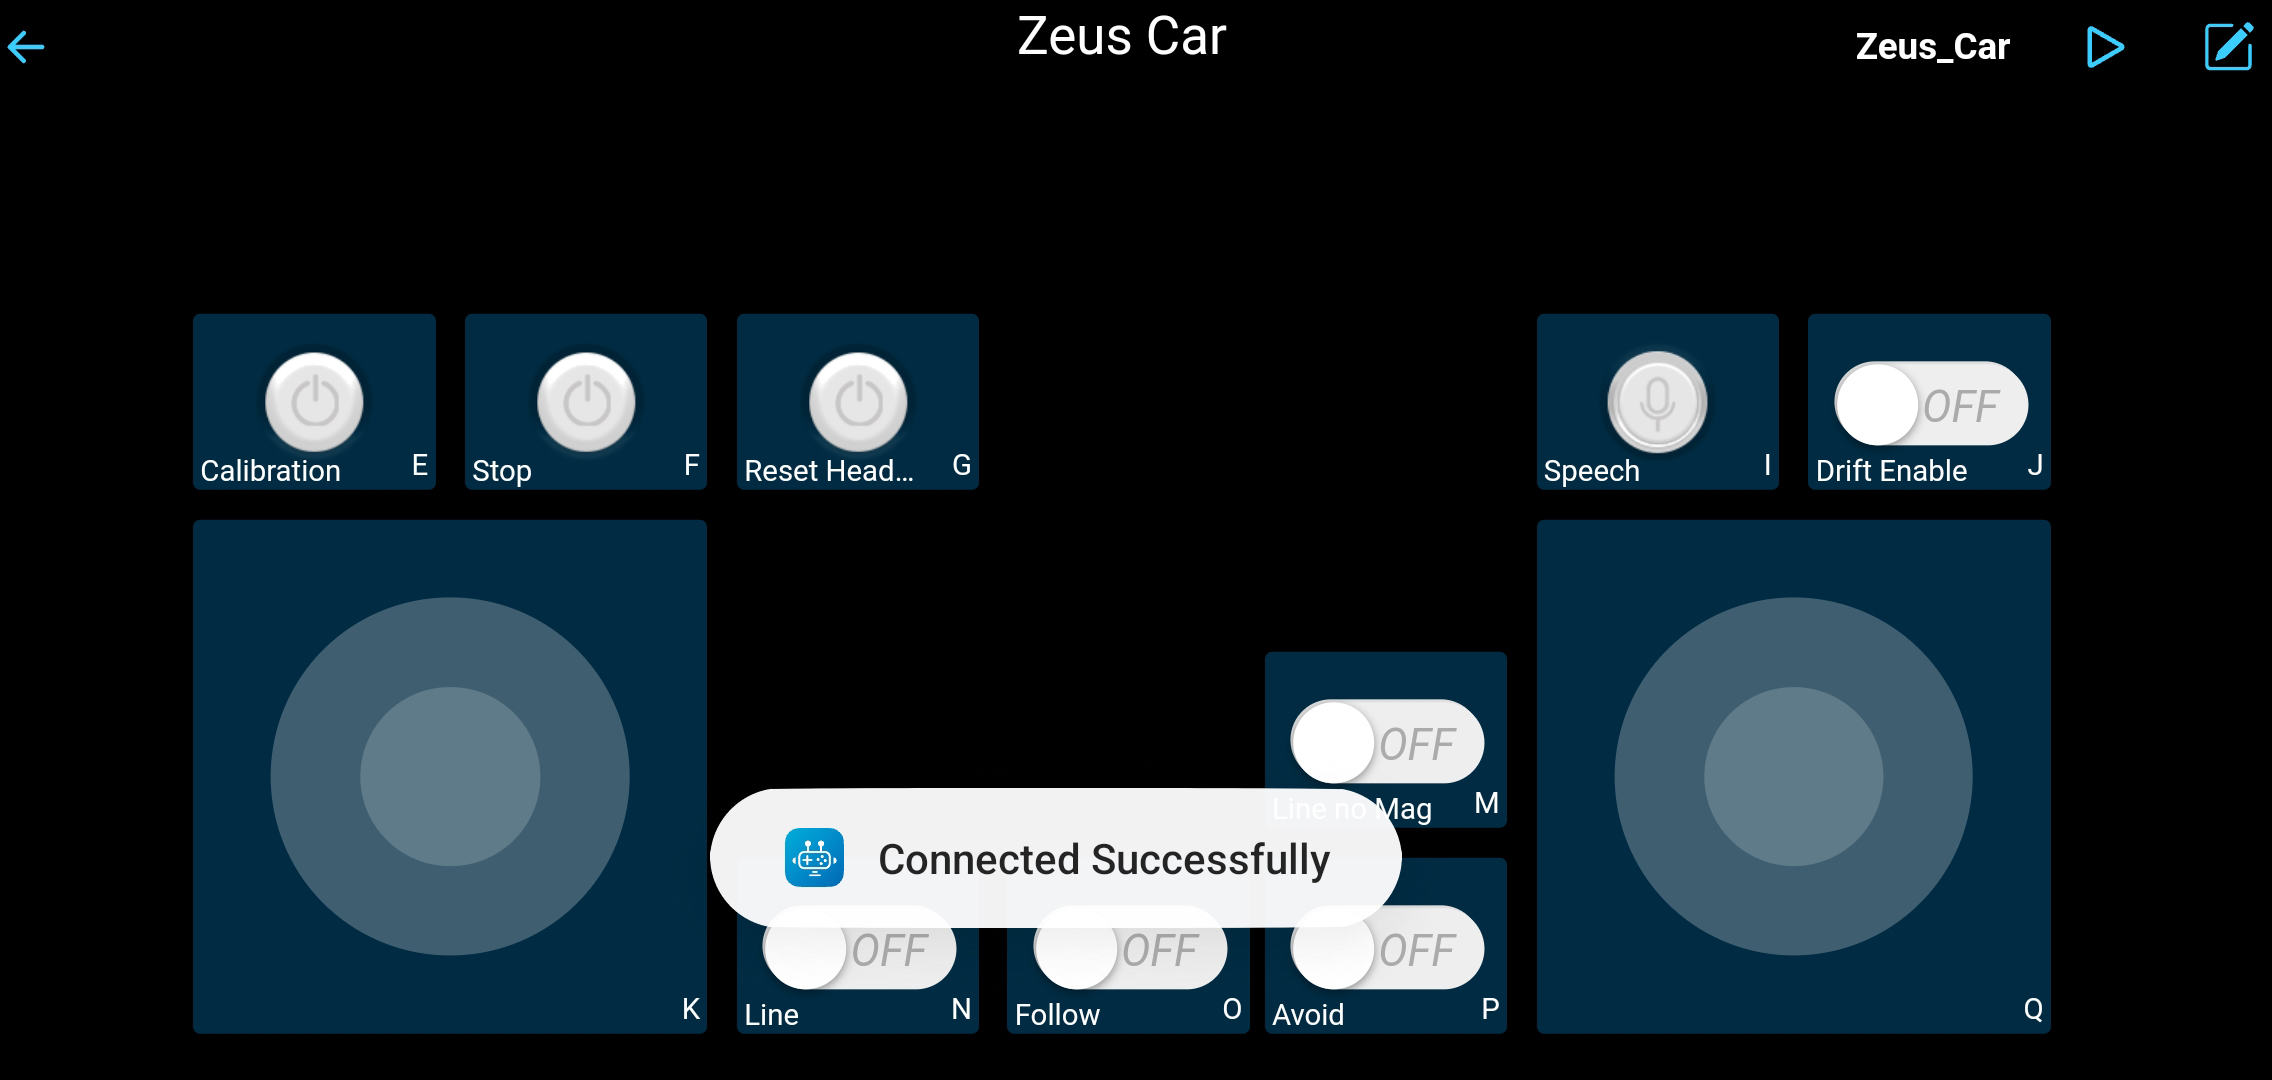
Open the SunFounder Controller App, tap the “+” icon to create a new controller, select the “Zeus Car” preset, enter a name or tap “Confirm” to proceed.
The app will automatically search for the Zeus Car. After a moment, you will see a prompt stating “Connected Successfully.”

Now, tap the
 button enables you to view the live video feed from the camera and control the rover using the provided widgets.
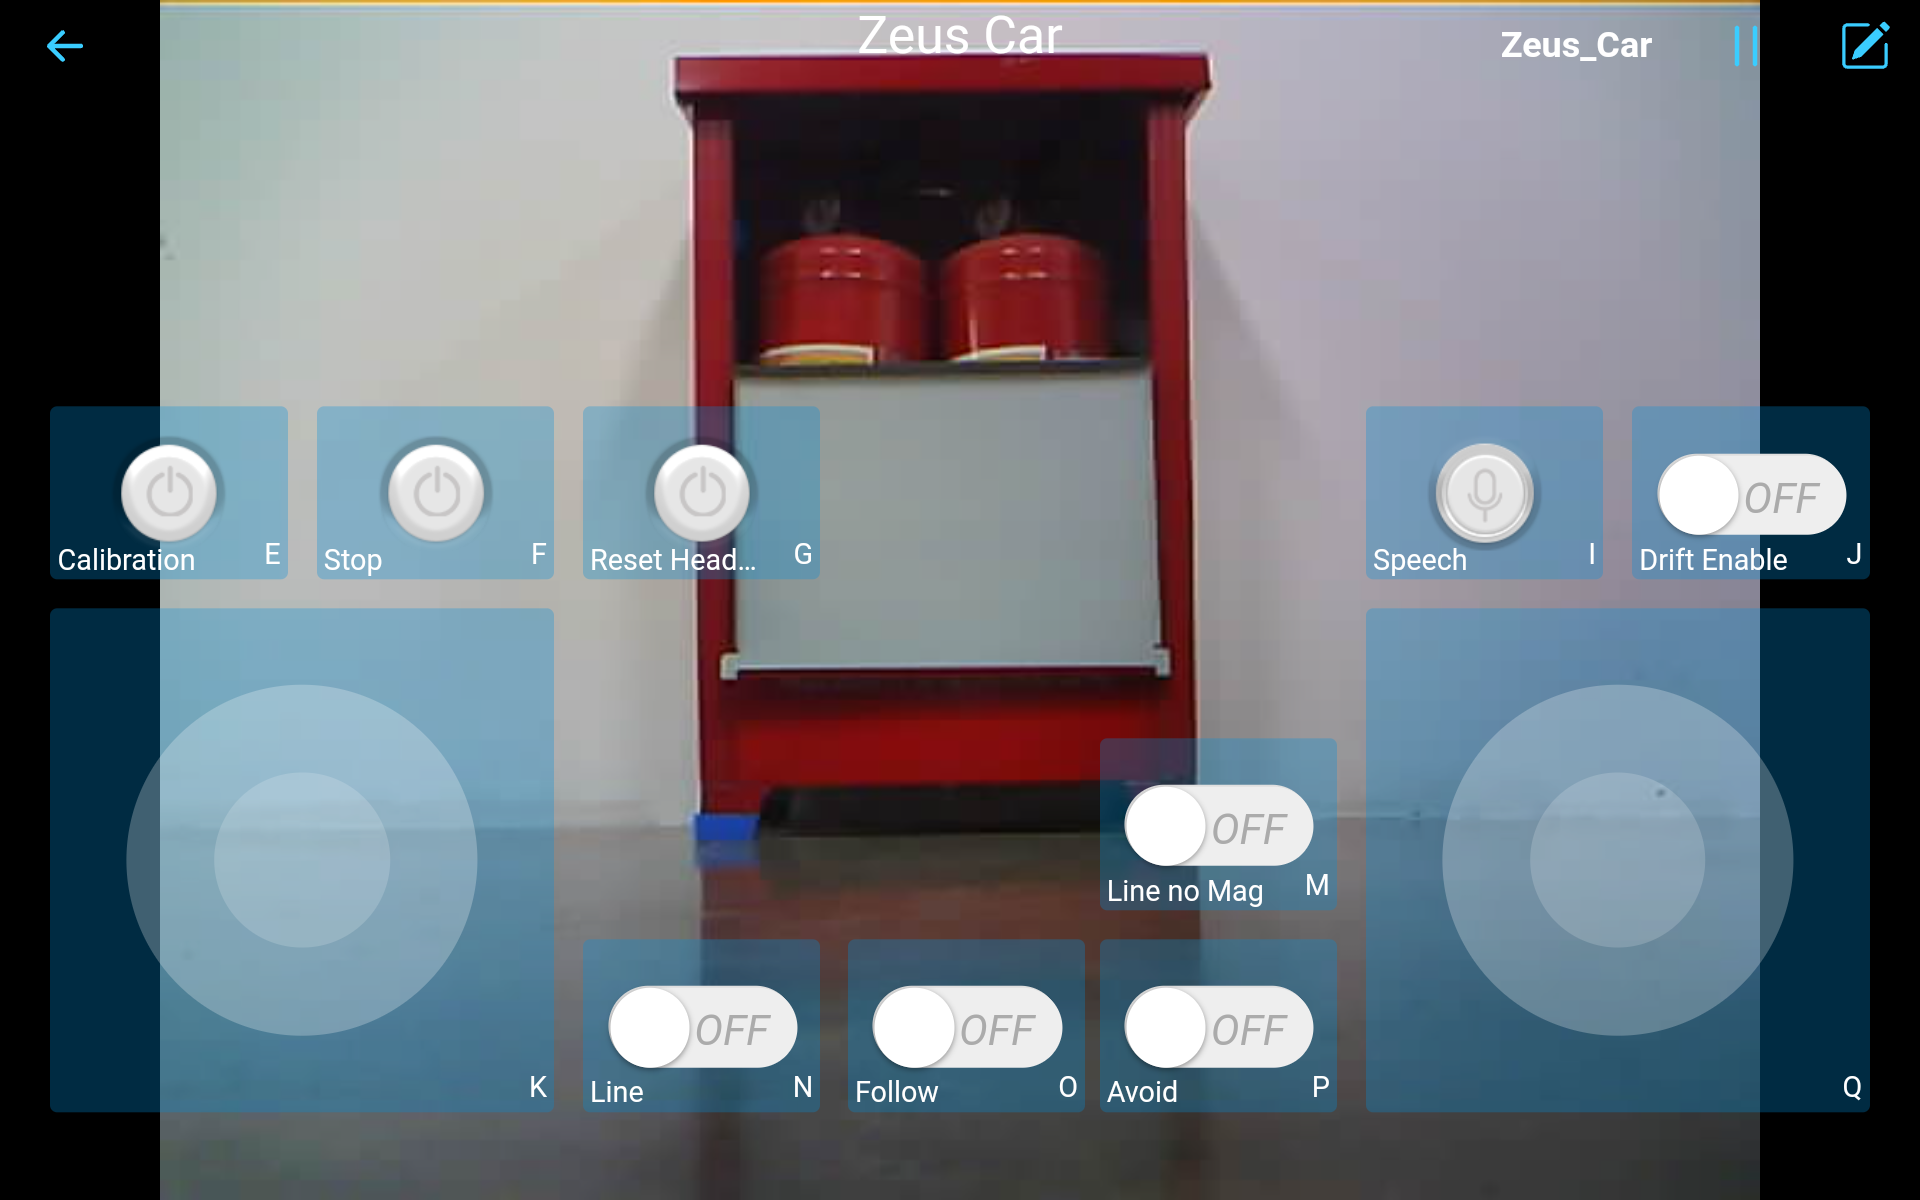
How to Invert the Camera?
If you find the camera feed upside down while using the SunFounder Controller, you can easily correct it through the app. Follow these steps:
Tap the
 button in the top-right corner.
Click the camera button to open a popup. Toggle the Inverted switch to turn it on.

Save your settings.

Return to the control interface and click the
button.Note
Occasionally, the camera feed may not appear. If this happens, pause the controller and then click the run button again.

Compilation error: SoftPWM.h: No such file or directory?
If you get a “Compilation error: SoftPWM.h: No such file or directory” prompt, it means you don’t have the SoftPWM library installed.
Please refer to Install the Required Libraries to install the required libraries.
avrdude: stk500_getsync() attempt 10 of 10: not in sync: resp=0x6e?
If the following message keeps appearing after clicking the Upload button when the board and port have been selected correctly.
avrdude: stk500_recv(): programmer is not responding
avrdude: stk500_getsync() attempt 1 of 10: not in sync: resp=0x00
avrdude: stk500_recv(): programmer is not responding
avrdude: stk500_getsync() attempt 2 of 10: not in sync: resp=0x00
avrdude: stk500_recv(): programmer is not responding
avrdude: stk500_getsync() attempt 3 of 10: not in sync: resp=0x00
At this point, you need to make sure that the ESP32 CAM is unplugged.
The ESP32-CAM and the Arduino board share the same RX (receive) and TX (transmit) pins. So, when you’re uploading code, you’ll need to first disconnect the ESP32-CAM to avoid any conflicts or potential issues.
How can I use the STT feature on my Android device?
The STT feature requires the Android mobile device to be connected to the Internet and to install the Google service component.
Now follow the steps below.
Modify the AP mode of
Zeus_Car.inofile to STA mode.Open the the
Zeus_Car.inofile located in thezeus-car-main/Zeus_Cardirectory.Then comment out the AP mode related code. Uncomment the STA mode related code and fill in the
SSDandPASSWORDof your home Wi-Fi./** Configure Wifi mode, SSID, password*/ // #define WIFI_MODE WIFI_MODE_AP // #define SSID "Zeus_Car" // #define PASSWORD "12345678" #define WIFI_MODE WIFI_MODE_STA #define SSID "xxxxxxxxxx" #define PASSWORD "xxxxxxxxxx"
Save this code, select the correct board (Arduino Uno) and port, then click the Upload button to upload it to the R3 board.
Search
googlein Google Play, find the app shown below and install it.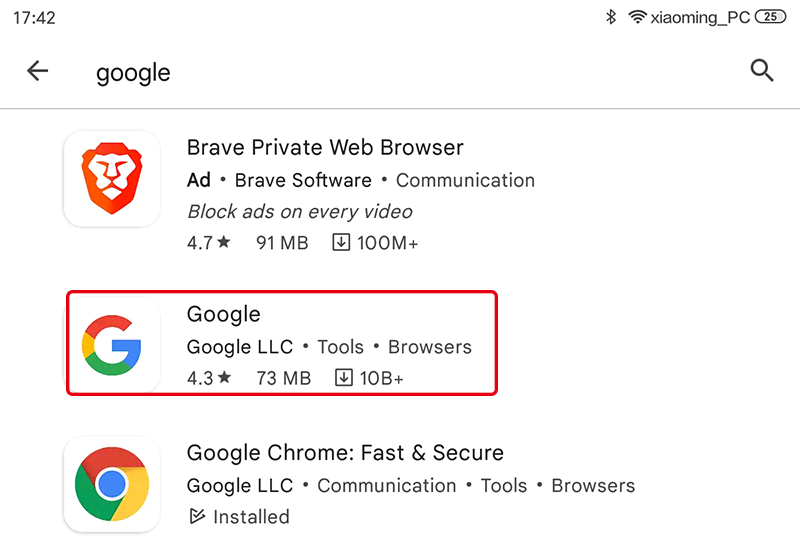
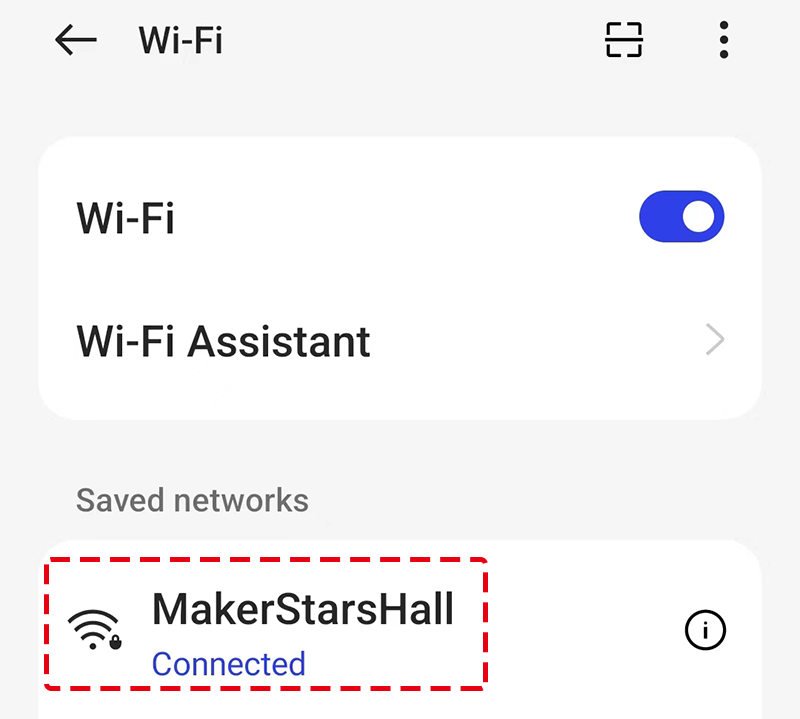
Connect your mobile device to the same Wi-Fi as you wrote in the code.
Open the controller previously created in SunFounder Controller and connect it to
Zeus_Carthrough the button.
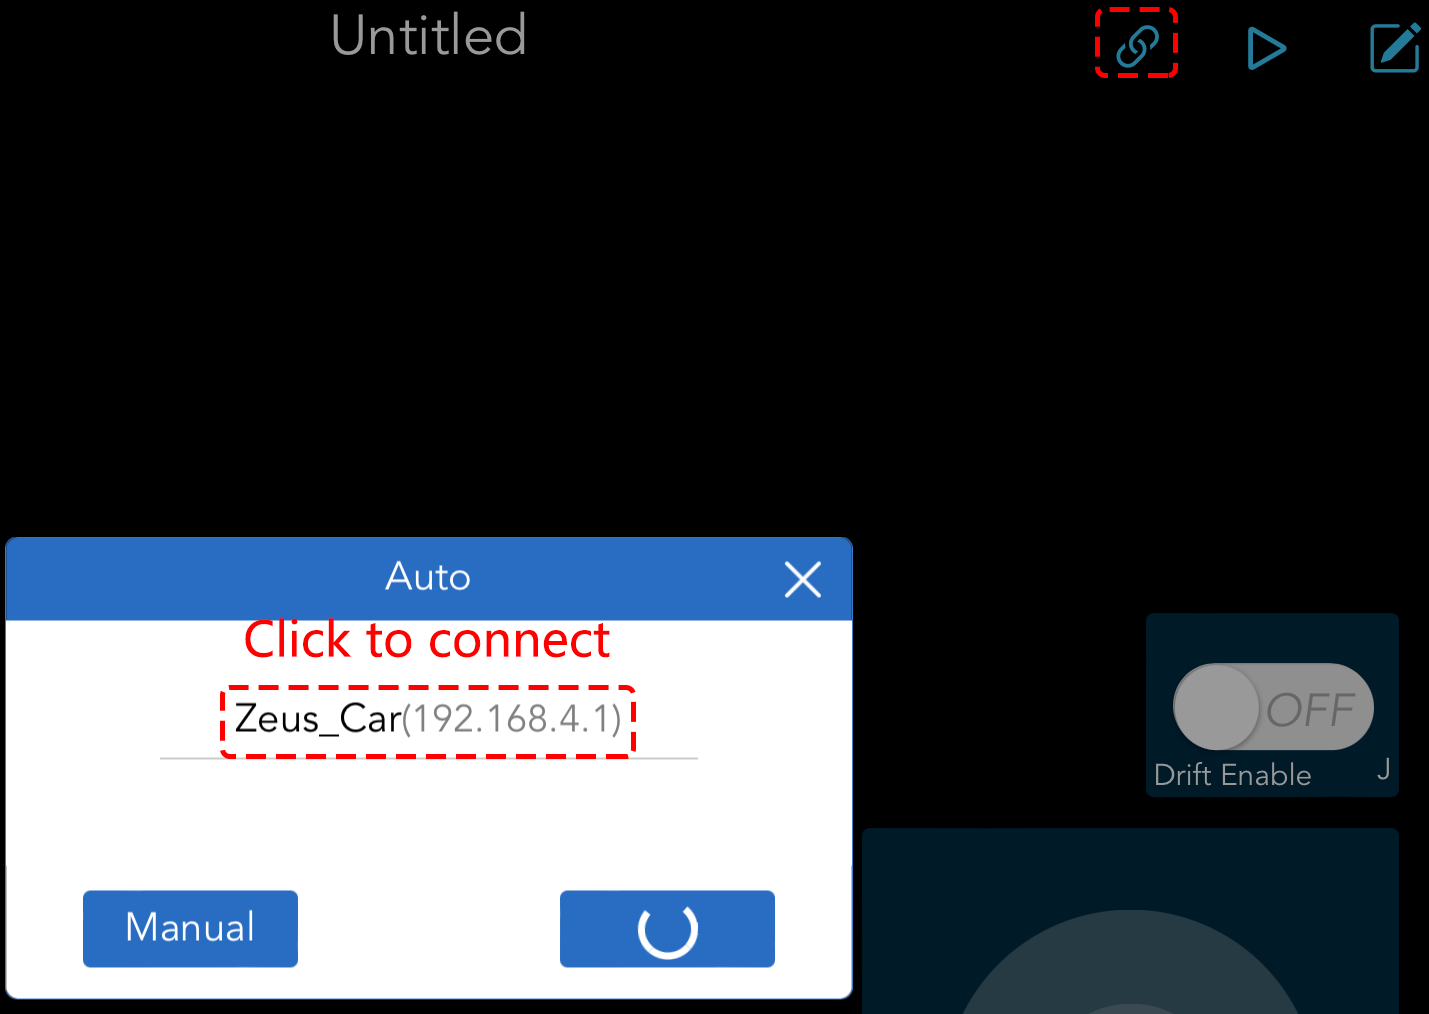
Tap and hold the
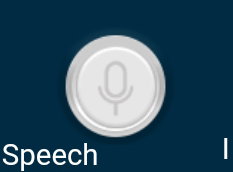 widget after clicking the button. A prompt will appear indicating that it is listening. Say the following command to move the car.
stop: All movements of the car can be stopped.pasue: The function is basically the same as Stop, but if the head of the car is not facing the direction originally set, it will slowly move to the set direction.forwardbackwardleft forwardleft backwardright forwardright backwardmove leftmove right