Note
Hello, welcome to the SunFounder Raspberry Pi & Arduino & ESP32 Enthusiasts Community on Facebook! Dive deeper into Raspberry Pi, Arduino, and ESP32 with fellow enthusiasts.
Why Join?
Expert Support: Solve post-sale issues and technical challenges with help from our community and team.
Learn & Share: Exchange tips and tutorials to enhance your skills.
Exclusive Previews: Get early access to new product announcements and sneak peeks.
Special Discounts: Enjoy exclusive discounts on our newest products.
Festive Promotions and Giveaways: Take part in giveaways and holiday promotions.
👉 Ready to explore and create with us? Click [here] and join today!
Assemble and Use a Camera Module
Required Components
TS7-Pro Screen
Camera Module (Self-provided)
Raspberry Pi (Self-provided)
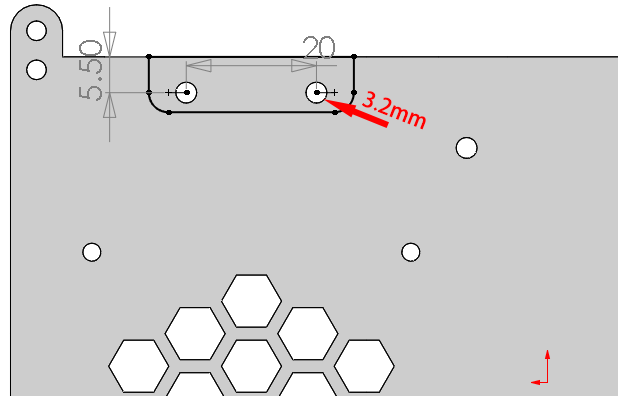
Hole size for mounting the Camera module:
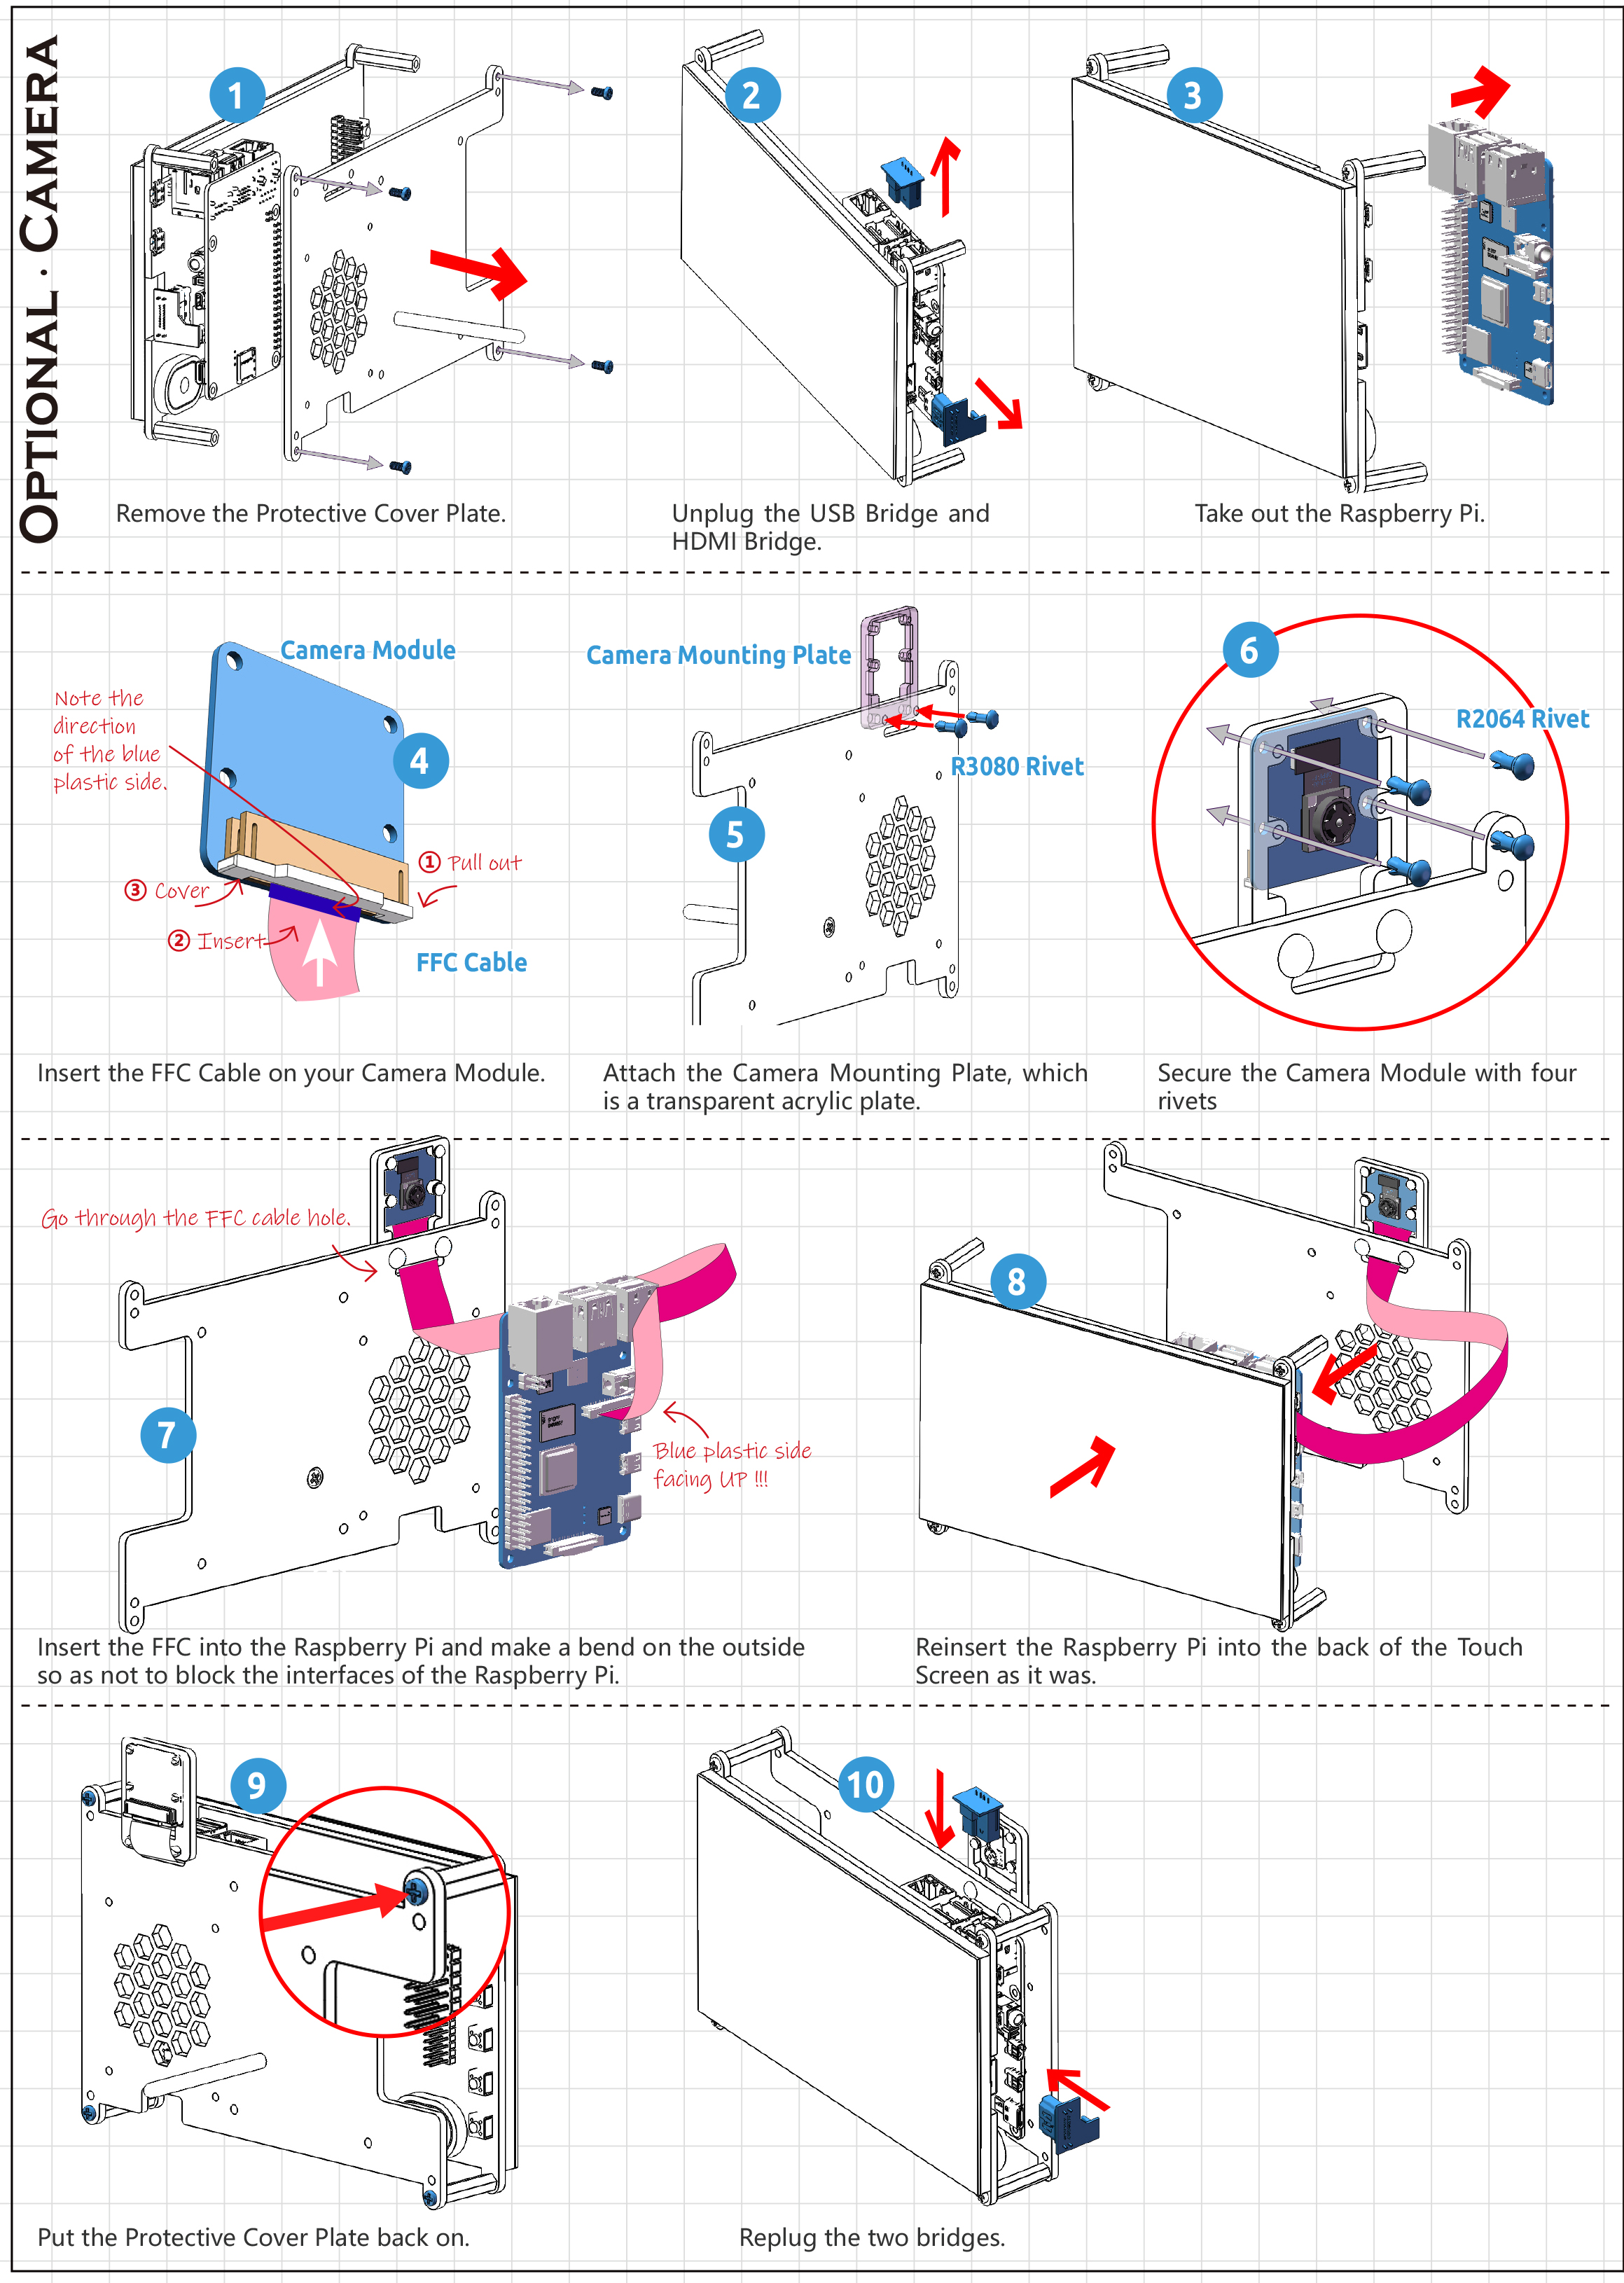
Mount Camera Module
Refer to the following tutorial to mount the camera module.
Enable the Camera
Open Raspberry Pi Configuration.
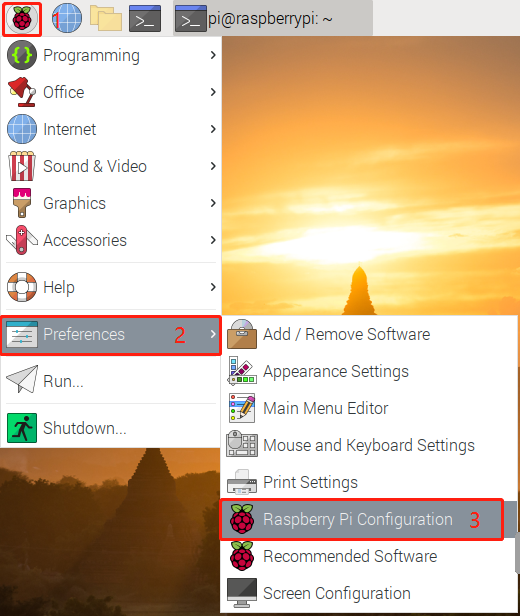
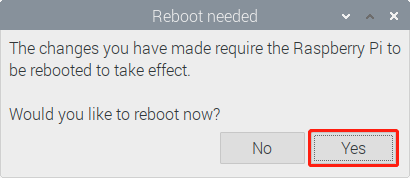
In the Interfaces option, Enable the Camera, and then click OK.
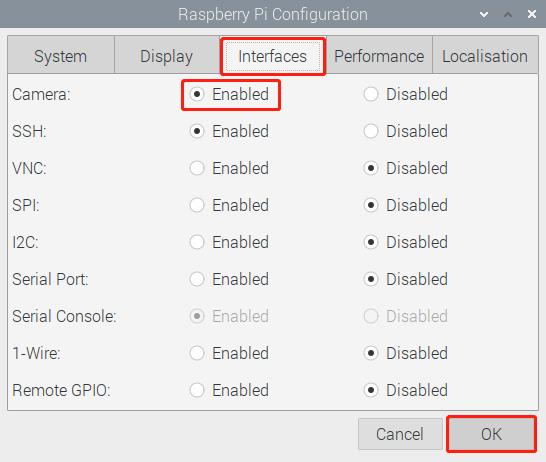
In the pop-up prompt box, choose to restart now.
After the restart is complete, use the following command line to check whether the camera is available.
If the camera screen appears it means that the camera is installed successfully. Otherwise the FFC cable needs to be unplugged and plugged in again.
raspivid -o vid.h264