Note
Hello, welcome to the SunFounder Raspberry Pi & Arduino & ESP32 Enthusiasts Community on Facebook! Dive deeper into Raspberry Pi, Arduino, and ESP32 with fellow enthusiasts.
Why Join?
Expert Support: Solve post-sale issues and technical challenges with help from our community and team.
Learn & Share: Exchange tips and tutorials to enhance your skills.
Exclusive Previews: Get early access to new product announcements and sneak peeks.
Special Discounts: Enjoy exclusive discounts on our newest products.
Festive Promotions and Giveaways: Take part in giveaways and holiday promotions.
👉 Ready to explore and create with us? Click [here] and join today!
Test Servos and the Ultrasonic Module
Before assembling, you need to test the servos and the ultrasonic module according to the following.
Test the Servo
Warning
Due to an unfortunate manufacturing error, the polarity of some battery connectors has been reversed, which may cause overheating when using 9V battery.
To prevent any safety risks or damage to the product, please carefully check the polarity of the battery connectors before inserting a 9V battery.
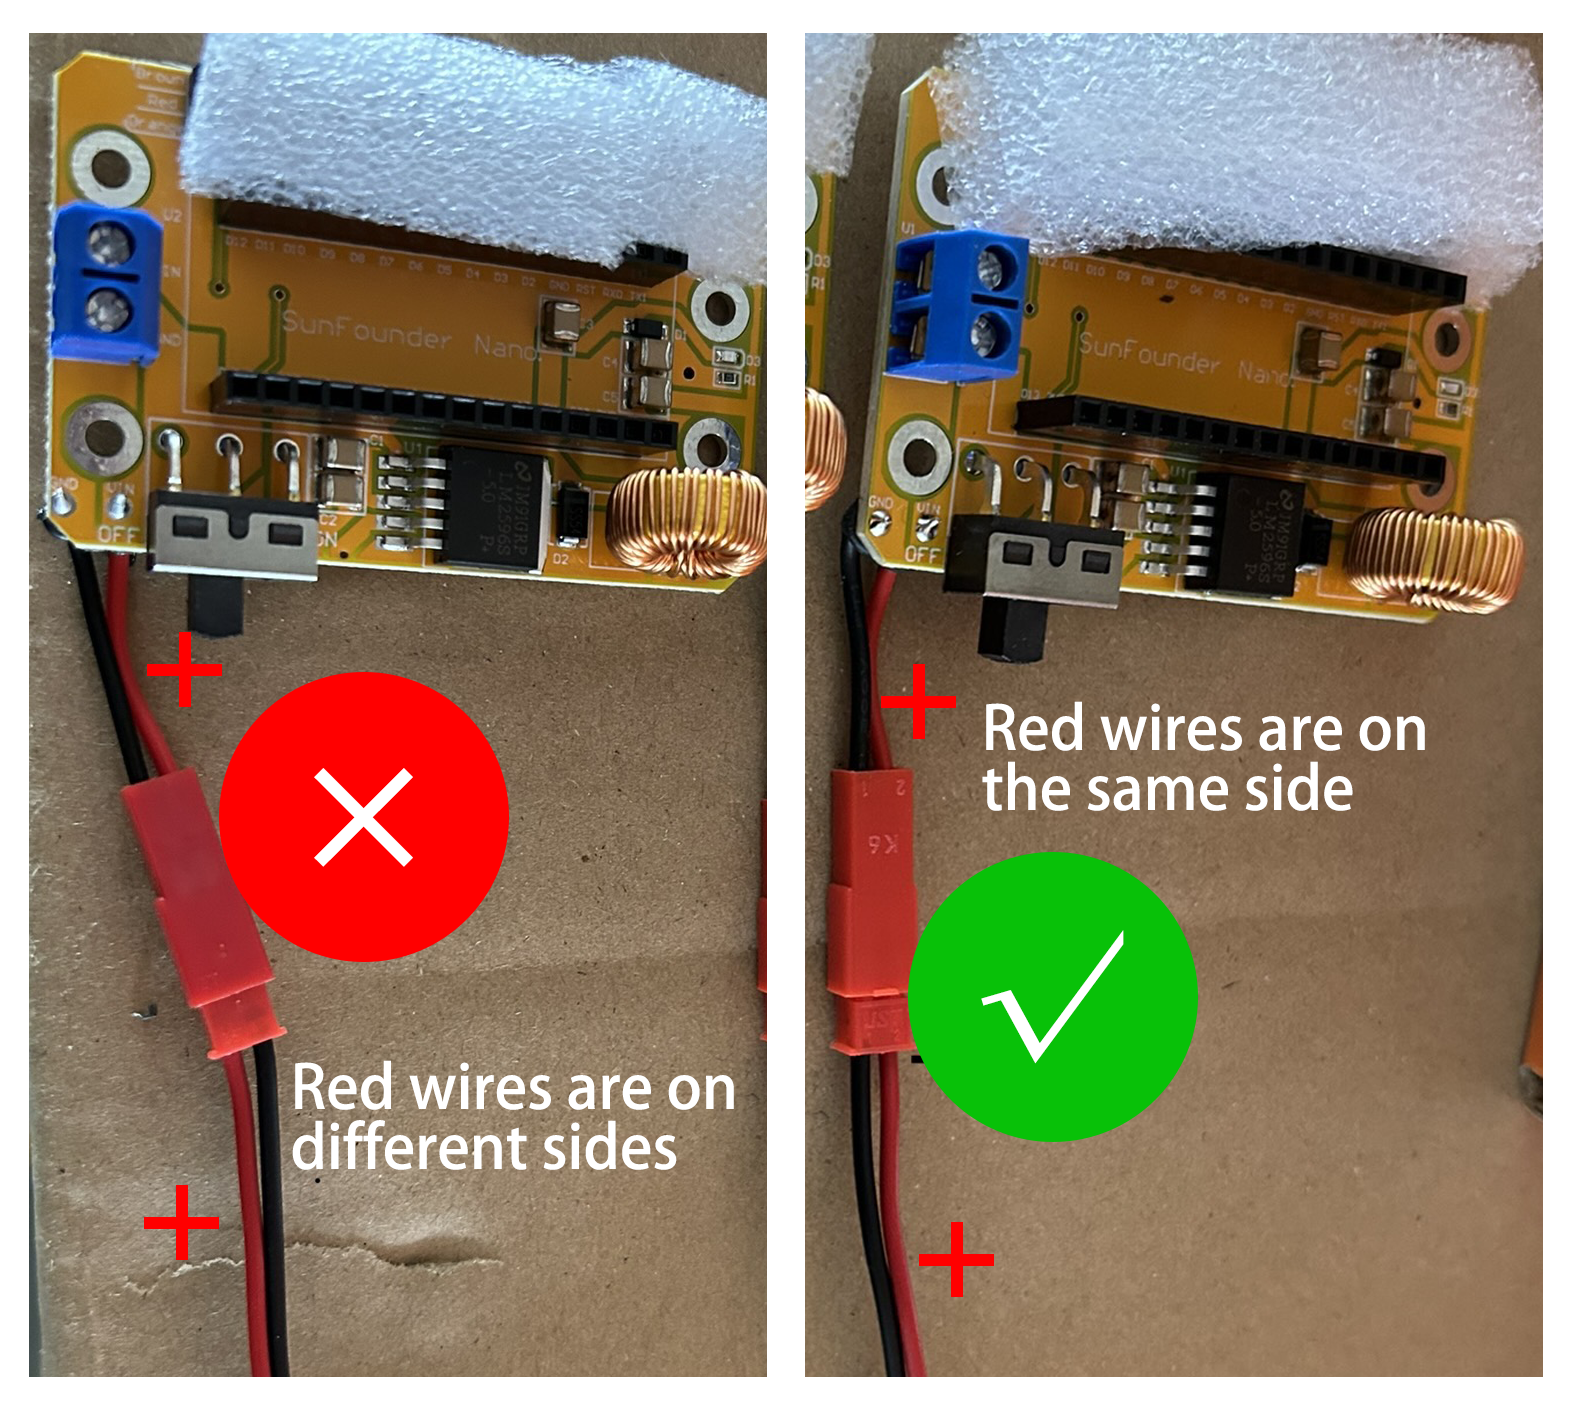
If you find that the battery connector is reversed, please do not attempt to complete the installation. Instead, please contact our customer support team. We will replace it for you as soon as possible.
Email: cs@sunfounder.com
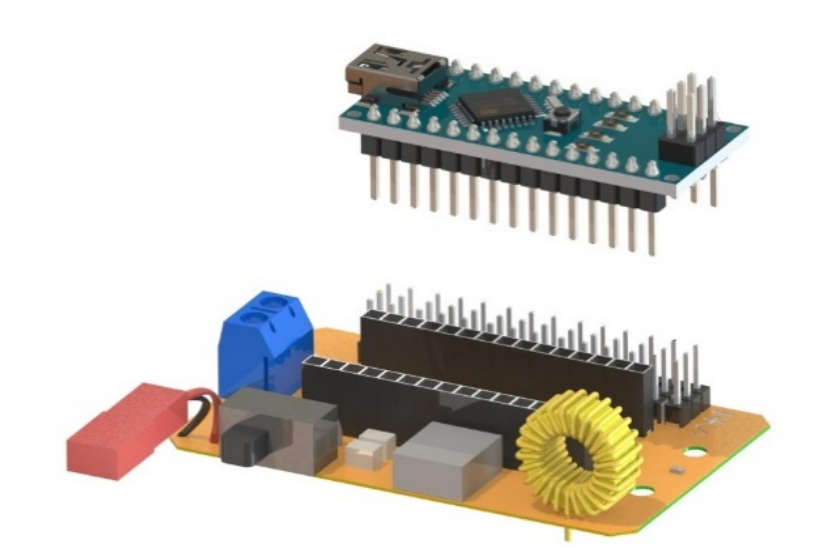
Insert SunFounder Nano board into the Servo Control Board.
Note
The USB port should be at the same side with blue power supply terminal.
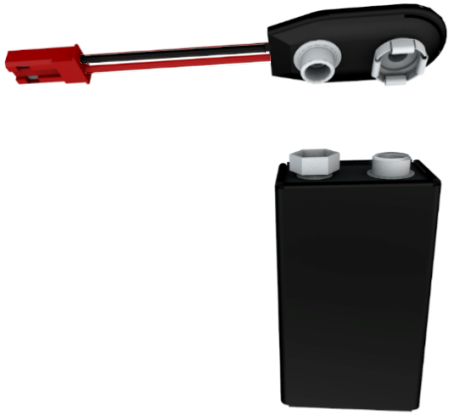
Insert the battery to the battery cable.
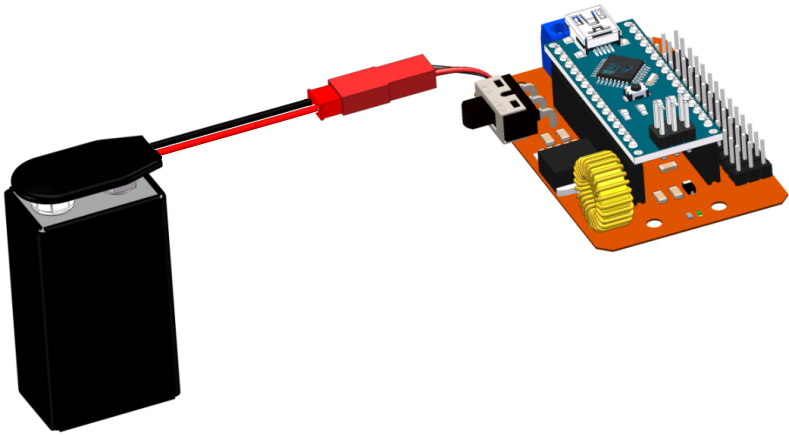
And connect the battery cable to the expansion board.
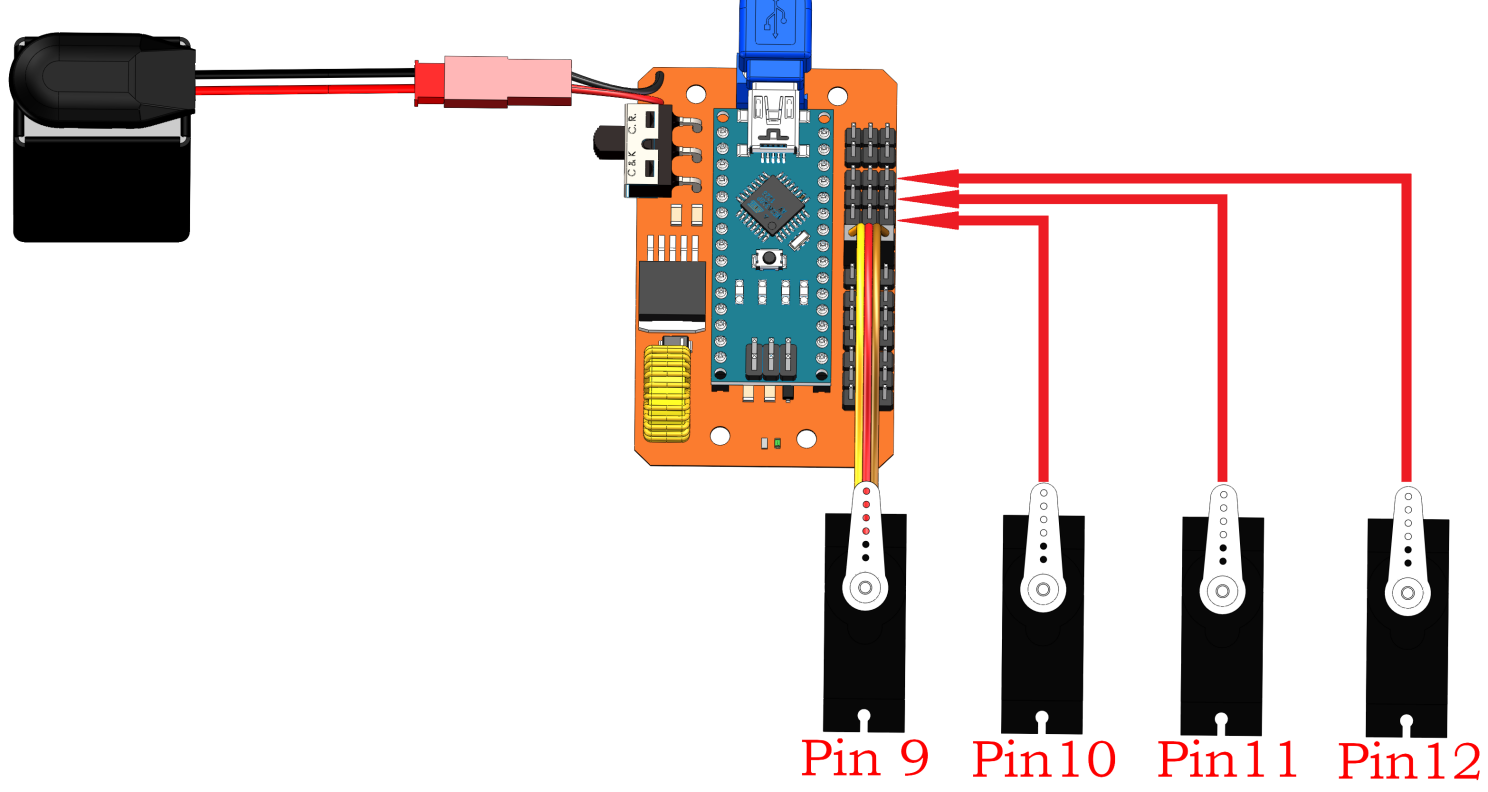
Connect four servos to pin 9 to pin 12 of the expansion board.
Note
The yellow, red, and brown wires connect to Signal, VCC, and GND on the expansion board, respectively.
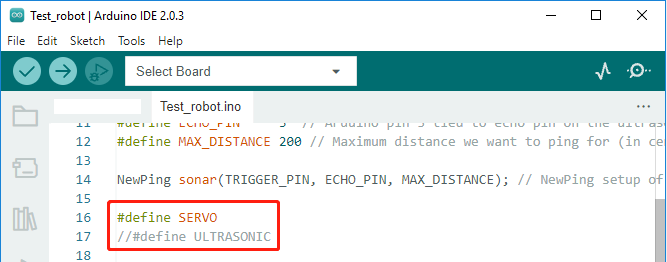
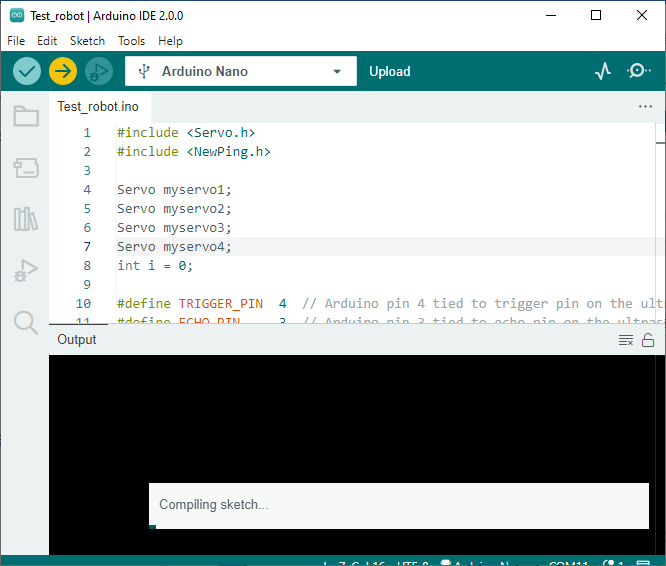
Open the Test_robot.ino under this path of
DIY_4-DOF_Robot_Kit_-_Sloth\Code\Test_robot. Uncomment the line 16 (delete sign//to start the corresponding servo test code); then comment the line://#define ULTRASONIC.Note
It is not recommended to uncomment both lines at the same time.
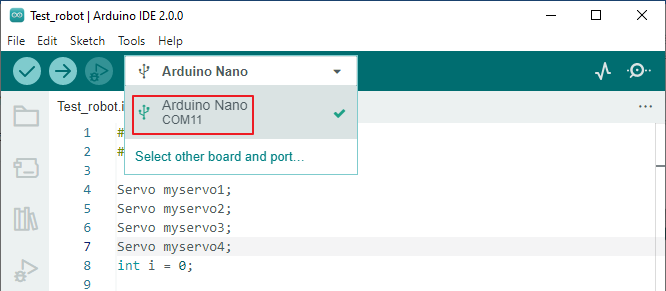
The Arduino IDE may not recognize your board if you see Unknown COMXX when selecting a board here.
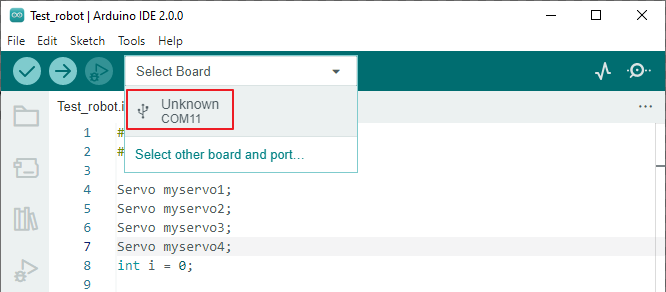
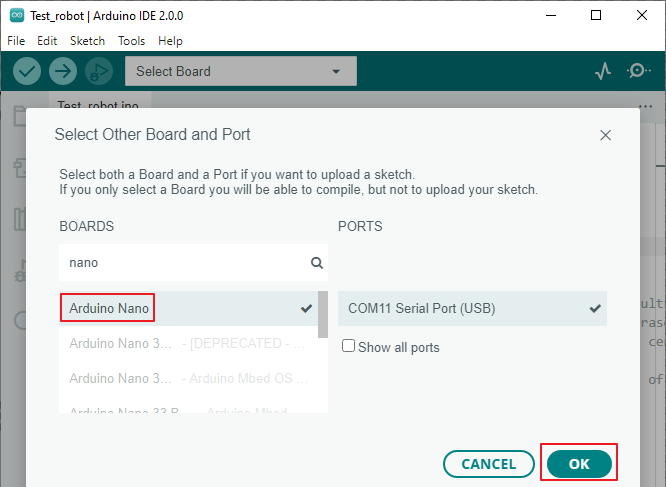
After clicking on Unknown COMXX, the Select Other Board and Port pop-up will appear. Type nano in the search box, then select Arduino Nano and click OK to confirm.
Note
It doesn’t matter if your Arduino Nano is greyed out, it means you don’t have the Arduino AVR Boards core installed, just select it here and click OK to install it automatically.
Now you will be able to see the Arduino Nano board being recognized.
Upload codes to the Nano board. After a few seconds, the “Done uploading” message will appear.
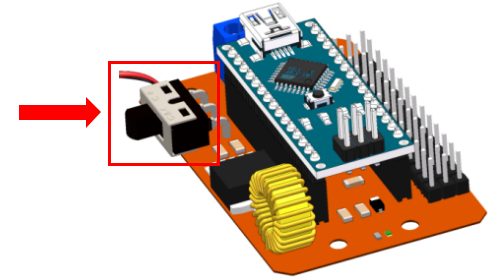
Slide the power switch to ON. You will see the rocker arm rotates within 0-180 degrees, indicating the servo can work.
Test the Ultrasonic Module
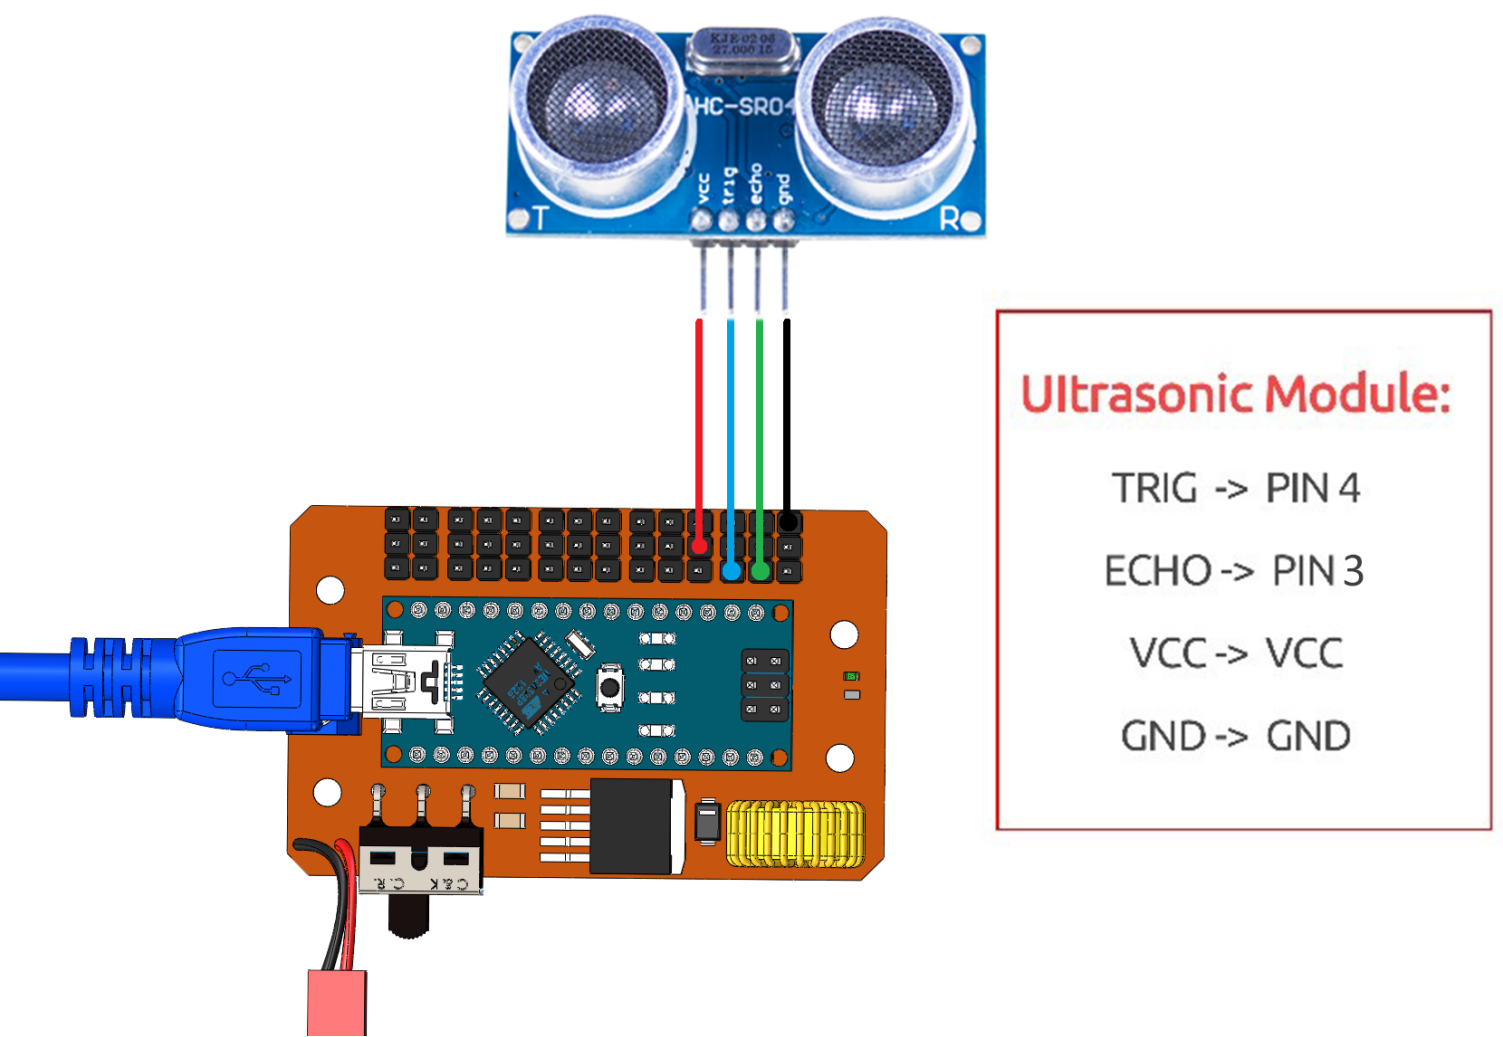
Connect Ultrasonic module to Servo Control Board via 4-Pin Anti-reverse Cable.
Open the
Test_robot.inoand select Board, Processor and Port.Comment out line 16 by prefixing
#define SERVOwith//; then uncomment#define ULTRASONIC.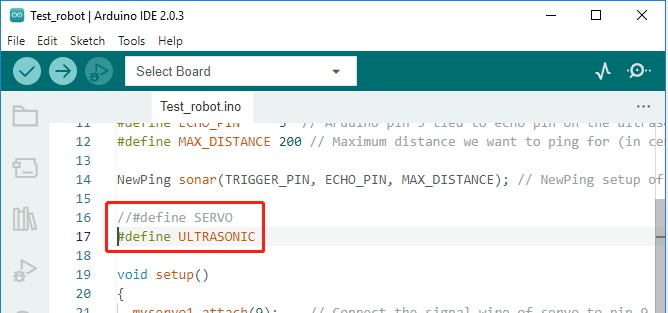
Open the serial monitor after uploading the code. Set the baud rate to 115200 (started by line 25
serial.begin(115200)).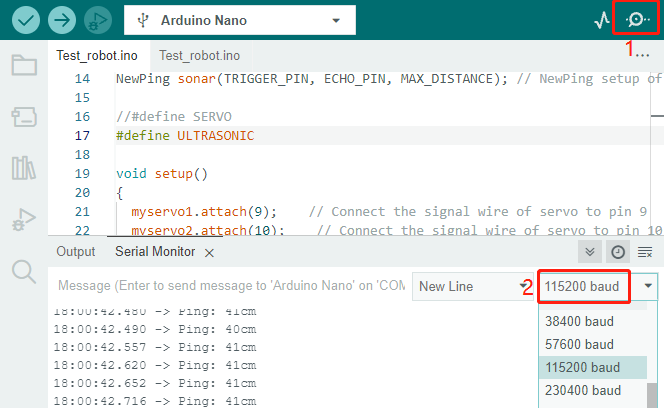
Turn the power switch to ON you can see the detected distance.
Note
The detection distance of ultrasonic module is 2-400cm, if the data is 0 or a few thousand, it means that it is invalid data need to be ignored.