Note
Hello, welcome to the SunFounder Raspberry Pi & Arduino & ESP32 Enthusiasts Community on Facebook! Dive deeper into Raspberry Pi, Arduino, and ESP32 with fellow enthusiasts.
Why Join?
Expert Support: Solve post-sale issues and technical challenges with help from our community and team.
Learn & Share: Exchange tips and tutorials to enhance your skills.
Exclusive Previews: Get early access to new product announcements and sneak peeks.
Special Discounts: Enjoy exclusive discounts on our newest products.
Festive Promotions and Giveaways: Take part in giveaways and holiday promotions.
👉 Ready to explore and create with us? Click [here] and join today!
Quick Guide on Scratch
Note
When programming with Scratch 3, you may need a screen for a better experience, refer to: Connect your Raspberry Pi. Of course, if you don’t have a screen, you can also access the Raspberry Pi desktop remotely, for a detailed tutorial please refer to Remote Desktop.
In addition, Scratch 3 needs at least 1GB of RAM to run, and we recommend a Raspberry Pi 4 with at least 2GB RAM. While you can run Scratch 3 on a Raspberry Pi 2, 3, 3B+, or a Raspberry 4 with 1GB RAM, performance on these models is reduced, and depending on what other software you run at the same time, Scratch 3 may fail to start due to lack of memory.
Install Scratch 3
When installing Raspberry Pi OS (Installing the Operating System), you have to choose the version with desktop, either with desktop only or with desktop and recommended software.
If you install the version with the recommended software, you can see Scratch 3 in the system menu at Programming.
If you installed the desktop-only version, you will need to install Scratch 3 manually, as described below.
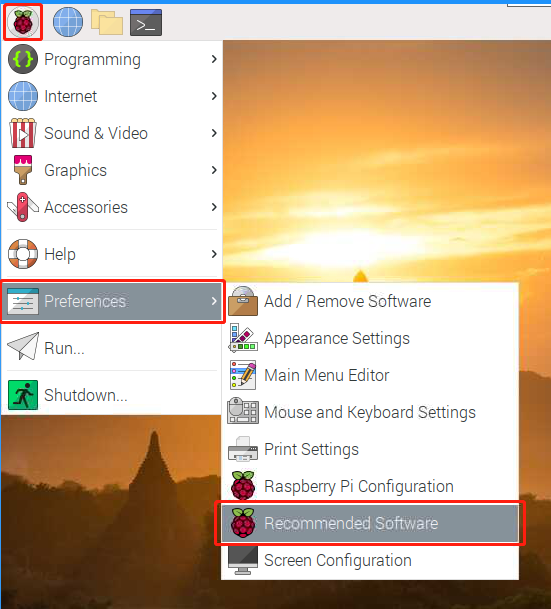
Open up the menu, click on Preferences -> Recommended Software.
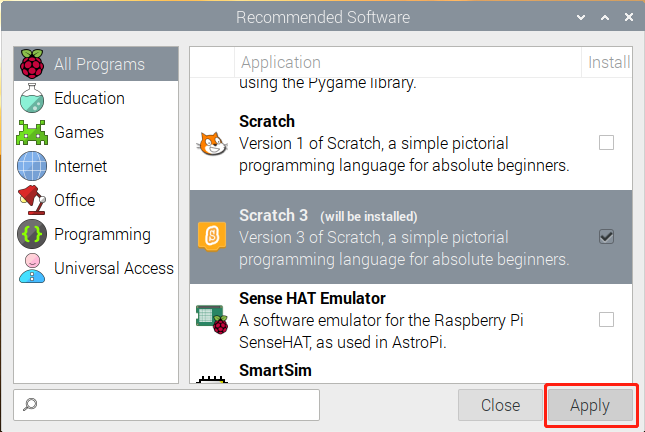
Find scratch 3 and check it, then click Apply and finally wait for the installation to finish.
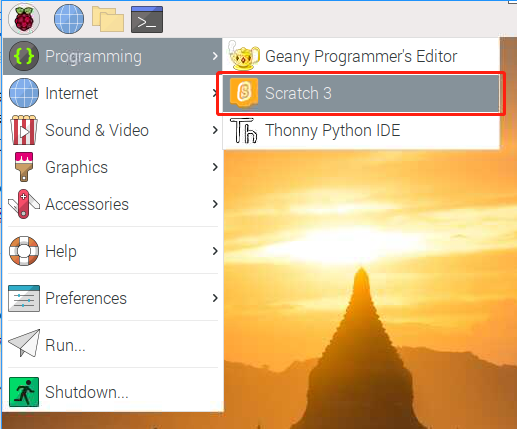
Once the installation is complete, you should see it on the Programming in the system menu.
About Scratch 3’s Interface
Scratch 3 is designed to be fun, educational, and easy to learn. It has tools for creating interactive stories, games, art, simulations, and more, using block-based programming. Scratch also has its own paint editor and sound editor built-in.
The top of scratch 3 has some basic options, the first one from left to right is the language option, you can choose different languages for programming. The second one is the File option, you can create new files, read local files and save current files with this option. The third is the Edit option, which allows you to resume some deletion operations and enable the acceleration mode (in which the sprite movement becomes particularly fast). The fourth is the Tutorials option, which allows you to view tutorials for some projects. The fifth is the file naming option, where you can rename the project.

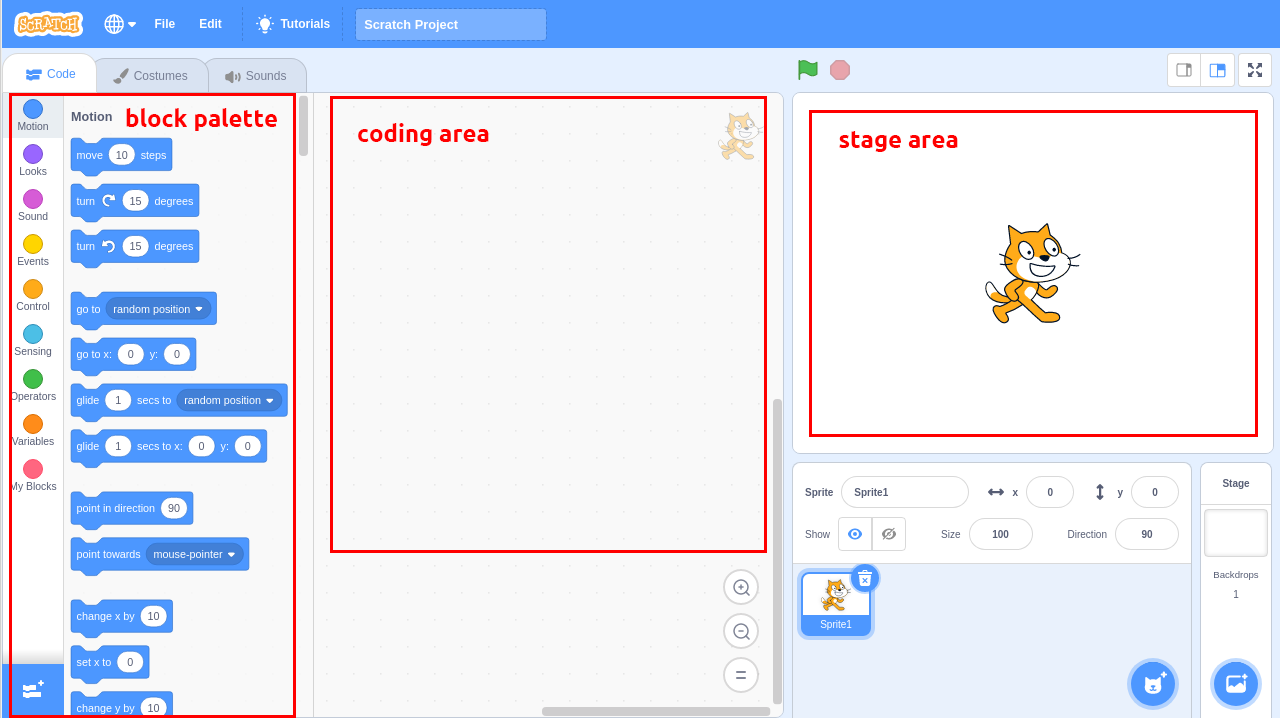
Code
It has three main sections: a stage area, block palette, and coding area. Programming by clicking and dragging the block on the block palette to the coding area, and finally your programming results will be displayed on the stage area.
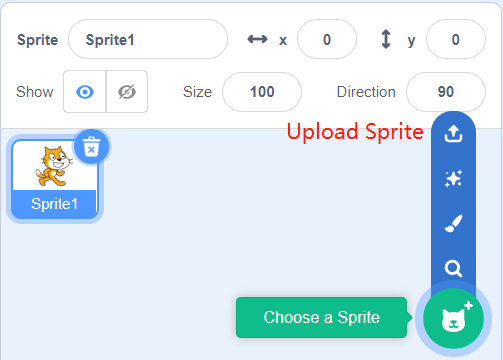
Here is the sprites area of Scratch 3. Above the area are the basic parameters of the sprites, you can add sprites that come with Scratch 3 or upload local sprites.
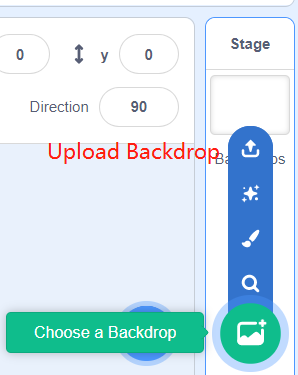
Here is the Scratch 3 backdrop area, mainly to add a suitable backdrop for your stage, you can add the backdrop that comes with Scratch 3 or upload a local one.
This is a Add Extension button.
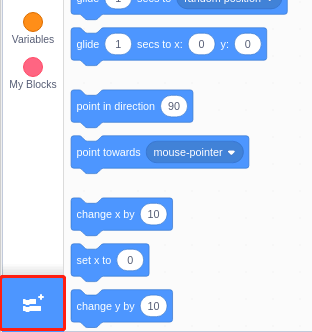
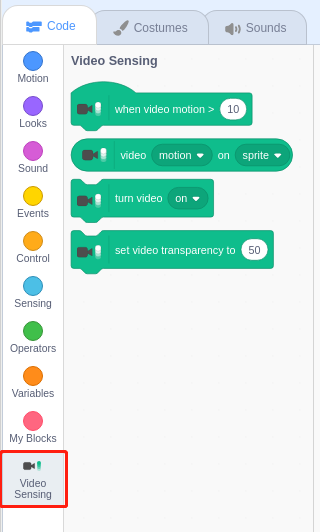
In Scratch 3, we can add all kinds of useful extensions, here we take Video Sensing as an example and click on it.
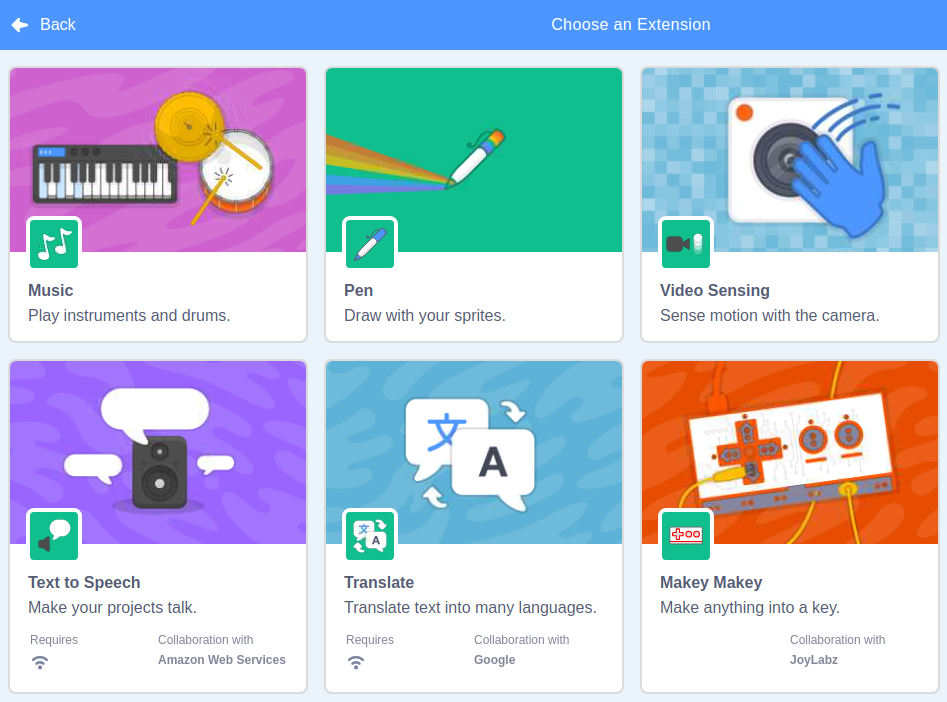
You will see it on the block palette and you can use the functions associated with this extension. If you have a camera connected, you will see the camera screen on the stage area.
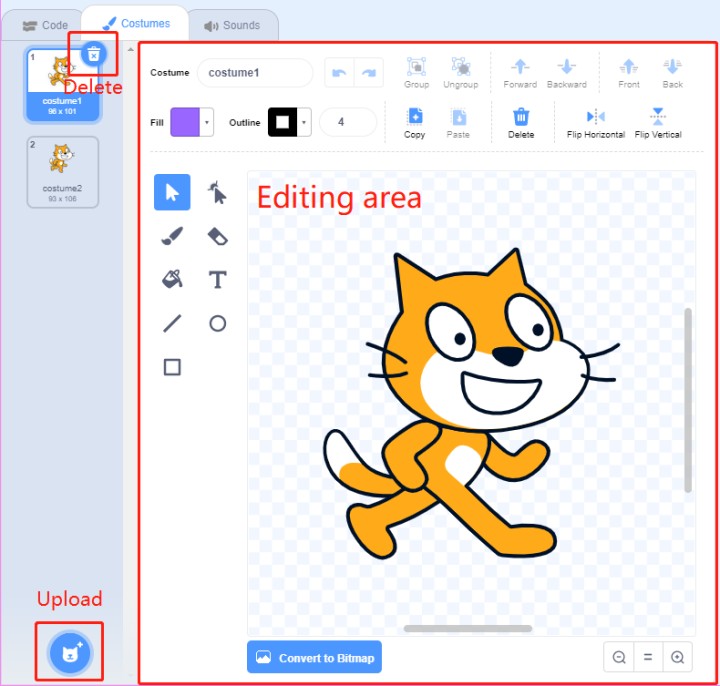
Costumes
Click on the Costumes option in the upper left corner to enter the costumes palette. Different costumes allow the sprites to have different static movements, and when these static movements are stitched together, they form a coherent dynamic movement.
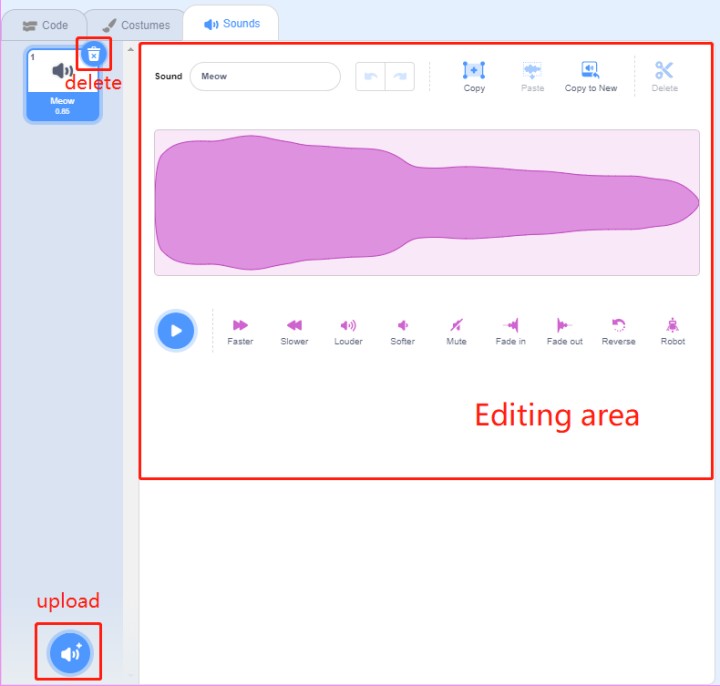
Sounds
You may need to use some music clips to make your experiments more interesting. Click on the Sounds option in the upper left corner and you can edit the current sound or select/upload a new one.