1.1.3 LED Bar Graph
Introduction
In this project, we sequentially illuminate the lights on the LED Bar Graph.
Required Components
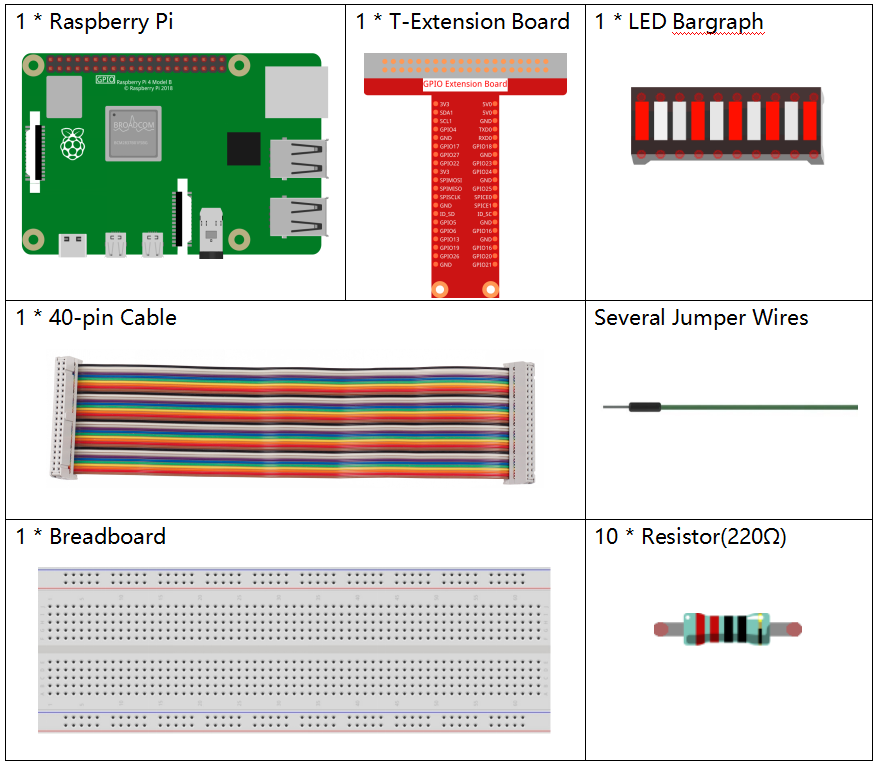
In this project, we need the following components.

It’s definitely convenient to buy a whole kit, here’s the link:
Name |
ITEMS IN THIS KIT |
LINK |
|---|---|---|
Raphael Kit |
337 |
You can also buy them separately from the links below.
COMPONENT INTRODUCTION |
PURCHASE LINK |
|---|---|
- |
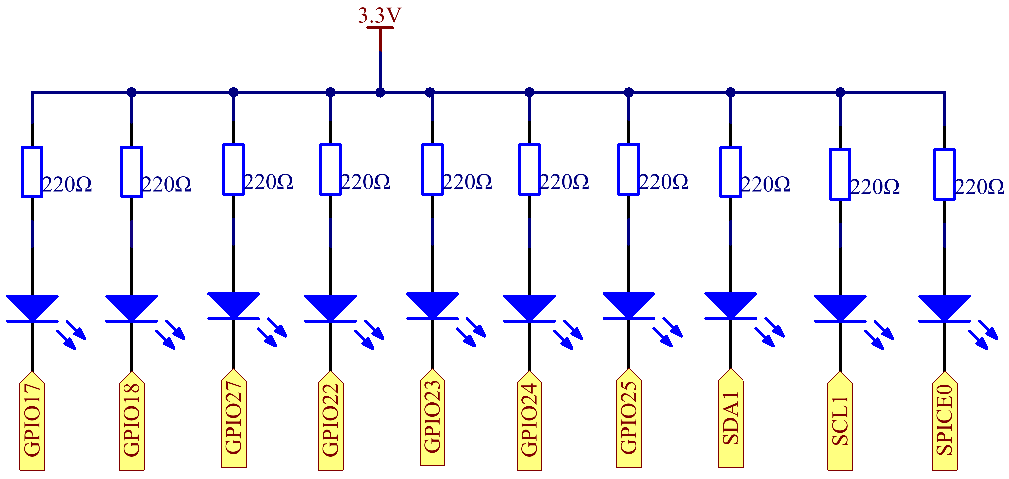
Schematic Diagram
T-Board Name |
physical |
wiringPi |
BCM |
GPIO17 |
Pin 11 |
0 |
17 |
GPIO18 |
Pin 12 |
1 |
18 |
GPIO27 |
Pin 13 |
2 |
27 |
GPIO22 |
Pin 15 |
3 |
22 |
GPIO23 |
Pin 16 |
4 |
23 |
GPIO24 |
Pin 18 |
5 |
24 |
GPIO25 |
Pin 22 |
6 |
25 |
SDA1 |
Pin 3 |
8 |
2 |
SCL1 |
Pin 5 |
9 |
3 |
SPICE0 |
Pin 24 |
10 |
8 |

Experimental Procedures
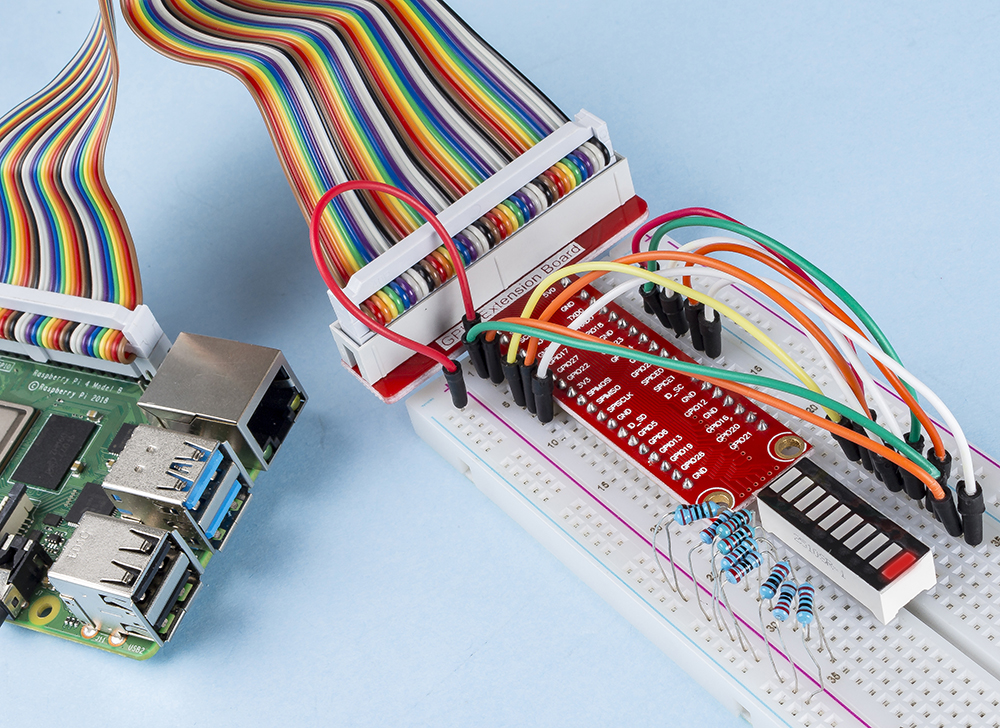
Step 1: Build the circuit.
Note
Pay attention to the direction when connecting. If you connect it backwards, it will not light up.

Step 2: Go to the folder of the code.
cd ~/raphael-kit/python/
Step 3: Run the executable file.
sudo python3 1.1.3_LedBarGraph.py
After the code runs, you will see the LEDs on the LED bar turn on and off regularly.
Code
Note
You can Modify/Reset/Copy/Run/Stop the code below. But before that, you need to go to source code path like raphael-kit/python. After modifying the code, you can run it directly to see the effect.
import RPi.GPIO as GPIO
import time

ledPins = [11, 12, 13, 15, 16, 18, 22, 3, 5, 24]

def oddLedBarGraph():
    for i in range(5):
        j = i*2
        GPIO.output(ledPins[j],GPIO.LOW)
        time.sleep(0.3)
        GPIO.output(ledPins[j],GPIO.HIGH)

def evenLedBarGraph():
    for i in range(5):
        j = i*2+1
        GPIO.output(ledPins[j],GPIO.LOW)
        time.sleep(0.3)
        GPIO.output(ledPins[j],GPIO.HIGH)

def allLedBarGraph():
    for i in ledPins:
        GPIO.output(i,GPIO.LOW)
        time.sleep(0.3)
        GPIO.output(i,GPIO.HIGH)

def setup():
    GPIO.setwarnings(False)
    GPIO.setmode(GPIO.BOARD)        # Numbers GPIOs by physical location
    for i in ledPins:
        GPIO.setup(i, GPIO.OUT)   # Set all ledPins' mode is output
        GPIO.output(i, GPIO.HIGH) # Set all ledPins to high(+3.3V) to off led

def loop():
    while True:
        oddLedBarGraph()
        time.sleep(0.3)
        evenLedBarGraph()
        time.sleep(0.3)
        allLedBarGraph()
        time.sleep(0.3)

def destroy():
    for pin in ledPins:
        GPIO.output(pin, GPIO.HIGH)    # turn off all leds
    GPIO.cleanup()                     # Release resource

if __name__ == '__main__':     # Program start from here
    setup()
    try:
        loop()
    except KeyboardInterrupt:  # When 'Ctrl+C' is pressed, the program destroy() will be  executed.
        destroy()
Code Explanation
ledPins = [11, 12, 13, 15, 16, 18, 22, 3, 5, 24] Create an array and assign it to the pin number corresponding to the LED Bar Graph (11, 12, 13, 15, 16, 18, 22, 3, 5, 24) and the array will be used to control the LED.
def oddLedBarGraph():
    for i in range(5):
        j = i*2
        GPIO.output(ledPins[j],GPIO.LOW)
        time.sleep(0.3)
        GPIO.output(ledPins[j],GPIO.HIGH)
Let the LED on the odd digit of the LED Bar Graph light on in turn.
def evenLedBarGraph():
    for i in range(5):
        j = i*2+1
        GPIO.output(ledPins[j],GPIO.LOW)
        time.sleep(0.3)
        GPIO.output(ledPins[j],GPIO.HIGH)
Make the LED on the even digit of the LED Bar Graph light on in turn.
def allLedBarGraph():
    for i in ledPins:
        GPIO.output(i,GPIO.LOW)
        time.sleep(0.3)
        GPIO.output(i,GPIO.HIGH)
Let the LED on the LED Bar Graph light on one by one.
Phenomenon Picture
