Note
Welcome to the SunFounder Raspberry Pi, Arduino & ESP32 Community on Facebook!
Get technical support and troubleshooting help.
Learn and share projects, tips, and tutorials.
Access early product previews and updates.
Enjoy exclusive discounts and giveaways.
👉 Join us here: [here]
Installing the OS on a Micro SD Card
If you are using a Micro SD card, you can follow the tutorial below to install the system onto your Micro SD card.
Required Components
A Personal Computer
A Micro SD card and Reader
1. Install Raspberry Pi Imager
Visit the official Raspberry Pi Imager download page: Raspberry Pi Imager. Download the correct installer for your operating system.

Follow the installation prompts (language, install path, confirmation). After installation, launch Raspberry Pi Imager from your desktop or applications menu.

2. Install the OS to the microSD Card
Insert your microSD card into your computer using a card reader. Before proceeding, back up any important data on the card, as it will be erased.

When Raspberry Pi Imager opens, you will see the Device page. Select your Raspberry Pi 5 model from the list.

Go to the OS section, scroll down to the bottom of the page, and select your operating system.
Note
For Ubuntu, click Other general-purpose OS → Ubuntu, then select Ubuntu Desktop 24.04 LTS (64-bit) or Ubuntu Server 24.04 LTS (64-bit).
For Kali Linux and Homebridge, click Other specific-purpose OS, then select the corresponding system.
Warning
Whichever system you choose, be sure to select a 64-bit version. On a 32-bit system, some packages are only available for
aarch64(64-bit), and certain features may fail to install or work properly.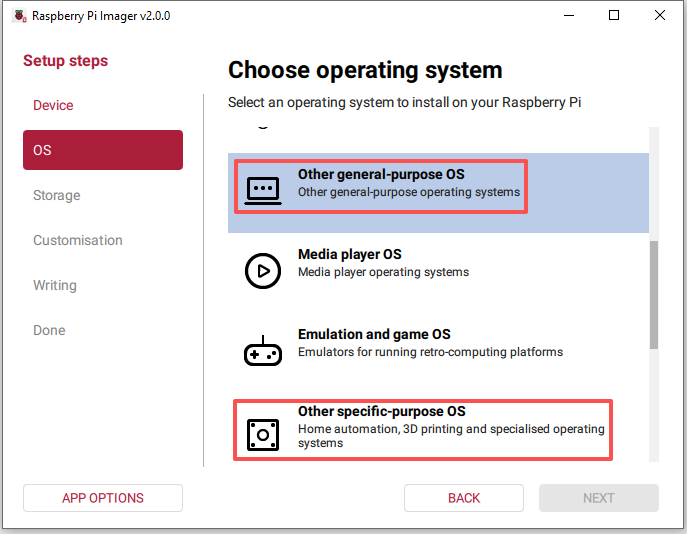
In the Storage section, select your microSD card. For safety, it is recommended to unplug other USB storage devices so that only the microSD card appears in the list.

Click NEXT.
Note
For systems that cannot be configured in advance, clicking NEXT will skip the Customisation step and go directly to Writing, where the OS is written to the microSD card.
For systems that support pre-configuration, follow the Customisation steps to configure options such as Hostname, WiFi, and Enable SSH.
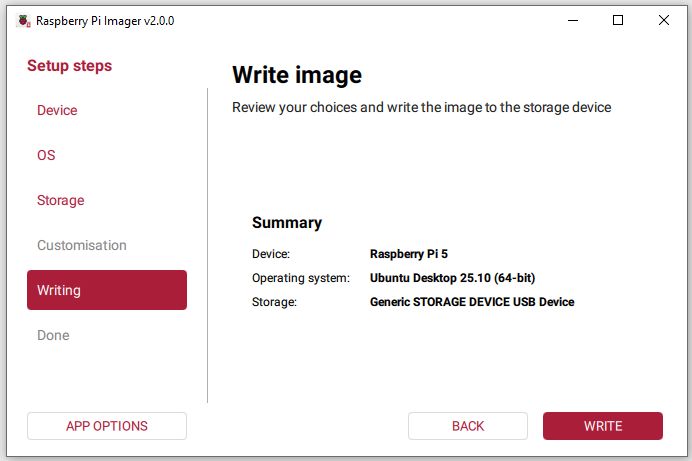
When the “Write Successful” popup appears, the image has been fully written and verified. You can now safely remove the microSD card and use it to boot your Raspberry Pi.