3. Power Supply for Raspberry Pi (Important)
Charge
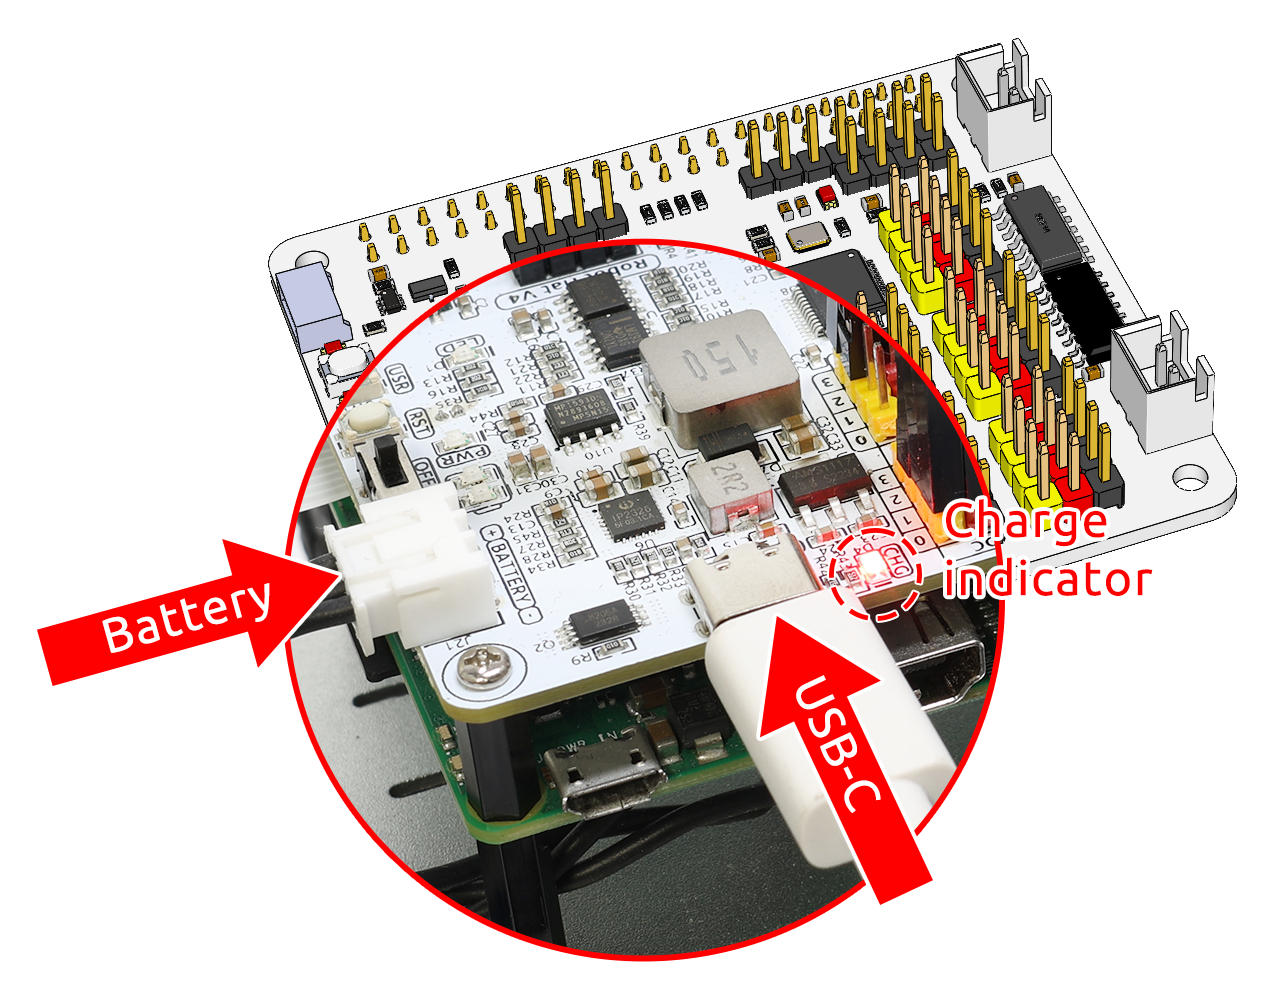
Insert the battery cable. Next, insert the USB-C cable to charge the battery. You will need to provide your own charger; we recommend a 5V 3A charger, or your commonly used smartphone charger will suffice.
Note
Connect an external Type-C power source to the Type-C port on the robot hat; it will immediately start charging the battery, and a red indicator light will illuminate.When the battery is fully charged, the red light will automatically turn off.
Power ON
Turn on the power switch. The Power indicator light and the battery level indicator light will illuminate.
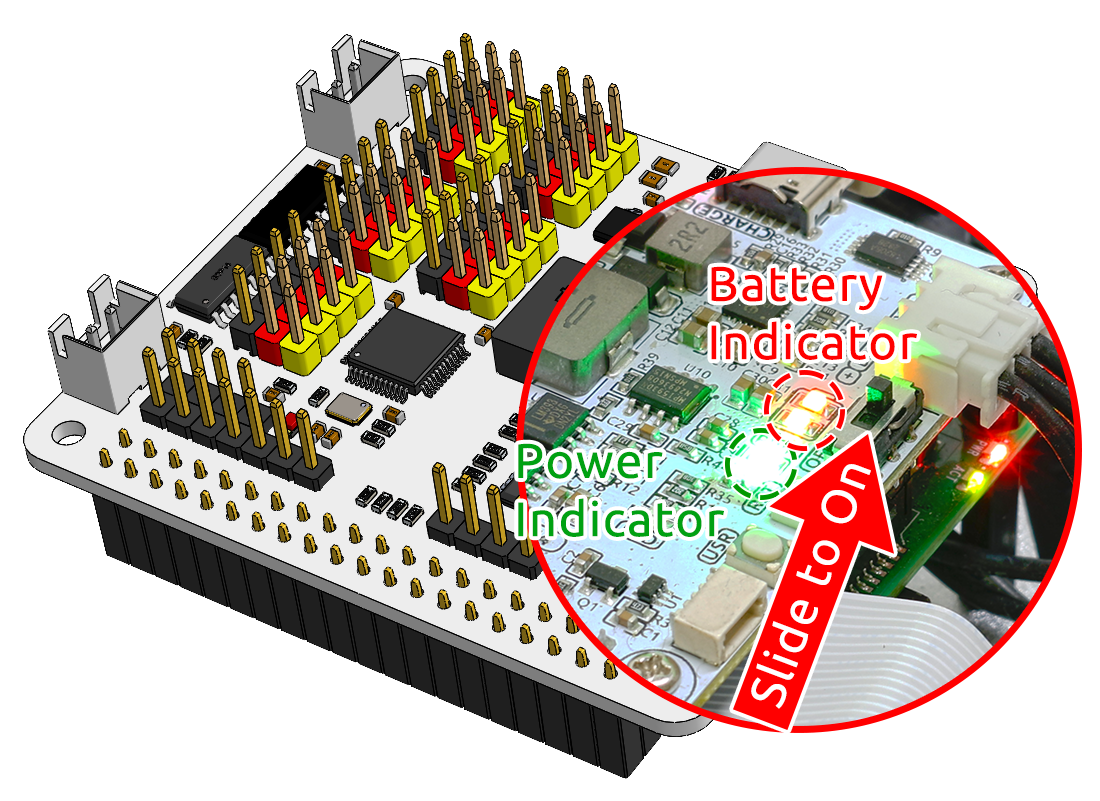
Wait for a few seconds, and you will hear a slight beep, indicating that the Raspberry Pi has successfully booted.
Note
If both battery level indicator lights are off, please charge the battery. When you need extended programming or debugging sessions, you can keep the Raspberry Pi operational by inserting the USB-C cable to charge the battery simultaneously.
18650 Battery
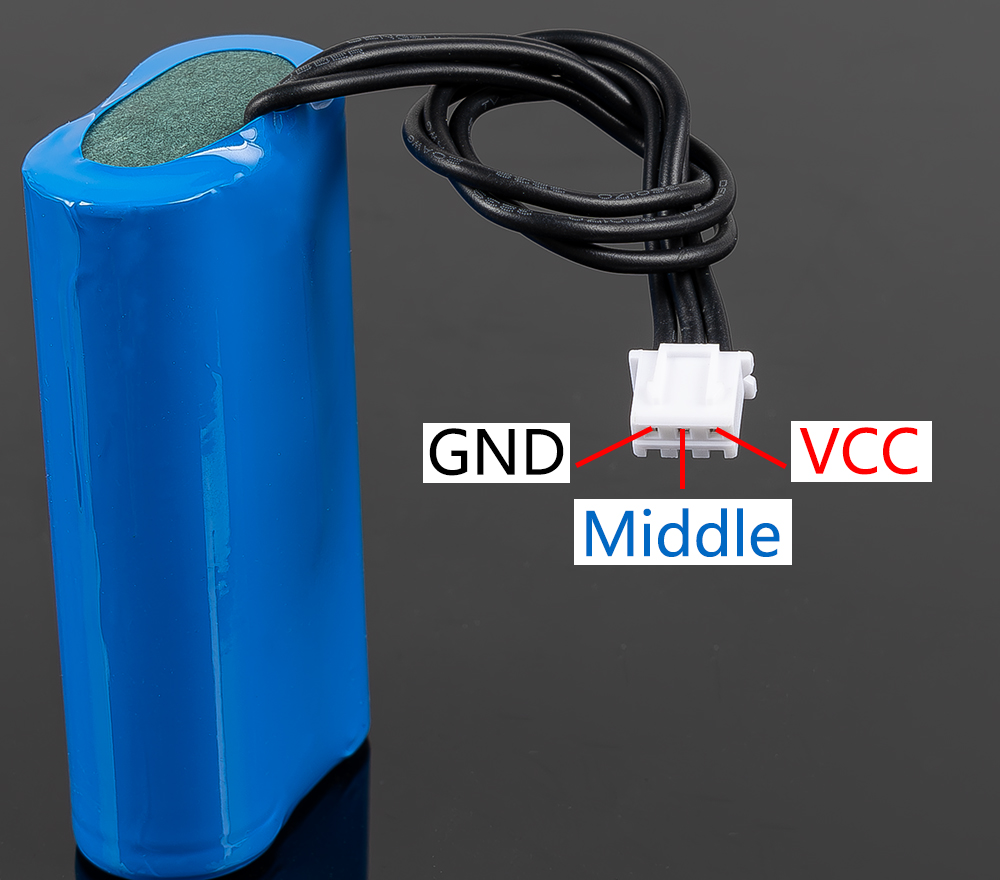
VCC: Battery positive terminal, here there are two sets of VCC and GND is to increase the current and reduce the resistance.
Middle: To balance the voltage between the two cells and thus protect the battery.
GND: Negative battery terminal.
This is a custom battery pack made by SunFounder consisting of two 18650 batteries with a capacity of 2000mAh. The connector is XH2.54 3P, which can be charged directly after being inserted into the shield.
Features
Battery charge: 5V/2A
Battery output: 5V/5A
Battery capacity: 3.7V 2000mAh x 2
Battery life: 90min
Battery charge time: 130min
Connector:XH2.54 3P