Note
Hello, welcome to the SunFounder Raspberry Pi & Arduino & ESP32 Enthusiasts Community on Facebook! Dive deeper into Raspberry Pi, Arduino, and ESP32 with fellow enthusiasts.
Why Join?
Expert Support: Solve post-sale issues and technical challenges with help from our community and team.
Learn & Share: Exchange tips and tutorials to enhance your skills.
Exclusive Previews: Get early access to new product announcements and sneak peeks.
Special Discounts: Enjoy exclusive discounts on our newest products.
Festive Promotions and Giveaways: Take part in giveaways and holiday promotions.
👉 Ready to explore and create with us? Click [here] and join today!
2. Calibrating PiDog
Introduction
Calibrating your PiDog is a crucial step to ensure its stable and efficient operation. This process helps correct any imbalance or inaccuracy caused by assembly or structural errors. Follow the steps below carefully to make sure your PiDog walks smoothly and performs as expected.
If the deviation angle is too large, return to Servo Adjust(Important), set the servo angle to 0°, and then reassemble PiDog according to the instructions.
Calibration Video
For a detailed guide, refer to the full calibration tutorial video. It will visually and step by step demonstrate how to accurately calibrate your PiDog.
Note
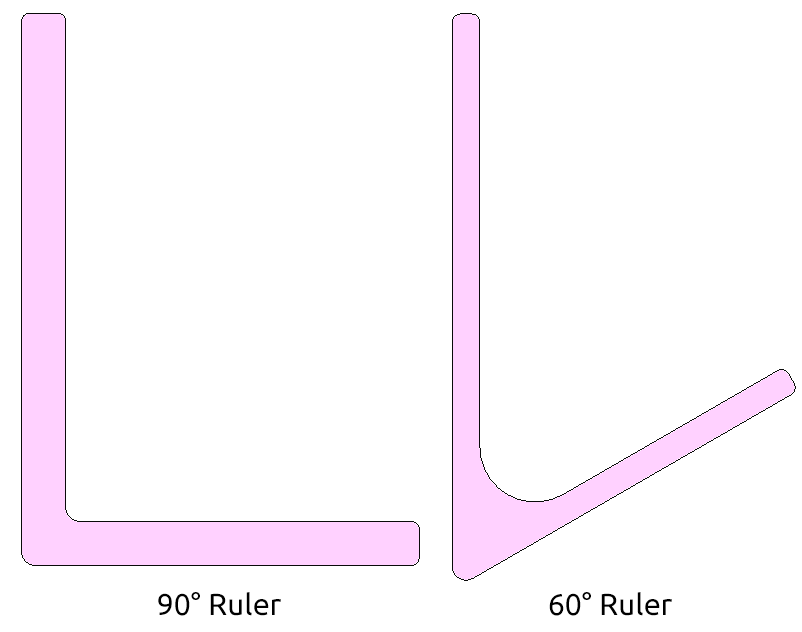
The PiDog kit includes either a 90° or 60° calibration ruler. The video uses the 90° ruler, but the 60° calibration process is very similar. You can also refer to the illustrated step-by-step guide below.
Steps
Follow these steps:
Place the PiDog on a flat platform.
Navigate to the PiDog example code directory and run the
0_calibration.pyscript.cd ~/pidog/examples sudo python3 0_calibration.py
After running the script, an interactive interface will appear in the terminal. Choose the type of calibration ruler you have: select option 1 for 90°, or option 2 for 60°.

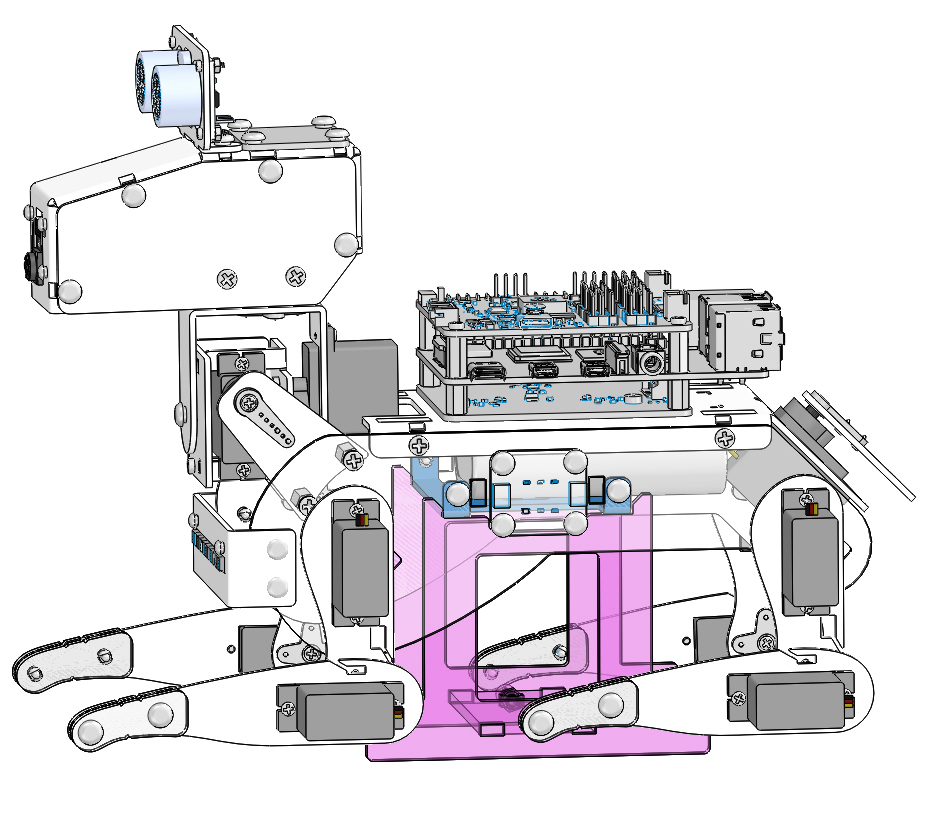
After making your selection, the following calibration interface will appear:

If you are using the 60° calibration ruler
Position the calibration ruler (acrylic C-board) as shown, with the long edge on the horizontal surface. Press
1in the terminal and use thewandskeys to adjust the alignment.
Reposition the calibration ruler as shown in the figure below. Press
2in the terminal and fine-tune the alignment using thewandskeys.
Repeat the calibration process for servos 3 to 8 to ensure all four legs of the PiDog are properly calibrated.
If you are using the 90° calibration ruler
Position the calibration ruler (acrylic C-board) as shown. Press
1in the terminal, then usewandsto align the edges with the illustration.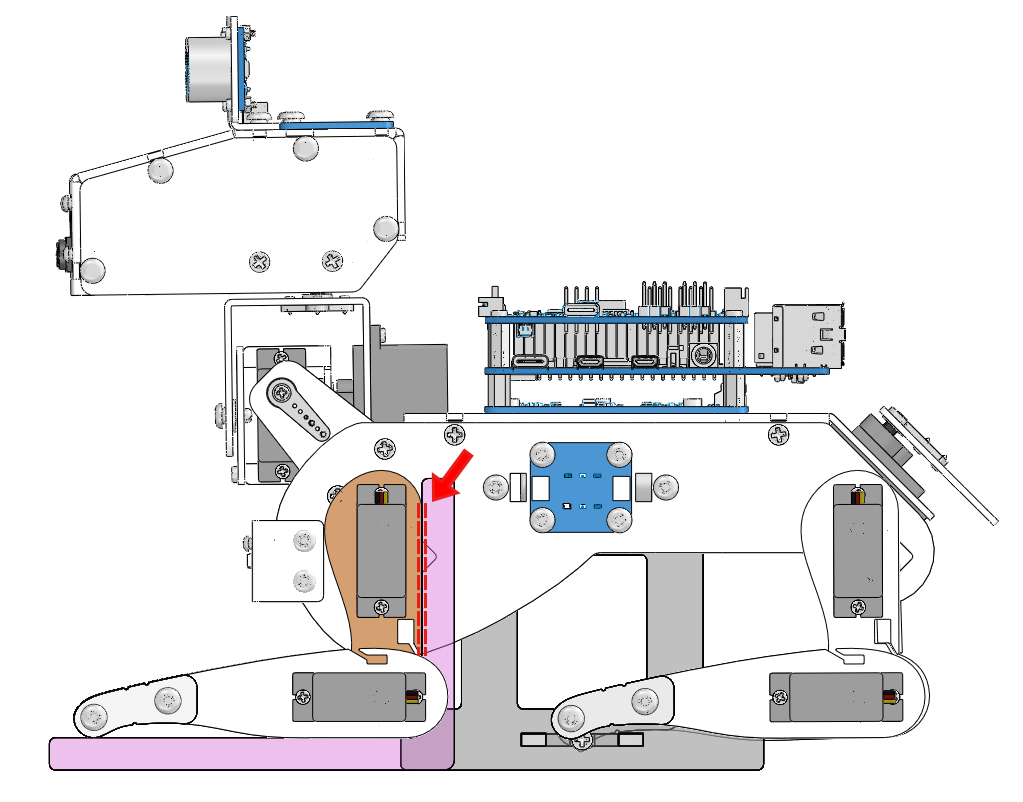
Reposition the calibration ruler (acrylic C-board) as shown. Press
2in the terminal, then adjust again withwands.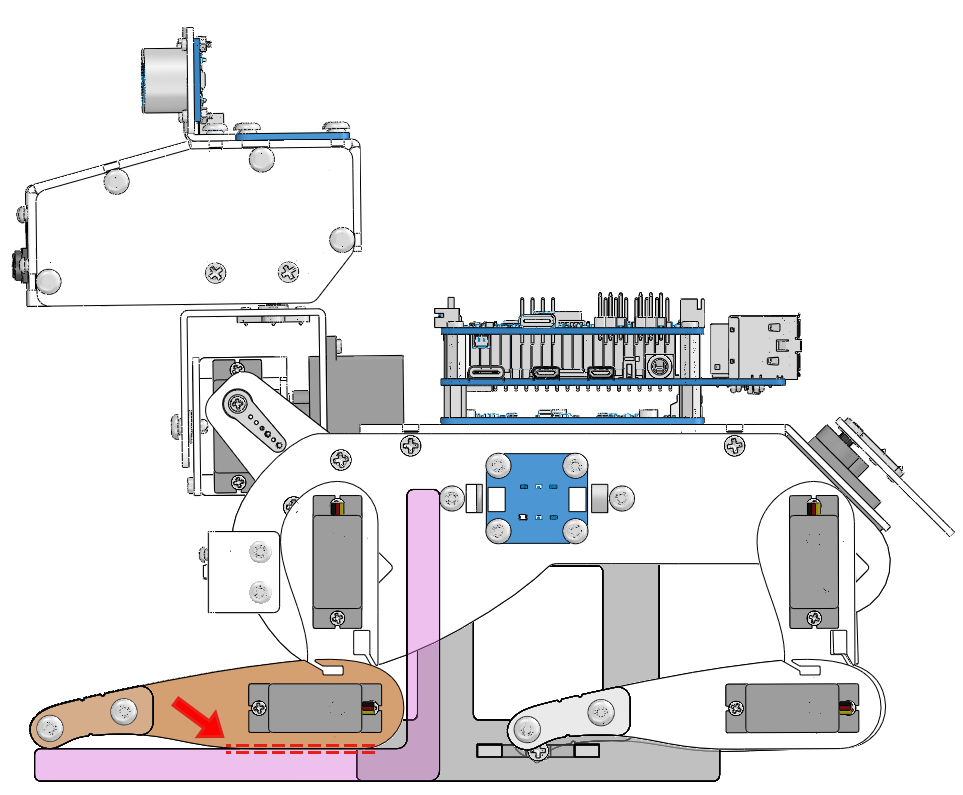
Repeat the calibration procedure for servos 3 to 8 to ensure all four legs of the PiDog are properly calibrated.
Completing the Calibration
Once all servos are calibrated, rerun the PiDog walking or posture example code to check if the movements are smooth.
If there is still deviation, return to the calibration program for fine-tuning.
It is highly recommended to complete this step after your initial assembly to ensure stable performance during operation.
Tip
To avoid recalibrating in the future, you can record the servo angles or export the configuration file after calibration. This makes it easy to restore settings quickly next time.