Robot HAT
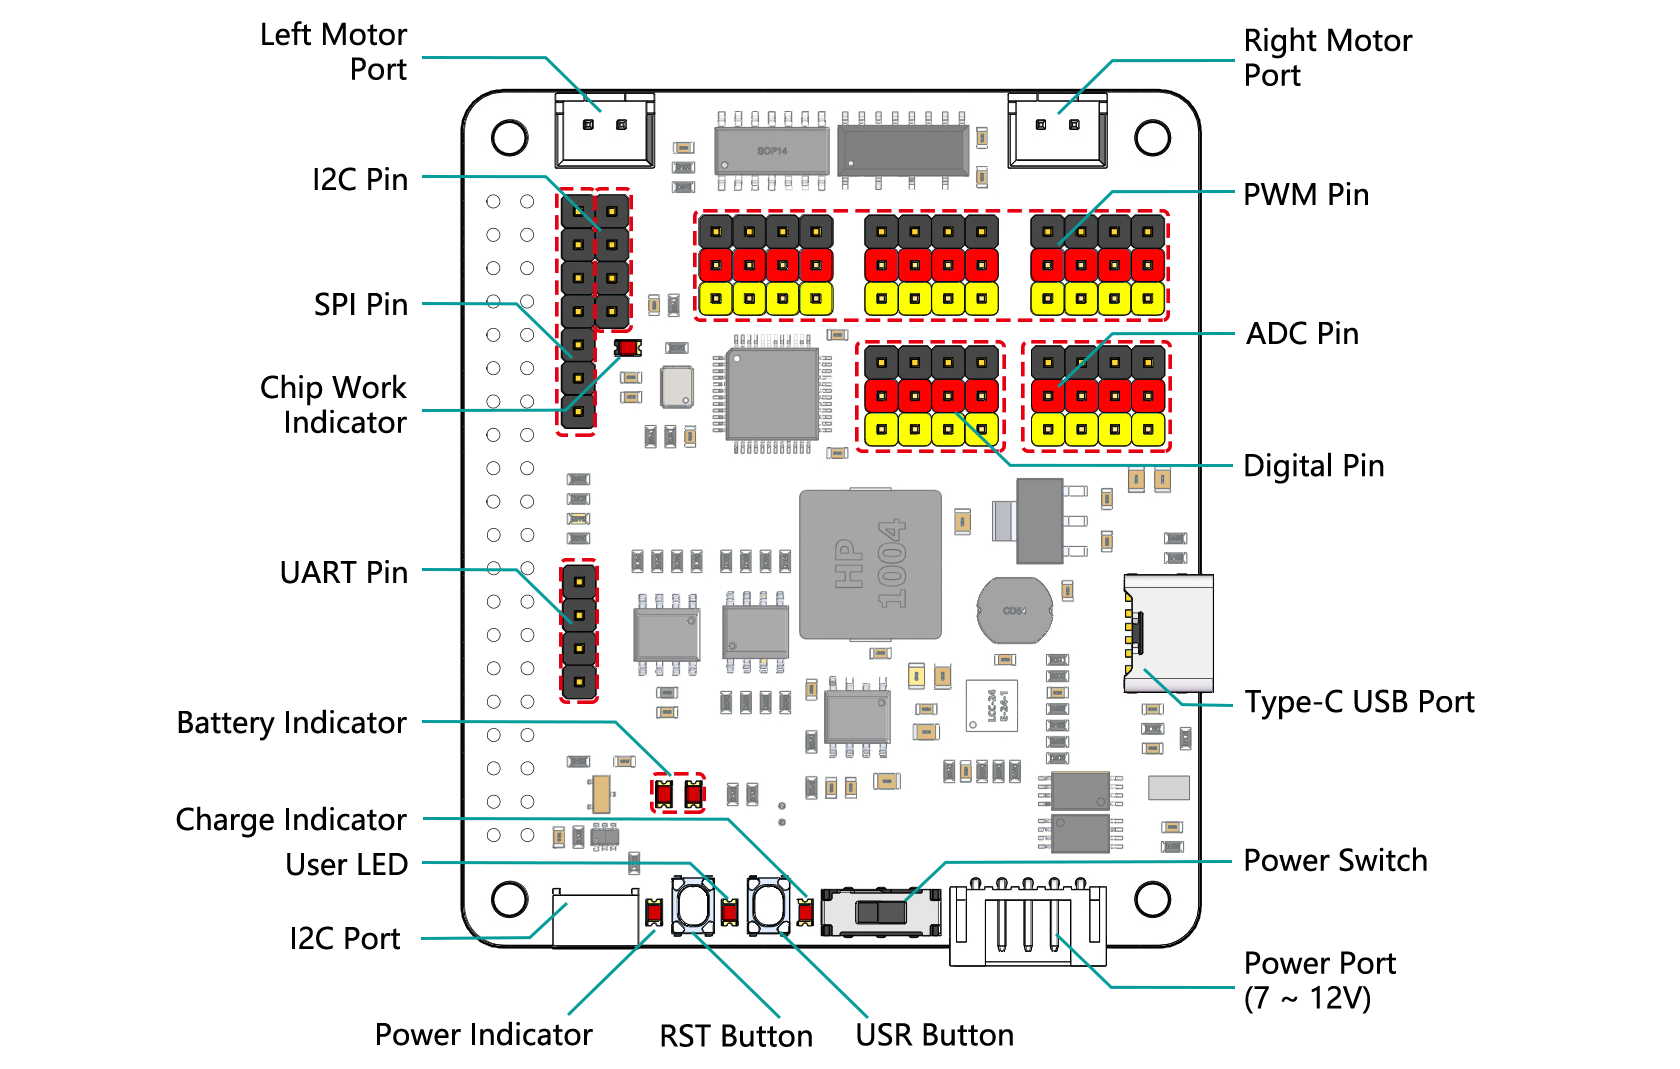
Robot HAT is a multifunctional expansion board that allows Raspberry Pi to be quickly turned into a robot. An MCU is on board to extend the PWM output and ADC input for the Raspberry Pi, as well as a motor driver chip, I2S audio module and mono speaker. As well as the GPIOs that lead out of the Raspberry Pi itself.
It also comes with a Speaker, which can be used to play background music, sound effects and implement TTS functions to make your project more interesting.
Accepts 7-12V PH2.0 5pin power input with 2 battery indicators, 1 charge indicator and 1 power indicator. The board also has a user available LED and a button for you to quickly test some effects.

- Power Port
7-12V PH2.0 3pin power input.
Powering the Raspberry Pi and Robot HAT at the same time.
- Power Switch
Turn on/off the power of the robot HAT.
When you connect power to the power port, the Raspberry Pi will boot up. However, you will need to switch the power switch to ON to enable Robot HAT.
- Type-C USB Port
Insert the Type-C cable to charge the battery.
At the same time, the charging indicator lights up in red color.
When the battery is fully charged, the charging indicator turns off.
If the USB cable is still plugged in about 4 hours after it is fully charged, the charging indicator will blink to prompt.
- Digital Pin
4-channel digital pins, D0-D3.
- ADC Pin
4-channel ADC pins, A0-A3.
- PWM Pin
12-channel PWM pins, P0-P11.
- Left/Right Motor Port
2-channel XH2.54 motor ports.
The left port is connected to GPIO 4 and the right port is connected to GPIO 5.
- I2C Pin and I2C Port
I2C Pin: P2.54 4-pin interface.
I2C Port: SH1.0 4-pin interface, which is compatible with QWIIC and STEMMA QT.
These I2C interfaces are connected to the Raspberry Pi’s I2C interface via GPIO2 (SDA) and GPIO3 (SCL).
- SPI Pin
P2.54 7-pin SPI interface.
- UART Pin
P2.54 4-pin interface.
- RST Button
The RST button, when using Ezblock, serves as a button to restart the Ezblock program.
If not using Ezblock, the RST button does not have a predefined function and can be fully customized according to your needs.
- USR Button
The functions of USR Button can be set by your programming. (Pressing down leads to a input “0”; releasing produces a input “1”. )
- Battery Indicator
Two LEDs light up when the voltage is higher than 7.6V.
One LED lights up in the 7.15V to 7.6V range.
Below 7.15V, both LEDs turn off.
- Speaker and Speaker Port
Speaker: This is a 2030 audio chamber speaker.
Speaker Port: The Robot HAT is equipped with onboard I2S audio output, along with a 2030 audio chamber speaker, providing a mono sound output.