Continuous Shooting
This example allows us to use the pan-tilt for shooting/continuous shooting more conveniently.
By the way, a large number of still photos captured in continuous shooting can be used as frames to synthesize videos. This usage will be later in the chapter Time Lapse Photography.
Here you will use two windows at the same time:
One is Terminal, where you will enter wasd to control the camera orientation, enter q to shoot, and enter g to exit shooting. If the program has not been terminated after exiting the shooting, please press ctrl+c.
Another browser interface, after the program runs, you will need to enter http://<Your Raspberry Pi IP>:9000/mjpg in the PC browser (such as chrome) to view the viewfinder screen.
Run the Code
cd /home/pi/pan-tilt-hat/examples
sudo python3 continuous_shooting.py
View the Image
After the code runs, the terminal will display the following prompt:
No desktop !
* Serving Flask app "vilib.vilib" (lazy loading)
* Environment: production
WARNING: Do not use the development server in a production environment.
Use a production WSGI server instead.
* Debug mode: off
* Running on http://0.0.0.0:9000/ (Press CTRL+C to quit)
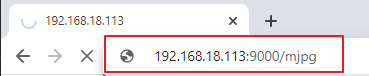
Then you can enter http://<your IP>:9000/mjpg in the browser to view the video screen. such as: http://192.168.18.113:9000/mjpg
Code
from time import sleep,strftime,localtime
from vilib import Vilib
from sunfounder_io import PWM,Servo,I2C

import sys
import tty
import termios

# region  read keyboard
def readchar():
    fd = sys.stdin.fileno()
    old_settings = termios.tcgetattr(fd)
    try:
        tty.setraw(sys.stdin.fileno())
        ch = sys.stdin.read(1)
    finally:
        termios.tcsetattr(fd, termios.TCSADRAIN, old_settings)
    return ch

manual = '''
Press keys on keyboard to record value!
    W: up
    A: left
    S: right
    D: down
    Q: continuous_shooting

    G: Quit
'''
# endregion

# region init
I2C().reset_mcu()
sleep(0.01)

pan = Servo(PWM("P1"))
tilt = Servo(PWM("P0"))
panAngle = 0
tiltAngle = 0
pan.angle(panAngle)
tilt.angle(tiltAngle)

#endregion init

# region servo control
def limit(x,min,max):
    if x > max:
        return max
    elif x < min:
        return min
    else:
        return x

def servo_control(key):
    global panAngle,tiltAngle
    if key == 'w':
        tiltAngle -= 1
        tiltAngle = limit(tiltAngle, -90, 90)
        tilt.angle(tiltAngle)
    if key == 's':
        tiltAngle += 1
        tiltAngle = limit(tiltAngle, -90, 90)
        tilt.angle(tiltAngle)
    if key == 'a':
        panAngle += 1
        panAngle = limit(panAngle, -90, 90)
        pan.angle(panAngle)
    if key == 'd':
        panAngle -= 1
        panAngle = limit(panAngle, -90, 90)
        pan.angle(panAngle)

# endregion

# continuous shooting
def continuous_shooting(path,interval_ms:int=50,number=10):
    print("continuous_shooting .. ")
    path=path+'/'+strftime("%Y-%m-%d-%H.%M.%S", localtime())
    for i in range(number):
        Vilib.take_photo(photo_name='%03d'%i,path=path)
        print("take_photo: %s"%i)
        sleep(interval_ms/1000)
    print("continuous_shooting done ")

def main():

    Vilib.camera_start(vflip=True,hflip=True)
    Vilib.display(local=True,web=True)

    path = "/home/pi/Pictures/continuous_shooting"

    print(manual)
    while True:
        key = readchar()
        servo_control(key)
        if key == 'q':
            continuous_shooting(path,interval_ms=50,number=10)
        if key == 'g':
            Vilib.camera_close()
            break
        sleep(0.1)


if __name__ == "__main__":
    main()
How it works?
The code in this article looks slightly complicated, we can split it into three parts:
Keyboard input
Servo control
Take photos
First, let’s look at the keyboard control part, which includes the following parts:
import sys
import tty
import termios

# region  read keyboard
def readchar():
    fd = sys.stdin.fileno()
    old_settings = termios.tcgetattr(fd)
    try:
        tty.setraw(sys.stdin.fileno())
        ch = sys.stdin.read(1)
    finally:
        termios.tcsetattr(fd, termios.TCSADRAIN, old_settings)
    return ch
# endregion

def main():
    while True:
        key = readchar()
        sleep(0.1)

if __name__ == "__main__":
    main()
Its function is to make the terminal can obtain the keyboard input value in real time (without pressing enter), which is more convenient for practical operation.
Secondly, let’s look at the steering gear control part, which consists of the following code:
from time import sleep
from sunfounder_io import PWM,Servo,I2C

### The readchar part is omitted here ###

# region init
I2C().reset_mcu()
sleep(0.01)

pan = Servo(PWM("P1"))
tilt = Servo(PWM("P0"))
panAngle = 0
tiltAngle = 0
pan.angle(panAngle)
tilt.angle(tiltAngle)
#endregion init

# region servo control
def limit(x,min,max):
    if x > max:
        return max
    elif x < min:
        return min
    else:
        return x

def servo_control(key):
    global panAngle,tiltAngle
    if key == 'w':
        tiltAngle -= 1
        tiltAngle = limit(tiltAngle, -90, 90)
        tilt.angle(tiltAngle)
    if key == 's':
        tiltAngle += 1
        tiltAngle = limit(tiltAngle, -90, 90)
        tilt.angle(tiltAngle)
    if key == 'a':
        panAngle += 1
        panAngle = limit(panAngle, -90, 90)
        pan.angle(panAngle)
    if key == 'd':
        panAngle -= 1
        panAngle = limit(panAngle, -90, 90)
        pan.angle(panAngle)

# endregion

def main():
    while True:
        key = readchar()
        servo_control(key)

if __name__ == "__main__":
    main()
It seems to be a little bit more complicated, but after careful observation, you will find that most of this is the initialization and restriction of the position of the steering gear, which can be perfected according to personal preferences. Its main core is nothing more than the following lines:
from time import sleep
from sunfounder_io import PWM,Servo,I2C

I2C().reset_mcu()
sleep(0.01)

pan = Servo(PWM("P1"))
tilt = Servo(PWM("P0"))
panAngle = 0
tiltAngle = 0
pan.angle(panAngle)
tilt.angle(tiltAngle)
Among them,
I2C().reset_mcu()is used to reset Pan-tilt HAT, which can help you reduce many accidents. It is recommended to add it in every example of using a steering gear.And
tilt = Servo(PWM("P0"))is used to init the servo object. Here, the servo connected to P0 is declared as an object namedtilt.As for
tilt.angle(angle), it directly controls the tiltServo, which is the angle of the servo connected to P0.
Finally, let’s take a look at the photo section, which is roughly similar to Take Photo, but with the addition of continuous shooting.
from time import sleep,strftime,localtime
from vilib import Vilib

### The readchar part & servo part is omitted here ###

# continuous shooting
def continuous_shooting(path,interval_ms:int=50,number=10):
    print("continuous_shooting .. ")
    path=path+'/'+strftime("%Y-%m-%d-%H.%M.%S", localtime())
    for i in range(number):
        Vilib.take_photo(photo_name='%03d'%i,path=path)
        print("take_photo: %s"%i)
        sleep(interval_ms*0.001)
    print("continuous_shooting done ")

def main():
    Vilib.camera_start(vflip=True,hflip=True)
    Vilib.display(local=True,web=True)

    path = "/home/pi/Pictures/continuous_shooting"

    while True:
        key = readchar()
        #servo_control(key)
        if key == 'q':
            continuous_shooting(path,interval_ms=50,number=10)
        if key == 'g':
            Vilib.camera_close()
            break
        sleep(0.1)

if __name__ == "__main__":
    main()
We have written a function
continuous_shooting(path,interval_ms=50,number=10), whose function is to execute a for loop and executeVilib.take_photo()to achieve continuous shooting.The photos produced by continuous shooting will be stored in a newly created folder, and the folder will be named according to the current time. Here you may be curious about the time-related functions
strftime()andlocaltime(), then please see Time-Python Docs.