Note
Hello, welcome to the SunFounder Raspberry Pi & Arduino & ESP32 Enthusiasts Community on Facebook! Dive deeper into Raspberry Pi, Arduino, and ESP32 with fellow enthusiasts.
Why Join?
Expert Support: Solve post-sale issues and technical challenges with help from our community and team.
Learn & Share: Exchange tips and tutorials to enhance your skills.
Exclusive Previews: Get early access to new product announcements and sneak peeks.
Special Discounts: Enjoy exclusive discounts on our newest products.
Festive Promotions and Giveaways: Take part in giveaways and holiday promotions.
👉 Ready to explore and create with us? Click [here] and join today!
4. Text Vision Talk with Ollama
In this lesson, you will learn how to use Ollama, a tool for running large language and vision models locally. We will show you how to install Ollama, download a model, and connect Fusion HAT+ to it.
With this setup, Fusion HAT+ can take a camera snapshot and the model will see and tell — you can ask any question about the image, and the model will reply in natural language.
1. Install Ollama (LLM) and Download Model
You can choose where to install Ollama:
On your Raspberry Pi (local run)
Or on another computer (Mac/Windows/Linux) in the same local network
Recommended models vs hardware
You can choose any model available on Ollama Hub. Models come in different sizes (3B, 7B, 13B, 70B…). Smaller models run faster and require less memory, while larger models provide better quality but need powerful hardware.
Check the table below to decide which model size fits your device.
Model size |
Min RAM Required |
Recommended Hardware |
|---|---|---|
~3B parameters |
8GB (16GB better) |
Raspberry Pi 5 (16GB) or mid-range PC/Mac |
~7B parameters |
16GB+ |
Pi 5 (16GB, just usable) or mid-range PC/Mac |
~13B parameters |
32GB+ |
Desktop PC / Mac with high RAM |
30B+ parameters |
64GB+ |
Workstation / Server / GPU recommended |
70B+ parameters |
128GB+ |
High-end server with multiple GPUs |
Install on Raspberry Pi
If you want to run Ollama directly on your Raspberry Pi:
Use a 64-bit Raspberry Pi OS
Strongly recommended: Raspberry Pi 5 (16GB RAM)
Run the following commands:
# Install Ollama
curl -fsSL https://ollama.com/install.sh | sh

# Pull a lightweight model (good for testing)
ollama pull llama3.2:3b

# Quick run test (type 'hi' and press Enter)
ollama run llama3.2:3b

# Serve the API (default port 11434)
# Tip: set OLLAMA_HOST=0.0.0.0 to allow access from LAN
OLLAMA_HOST=0.0.0.0 ollama serve
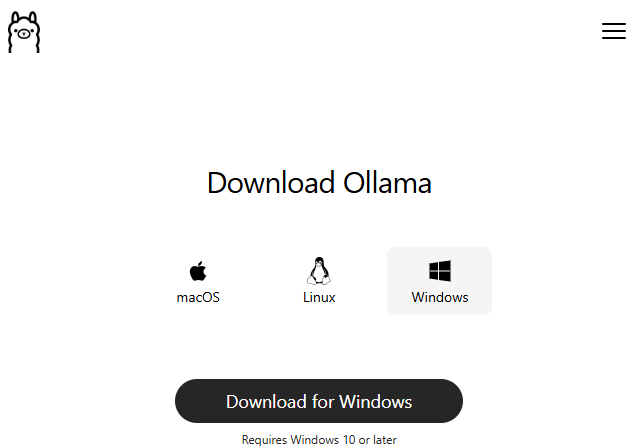
Install on Mac / Windows / Linux (Desktop App)
Download and install Ollama from Ollama Download Page
Open the Ollama app, go to the Model Selector, and use the search bar to find a model. For example, type
llama3.2:3b(a small and lightweight model to start with).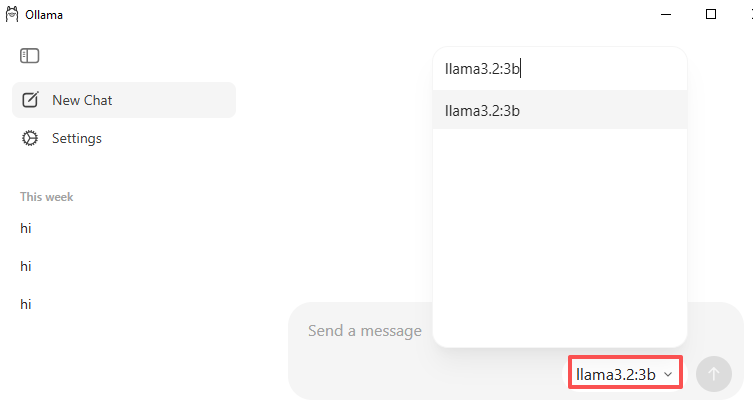
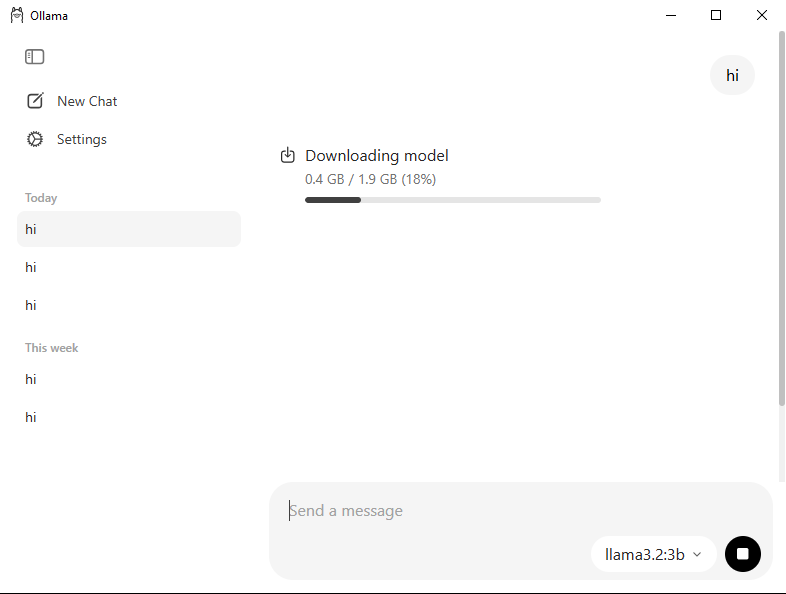
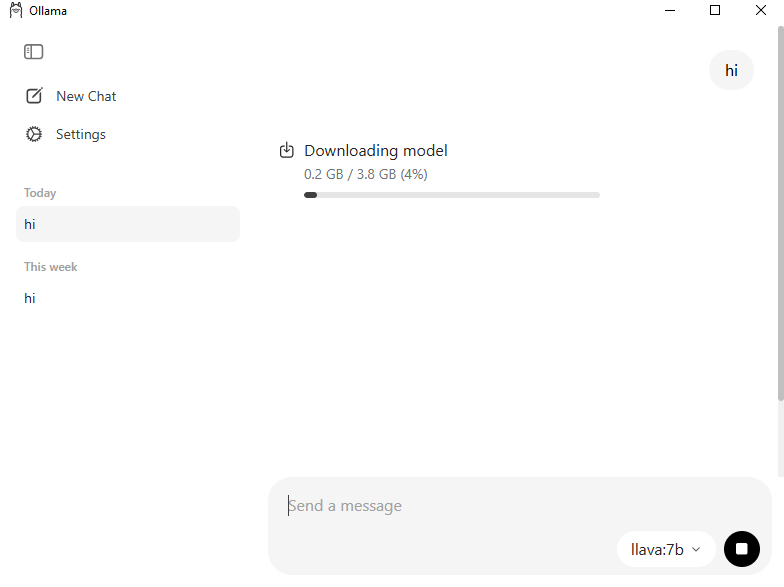
After the download is complete, type something simple like “Hi” in the chat window, Ollama will automatically start downloading it when you first use it.
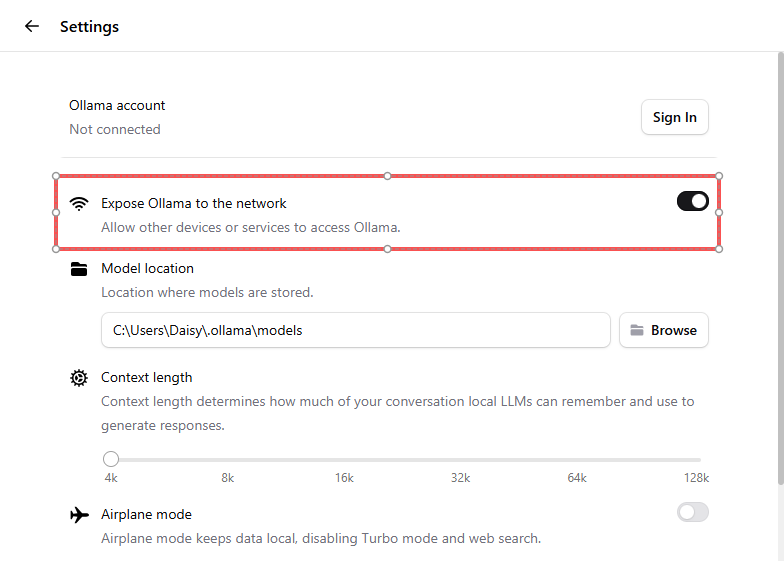
Go to Settings → enable Expose Ollama to the network. This allows your Raspberry Pi to connect to it over LAN.
Warning
If you see an error like:
Error: model requires more system memory ...
The model is too large for your machine. Use a smaller model or switch to a computer with more RAM.
2. Test Ollama
Once Ollama is installed and your model is ready, you can quickly test it with a minimal chat loop.
Run the program
cd ~/fusion-hat/examples
sudo python3 llm_ollama.py
Now you can chat with Fusion HAT+ directly from the terminal.
You can choose any model available on Ollama Hub, but smaller models (e.g.
moondream:1.8b,phi3:mini) are recommended if you only have 8–16GB RAM.Make sure the model you specify in the code matches the model you have already pulled in Ollama.
Type
exitorquitto stop the program.If you cannot connect, ensure that Ollama is running and that both devices are on the same LAN if you are using a remote host.
Code
from fusion_hat.llm import Ollama

INSTRUCTIONS = "You are a helpful assistant."
WELCOME = "Hello, I am a helpful assistant. How can I help you?"

# Change this to your computer IP, if you run it on your pi, then change it to localhost
llm = Ollama(
   ip="localhost",
   model="llama3.2:3b"
)

# Set how many messages to keep
llm.set_max_messages(20)
# Set instructions
llm.set_instructions(INSTRUCTIONS)
# Set welcome message
llm.set_welcome(WELCOME)

print(WELCOME)

while True:
   input_text = input(">>> ")

   # Response without stream
   # response = llm.prompt(input_text)
   # print(f"response: {response}")

   # Response with stream
   response = llm.prompt(input_text, stream=True)
   for next_word in response:
      if next_word:
            print(next_word, end="", flush=True)
   print("")
3. Vision Talk with Ollama
In this demo, the Pi camera takes a snapshot each time you type a question. The program sends your typed text + the new photo to a local vision model via Ollama, and then streams the model’s reply in plain English. This is a minimal “see & tell” baseline you can later extend with color/face/QR checks.
Before You Start
Open the Ollama app (or run the service) and make sure a vision-capable model is pulled.
If you have enough memory (≥16GB RAM), you may try
llava:7b.If you only have 8GB RAM, prefer a smaller model such as
moondream:1.8borgranite3.2-vision:2b.
Run the Demo
Go to the example folder and run the script:
cd ~/fusion-hat/examples
python3 llm_ollama_with_image.py
What happens when it runs:
The program prints a welcome line and waits for your input (
>>>).Every time you type anything (e.g., “hello”, “Is there yellow?”, “Any faces?”, “What is on the desk?”), it:
captures a photo from the Pi camera (saved to
/tmp/llm-img.jpg),sends your text + the photo to the vision model via Ollama,
streams back the model’s answer to the terminal.
Type
exitorquitto end the program.
Code
from fusion_hat.llm import Ollama
from picamera2 import Picamera2
import time

'''
You need to setup ollama first, see llm_local.py

You need at leaset 8GB RAM to run llava:7b large multimodal model
'''

INSTRUCTIONS = "You are a helpful assistant."
WELCOME = "Hello, I am a helpful assistant. How can I help you?"

llm = Ollama(
   ip="localhost",          # e.g., "192.168.100.145" if remote
   model="llava:7b"         # change to "moondream:1.8b" or "granite3.2-vision:2b" for 8GB RAM
)

# Set how many messages to keep
llm.set_max_messages(20)
# Set instructions
llm.set_instructions(INSTRUCTIONS)
# Set welcome message
llm.set_welcome(WELCOME)

# Init camera
camera = Picamera2()
config = camera.create_still_configuration(
   main={"size": (1280, 720)},
)
camera.configure(config)
camera.start()
time.sleep(2)

print(WELCOME)

while True:
   input_text = input(">>> ")

   # Capture image
   img_path = '/tmp/llm-img.jpg'
   camera.capture_file(img_path)

   # Response without stream
   # response = llm.prompt(input_text, image_path=img_path)
   # print(f"response: {response}")

   # Response with stream
   response = llm.prompt(input_text, stream=True, image_path=img_path)
   for next_word in response:
      if next_word:
            print(next_word, end="", flush=True)
   print("")
Troubleshooting
I get an error like: `model requires more system memory …`.
This means the model is too large for your device.
Use a smaller model such as
moondream:1.8borgranite3.2-vision:2b.Or switch to a machine with more RAM and expose Ollama to the network.
The code cannot connect to Ollama (connection refused).
Check the following:
Make sure Ollama is running (
ollama serveor the desktop app is open).If using a remote computer, enable Expose to network in Ollama settings.
Double-check that the
ip="..."in your code matches the correct LAN IP.Confirm both devices are on the same local network.
My Pi camera does not capture anything.
Verify that
Picamera2is installed and working with a simple test script.Check that the camera cable is properly connected and enabled in
raspi-config.Ensure your script has permission to write to the target path (
/tmp/llm-img.jpg).
The output is too slow.
Smaller models reply faster, but with simpler answers.
You can lower the camera resolution (e.g., 640×480 instead of 1280×720) to speed up image processing.
Close other programs on your Pi to free up CPU and RAM.