Note
Hello, welcome to the SunFounder Raspberry Pi & Arduino & ESP32 Enthusiasts Community on Facebook! Dive deeper into Raspberry Pi, Arduino, and ESP32 with fellow enthusiasts.
Why Join?
Expert Support: Solve post-sale issues and technical challenges with help from our community and team.
Learn & Share: Exchange tips and tutorials to enhance your skills.
Exclusive Previews: Get early access to new product announcements and sneak peeks.
Special Discounts: Enjoy exclusive discounts on our newest products.
Festive Promotions and Giveaways: Take part in giveaways and holiday promotions.
👉 Ready to explore and create with us? Click [here] and join today!
3. Train Your Custom YOLO Model
Training your own YOLO model essentially involves letting the deep learning algorithm learn how to identify specific objects from the image data you provide. This process can be analogized to teaching a child to recognize something new: you show them numerous example images from different angles and environments, telling them “this is the target object.” After sufficient examples, they can accurately identify that object in new images.
For YOLO, the training process works like this:
Data Preparation: Collect images containing the target objects and annotate the position and category of each object
Model Learning: The algorithm automatically learns the feature patterns of objects by analyzing this annotated data
Weight Generation: After training completes, generate a model file (.pt file) containing the learned knowledge
Inference Application: Deploy this model to the Raspberry Pi for detection on new images
Thanks to transfer learning, we don’t need to train from scratch. The Ultralytics platform provides pre-trained base models (such as YOLOv8n) that have been trained on millions of images. We only need to “fine-tune” these models with a small number of our own images to create effective custom models.
Capturing Photos
Since our YOLO project is based on the Raspberry Pi, we’ll use the Raspberry Pi camera to capture photos. For better results, we also used mobile phones to capture some photos to increase data diversity.
Photo Capture Tips
Clarity: Capture objects as clearly as possible, avoiding blurriness
Diversity: Capture photos from different angles (front, side, overhead, etc.) and under different lighting conditions (bright light, low light, backlight, etc.)
Background Variation: Try to capture images against different backgrounds to help the model learn the essential features of objects rather than backgrounds
Avoid Overlap: You can capture multiple objects simultaneously, but avoid significant overlap between objects
Quantity Recommendation: Aim for at least 50-100 photos per category; more images yield better results
What Object Should You Use?
You can choose any object you’re interested in to train, such as: a doll, a cup, a chair, or even your pet. This tutorial uses a snowman toy as an example; simply replace it with your own target object.
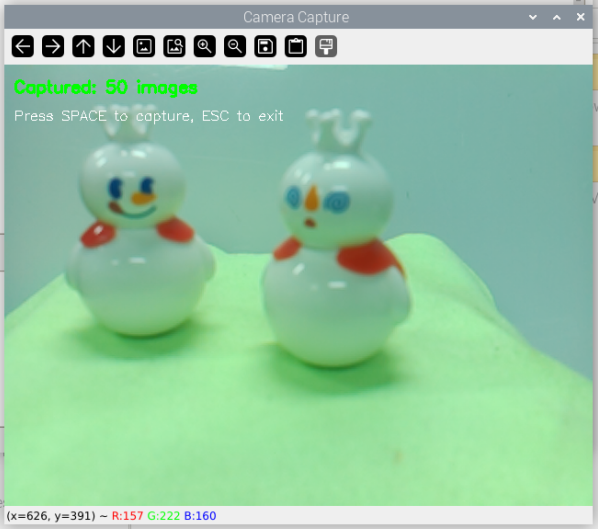
Capturing Photos with the Raspberry Pi Camera
Here’s the code for capturing photos using the Raspberry Pi camera:
cd ~/ai-lab-kit/yolo
python3 yolo_capture_images.py
#!/usr/bin/env python3
"""
Simple camera capture script for Raspberry Pi
Press SPACE to capture, ESC to exit
Images saved to ./captured_images/
"""

from picamera2 import Picamera2
import cv2
import os
import time

# Create save directory
save_dir = "captured_images"
os.makedirs(save_dir, exist_ok=True)

# Initialize camera
picam2 = Picamera2()
picam2.preview_configuration.main.size = (640, 480)
picam2.preview_configuration.main.format = "RGB888"
picam2.configure("preview")
picam2.start()

# Wait for camera to warm up
time.sleep(1)

print("=== Camera Capture Tool ===")
print(f"Images will be saved to: {save_dir}")
print("Controls:")
print("  SPACE - Capture image")
print("  ESC   - Exit")
print("==========================")

count = 0

try:
   while True:
      # Capture frame
      frame = picam2.capture_array()

      # Display frame with instructions
      display = frame.copy()
      cv2.putText(display, f"Captured: {count} images", (10, 30),
                  cv2.FONT_HERSHEY_SIMPLEX, 0.6, (0, 255, 0), 2)
      cv2.putText(display, "Press SPACE to capture, ESC to exit", (10, 60),
                  cv2.FONT_HERSHEY_SIMPLEX, 0.5, (255, 255, 255), 1)

      cv2.imshow("Camera Capture", display)

      # Wait for key press
      key = cv2.waitKey(1) & 0xFF

      if key == 32:  # SPACE key
            # Save image
            filename = f"{save_dir}/img_{count:04d}.jpg"
            cv2.imwrite(filename, frame)
            print(f"Captured: {filename}")
            count += 1

            # Optional: flash effect
            flash = frame.copy()
            flash[:] = (255, 255, 255)
            cv2.imshow("Camera Capture", flash)
            cv2.waitKey(50)

      elif key == 27:  # ESC key
            print(f"\nExiting. Total captured: {count} images")
            break

finally:
   cv2.destroyAllWindows()
   picam2.stop()
   print("Camera stopped")
Transferring Images to Your Computer
After capturing, use FileZilla Software to download the images from the Raspberry Pi to your computer:
Check the IP address on your Raspberry Pi:
hostname -IConnect to the Raspberry Pi in FileZilla (username: pi, password: your password)
Navigate to the
~/ai-lab-kit/yolo/captured_images/directoryDownload all images to your computer
Training the Model
We’ll use the online Ultralytics Platform. This platform provides convenient model training services without the need to configure complex training environments.
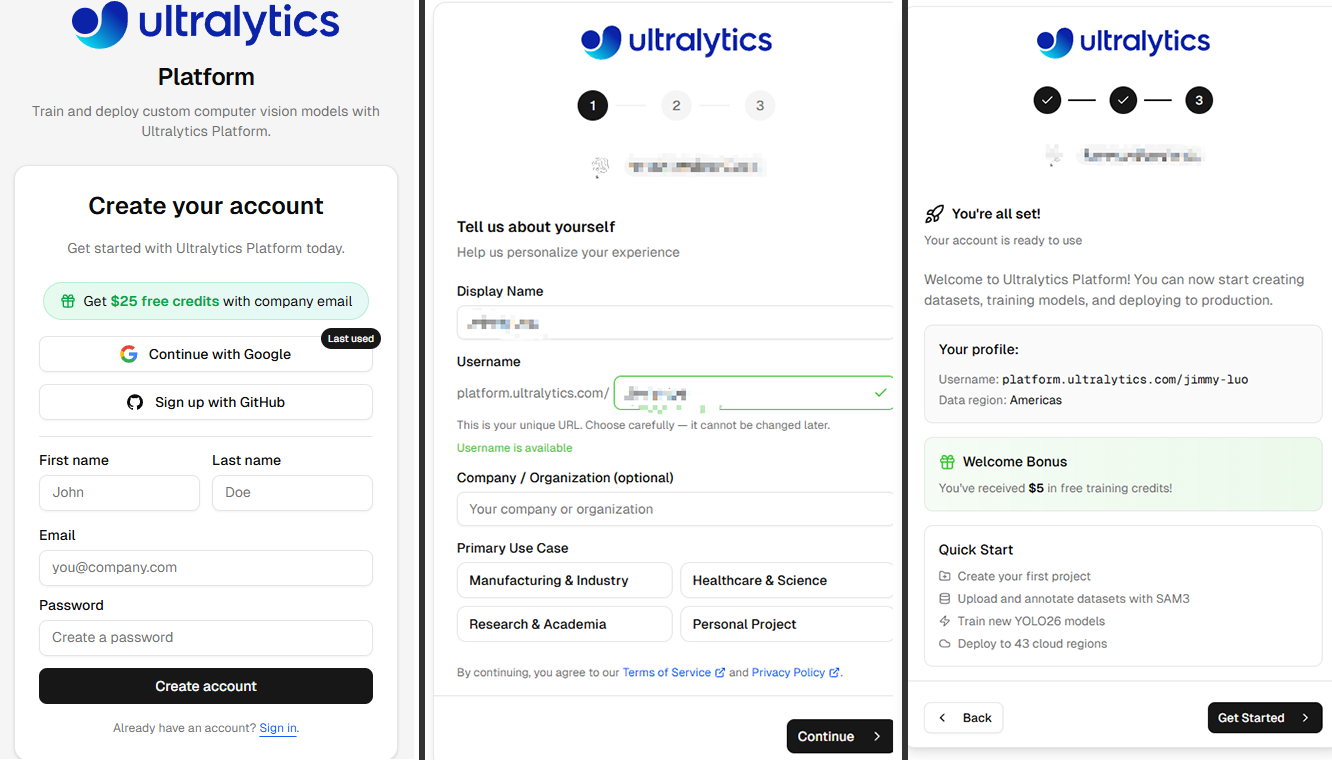
Registration and Login
Click Get started in the upper right corner to access the registration page and complete the sign-up process.
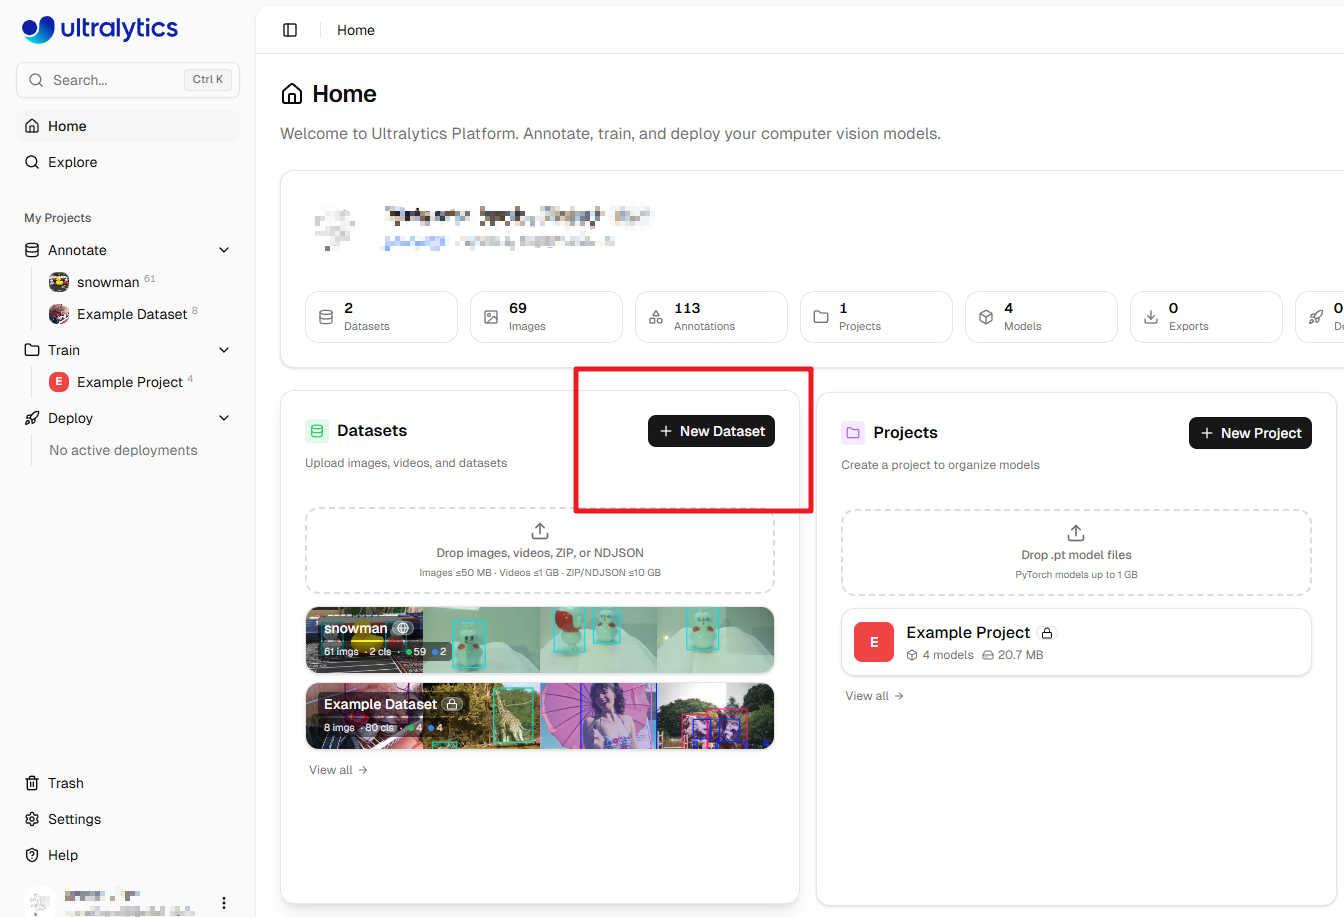
Creating a Dataset
After registration, you’ll be taken to the homepage. Click New Dataset to create a new dataset.
A window will pop up. Here you can upload the photos you just captured with your Raspberry Pi and enter a Dataset name. Then click Create & upload.
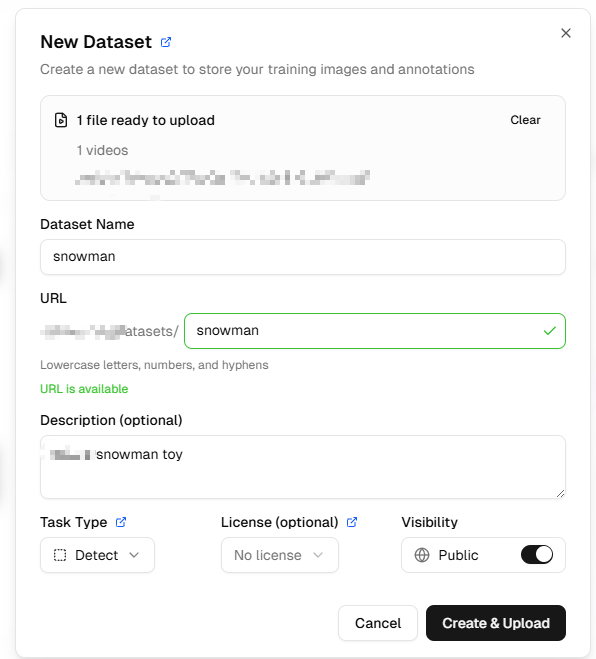
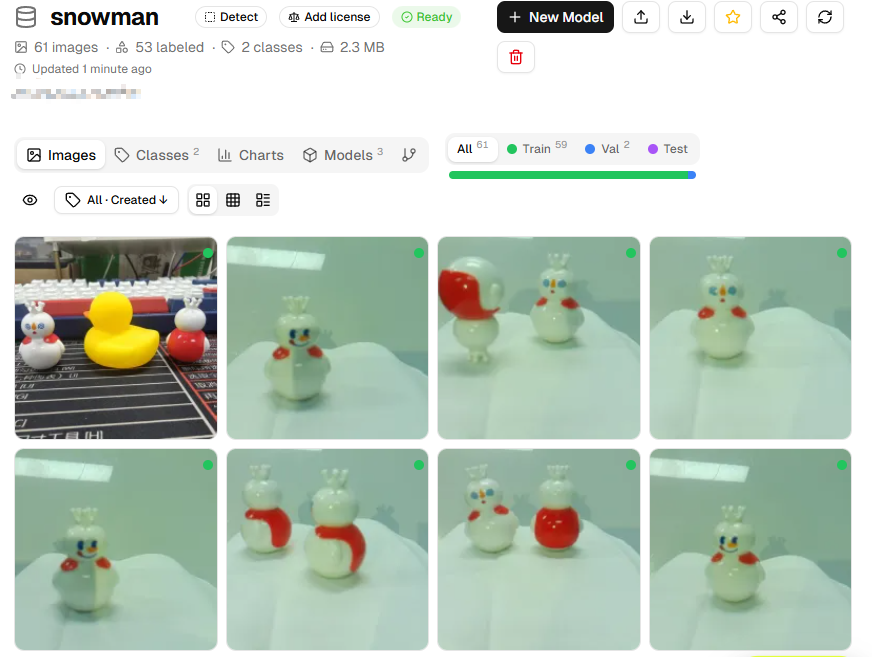
You’ll now enter the dataset interface, where you can see all uploaded images.
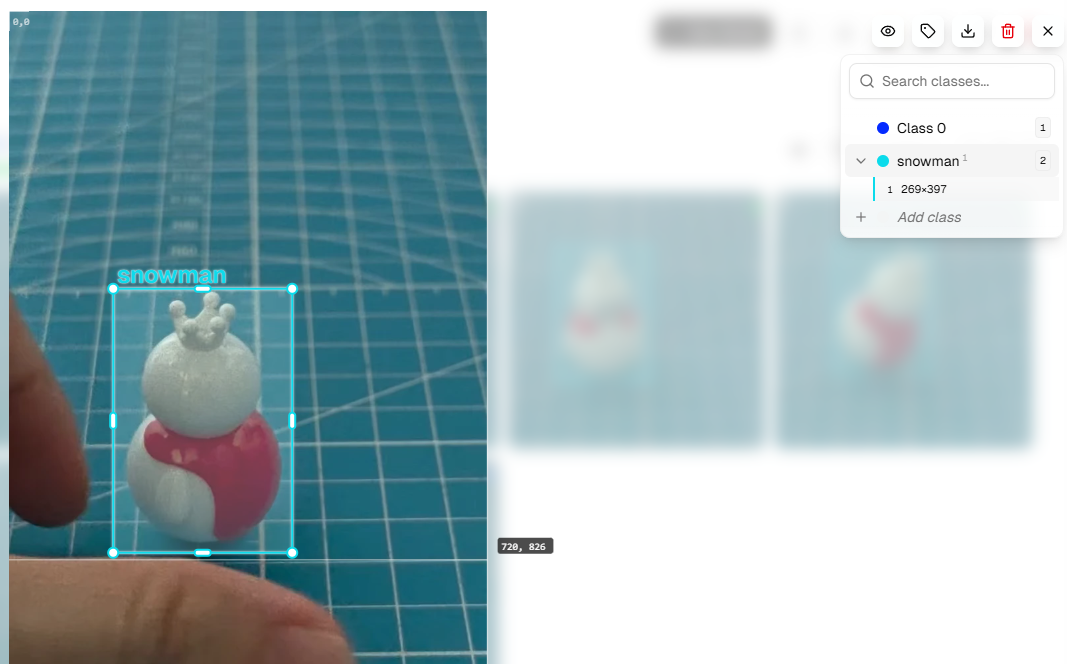
Annotating Images
Open each photo to annotate. Use the +Add Class button on the right to add categories. Add the appropriate category name based on the object you want to identify (for example: if training to recognize a cup, add “cup”; if training to recognize a pet, add “pet”).
Annotation Tips: - Use the mouse to draw bounding boxes around objects, keeping them as close to object edges as possible - Ensure each object is correctly annotated - If an image contains no target objects, no annotation is needed
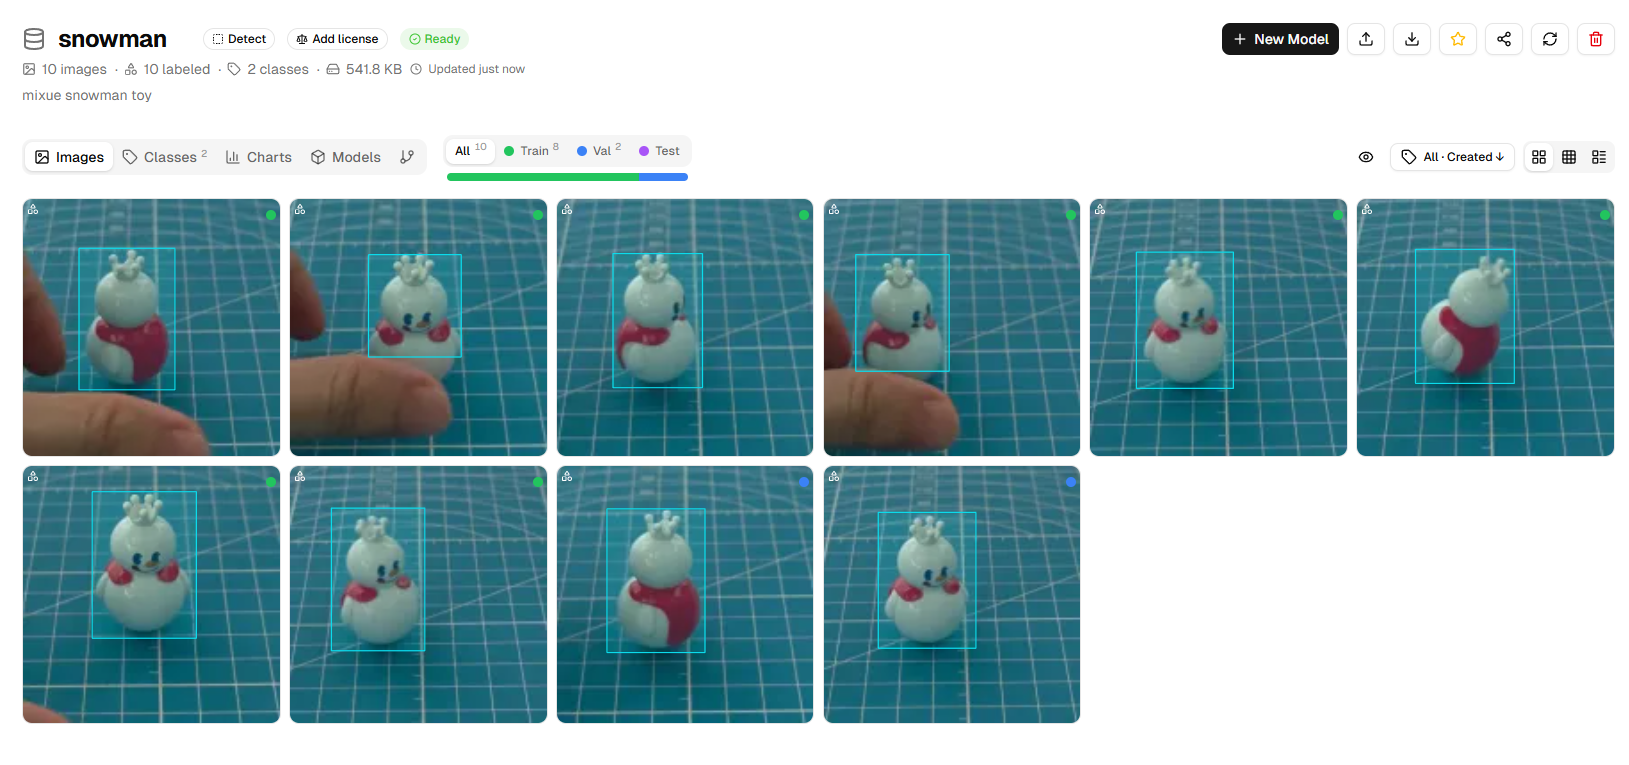
Repeat the above steps until all photos are annotated. Check that annotations on each image are accurate.
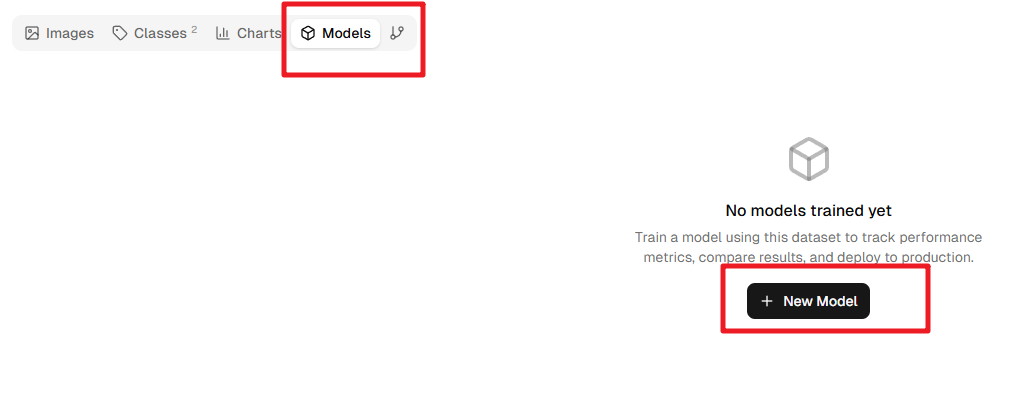
Creating a Training Model
Click Models, then click New Model.
In the pop-up window, select YOLOv8n or YOLO11n as the Base Model. These are nano versions suitable for Raspberry Pi, offering small size and fast speed.
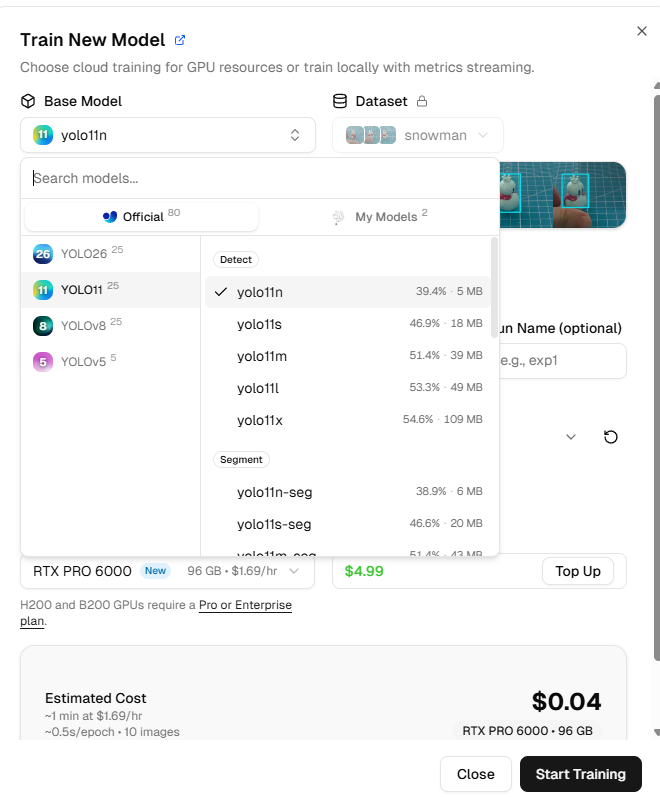
Configure training parameters:
Image size: Select 320 (this is the image size that the Raspberry Pi can efficiently process)
Epochs: Keep the default (typically 50-100 epochs)
GPU Type: No specific requirement, but different GPU types affect training speed and cost
Note: New Ultralytics accounts come with $5 in free credits; training a small model typically costs only a few cents, use as needed.
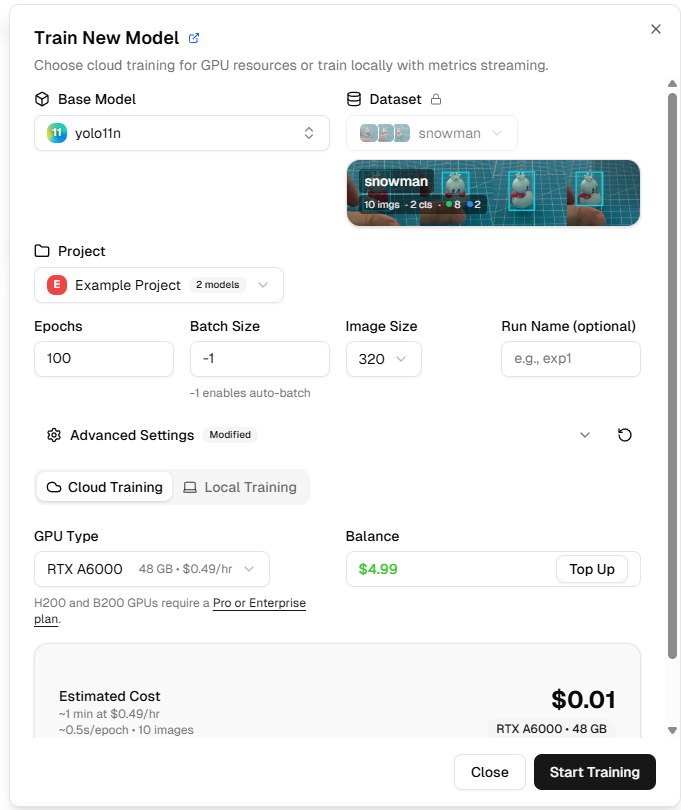
Click Start Training. Wait for a period (usually 10-30 minutes, depending on data volume and GPU), and the model will complete training.
During training, you can see real-time metrics:
box_loss: Bounding box loss; smaller values are better
cls_loss: Classification loss; smaller values are better
mAP: Mean Average Precision; higher values are better (0-1 range)
Downloading and Deploying
After training completes, click Download PyTorch Model to download the trained model (it will be a .pt file).
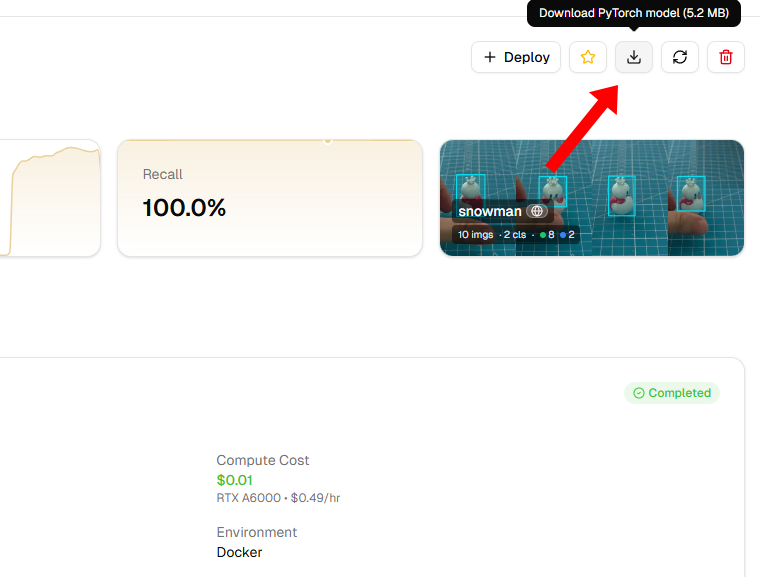
After downloading, use FileZilla to transfer it to your Raspberry Pi (recommended to place it in the
~/ai-lab-kit/yolo/directory).
Running the Custom Model
After placing the model on your Raspberry Pi, you need to modify the model path in the example code. Here’s a complete running example
cd ~/ai-lab-kit/yolo
nano yolo_custom.py
replace the model filename with your own downloaded file:
#!/usr/bin/env python3
import cv2
from picamera2 import Picamera2
from ultralytics import YOLO

model = YOLO("your_model.pt")  # Replace with your model filename

# initialize camera
picam2 = Picamera2()
picam2.preview_configuration.main.size = (640, 480)
picam2.preview_configuration.main.format = "RGB888"
picam2.configure("preview")
picam2.start()

print("YOLO start, Press 'q' to exit...")

try:
   while True:
      # capture frame
      frame = picam2.capture_array()

      # run YOLO and set imgsz=320
      results = model(frame, imgsz=320)

      # draw results
      annotated = results[0].plot()

      # show results
      cv2.imshow("YOLO on Raspberry Pi", annotated)

      # press 'q' to exit
      if cv2.waitKey(1) & 0xFF == ord('q'):
            break
finally:
   cv2.destroyAllWindows()
   picam2.stop()
   print("exit")
Verifying Results
Run the example code to observe how the YOLO model performs on your Raspberry Pi:
python3 yolo_custom.pyIf everything works correctly, you should see your trained target object framed by a bounding box in the camera feed, with the category name and confidence score displayed.
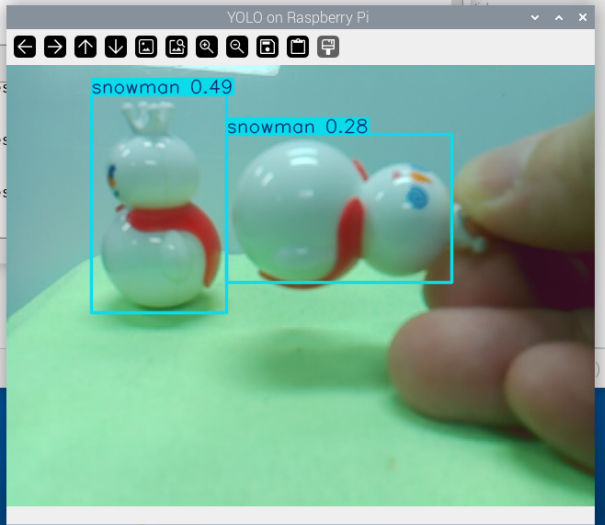
Congratulations! You have successfully trained your own YOLO model and deployed it on the Raspberry Pi.
Training Tips and Recommendations
Improving Model Performance
Increase Data Volume: Aim for at least 50-100 images per category
Data Augmentation: Proactively vary angles, distances, and lighting during capture
Negative Samples: Include some images without target objects to help reduce false positives
Balanced Dataset: If identifying multiple categories, ensure similar image counts for each category
Common Questions
Q: What if model detection results are unsatisfactory?
Check annotation accuracy
Increase the number of training images
Try larger models (like YOLOv8s) or more training epochs
Capture more images from different scenarios
Q: How long does training take?
With approximately 50 images and YOLOv8n, training typically takes 10-20 minutes
The platform automatically adjusts based on the selected GPU
Q: Can I train locally?
Yes, but you’ll need to configure the Python environment and GPU drivers. For beginners, the Ultralytics platform is recommended for quickly validating ideas.