6.4 Reversing Aid
With the development of science and technology, a lot of high-tech products have been installed in cars, among which the reversing assist system is one of them. Here we use ultrasonic module, LCD, LED and buzzer to make a simple ultrasonic reversing assist system.
Required Components
In this project, we need the following components.
It’s definitely convenient to buy a whole kit, here’s the link:
Name |
ITEMS IN THIS KIT |
LINK |
|---|---|---|
3 in 1 Starter Kit |
380+ |
You can also buy them separately from the links below.
COMPONENT INTRODUCTION |
PURCHASE LINK |
|---|---|
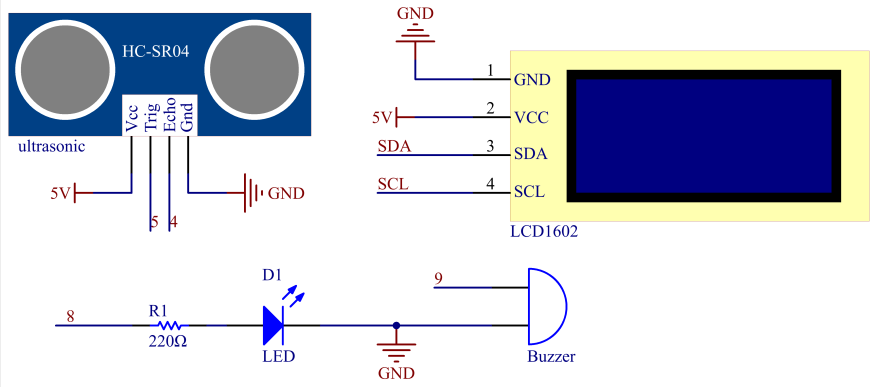
Schematic
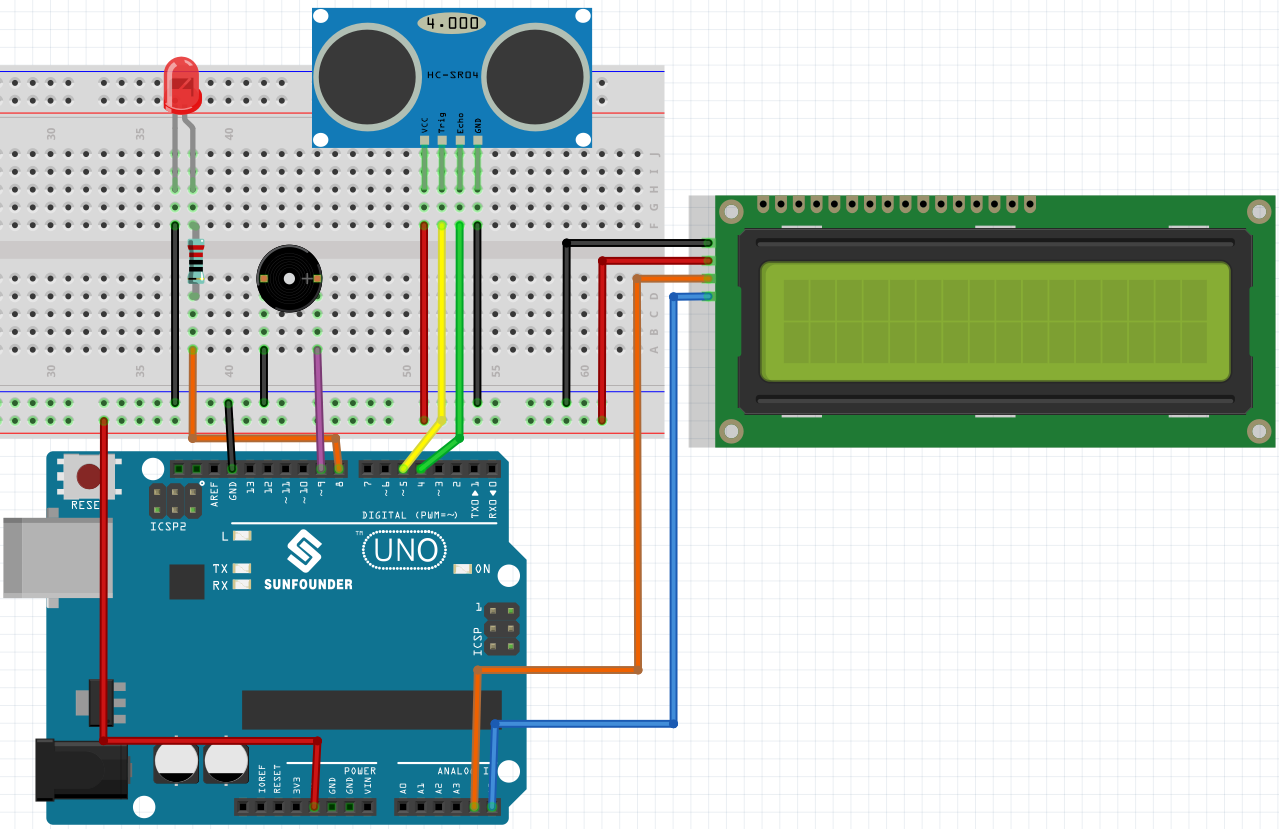
Wiring
Code
Note
You can open the file
6.4_reversingAid.inounder the path of3in1-kit\basic_project\6.4_reversingAiddirectly.Or copy this code into Arduino IDE 1/2.
The
LiquidCrystal I2Clibrary is used here, you can install it from the Library Manager.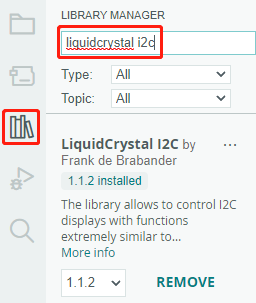
After the code is successfully uploaded, the current detected distance will be displayed on the LCD. Then the buzzer will change the sounding frequency according to different distances.
Note
If the code and wiring are fine, but the LCD still does not display content, you can turn the potentiometer on the back.
How it works?
This code helps us create a simple distance measuring device that can measure the distance between objects and provide feedback through an LCD display and a buzzer.
The loop() function contains the main logic of the program and runs continuously. Let’s take a closer look at the loop() function.
Loop to read distance and update parameters
In the
loop, the code first reads the distance measured by the ultrasonic module and updates the interval parameter based on the distance.// Update the distance distance = readDistance(); // Update intervals based on distance if (distance <= 10) { intervals = 300; } else if (distance <= 20) { intervals = 500; } else if (distance <= 50) { intervals = 1000; } else { intervals = 2000; }
Check if it’s time to beep
The code calculates the difference between the current time and the previous beep time, and if the difference is greater than or equal to the interval time, it triggers the buzzer and updates the previous beep time.
unsigned long currentMillis = millis();
if (currentMillis - previousMillis >= intervals) {
    Serial.println("Beeping!");
    beep();
    previousMillis = currentMillis;
}
Update LCD display
The code clears the LCD display and then displays “Dis:” and the current distance in centimeters on the first line.
lcd.clear();
lcd.setCursor(0, 0);
lcd.print("Dis: ");
lcd.print(distance);
lcd.print(" cm");

delay(100);