Note
Hello, welcome to the SunFounder Raspberry Pi & Arduino & ESP32 Enthusiasts Community on Facebook! Dive deeper into Raspberry Pi, Arduino, and ESP32 with fellow enthusiasts.
Why Join?
Expert Support: Solve post-sale issues and technical challenges with help from our community and team.
Learn & Share: Exchange tips and tutorials to enhance your skills.
Exclusive Previews: Get early access to new product announcements and sneak peeks.
Special Discounts: Enjoy exclusive discounts on our newest products.
Festive Promotions and Giveaways: Take part in giveaways and holiday promotions.
👉 Ready to explore and create with us? Click [here] and join today!
1.2 Beep
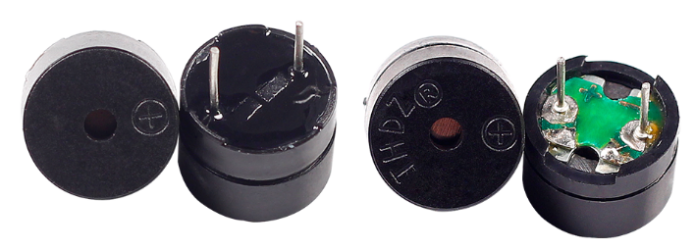
The active buzzer is a typical digital output device that is as easy to use as lighting up an LED!
Two types of buzzers are included in the kit. We need to use active buzzer. Turn them around, the sealed back (not the exposed PCB) is the one we want.
Required Components
In this project, we need the following components.
It’s definitely convenient to buy a whole kit, here’s the link:
Name |
ITEMS IN THIS KIT |
LINK |
|---|---|---|
3 in 1 Starter Kit |
380+ |
You can also buy them separately from the links below.
COMPONENT INTRODUCTION |
PURCHASE LINK |
|---|---|
- |
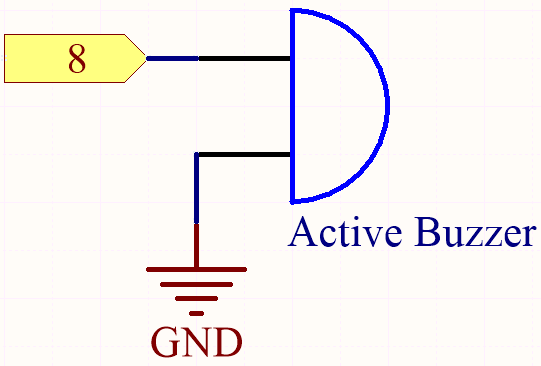
Schematic
Wiring

Code
Note
You can open the file
1.2.beep.inounder the path of3in1-kit\basic_project\1.2.beep.Or copy this code into Arduino IDE.
Or upload the code through the Arduino Web Editor.
After the code is uploaded successfully, you will hear a beep every second.