DIY RasPad Monitor Device
Description
You can turn RasPad3 into a game screen playing with your friends, a smart alarm showing the weather and time, a display monitoring your robot’s action and many other things.
This article will show you how to DIY a RasPad Monitor Device on your RasPad 3. Let’s take a look!
Required Components
A RasPad 3
8G+ SD Card
Scratch 3 (either online or offline)
Micro SD Card Reader
40P Ribbon Cable
T-Type GPIO Extension Board
Breadboard
PIR Module
Camera Module
FFC Cable
Jump Wire F/M
You Will Learn
Use Raspberry Pi extensions on Scratch.
Use audio functions on Scratch.
Use PIR module.
Lesson Guide
Build the Circuit
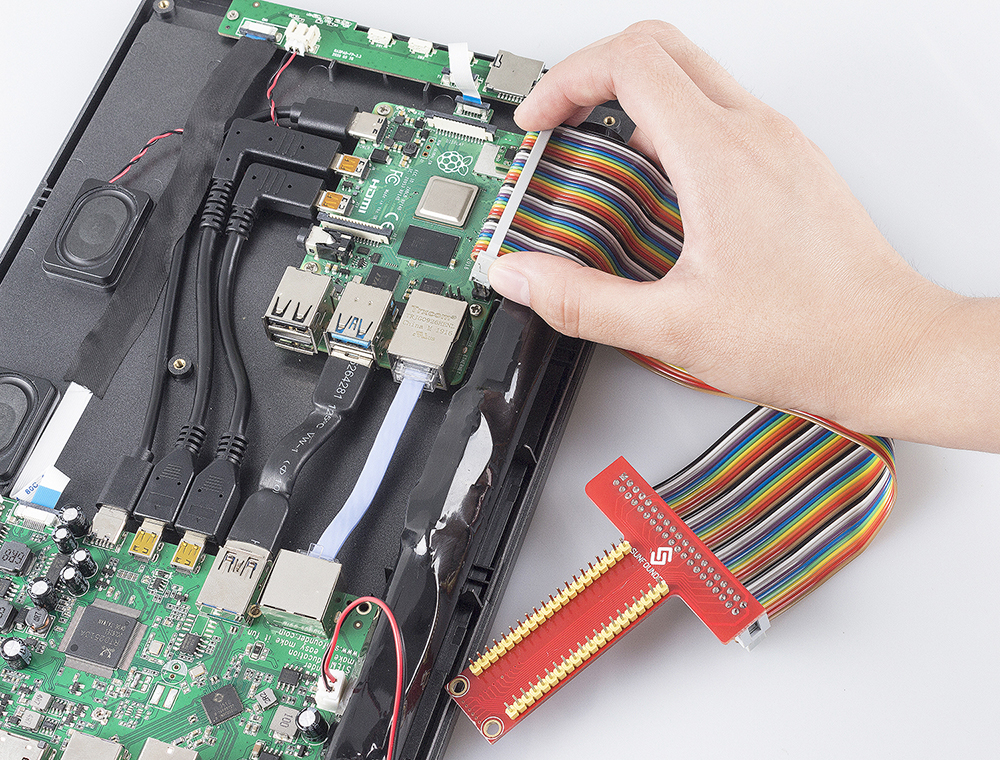
First connect the GPIO Extension Board, please read GPIO Extension Board for specific steps.
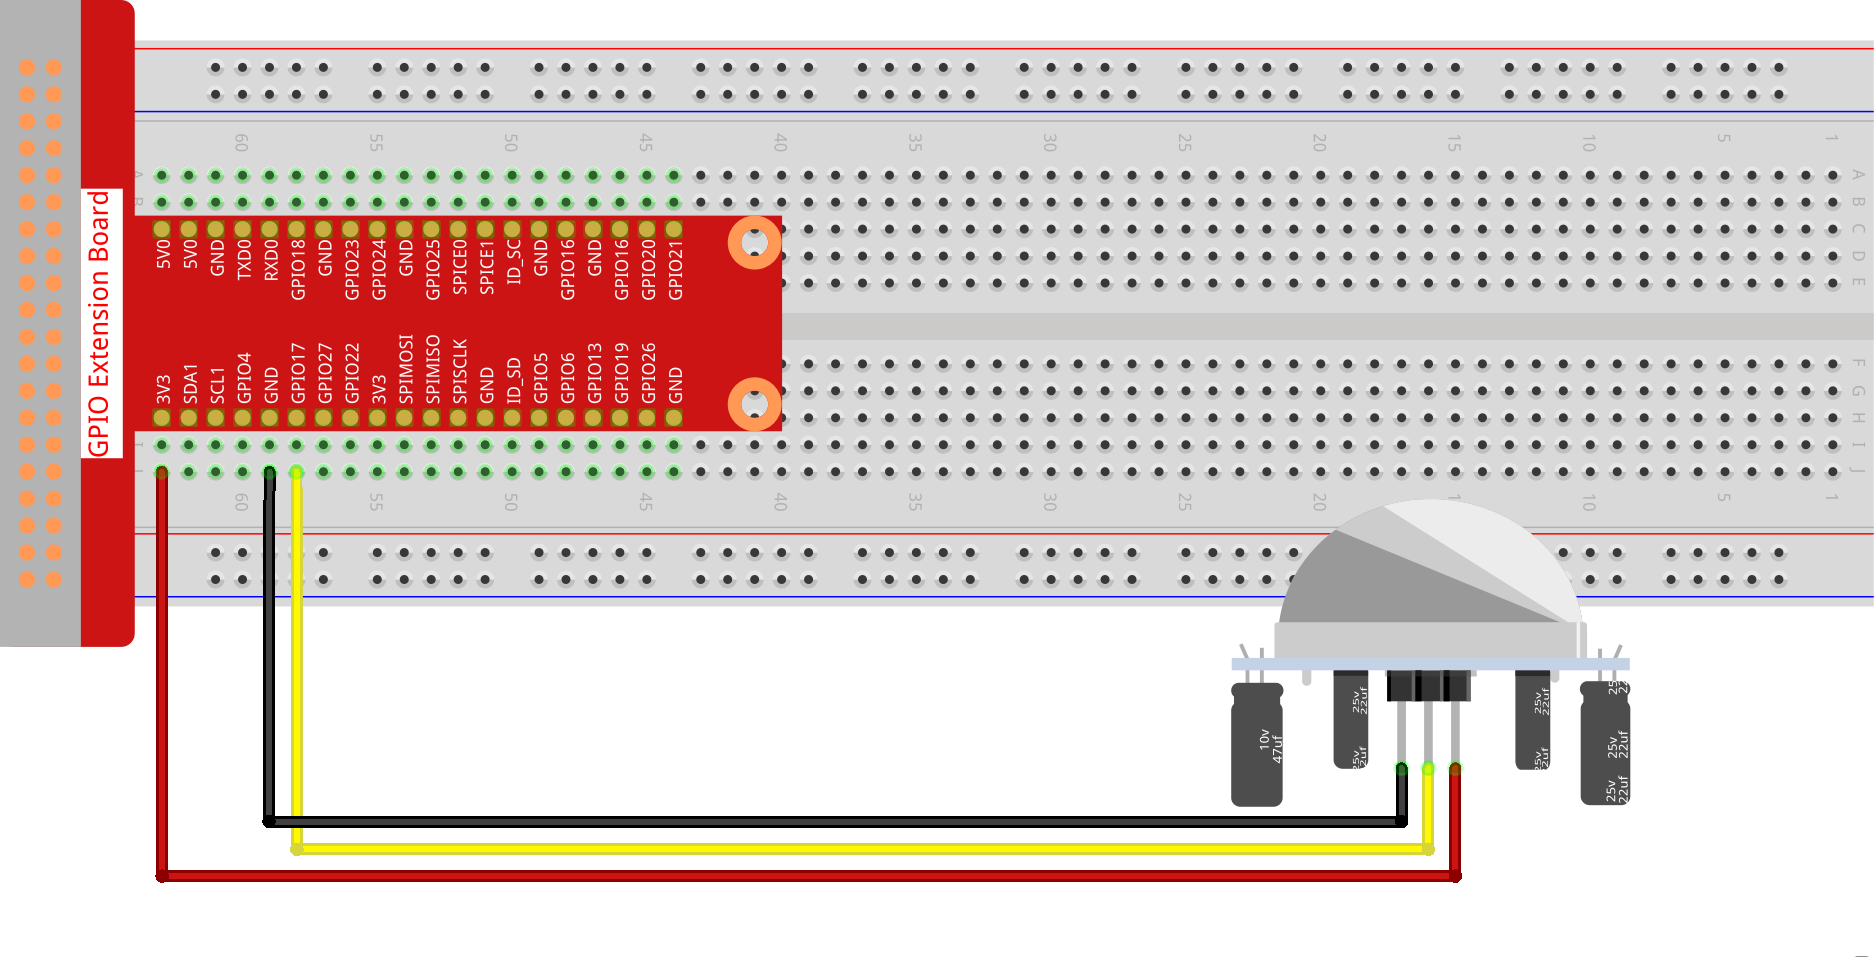
Plug the T-type GPIO extension board into the breadboard and build the circuit.
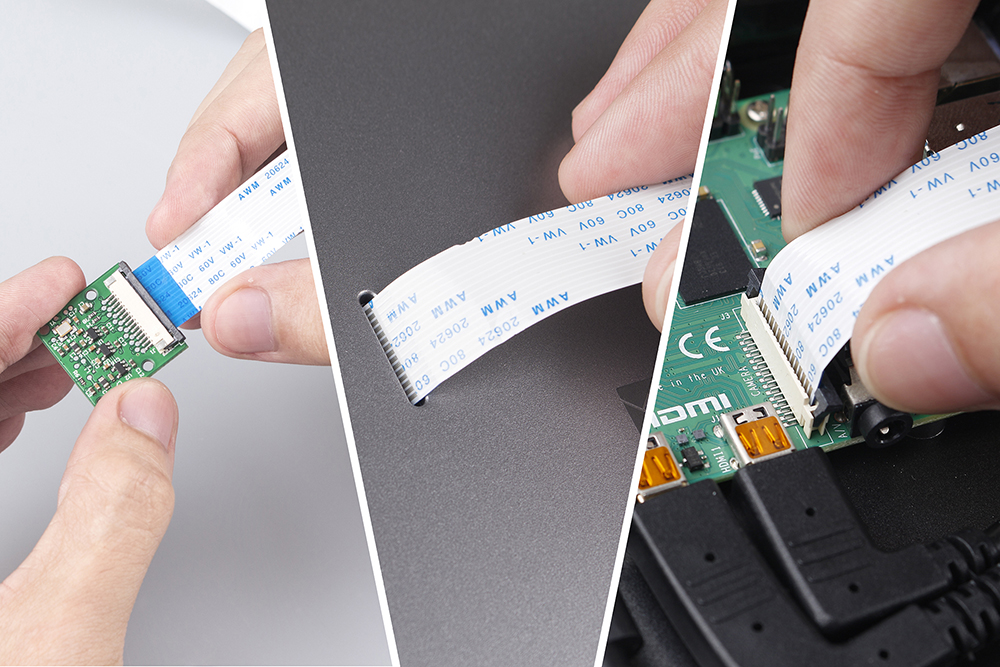
For the camera installation tutorial, please refer to Assemble the Camera Module.
Programming with Scratch 3
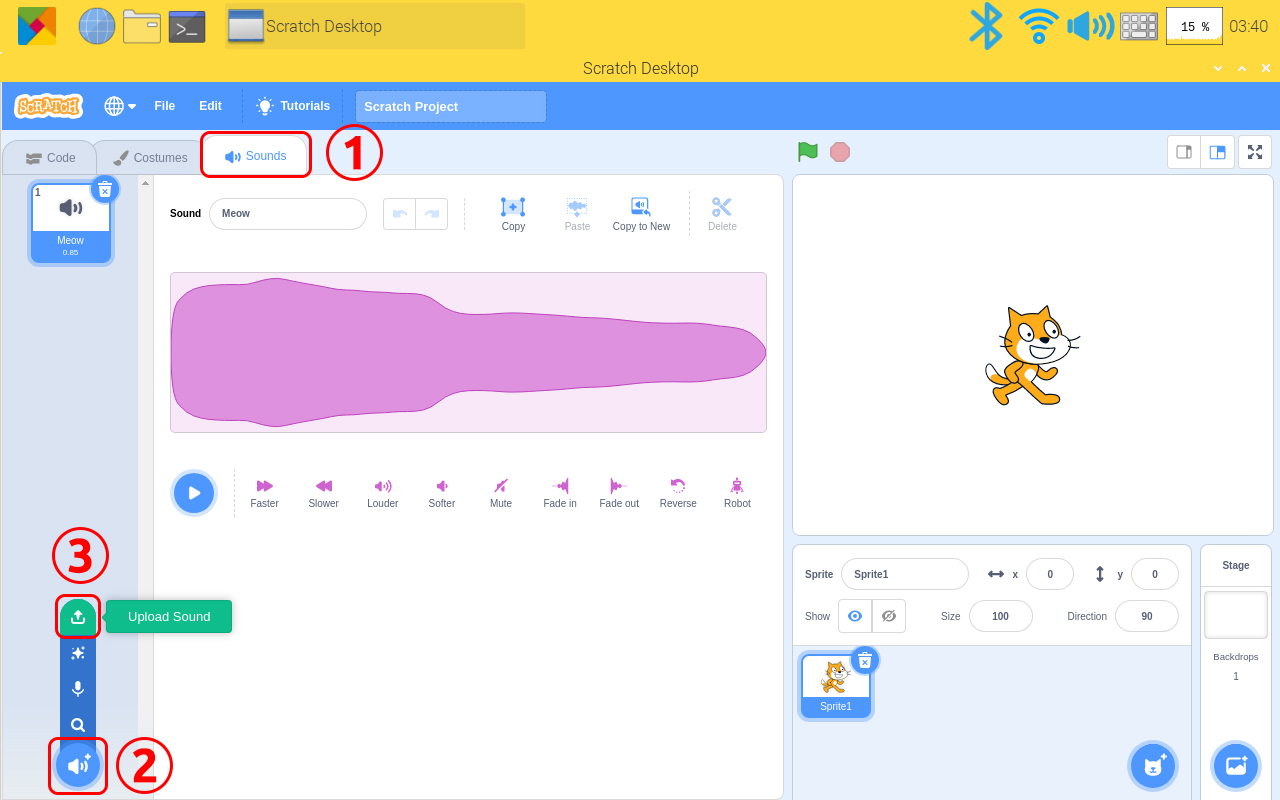
In this step you will learn how to upload the prepared music to the Scratch. Tap the “Sounds”option on the left upper corner,then tap the “speaker” icon and choose “Upload Sound” icon to upload the prepared music file - hello, finally tap“Open” to confirm.
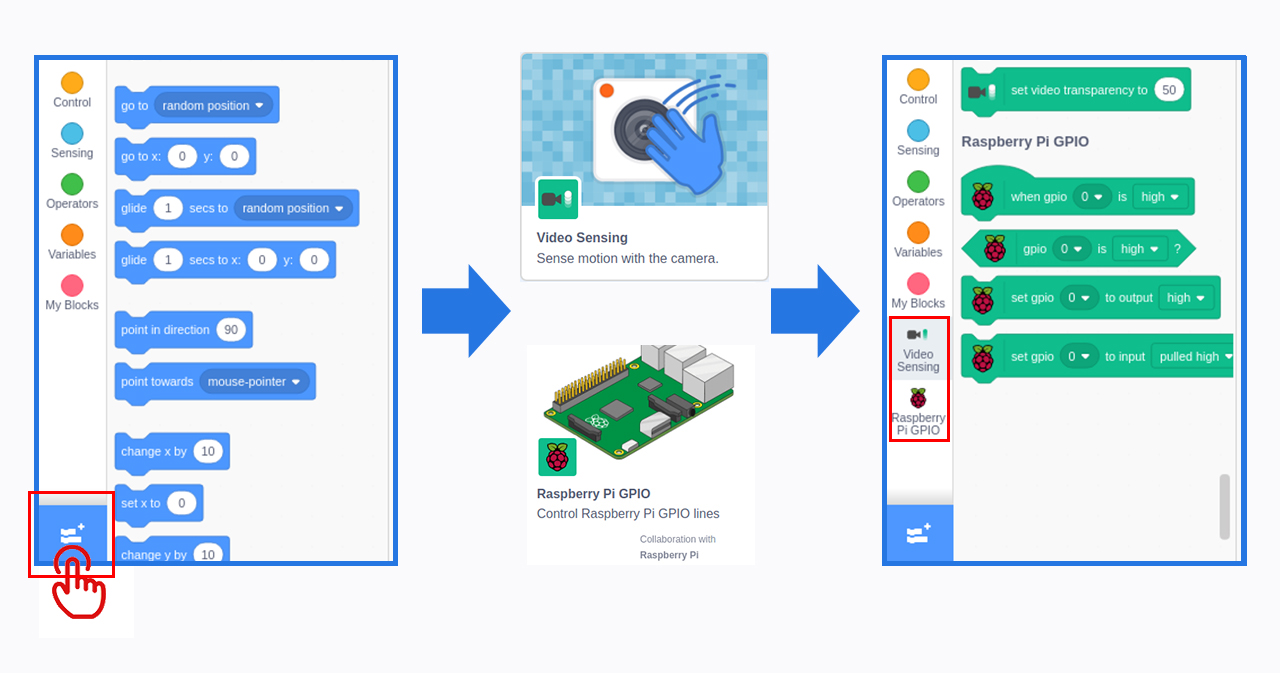
Tap Add icon at lower left corner and choose“Video Sensing”and“Raspberry Pi GPIO”to add two functions.
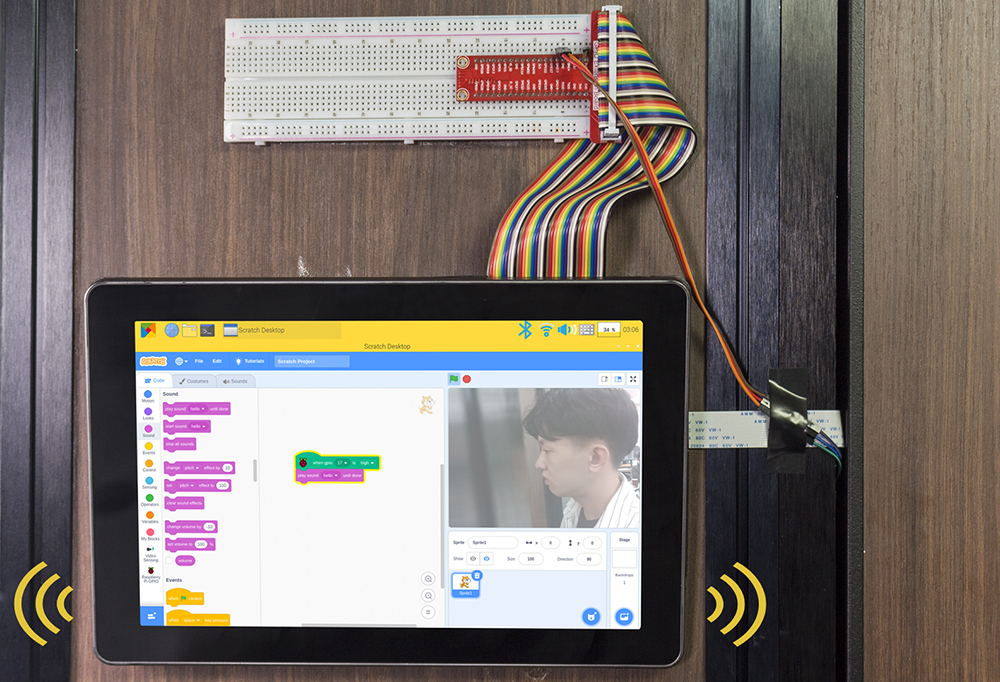
Back to the main page, drag a “when gpio 0 is high” from Raspberry Pi GPIO function and a “play sound (hello) until done”to the coding area.

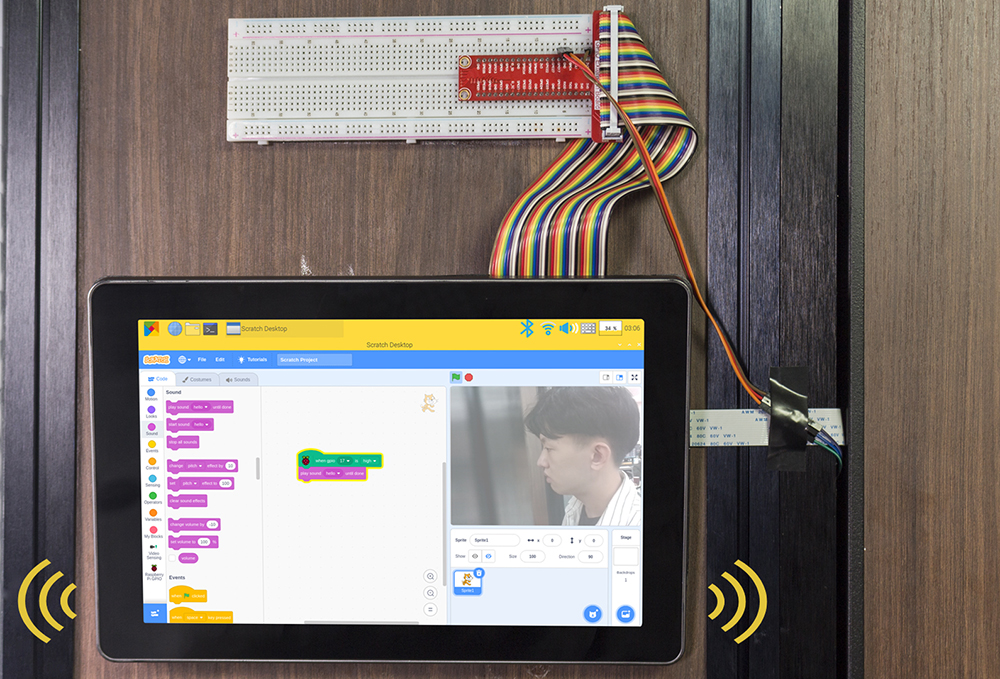
Stick the pir module and camera to the wall outside the door, And stick the RasPad to the wall inside the door or anywhere. When the door is opened, you will hear music and then see who is there.
If you hate reading, see this video.
In this article, we introduce how to use RasPad 3 to DIY a RasPad Monitor Device. Surely, you can also add a relay and a stepper motor to open the door when someone is detected at the door.