Use the SSH Remote Control
Bash is the standard default shell of Linux, and can be opened on the Raspberry Pi by using SSH. The Shell itself is a program written in C programming language that acts as a bridge linking the customers and Unix/Linux systems.
For Linux or/Mac OS X Users
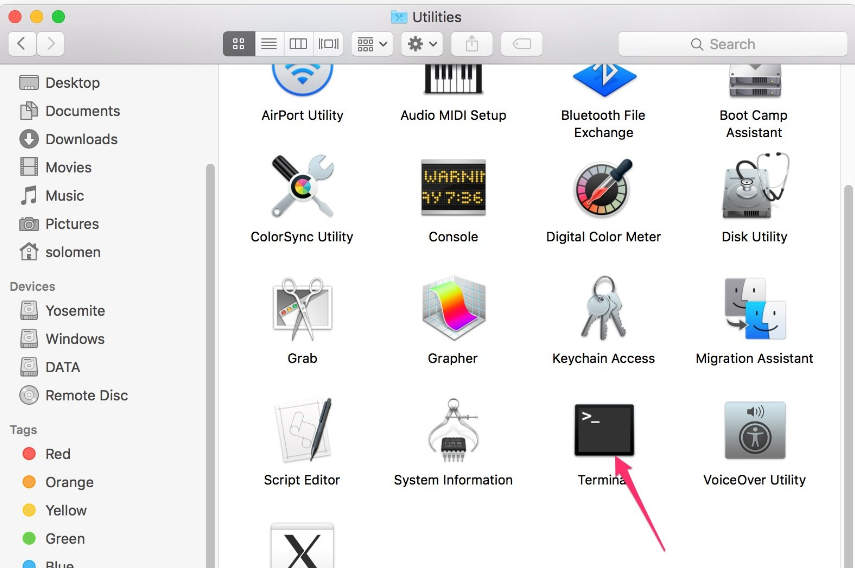
Go to Applications -> Utilities, find the Terminal, and open it.

Type in ssh pi@ip_address where pi is the username and ip_address is the IP address of the Raspberry Pi. For example:
ssh pi@192.168.18.197
At the prompt, type yes in lowercase.

The default password is raspberry.
Note
The characters do not display when typing in the password. Make sure to input the correct password.

We now get the Raspberry Pi connected and are ready to go to the next step.

For Windows Users
Windows users can use SSH with the PuTTY application.
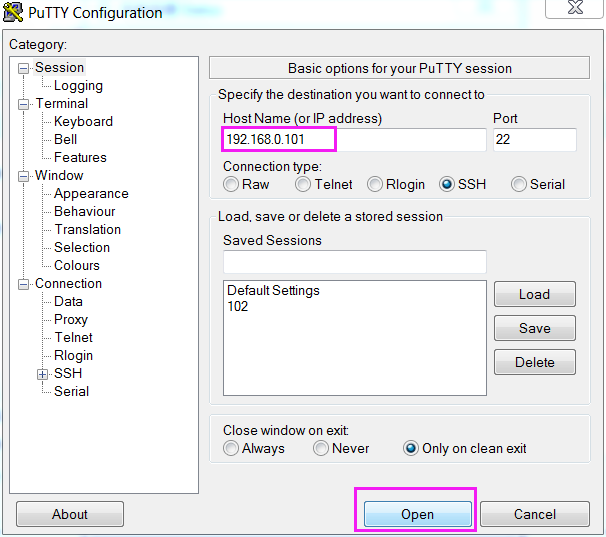
Download PuTTY, open the application, and click Session on the left of the tree-like structure. Enter the IP address of the Raspberry Pi in the text box under Host Name, and enter 22 under Port.

Click Open.
Note
When first logging in to the Raspberry Pi with the IP address, there will be a security prompt. Click Yes to continue.
When the PuTTY window prompts login as:, type in pi for the user name of the Raspberry Pi. The default password is raspberry.
Note
The characters do not display when typing in the password. Make sure to input the correct password.

Here, we get the Raspberry Pi connected and it is time to conduct the next steps.