Note
Hello, welcome to the SunFounder Raspberry Pi & Arduino & ESP32 Enthusiasts Community on Facebook! Dive deeper into Raspberry Pi, Arduino, and ESP32 with fellow enthusiasts.
Why Join?
Expert Support: Solve post-sale issues and technical challenges with help from our community and team.
Learn & Share: Exchange tips and tutorials to enhance your skills.
Exclusive Previews: Get early access to new product announcements and sneak peeks.
Special Discounts: Enjoy exclusive discounts on our newest products.
Festive Promotions and Giveaways: Take part in giveaways and holiday promotions.
👉 Ready to explore and create with us? Click [here] and join today!
Custom Step
In the previous projects, we used a lot of actions that we wrote, so how are these actions composed and done? Generally speaking, an action is composed of one or more steps.
In this project, we will learn how to customize PiSloth’s step.
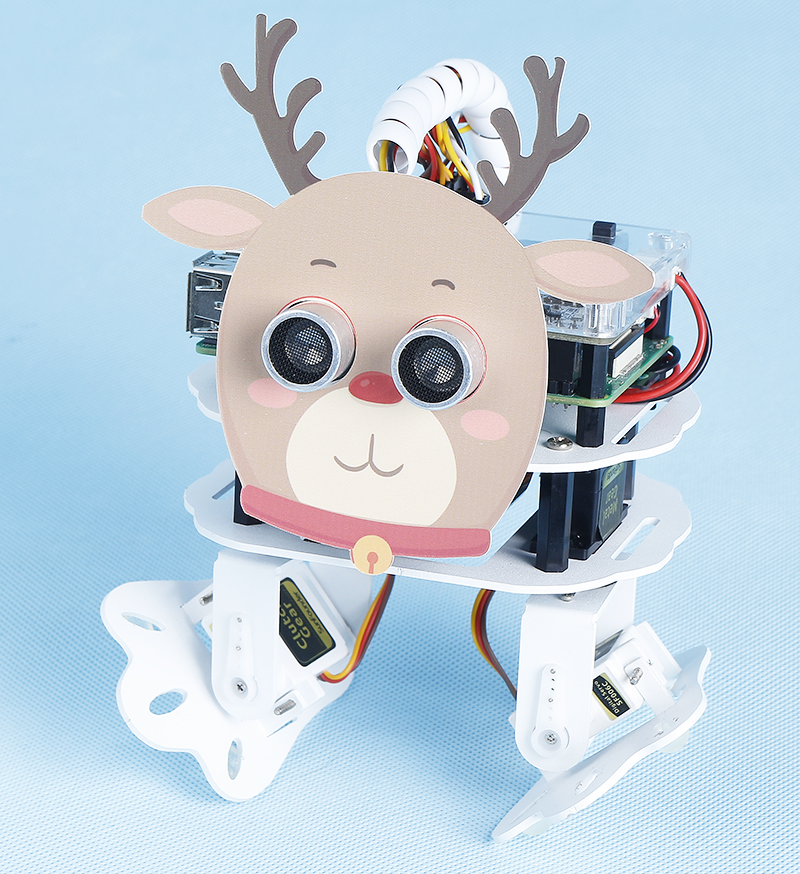
All we have to do is to use the buttons in the remote control page to make PiSloth complete the step shown in the figure below, and then get the angles of the 4 Servos at that time.
Note
You can download and print the PDF Cartoon Mask for your PiSloth.
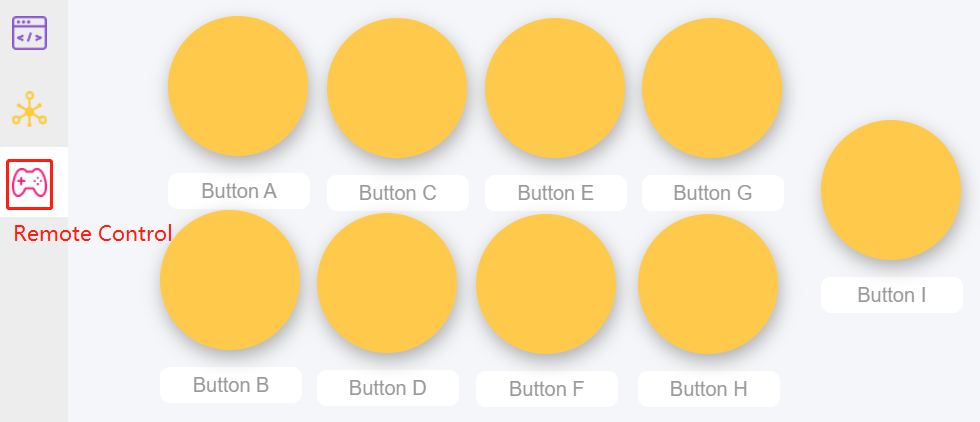
Step 1: Drag out 9 buttons in the Remote Control to control the rotation angles of the 4 Servos on the PiSloth.
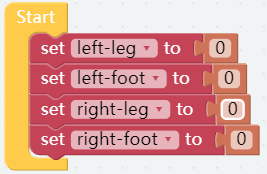
Step 2: Create 4 variables to store the angles of the 4 Servos.
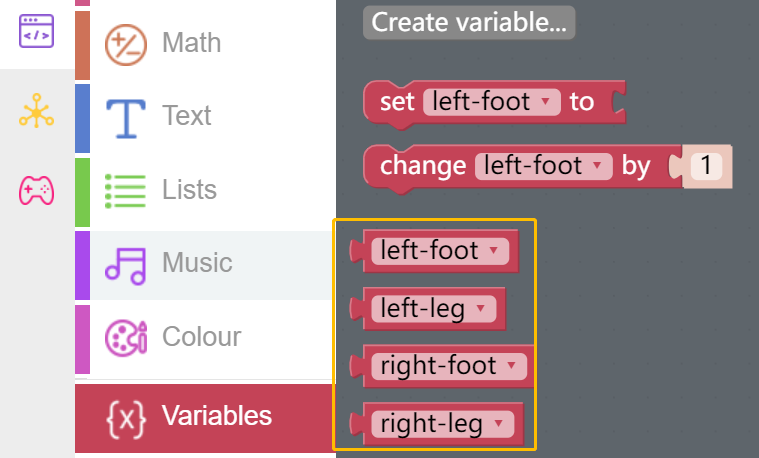
Then initialize the angle to 0.
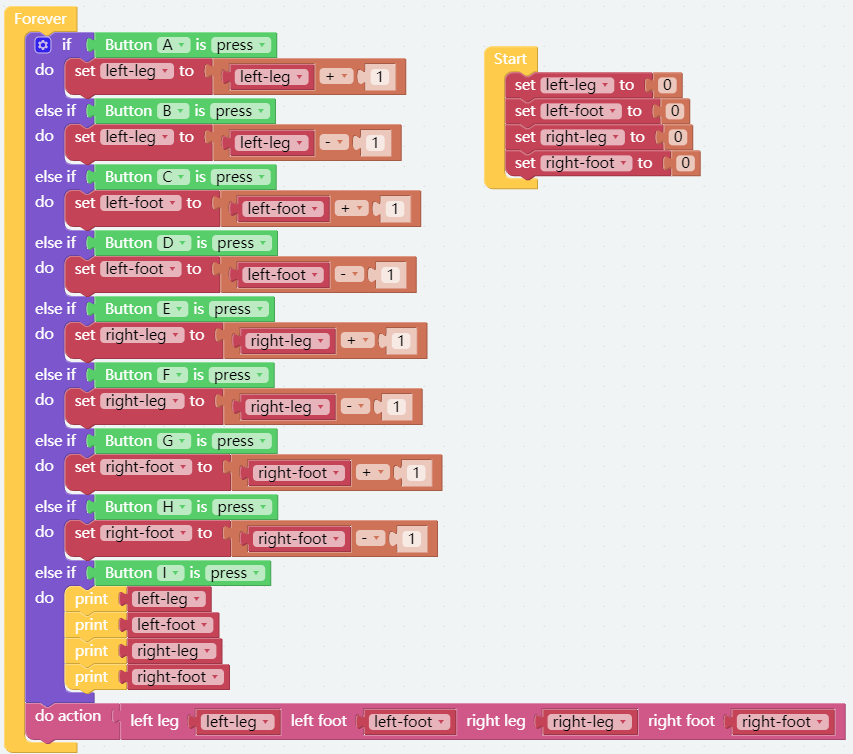
Step 3: Reads the values of the different buttons that are used to control the angles of the Servos.
button AB control the left-leg.
button CD control the left-foot.
button EF control the right-leg.
button GH control the right-foot.
Press button I and the angles of the 4 Servos will be printed in the Debug Monitor.
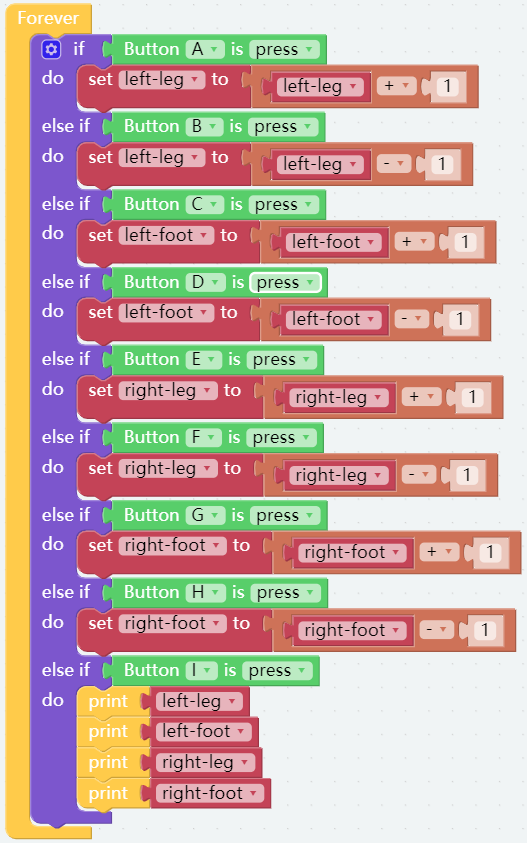
Step 4: At the end of the Forever block, fill in the angle values read into the 4 servos and use the do action block to make PiSloth do this step.

Step 5: Once the code is complete, click the download icon in the bottom right corner to download and run the code. Now we can click button CD and button GH (according to the actual code) to make PiSloth pose like this, you can also make it do other steps.
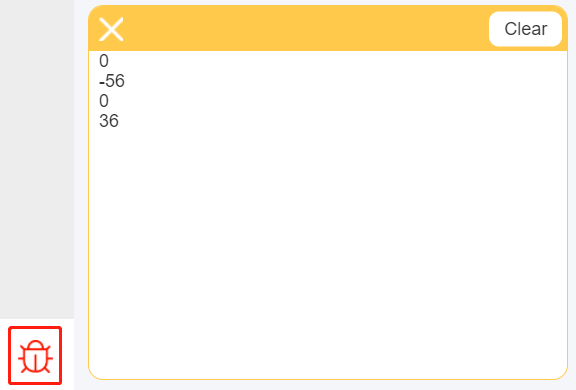
Step 6: Click on the Debug Monitor icon in the bottom left corner, and you will see the angle of the 4 servos in the Debug Monitor at that moment when you press button I.
Note
Some times more than 2 sets of data may appear because if you click button I for a little longer, EzBlock will think button I was clicked 2 times. You can clear the data and click button I again.
The complete code is as follows: