Note
Welcome to the SunFounder Raspberry Pi, Arduino & ESP32 Community on Facebook!
Get technical support and troubleshooting help.
Learn and share projects, tips, and tutorials.
Access early product previews and updates.
Enjoy exclusive discounts and giveaways.
👉 Join us here: [here]
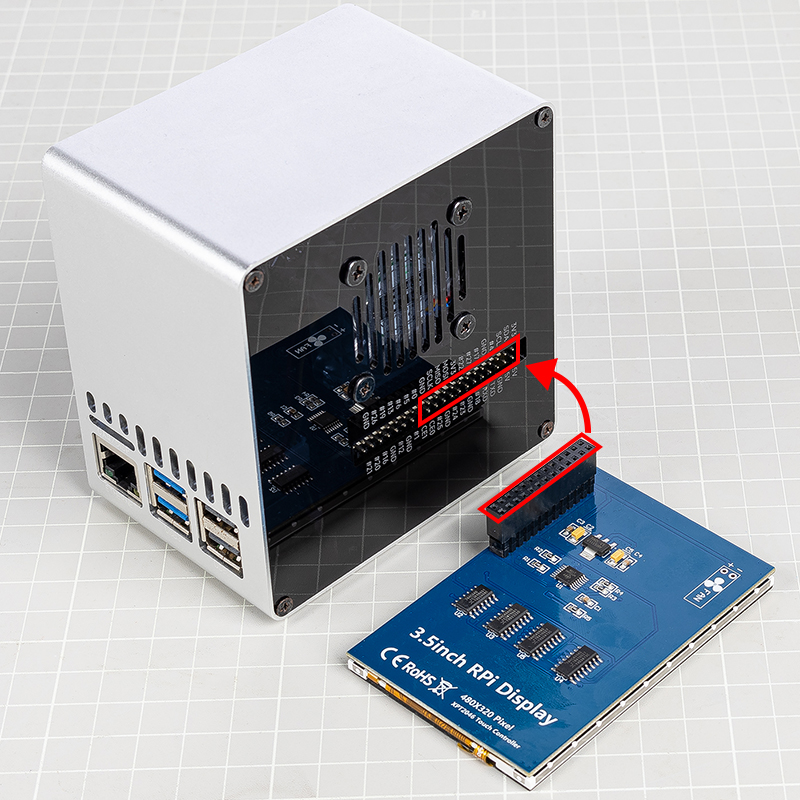
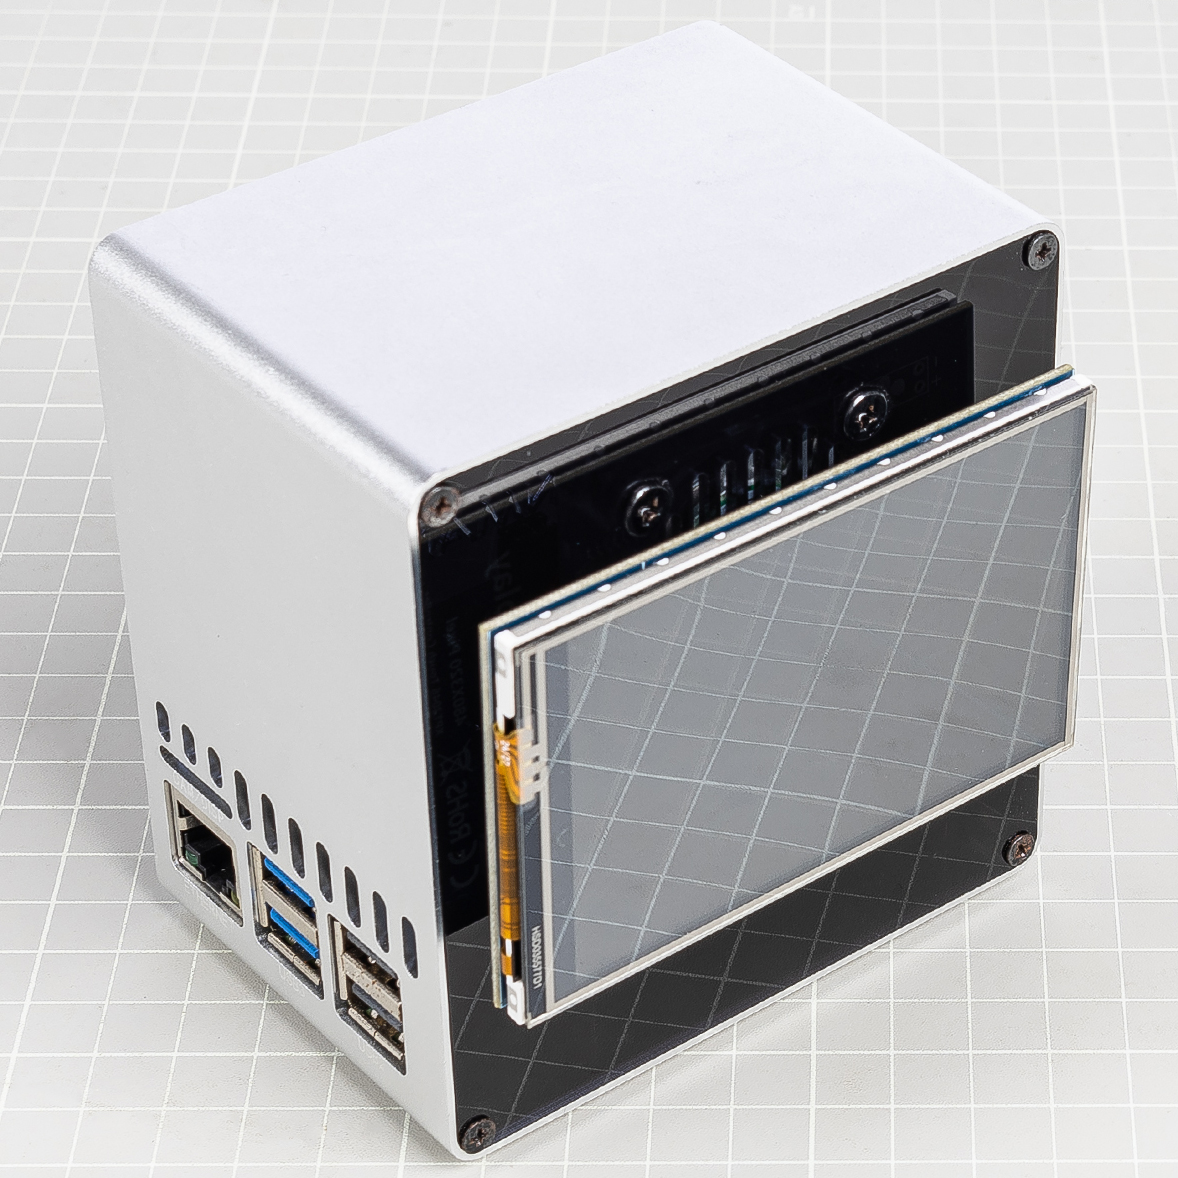
3.5-inch Touch Screen
Note
The Pironman 5 series do not include a 3.5-inch touch screen. You will need to prepare one yourself or purchase it from our official website:
The 3.5-inch touch screen connects directly to the Raspberry Pi GPIO header, providing both display and touch control for the Pironman 5. Please follow the steps carefully to ensure correct installation and avoid hardware damage.
More details can be found here: 3.5-inch touch screen Documentation.
Assemble
Warning
When installing the 3.5-inch touch screen onto the Pironman 5, ensure the pins are perfectly aligned. The header must match the Raspberry Pi’s GPIO interface with no offset. Misalignment may damage the screen or even the Raspberry Pi. Double-check connections before powering on!
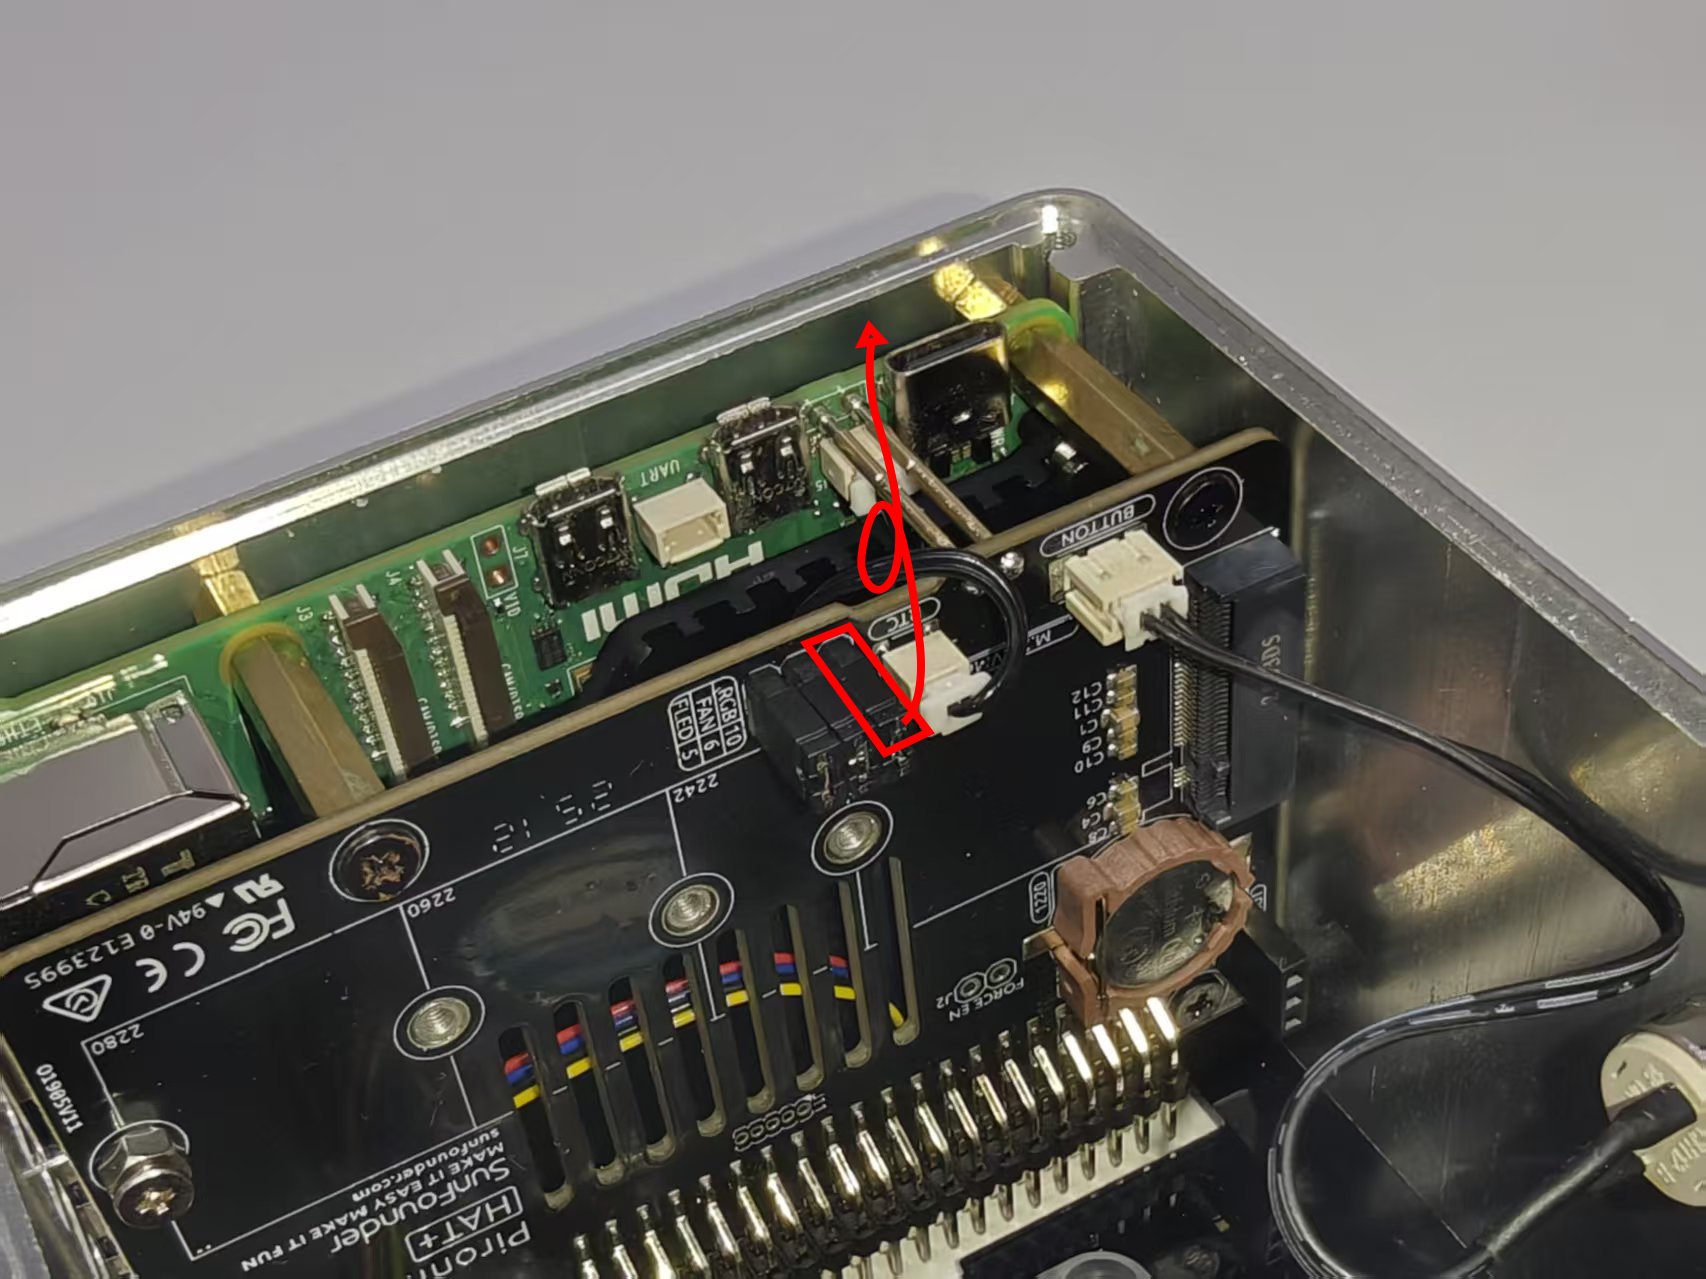
Remove RGB Jumper
When using the Pironman 5 with the 3.5-inch touch screen, note that the RGB LEDs on the IO Expander share the same SPI MOSI pin (GPIO10) as the screen. To prevent conflicts and ensure proper operation:
On the IO Expander, remove the jumper cap from the RGB LED pins (above J9).
Disable the RGB LED control service:
sudo pironman5 -re false
sudo systemctl restart pironman5.service
This frees the SPI interface for the 3.5-inch touch screen and avoids display issues.
Driver Installation
For detailed instructions, please refer to 3.5 Inch IPS Screen Driver Installation, which describes the driver installation for different systems.