Servo Configuration
Since the servos used in this kit are adjusted by software and there’s no such physical sticking point as other servos, here we need to configure the servo via software. First you need to finish some software installation before the configuration.
Note
Please do forget to put in the battery and slide the power switch to ON in following chapters.
Get Source Code
You can find the source code in our Github repositories. Download the source code by git clone:
cd /home/pi/
git clone --recursive https://github.com/sunfounder/SunFounder_PiCar-S.git -b V3.0
Note
Please pay attention to your typing – if you get the prompt of entering your user name and password, you may have typed wrong. If unluckily you did so, press Ctrl + C to exit and try again.
Go to the Code Directory
cd ~/SunFounder_PiCar-S/
ls
Enter the code directory and you can see the installation script:

Install the Environment via Script
You can get all the required software and configuration done with the installation script. If you want to do step by step instead, refer to the operations in Appendix 1: Installing Manually.
sudo ./install_dependencies
Note
The installation script will install the required components and configure for the running environment. Make sure your Raspberry Pi is connected to the Internet during the installation, or it would fail.
The Raspberry Pi will prompt you to reboot after the installation. You’re recommended to type in yes to reboot.
Set the Servo to 90 Degrees
After reboot, type in the command:
picar
You can see three commands here.

The first one servo-install is for servo adjustment, which is used after the front wheels are assembled. The servo will rotate to 90 degrees after this command is run, so we will use this command here.
picar servo-install

Note
If the “OSError: [Errno 121] Remote I/O error” error message appears, open raspi-config:
sudo raspi-config
Then choose 3 Interfacing Options → P5 I2C → <YES> →OK to enable I2C service. You can use the up, down, left, and right keys on the keyboard to select, and then press Enter to confirm.
After the code is running, insert the rocker arm into the servo. You will see the rocker arm is rotate in clockwise and counterclockwise, then stop at a specific location. It means the servo is good. If the any of the conditions below happened to your servo, your servo is bad:
Noisy, hot.
If unplug the servo line and rotate the rocker arm, it sounds like “ka” “ka” “ka” or there has no sounds of gear driving.
Rotate slowly but continuously.
If you find one of the conditions above, please send e-mail to service@sunfounder.com . We will change a new one to you. If it is broken in the process of using or assembling, you should go to the official website www.sunfounder.com to buy.
Build the Rest of the Car
Warning
Please keep the command servo-install running in the whole process of assembly.
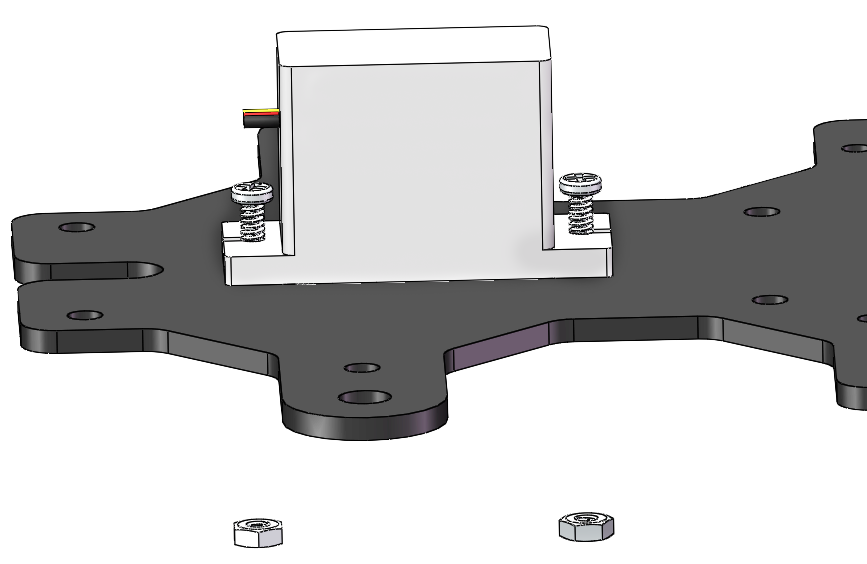
Mount the steering servo to the Upper Plate with two M2x8 Screws and two M2 nuts (pay attention to the direction of the servo wires):
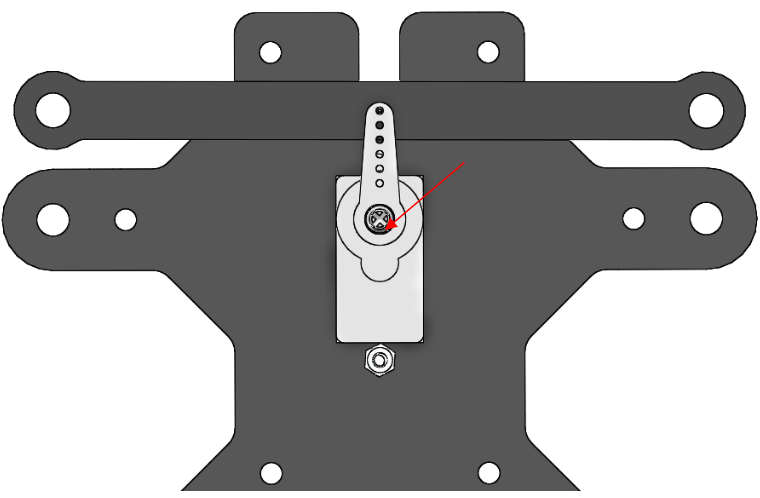
The Rocker Arm is facing straight ahead, and then inserted into the Servo shaft, and then fixed with Rocker Arm Fixing Screw (the shortest).
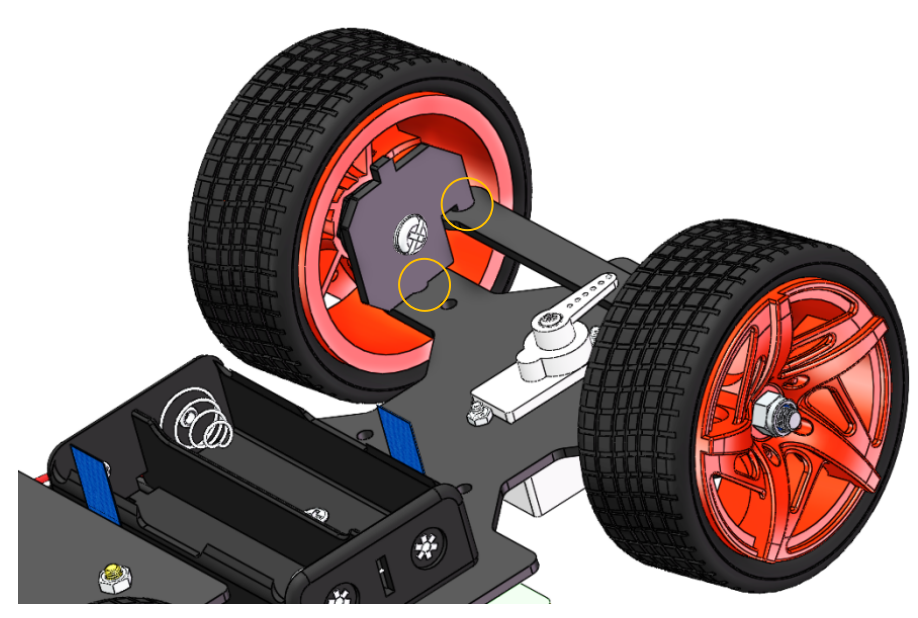
Mount the wheels onto the Upper Plate carefully.
Then put the assembled Front Half Chassis onto the Upper Plate with standoffs aligned with the holes.

Hold them carefully, turn upside down, and fasten the standoffs and the Upper Plate with four M3x8 screws:

So now, the whole assembly is DONE! Congratulations!