Note

Hello, welcome to the SunFounder Raspberry Pi & Arduino & ESP32 Enthusiasts Community on Facebook! Dive deeper into Raspberry Pi, Arduino, and ESP32 with fellow enthusiasts.

Why Join?

  • Expert Support: Solve post-sale issues and technical challenges with help from our community and team.

  • Learn & Share: Exchange tips and tutorials to enhance your skills.

  • Exclusive Previews: Get early access to new product announcements and sneak peeks.

  • Special Discounts: Enjoy exclusive discounts on our newest products.

  • Festive Promotions and Giveaways: Take part in giveaways and holiday promotions.

👉 Ready to explore and create with us? Click [here] and join today!

1.4 Upload the Libraries to Pico

In some projects, you will need additional libraries. So here we upload these libraries to Raspberry Pi Pico W first, and then we can run the code directly later.

  1. Download the relevant code from the link below.

  2. Open Thonny IDE and plug the Pico into your computer with a micro USB cable and click on the “MicroPython (Raspberry Pi Pico).COMXX” interpreter in the bottom right corner.
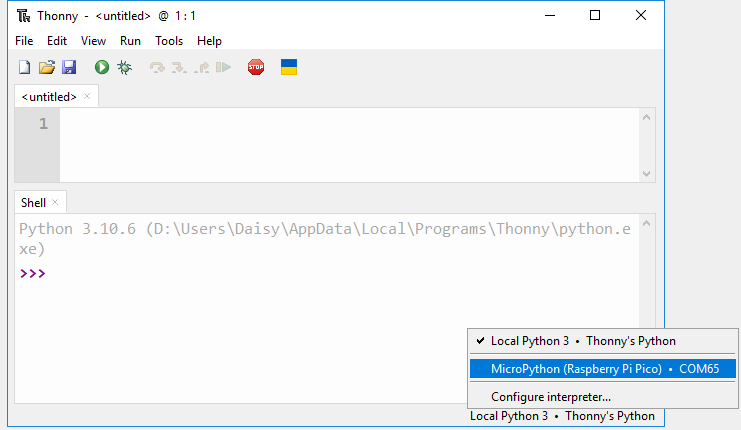
    ../../_images/sec_inter1.png
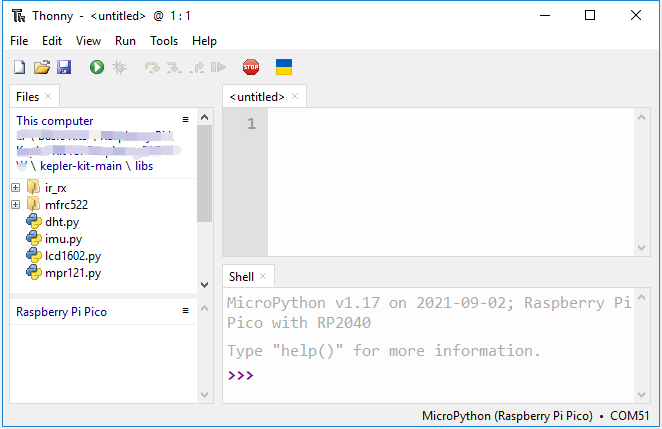
  3. In the top navigation bar, click View -> Files.

    ../../_images/th_files1.png
  4. Switch the path to the folder where you downloaded the code package before, and then go to the kepler-kit-main/libs folder.

    ../../_images/th_path1.png
  5. Select all the files or folders in the libs/ folder, right-click and click Upload to, it will take a while to upload.
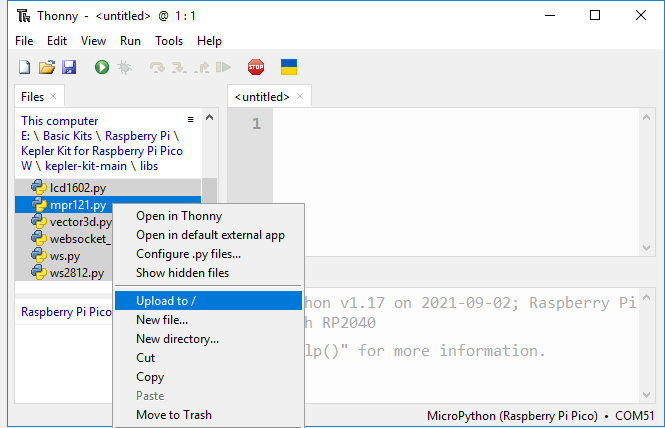
    ../../_images/th_upload1.png
  6. Now you will see the files you just uploaded inside your drive Raspberry Pi Pico.
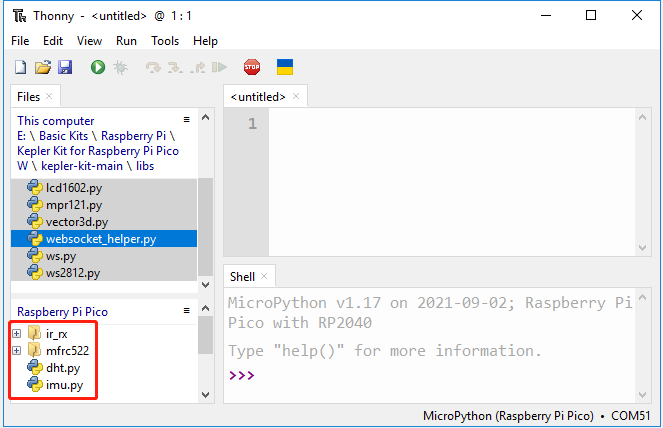
    ../../_images/th_done1.png