Play Mode
Are you eager to kick-start your Martian journey right away? Our Play Mode is perfectly tailored for those of you who just can’t wait to dive in. Equipped with factory-preloaded code, you can jump straight into the action after assembling your GalaxyRVR. Use the user-friendly SunFounder Controller app to explore its myriad of functions including first-person driving, switching between obstacle avoidance and follow modes, and even voice control.
But before you set off to explore the Red Planet, let’s make sure you are fully equipped and ready for the adventure. Below is a Quick Guide to assist you in this exciting journey!
Note
If your R3 board has already been uploaded with other code, but you want to continue using Play Mode, you will need to download the relevant code.
Then, open the
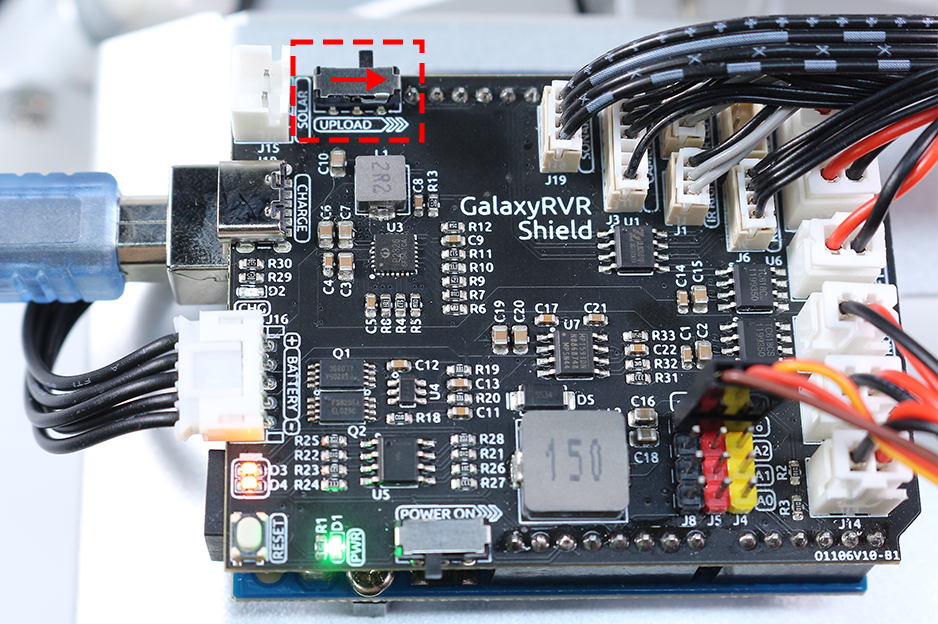
galaxy-rvr.inofile located in thegalaxy-rvr-main\galaxy-rvrdirectory.Move the switch to the right and then click Upload.
Q1: Compilation error: SoftPWM.h: No such file or directory?
Quick Guide
Let’s start the GalaxyRVR.
The first time you use your GalaxyRVR, it is recommended that you plug in a Type-C USB cable to fully charge the battery first. Then turn the power on.
To activate the ESP32 CAM, move the mode switch to the Run position, and press the reset button to reboot the R3 board. You will then observe a cyan light flashing on the bottom strip.
Install SunFounder Controller from APP Store(iOS) or Google Play(Android).
Connect to the
GalaxyRVRNetwork.For optimal communication between your mobile device and the Rover, you’ll need to connect them to the same local area network (LAN) provided by GalaxyRVR.
Find
GalaxyRVRon the list of available networks on your mobile device (tablet or smartphone), enter the password12345678, and connect to it.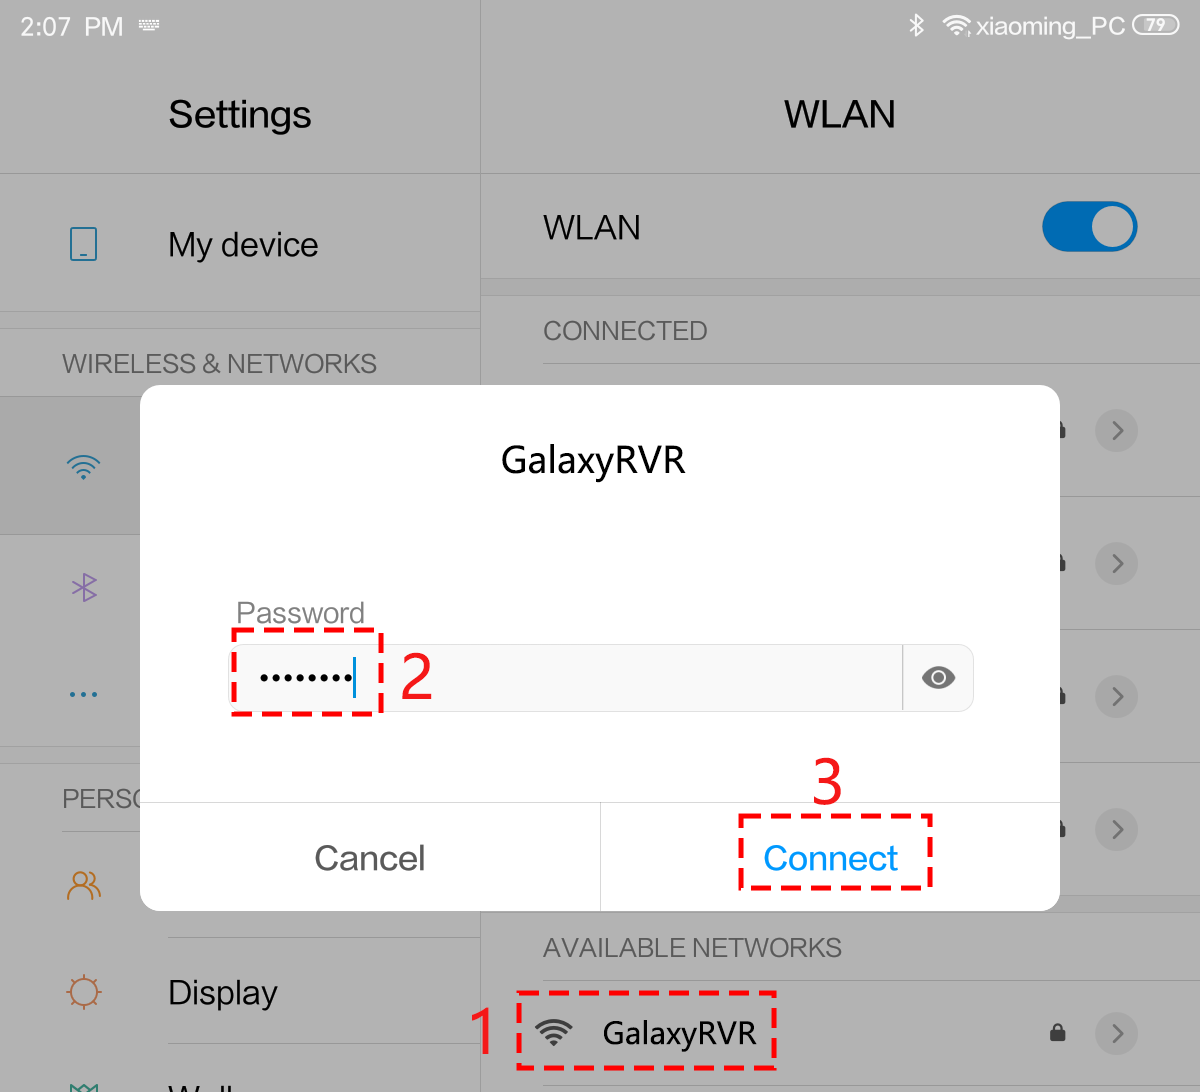
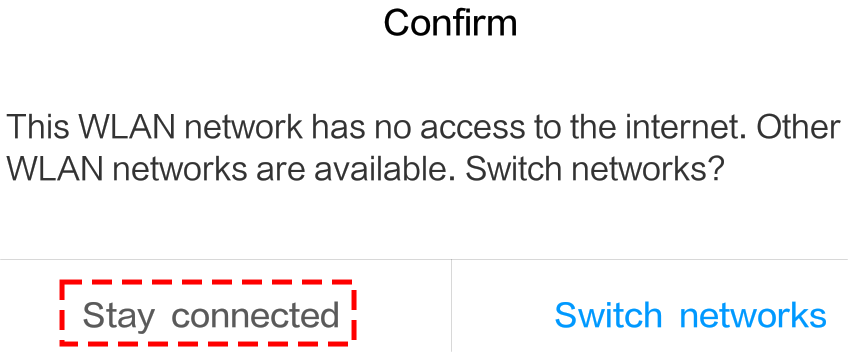
The default connection mode is AP mode. After you’ve connected, there might be a prompt warning that there is no internet access on this network. If so, choose “Stay connected”.
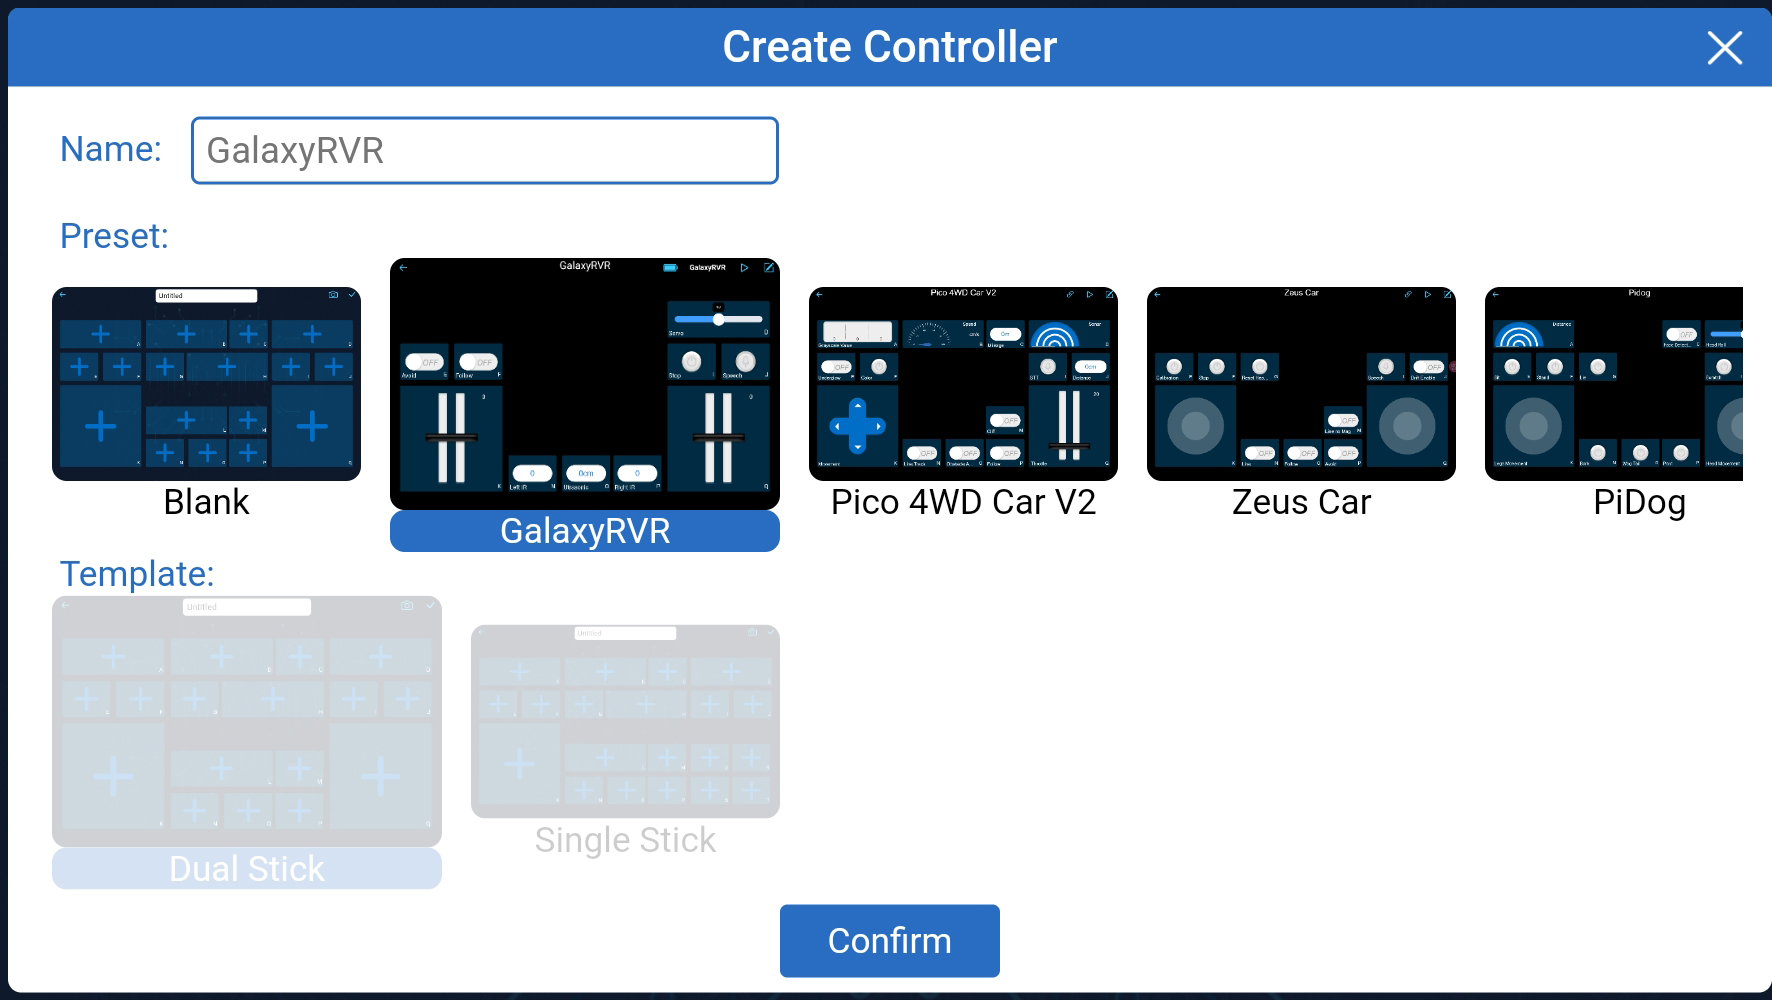
Set up a controller.
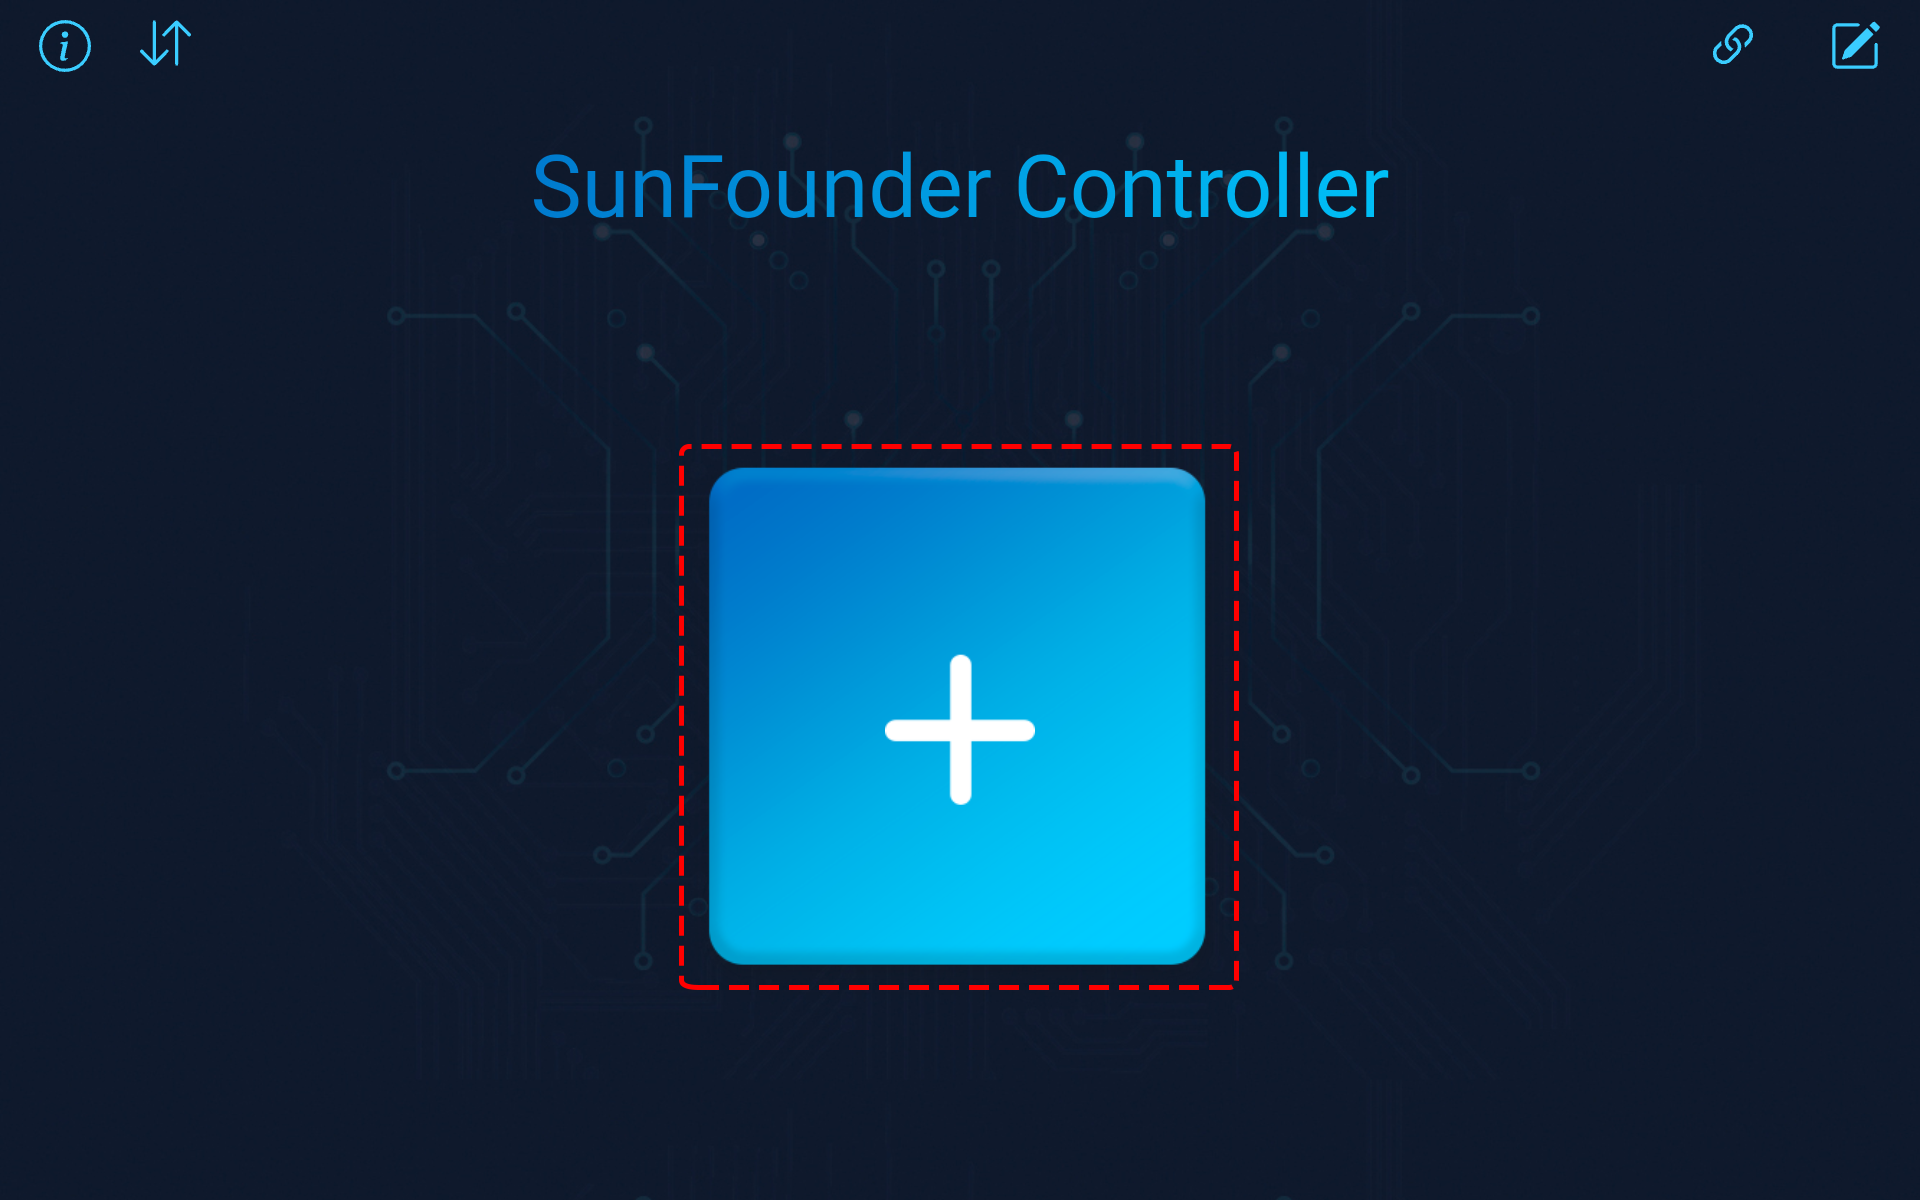
To create a controller on SunFounder Controller, tap the + icon.
Preset controllers are available for some products, here we choose GalaxyRVR. Give it a name, or simply tap Confirm.
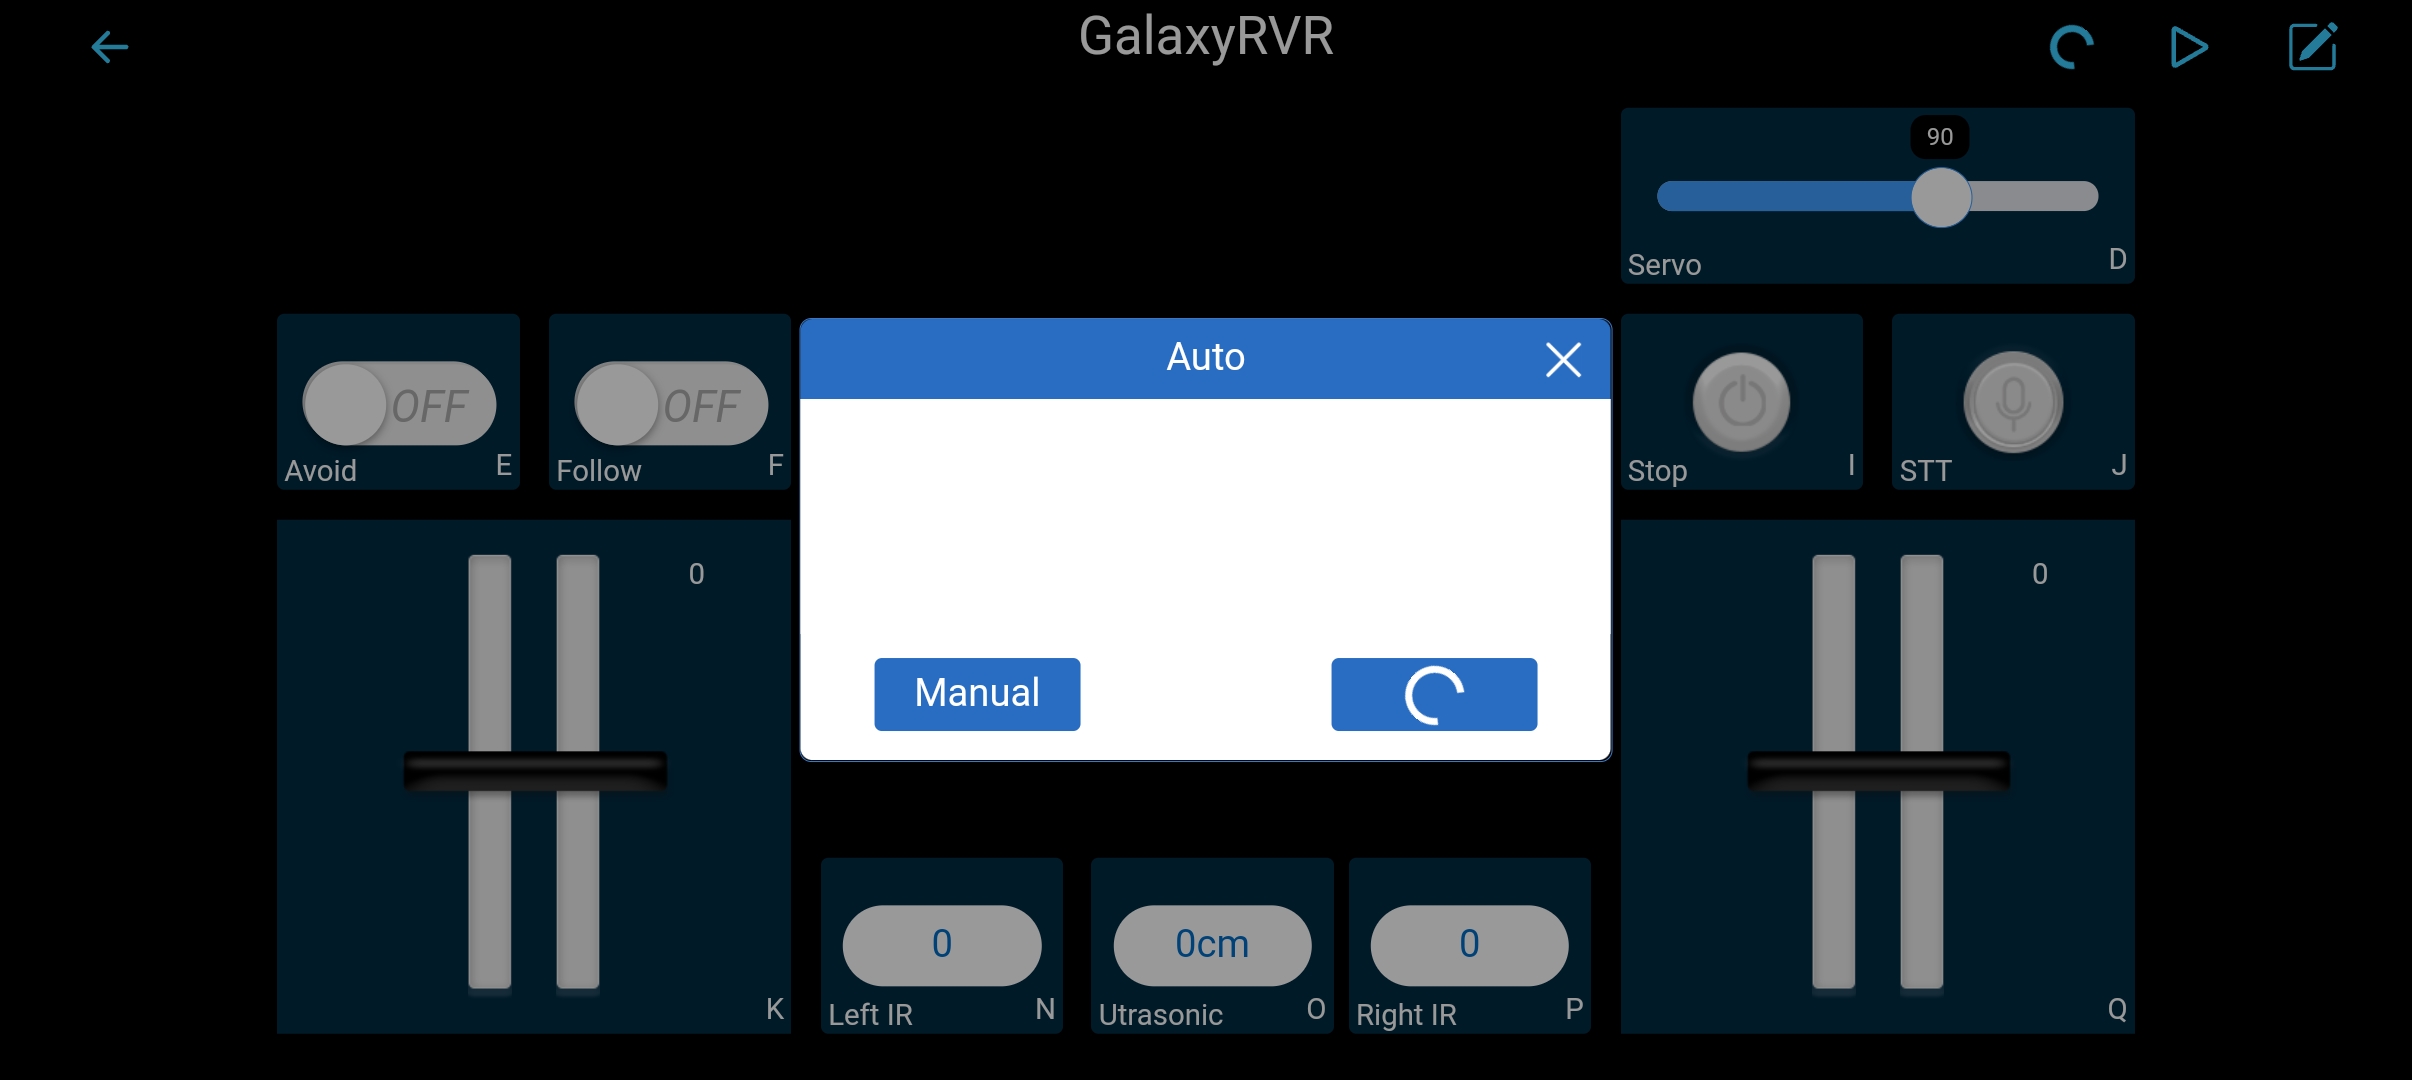
Once inside, the app will automatically search for the GalaxyRVR. After a moment, you will see a prompt saying “Connected Successfully”.
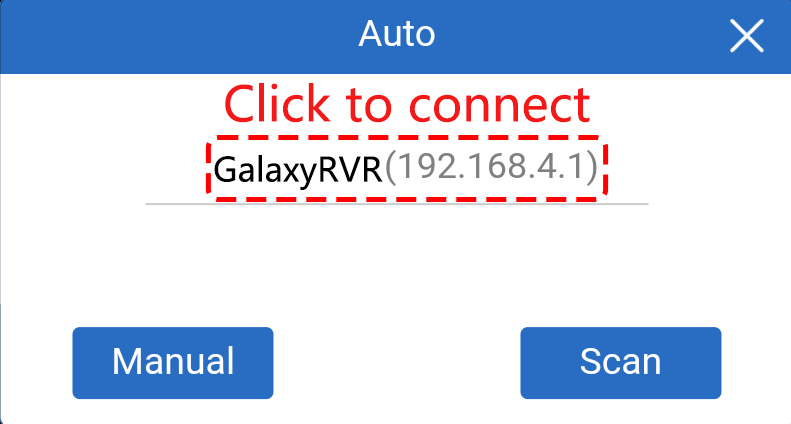
Note
If not connected, please confirm that your Wi-Fi is connected to
GalaxyRVR.You can also tap the
 button to connect manually. After a short wait, you should see
 GalaxyRVR(IP)appear. Tap on it to establish a connection.
Now, tap the
 button enables you to view the live video feed from the camera and control the car using the provided widgets.
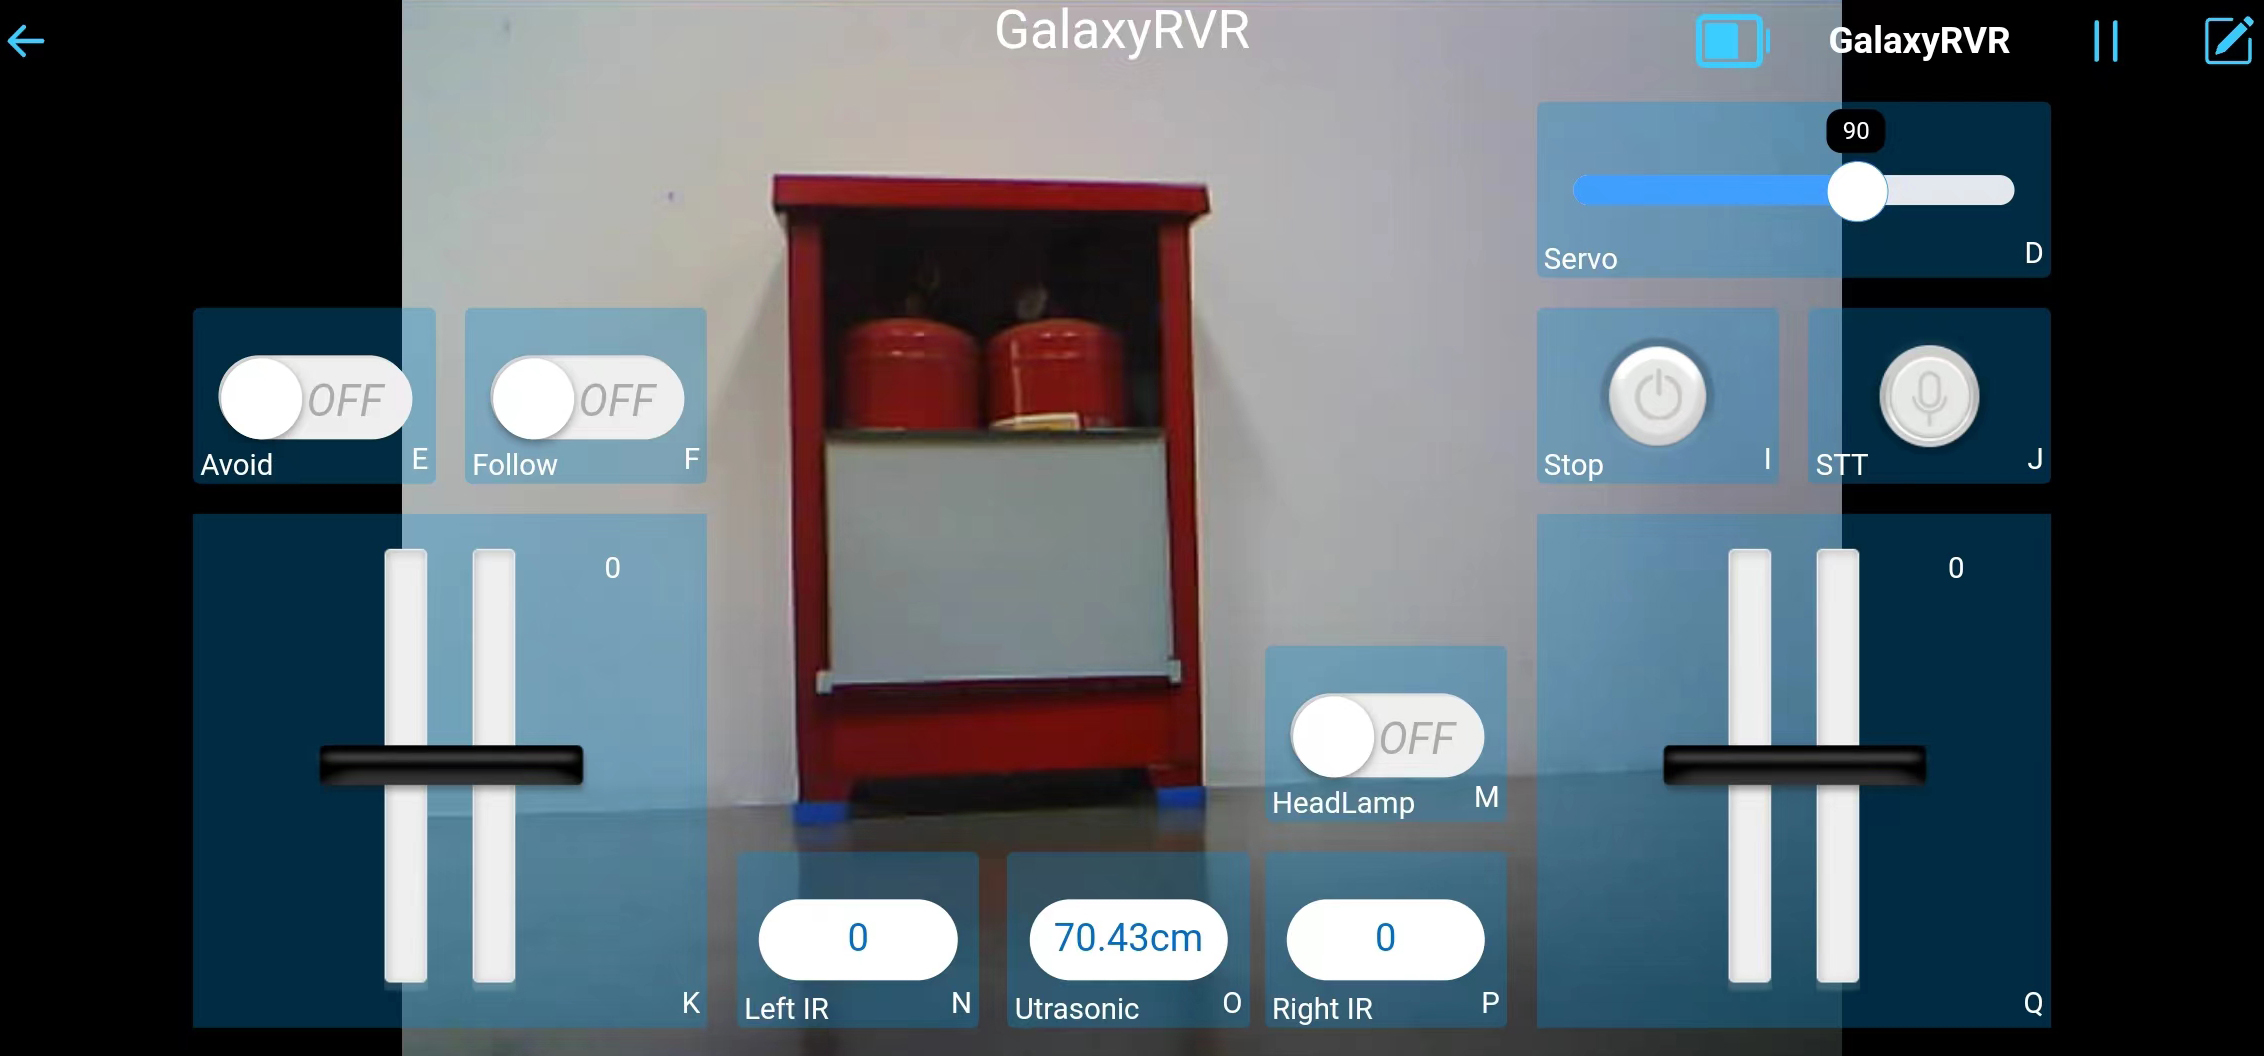
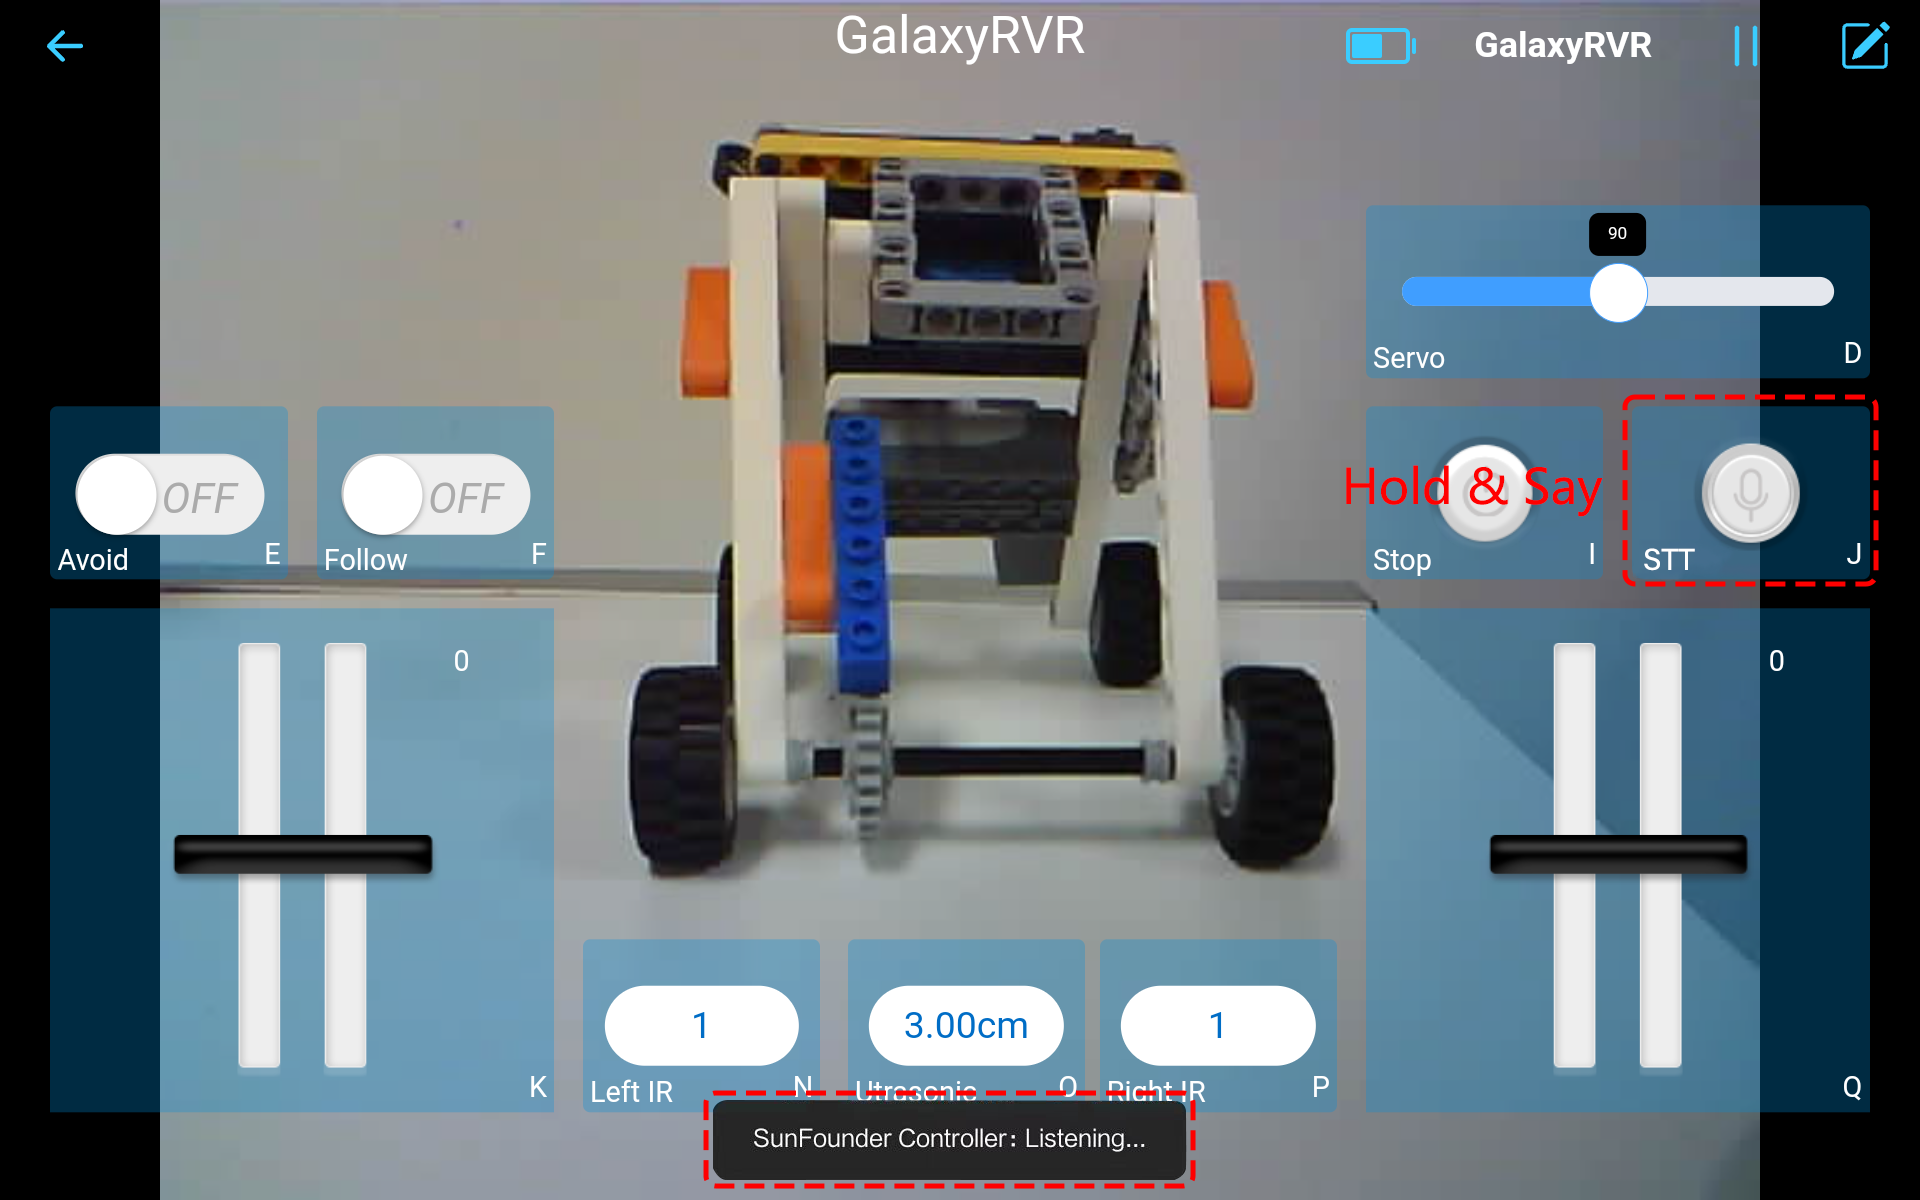
Let’s now delve into the functions of each widget:
Servo(D): Controls the tilt mechanism of the Rover’s camera, allowing you to observe a wider range.
Avoid(E): Switches the Rover into obstacle avoidance mode. The factory-set detection distances for each obstacle avoidance module may differ. Manual adjustment is required.
Follow(F): Toggles the Rover into follow mode. The factory-set detection distances for each obstacle avoidance module may differ. Manual adjustment is required.
Stop(I): Immediately halts all Rover movements.
STT(J): Press this widget to initiate voice recognition and make the Rover perform corresponding actions.
HeadLamp(M): To turn the LED on/off on the ESP32 CAM.
Throttle Widgets on K and Q: The throttle widget in the K area controls the Rover’s left motors, while the one in the Q area controls the right motors. Coordinating both widgets allows the GalaxyRVR to move in any direction.
Left IR(N): Displays the readings from the left obstacle avoidance module.
Ultrasonic(O): Shows the distance measured by the ultrasonic module.
Right IR(P): Displays the readings from the right obstacle avoidance module.
Avoid(E)
Tap the Avoid(E) widget to activate the obstacle avoidance mode.
Before enabling this mode, you may need to adjust the detection ranges of the sensors according to your current environment, as the factory settings may not be ideal for all situations.
If the detection range of the two infrared modules is too short, the Mars Rover might bump into obstacles. Conversely, if the range is too long, the Rover might start swerving too far away from an obstacle, potentially disrupting its navigation.
Here’s how you can fine-tune the settings:
Start by adjusting the right obstacle avoidance module. During transportation, collisions may cause the transmitter and receiver on the infrared module to tilt. Therefore, you need to manually straighten them.
Place an obstacle about 20 cm directly in front of the right module. The box in which our Rover kit came is a good choice for this! Now, turn the potentiometer on the module until the indicator light on the module just lights up. Then, keep moving the obstacle back and forth to check if the indicator light comes on at the desired distance. If the light doesn’t turn on at the correct distance or if it remains on without going out, you’ll need to adjust the other potentiometer.
Repeat the same process for the other module.
Follow(F)
When you’re ready to activate follow mode, simply tap the Follow(F) widget. If you haven’t previously adjusted the detection distance of the obstacle avoidance modules, you will need to follow the steps in Avoid(E) first.
Once in follow mode, the GalaxyRVR will move towards an object in front of it or turn left or right to follow the object’s movement.
STT(J)
STT stands for Speech to Text. The SunFounder Controller app integrates with your mobile device’s voice recognition engine. Hence, when you tap and hold the STT(J) widget on the SunFounder Controller and speak into your mobile device,
Your device will capture your speech, convert it into text, and send it to the GalaxyRVR. If this text matches the pre-set commands in your code, the Rover will carry out the corresponding actions.
The following are the commands currently preset in the code. Speak any of the following commands and observe how the GalaxyRVR responds.
stop: All movements of the rover can be stopped.forward: Let the rover move forward.backward: Let the rover move backward.left: Let the rover turn left.right: Let the rover turn right.
Note
The STT (Speech to Text) function requires an internet connection and Google services on Android devices. However, this doesn’t work with the pre-set AP (Access Point) mode on the GalaxyRVR.
In AP mode, the GalaxyRVR creates a local Wi-Fi network that your mobile device can connect to, but it does not provide internet access.
To use the STT function on Android, switch the Rover’s code from AP to STA mode as outlined in Q3: How can I use the STT mode on my Android device?.
Note
iOS devices, using an offline voice recognition engine, work fine in both AP and STA modes.