Note
Hello, welcome to the SunFounder Raspberry Pi & Arduino & ESP32 Enthusiasts Community on Facebook! Dive deeper into Raspberry Pi, Arduino, and ESP32 with fellow enthusiasts.
Why Join?
Expert Support: Solve post-sale issues and technical challenges with help from our community and team.
Learn & Share: Exchange tips and tutorials to enhance your skills.
Exclusive Previews: Get early access to new product announcements and sneak peeks.
Special Discounts: Enjoy exclusive discounts on our newest products.
Festive Promotions and Giveaways: Take part in giveaways and holiday promotions.
👉 Ready to explore and create with us? Click [here] and join today!
Manually Install Driver for ESP32
If you’ve connected your ESP32 board to your computer via USB but don’t see a port in the Arduino IDE or Thonny IDE (or only see COM1), it means your computer hasn’t recognized the board. In this case, you’ll need to manually install the USB driver.
We offer two types of ESP32 boards, differing only by their USB-to-serial chip:
CP2102
CH340
Functionally, they work the same—the only difference is the USB driver required.

If your ESP32 board uses the CH340 USB chip, follow this guide to install the driver:
If your ESP32 board uses the CP2102 USB chip, follow this guide instead:
How to Install CH340 Driver?
In this tutorial, we’ll guide you through installing CH340 drivers on various operating systems. For many users, the driver installs automatically. However, depending on your system and its updates, manual installation may be required when connecting the CH340 chip to your computer for the first time.
Drivers
The CH340 chip is manufactured by WCH. Below are links to drivers for various systems from the official WCH website:
Windows (ZIP) – Driver v3.4 (2024-10-16)
Windows (EXE) – Executable installer
Mac (ZIP) – Driver v1.5 (2025-02-26)
Linux (ZIP) – Driver v1.5 (2024-10-24)
You can also visit the WCH official website to download the latest drivers. As of this writing, the newest version can be found on their Chinese-language page:
If you’re using Google Chrome, you can choose to translate the webpage automatically.
Next, we’ll go over how to install the CH340 driver on different systems.
Windows 7/11
Download the driver.
Windows (ZIP) – Driver v3.4 (2024-10-16)
Windows (EXE) – Executable installer
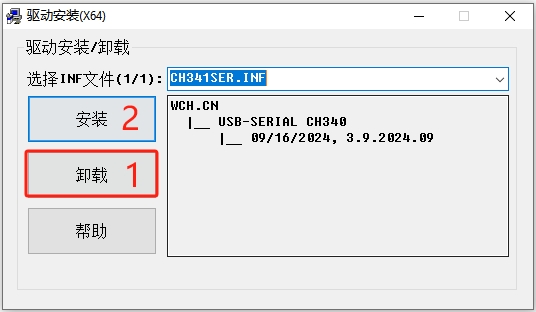
Double-click the
.exefile. If you downloaded the.zipversion, extract it first and then double-click the.exeinside.Click “Uninstall” first to remove any previous drivers, then click “Install”.
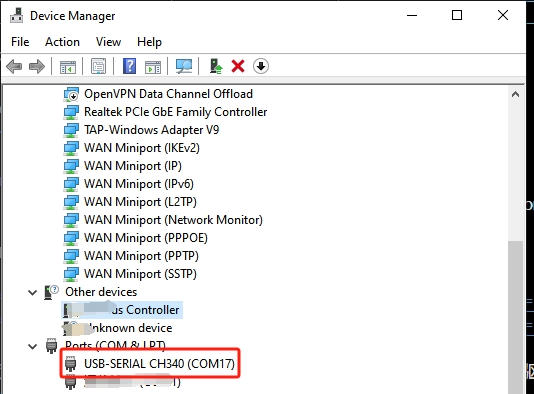
After installation, open Device Manager. You can click the Start or ⊞ (Windows) button and type “device manager” to quickly search for it.

In Device Manager, expand the “Ports (COM & LPT)” section. You should see USB-SERIAL CH340 (COM##) listed. The COM port number may vary.
macOS
Download and extract the driver package.
Mac (ZIP) – Driver v1.5 (2025-02-26)
Open the extracted folder and double-click the
.pkgfile. Follow the prompts to install.Note
If you see a “System Extension Blocked” or “Unverified Developer” message, go to System Settings > Privacy & Security and click Allow next to the blocked extension. You may need to unlock with your password. Restart your Mac to finish installation.

To verify the driver is working, plug in the CH340 device and open a Terminal window. Then run:
ls /dev/cu*
You should see a device like
/dev/cu.usbserial*****. The exact port name may vary.
Linux
Most Linux distributions already include CH340 driver support. It should work once plugged in. If not, try updating your system:
sudo apt-get update
sudo apt-get upgrade
Alternatively, download and install the Linux CH340 driver manually:
Linux (ZIP) – Driver v1.5 (2024-10-24)
Reconnect the ESP32 board to a USB port. Then run the following in your terminal:
ls /dev/ttyUSB*
You should see a result similar to
/dev/ttyUSB0.
How to Install CH2102 Driver?
This guide will walk you through the steps to install the CH2102 USB-to-Serial driver on different operating systems. In many cases, the driver is installed automatically by the operating system. However, depending on your system version or configuration, you may need to install the driver manually the first time you connect a CH2102 device to your computer.
Windows
Visit the Silicon Labs USB to UART Bridge VCP Drivers page and download the CP210x_Universal_Windows_Driver.
Extract the ZIP file, then right-click on the
.inffile and select Install. Follow any on-screen prompts to complete the driver installation.
Once installed, connect your CP2102 device to a USB port. Open Device Manager (press ⊞ Win + R, type
devmgmt.msc, and press Enter).Expand the Ports (COM & LPT) section. You should see an entry like
Silicon Labs CP210x USB to UART Bridge (COM#).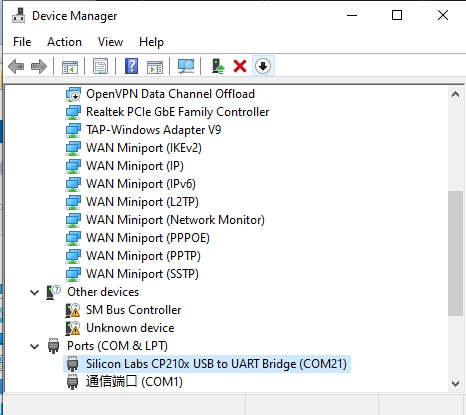
If the device appears without any warning icon, the driver has been successfully installed and is working correctly.
macOS
The CP2102 USB-to-UART bridge is manufactured by Silicon Labs. On recent macOS versions, the system may include basic support, but for full compatibility and stability, it’s recommended to install the official driver from Silicon Labs.
Visit the USB to UART Bridge VCP Drivers page. Download the CP210x VCP Mac OSX Driver suitable for your system (Apple Silicon or Intel).
Extract the downloaded ZIP file, then double-click the included
.dmgfile to mount it.In the mounted volume, open and run Install CP210x VCP Driver.app.
Follow the on-screen instructions to complete the installation.

On macOS 10.13 or later, the system may block the driver extension. If prompted:
Go to System Settings > Privacy & Security
Click Allow next to the Silicon Labs extension
Unlock settings if needed (click the lock icon and enter your password)
Restart your Mac to apply changes
After installation, restart your Mac if you haven’t already.
To verify the driver is installed, open Terminal and run:
ls /dev/cu.*
You should see a device like this, indicating the driver is working correctly:
/dev/cu.SLAB_USBtoUART
Linux
Most Linux distributions (e.g., Ubuntu, Debian, Fedora) include built-in support for the CP2102 driver. In most cases, simply plugging in the device will make it available automatically.
If the device is not recognized, try updating your system:
sudo apt-get update
sudo apt-get upgrade
After updating, reconnect the CP2102 device and run the following command in a terminal:
ls /dev/ttyUSB*
If the driver is working correctly, you should see a device like:
/dev/ttyUSB0
You can also check kernel logs to verify detection:
dmesg | grep ttyUSB