Note
Hello, welcome to the SunFounder Raspberry Pi & Arduino & ESP32 Enthusiasts Community on Facebook! Dive deeper into Raspberry Pi, Arduino, and ESP32 with fellow enthusiasts.
Why Join?
Expert Support: Solve post-sale issues and technical challenges with help from our community and team.
Learn & Share: Exchange tips and tutorials to enhance your skills.
Exclusive Previews: Get early access to new product announcements and sneak peeks.
Special Discounts: Enjoy exclusive discounts on our newest products.
Festive Promotions and Giveaways: Take part in giveaways and holiday promotions.
👉 Ready to explore and create with us? Click [here] and join today!
Bluetooth
Equipped with the ESP32 module, the UNO R4 WiFi board offers both Bluetooth® LE and Bluetooth® 5 functionalities, supporting speeds up to 2 Mbps. The ESP32 module comes with an integrated trace-antenna, eliminating the need for an external antenna to take advantage of the board’s connectivity features.
Note
The trace antenna in ESP32 module is shared with the Bluetooth® module, which means that you cannot use Bluetooth® and Wi-Fi® at the same time.
Basic Concepts of BLE
Bluetooth Low Energy (BLE) is a low-power wireless communication technology, designed specifically for short-range interactions. Distinguished from classic Bluetooth, BLE focuses on power efficiency and rapid connection, making it an ideal choice for a range of applications including Internet of Things (IoT) devices and health monitoring equipment.
BLE communications rely on two key protocols: GATT (Generic Attribute Profile) and GAP (Generic Access Profile). GATT is used for data exchange, while GAP is responsible for device discovery and connection.
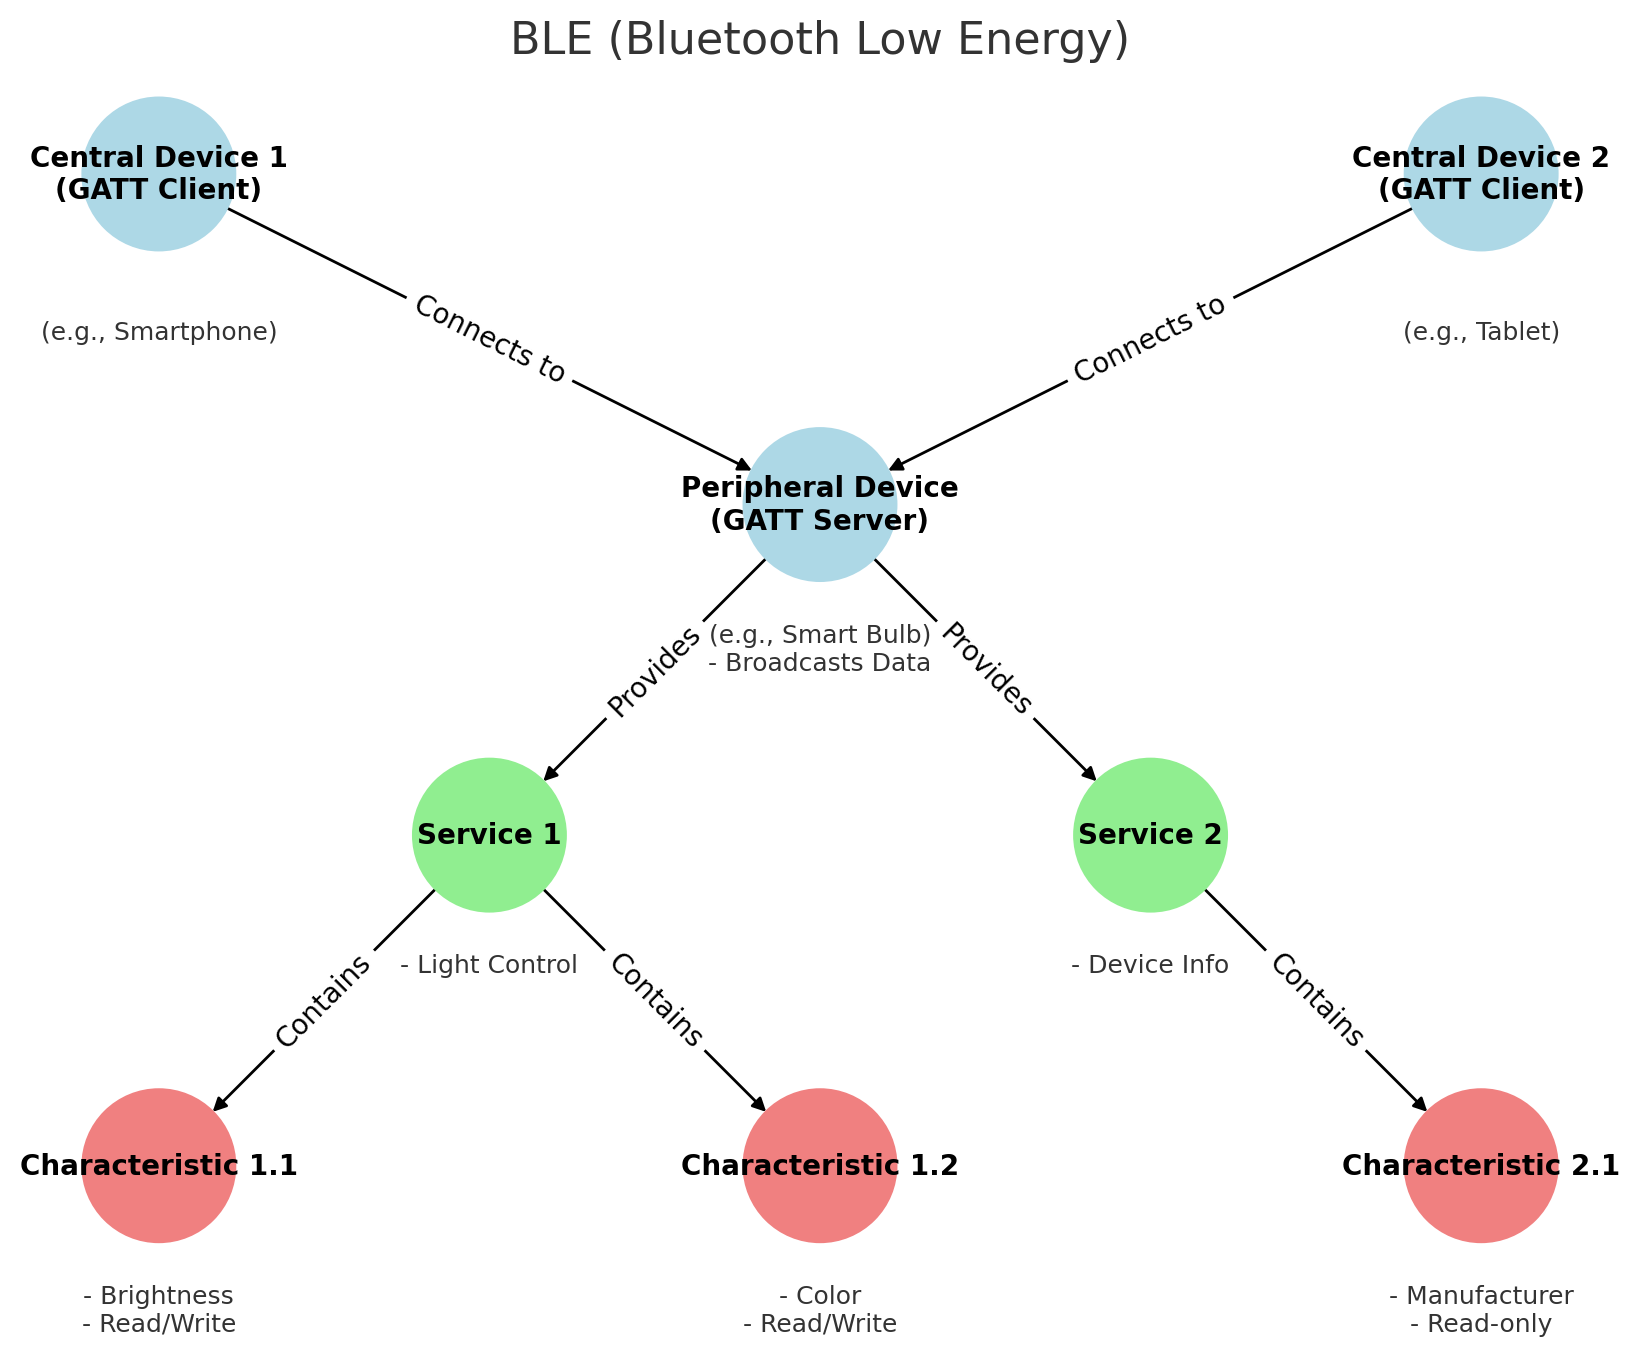
Peripheral Devices (Typically GATT Servers)
In the BLE network, peripheral devices primarily broadcast data to be discovered and accessed by central devices (typically acting as GATT clients). Such devices are usually sensors or small hardware like heart rate monitors, temperature sensors, or smart bulbs.
In the BLE communication model, peripheral devices often provide one or more services, each containing a set of characteristics. These services and characteristics collaboratively enable specific functionalities or use-cases, allowing central devices to read or manipulate relevant data.
Services
In BLE, Services act as high-level abstractions used to organize and encapsulate related Characteristics. Services in BLE can be categorized into standard services and custom services based on their origin and purpose.
Standard Services: Defined by the Bluetooth SIG (Bluetooth Special Interest Group), these are intended for specific functions. For example, the heart rate service for heart rate monitors, device information service providing manufacturer, model, and version details, and battery service indicating battery level and status.
Custom Services: These are defined by developers or device manufacturers to meet the requirements of specific applications or devices. For instance, a smart home device manufacturer might define a custom service to control light color and brightness.
Characteristics
Characteristics in BLE are the fundamental units of data exposed by the peripheral devices. They are enclosed within a Service and define various types of data and the operations that can be performed on them. Each characteristic is identified by a UUID and has a set of associated attributes like value, descriptor, and permissions.
Permissions: In BLE, each characteristic is associated with a set of permissions that dictate whether the characteristic is readable, writable, or notify-able. This helps in securing the data and defining how to interact with it.
UUID
Services, characteristics, and descriptors are collectively identified as attributes, each having a unique UUID. The Bluetooth SIG has reserved a set of UUIDs for standard attributes. These UUIDs are usually represented as 16-bit or 32-bit identifiers in the BLE protocol for efficiency, rather than the 128 bits required for a full UUID. For instance, the Device Information service is represented by the short code 0x180A.
Central Devices (Typically GATT Clients)
Central devices in the BLE network scan for nearby peripheral devices and establish connections to acquire or control data. These devices are generally more complex and feature-rich, such as smartphones, tablets, or specialized gateway hardware. They are responsible for discovering peripheral devices, connecting to them, and accessing or subscribing to services and characteristics offered by the peripherals to serve various applications or solve specific problems.
Central devices interact with characteristics in the following ways:
Read: Request the peripheral device to send the current value of a characteristic. This is commonly used for characteristics that don’t change often, like configuration settings or version numbers.
Write: Modify the value of a characteristic, typically used for command-like operations, like instructing a peripheral device to turn a motor on or off.
Subscribe: Request the peripheral device to continuously send updated values of a characteristic, eliminating the need for the central device to repeatedly request this data.
Example: Bluetooth-Controlled LED
In this example, the Arduino acts as a peripheral device in a Bluetooth Low Energy (BLE) network. It offers a custom BLE service designed to control an onboard LED. This service includes a characteristic that can be read and written by a central device, such as a smartphone. Once the central device connects to the Arduino, it can change the LED state by writing to this characteristic. The Arduino’s serial monitor displays debugging information, including the LED’s current state and the MAC address of the connected central device.
Upload the Code
Open the 02-bluetooth.ino file located at elite-explorer-kit-main\r4_new_feature\02-bluetooth, or paste the following code into your Arduino IDE.
 1/*
 2  This code is specifically designed for an Arduino Uno R4 board. It utilizes the
 3  ArduinoBLE library to establish a Bluetooth® Low Energy (BLE) service, enabling
 4  a central device to control the onboard LED. When the central device connects to
 5  the Arduino and writes a value to a specific characteristic, it will alter the
 6  state of the LED accordingly. Any non-zero value will turn on the LED, while a
 7  zero value will turn it off.
 8
 9  Board: Arduino Uno R4 WiFI
10*/
11
12
13#include <ArduinoBLE.h>
14
15BLEService ledService("19B10000-E8F2-537E-4F6C-D104768A1214"); // Bluetooth® Low Energy LED Service
16
17// Bluetooth® Low Energy LED Switch Characteristic - custom 128-bit UUID, read and writable by central
18BLEByteCharacteristic switchCharacteristic("19B10001-E8F2-537E-4F6C-D104768A1214", BLERead | BLEWrite);
19
20const int ledPin = LED_BUILTIN; // pin to use for the LED
21
22void setup() {
23  Serial.begin(9600);
24  while (!Serial);
25
26  // set LED pin to output mode
27  pinMode(ledPin, OUTPUT);
28
29  // begin initialization
30  if (!BLE.begin()) {
31    Serial.println("starting Bluetooth® Low Energy module failed!");
32
33    while (1);
34  }
35
36  // set advertised local name and service UUID:
37  BLE.setLocalName("UNO R4 LED");
38  BLE.setAdvertisedService(ledService);
39
40  // add the characteristic to the service
41  ledService.addCharacteristic(switchCharacteristic);
42
43  // add service
44  BLE.addService(ledService);
45
46  // set the initial value for the characeristic:
47  switchCharacteristic.writeValue(0);
48
49  // start advertising
50  BLE.advertise();
51
52  Serial.println("BLE LED Peripheral");
53}
54
55void loop() {
56  // listen for Bluetooth® Low Energy peripherals to connect:
57  BLEDevice central = BLE.central();
58
59  // if a central is connected to peripheral:
60  if (central) {
61    Serial.print("Connected to central: ");
62    // print the central's MAC address:
63    Serial.println(central.address());
64
65    // while the central is still connected to peripheral:
66    while (central.connected()) {
67      // if the remote device wrote to the characteristic,
68      // use the value to control the LED:
69      if (switchCharacteristic.written()) {
70        if (switchCharacteristic.value()) {   // any value other than 0
71          Serial.println("LED on");
72          digitalWrite(ledPin, HIGH);         // will turn the LED on
73        } else {                              // a 0 value
74          Serial.println(F("LED off"));
75          digitalWrite(ledPin, LOW);          // will turn the LED off
76        }
77      }
78    }
79
80    // when the central disconnects, print it out:
81    Serial.print(F("Disconnected from central: "));
82    Serial.println(central.address());
83  }
84}
Connect Arduino R4 via Bluetooth
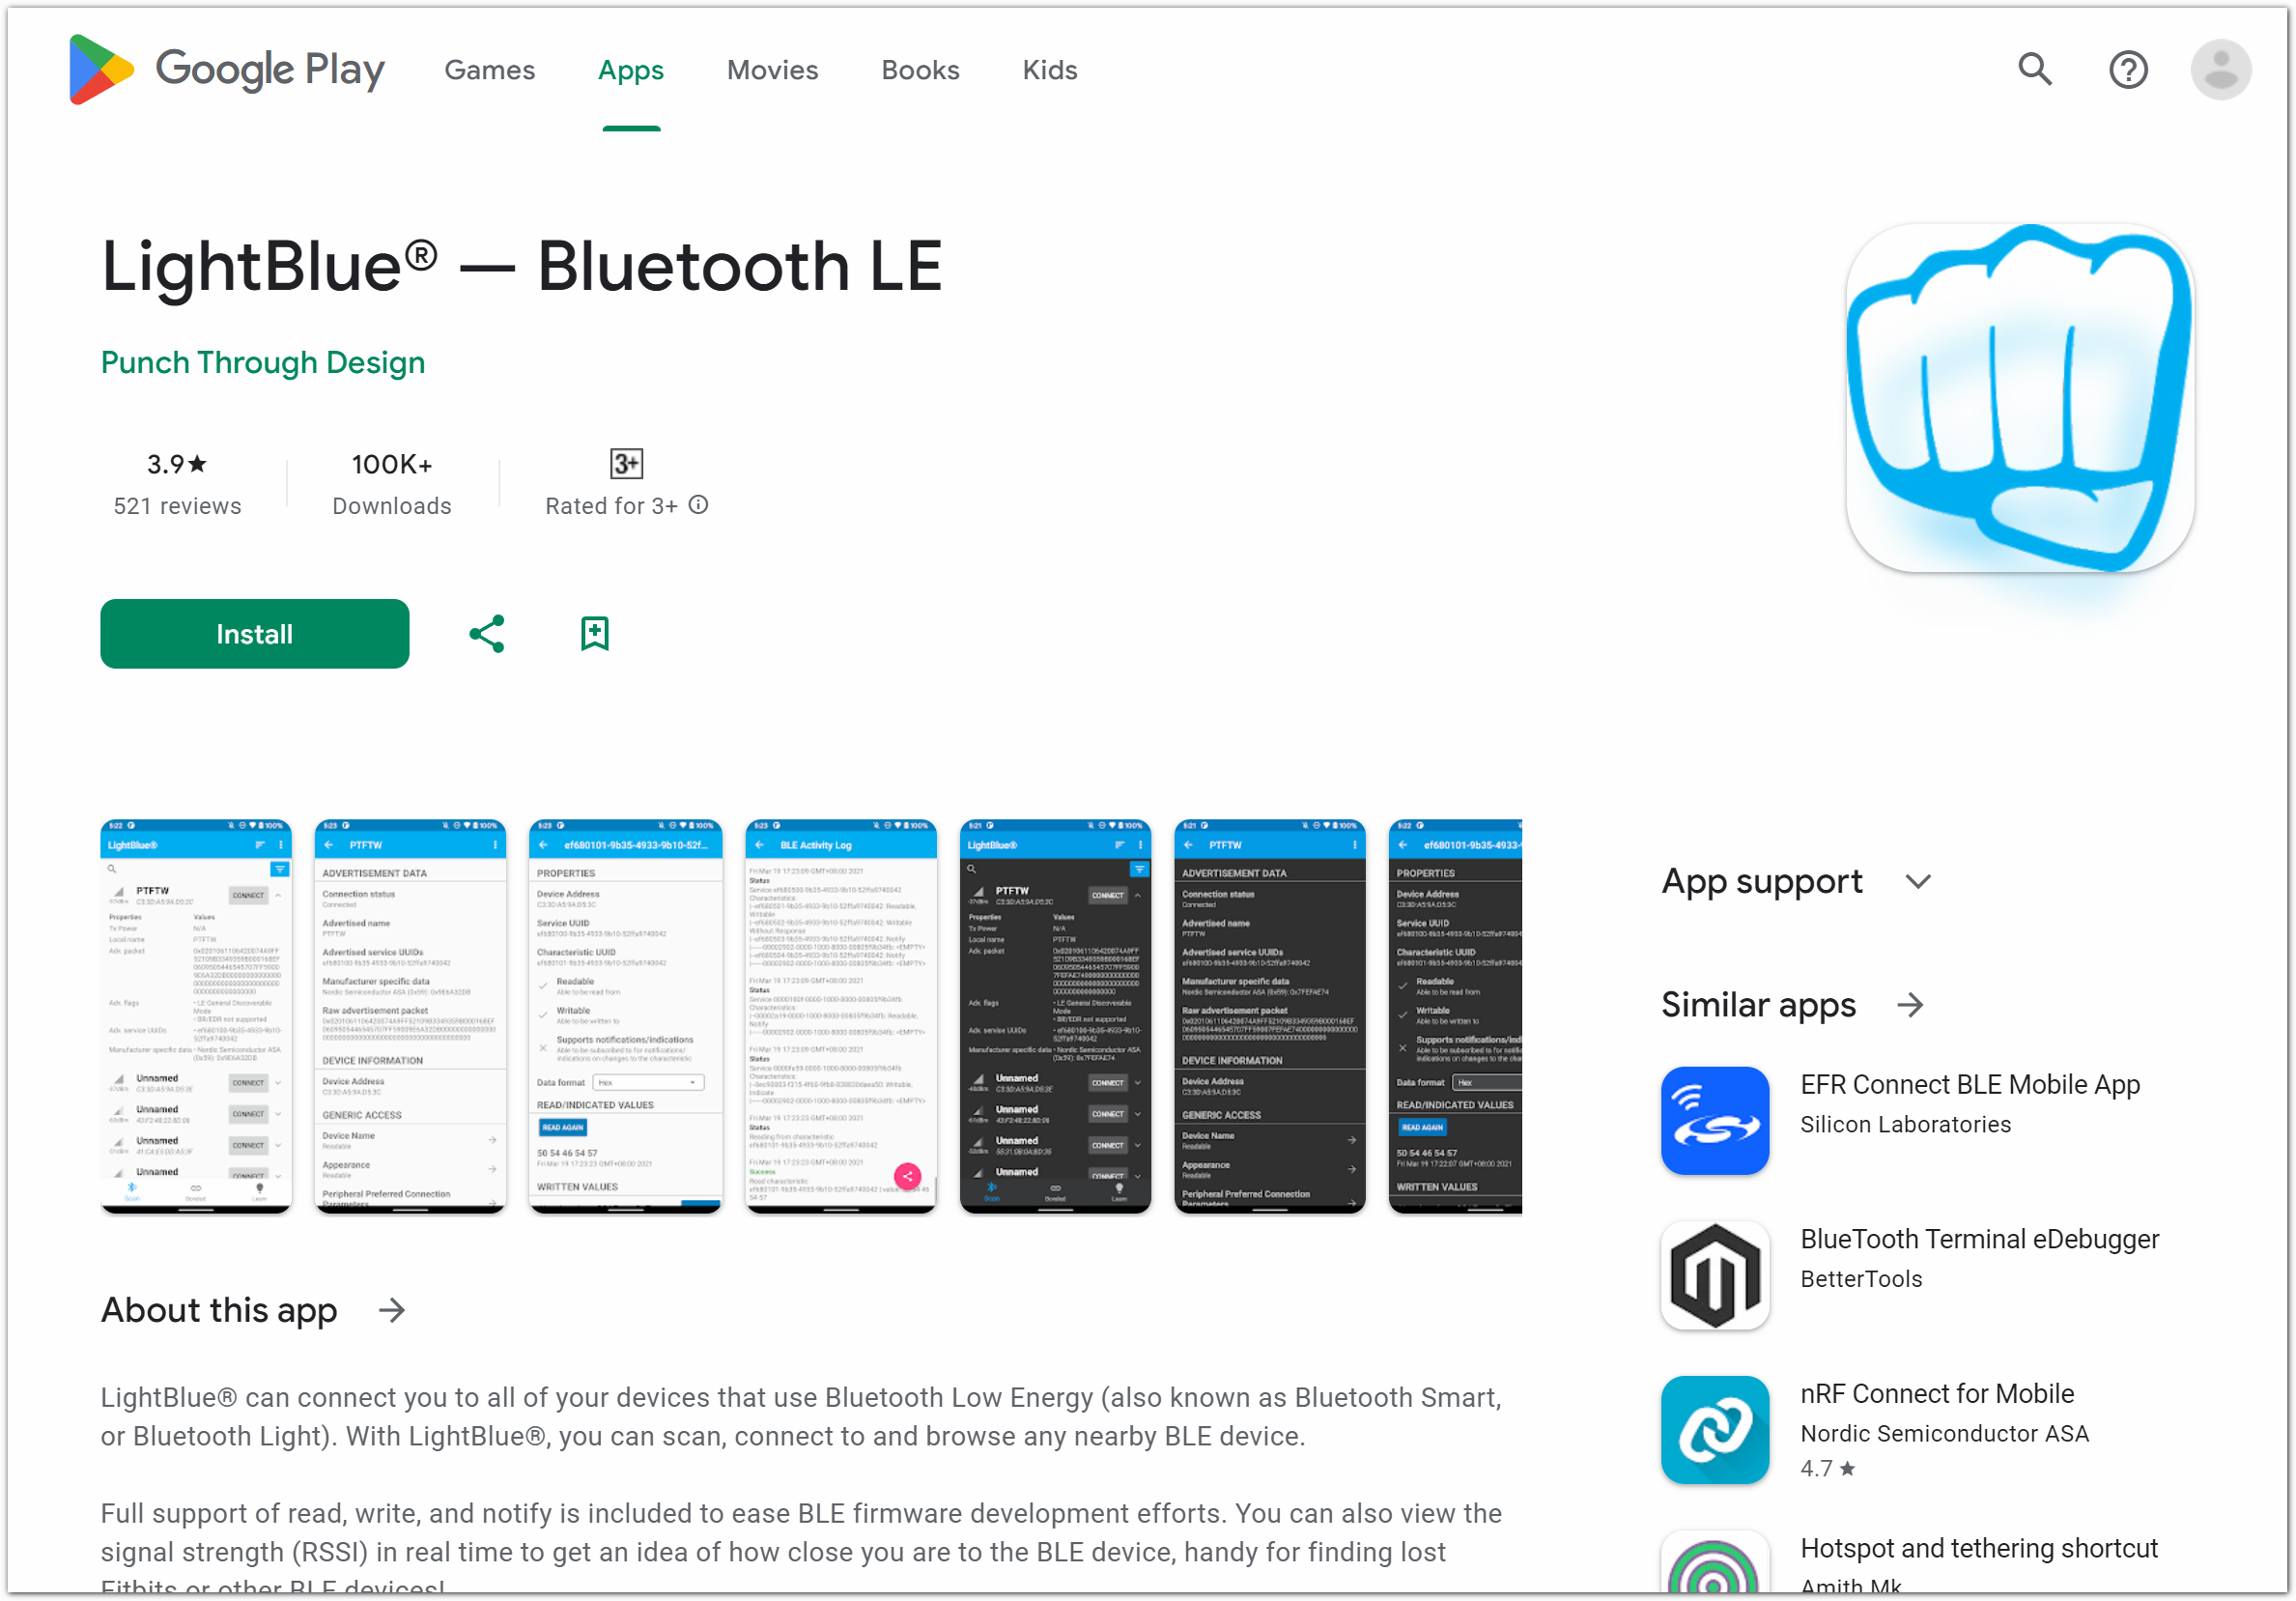
To interact with the services and characteristics created in this sketch, we should utilize a generic Bluetooth® Low Energy central app such as LightBlue (available for iOS and Android) or nRF Connect (for Android).
Let’s take LightBlue as an example to demonstrate how to control Arduino’s LED via Bluetooth.
Download the LightBlue app from the App Store (for iOS) or Google Play (for Android).
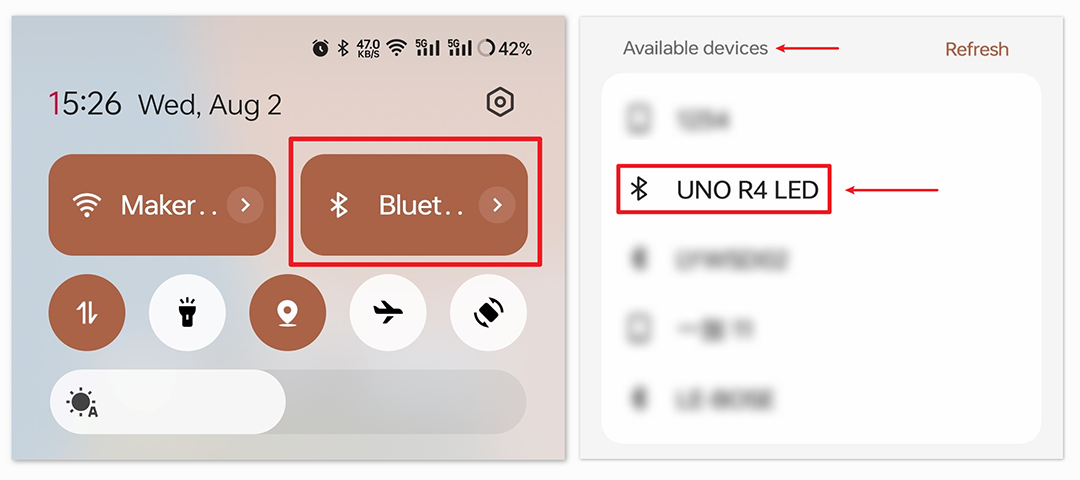
Connecting Arduino with Your Smartphone via Bluetooth
Navigate to your Bluetooth settings and locate the device named “UNO R4 LED”. Proceed to connect to it.
Interacting with Arduino via Bluetooth Using LightBlue
Launch LightBlue and tap on the Bonded tab located at the bottom of the interface. Here, you’ll see a list of BLE devices that your smartphone has previously paired with. Locate UNO R4 LED and tap CONNECT.
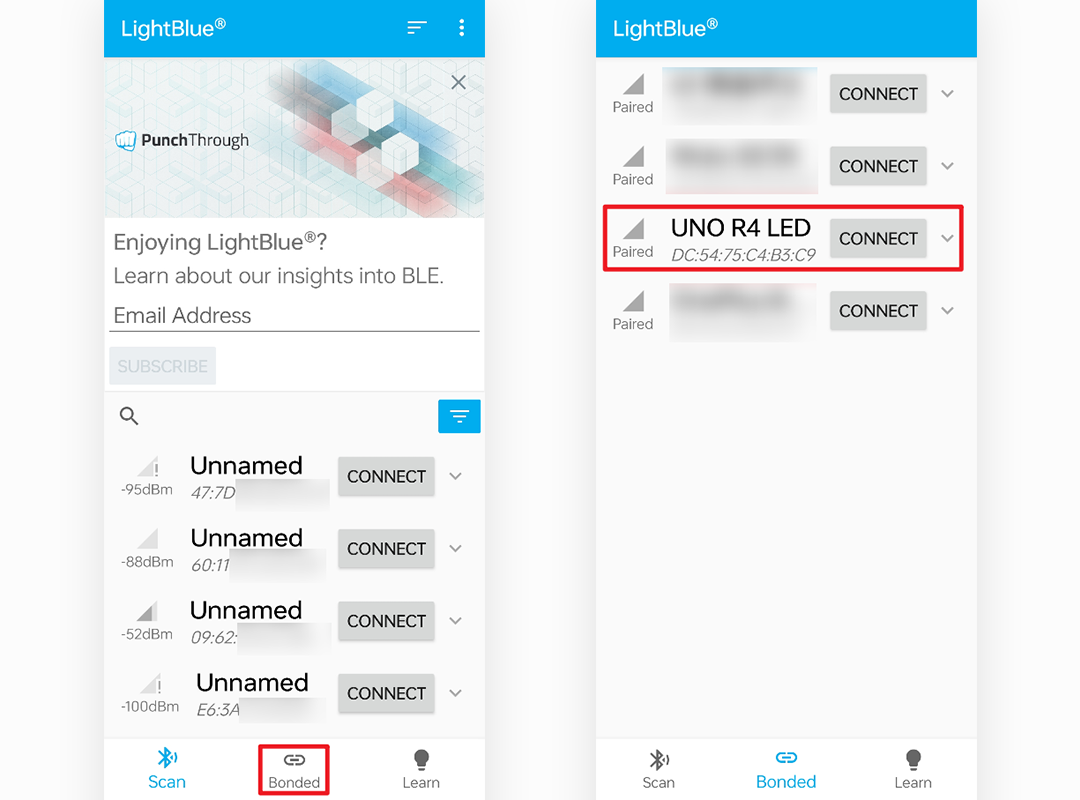
Once connected, you’ll gain access to detailed information about the “UNO R4 LED” Bluetooth device. Scroll down to find “ledService (19B10000-E8F2-537E-4F6C-D104768A1214)” and “switchCharacteristic (19B10001-E8F2-537E-4F6C-D104768A1214)”.
Tap on the 19B10001-E8F2-537E-4F6C-D104768A1214 Characteristic. You’ll notice that this Characteristic is both readable and writable, allowing you to both read from and write to it.

Continue scrolling to the WRITTEN VALUES section. Input ‘1’ into the text box to set the Characteristic value to 1, which will turn on the onboard LED of the Arduino R4.
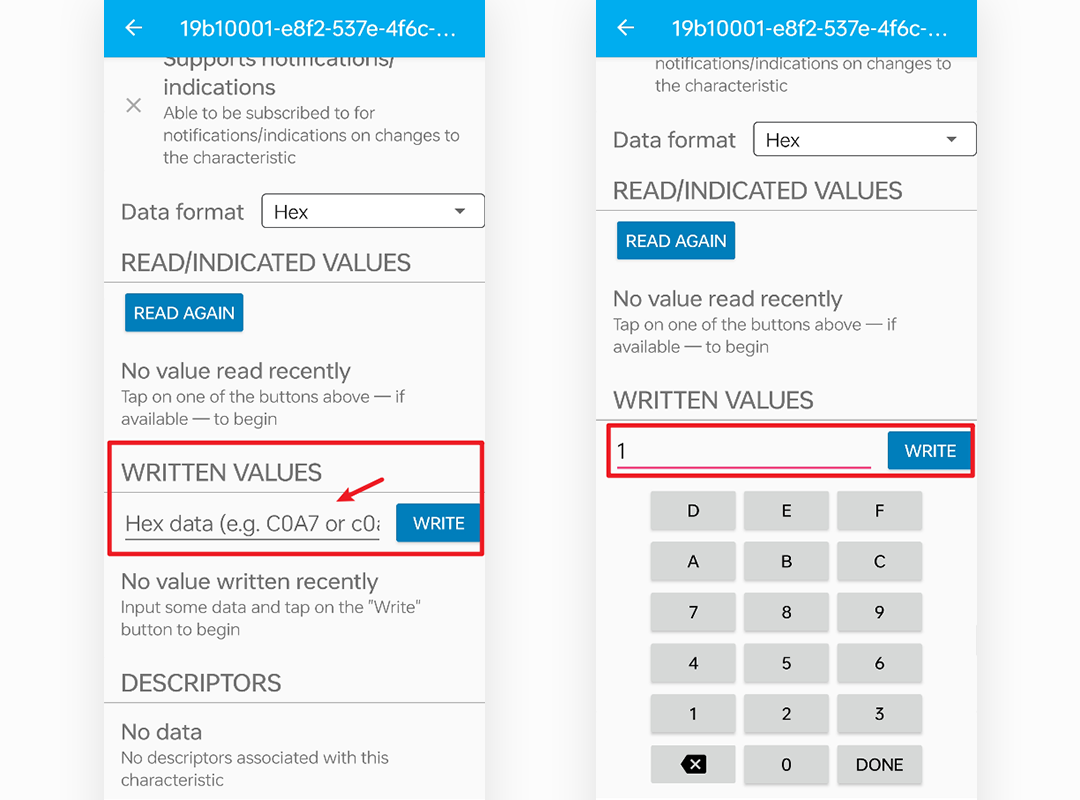
Similarly, you can set this value to ‘0’ to turn off the onboard LED.

Code explanation
Initialize BLE and LED
Note
When defining services and characteristic, we need to use UUIDs to identify them. To avoid UUID conflicts and make it easier for you to use, you can use the UUID generation tool at uuidgenerator.
#include <ArduinoBLE.h>
BLEService ledService("19B10000-E8F2-537E-4F6C-D104768A1214"); // Bluetooth® Low Energy LED Service
BLEByteCharacteristic switchCharacteristic("19B10001-E8F2-537E-4F6C-D104768A1214", BLERead | BLEWrite);
const int ledPin = LED_BUILTIN; // pin to use for the LED
Include the ArduinoBLE library.
Define the BLE service and characteristic.
Assign the built-in LED pin to
ledPin.
setup()Functionvoid setup() { Serial.begin(9600); while (!Serial); pinMode(ledPin, OUTPUT); if (!BLE.begin()) { Serial.println("starting Bluetooth® Low Energy module failed!"); while (1); } BLE.setLocalName("UNO R4 LED"); BLE.setAdvertisedService(ledService); ledService.addCharacteristic(switchCharacteristic); BLE.addService(ledService); switchCharacteristic.writeValue(0); BLE.advertise(); Serial.println("BLE LED Peripheral"); }
Initialize serial communication.
Set the LED pin as output.
Initialize the BLE and add the service and characteristics.
Start BLE advertising.
loop()Functionvoid loop() { BLEDevice central = BLE.central(); if (central) { Serial.print("Connected to central: "); Serial.println(central.address()); while (central.connected()) { if (switchCharacteristic.written()) { if (switchCharacteristic.value()) { Serial.println("LED on"); digitalWrite(ledPin, HIGH); } else { Serial.println("LED off"); digitalWrite(ledPin, LOW); } } } Serial.print("Disconnected from central: "); Serial.println(central.address()); } }
Listen for BLE central devices to connect.
If a central device is connected, read the characteristic value to control the LED. If a value other than 0 is received, turn on the LED. If 0 is received, turn off the LED.
Reference