Controlled by APP
To control Zeus Car from your mobile device, you must download the APP (RobotPilot) on your device, connect to the Zeus Car LAN, and then create your own controller on the APP.
Note
If your R3 board has previously been uploaded with other code, but you wish to return to Quick Play with APP or IR Remote Control, follow these steps:
Download the Required Code:
Follow the steps in Install Arduino IDE to install the Arduino IDE.
Ensure you have installed all required libraries by following the instructions in Install the Required Libraries.
The ESP32-CAM and the Arduino board share the same RX (receive) and TX (transmit) pins. To prevent conflicts during the code upload, first disconnect the ESP32-CAM.

Upload the code:
Open the
Zeus_Car.inofile located in the folderzeus-car-main\Zeus_Carand upload it to the Arduino board using the Arduino IDE.If you want both the Zeus Car and your mobile device to connect to your own Wi-Fi network, refer to Q5: Change AP mode to STA mode for guidance.
After successfully uploading the code, reconnect the ESP32-CAM and slide the power switch to ON to start the Zeus Car.
Quick Guide
1. 链接Zeus Car和你的设备
Let’s start the Zeus Car.
When first used or when the battery cable is unplugged, Zeus Car Shield will activate its over-discharge protection circuitry.
So you’ll need to plug in the Type-C cable for about 5 seconds.
If the power indicator lights up, it means that the protection status has been released. At this time look at the battery indicators, if both battery indicators are off, please continue to plug in the Type-C cable to charge the battery.

Now, you’ll need to flick the smaller switch to the right to establish communication between the car and the ESP32 CAM. Afterward, press the Reset button to reboot the code. At this point, you’ll observe the undercarriage lights transition from orange to a light blue.
Connect to
Zeus_CarWLAN.Now, connect your mobile device to the local area network (LAN) broadcast by the Zeus Car. This way, your mobile device and the Zeus Car will be on the same network, which will facilitate communication between the applications on your mobile device and the Zeus Car.
Find
Zeus_Caron the WLAN of the mobile phone (tablet), enter the password12345678and connect to it.The default connection mode is AP mode. So after you connect, there will be a prompt telling you that there is no Internet access on this WLAN network, please choose to continue connecting.

2. 安装和打开RobotPilot
Install RobotPilot from APP Store(iOS) or Google Play(Android).

Open RoboPilot. Click “Go into” to enter the control interface.

Calibration(E)
Turn on compass calibration by clicking the 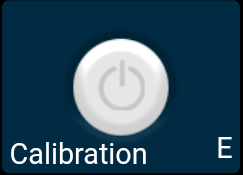 button.
Place the Zeus car on the ground. Upon turning on the compass calibration, the car will start rotating counterclockwise and will stop in about 1 minute. If it rotates longer than 2 minutes, the magnetic field here is complicated. Try changing the location and calibrating again.
Drift Enable(J)
Click the 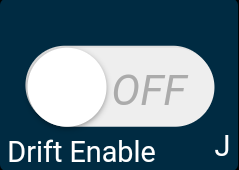 button to enable the drift function.
By sliding the
 widget counterclockwise, you will see Zeus Car drift to the right. Upon releasing the hand, the car will stop at its current position.

Similarly, if you slide the
widget clockwise, the Zeus Car will drift to the left and stop in the current position.

Move in All Directions(K)
The Zeus Car will move in the appropriate direction when you swipe the  widget.
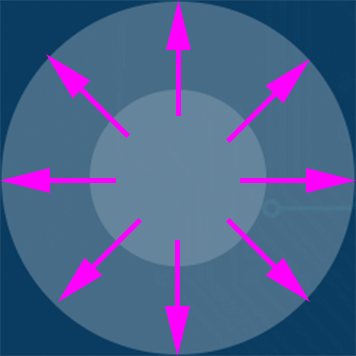
The car moves once every time you slide, so if you don’t release your hand all the time, the car keeps moving.

Speech(I)
By pressing the 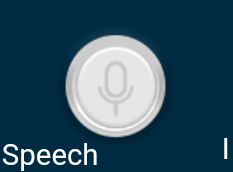 widget, you can activate the STT feature, where STT stands for Speech to Text.
The SunFounder Controller app integrates with your mobile device’s voice recognition engine. Hence, when you tap and hold the Speech(I) widget on the SunFounder Controller and speak into your mobile device.
Your device will capture your speech, convert it into text, and send it to the Zeus Car. If this text matches the pre-set commands in your code, the Car will carry out the corresponding actions.
The following are the commands currently preset in the code. Speak any of the following commands and observe how the Zeus Car responds.
stop: All movements of the car can be stopped.pasue: The function is basically the same as Stop, but if the head of the car is not facing the direction originally set, it will slowly move to the set direction.forwardbackwardleft forwardleft backwardright forwardright backwardmove leftmove right
Note
The STT (Speech to Text) function requires an internet connection and Google services on Android devices. However, this doesn’t work with the pre-set AP (Access Point) mode on the Zeus Car.
In AP mode, the Zeus Car creates a local Wi-Fi network that your mobile device can connect to, but it does not provide internet access.
To use the STT function on Android, switch the car’s code from AP to STA mode as outlined in Q3: How can I use the STT feature on my Android device?.
Note
iOS devices, using an offline voice recognition engine, work fine in both AP and STA modes.
After the car receives the above 8 commands, it will keep moving in the corresponding direction unless it receives stop or pasue commands.
turn left: This command will make the car to turn left 45° with the body as the center, then it will move forward or stop according to the previous state. If the previous state is stop, it will stop after turning left 45°; if it is forward, it will move forward after turning.

turn right: This command will make the car turn 45° to the right with the body as the center, and again will move forward or stop depending on the previous state.

Line Track
Click on the 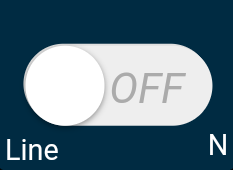 widget to switch to the line track mode.
Two modes of line track are available on the Zeus Car, one with its head always facing the direction of movement and one with its head facing a fixed direction. Here, the second mode is selected.
Stick a 3cm wide line
There are eight sensors on the Omni grayscale module, and the distance between each sensor is between 2 and 3 cm. There must be two sensors to detect the black line simultaneously. Therefore, the line you stick must be at least 3cm wide and the bend angle should not be less than 90°.

Calibrate the Omni Grayscale module.
Since each subfloor has different grayscale values, the factory-set grayscale threshold may not be appropriate for your current environment, so you will need to calibrate this module before use. It is recommended that you need to calibrate it whenever the floor color changes a lot.
Place the Zeus Car on white surface and turn the potentiometer until the gray sensor light is just illuminated.

Now let the two greyscale sensors on the side be located just between the black line and white surface, and slowly turn the potentiometer until the signal indicator just goes off.

You can move repeatedly over the the black line and white surface to make sure that the lights of the greyscale sensor are off when they are between the the black line and white surface and on when they are on the white surface, indicating that the module is successfully calibrated.
Place the Zeus Car on your stickied line, click the
widget, and it will track the line.Due to the high environmental requirements of the Omni grayscale module, it is recommended to calibrate it a few more times if the tracking effect is not satisfactory (off-track).
Follow(O)
Click the  widget to switch to follow mode.
The ultrasonic sensor detects obstacles in front (20 cm) and follows them forward. These two obstacle avoidance modules allow the car to follow left or right, but they need to be calibrated (15cm) before use.
Calibrate the IR obstacle avoidance module.
Start by adjusting the right obstacle avoidance module. During transportation, collisions may cause the transmitter and receiver on the infrared module to tilt. Therefore, you need to manually straighten them.
Place an obstacle about 15cm away from the IR obstacle avoidance module.
On the module are two potentiometers, one to adjust the sending power and one to adjust the sending frequency. By adjusting these two potentiometers, you can adjust the detection distance.
Then you can adjust a potentiometer, and if at 15cm, the signal light on the module illuminates, the adjustment is successful; if it doesn’t, adjust another potentiometer.

Calibrate the other obstacle avoidance module in the same way.
Place Zeus car on a table or the ground and let it follow your hand or other obstacles.
Avoid(P)
When you want to go into obstacle avoidance mode, click the 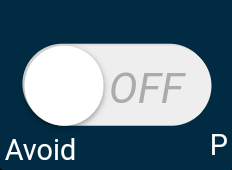 widget, but first reference the Follow(O) to calibrate the two obstacle avoidance modules.
Zeus car will move forward.
An ultrasonic module detects obstacles in front, if detected, the car turns left.
When the left obstacle avoidance module detects an obstacle, the car turns right, and when the right obstacle avoidance module detects an obstacle, the car turns left.
Control the Drection(Q)
When the
button is on, the widget is used to make the Zeus Car drift left and right.When the
widget is off, the widget is used to control the direction of the car’s head.By sliding the
widget counterclockwise, the car will also rotate counterclockwise. Upon releasing the hand, the head of the car will back to the original direction.
Similarly the car will rotate clockwise with the
widget and return to the original direction when released.