Assemble the Camera Module
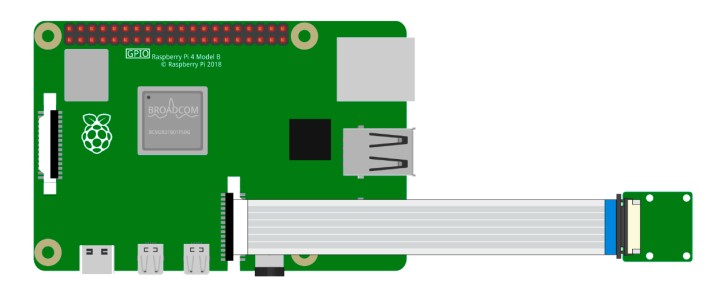
On the camera module or Raspberry Pi, you will find a flat plastic connector. Carefully pull out the black fixing switch until the fixing switch is partially pulled out. Insert the FFC cable into the plastic connector in the direction shown and push the fixing switch back into place.
If the FFC wire is installed correctly, it will be straight and will not pull out when you gently pull on it. If not, reinstall it again.


Warning
Do not install the camera with the power on, it may damage your camera.
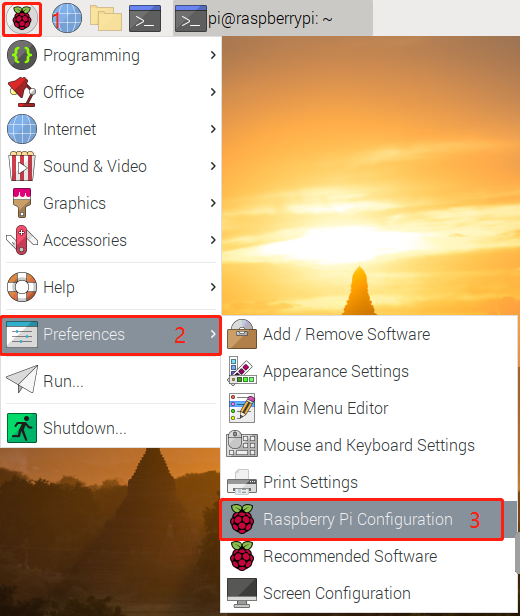
Open Raspberry Pi Configuration.

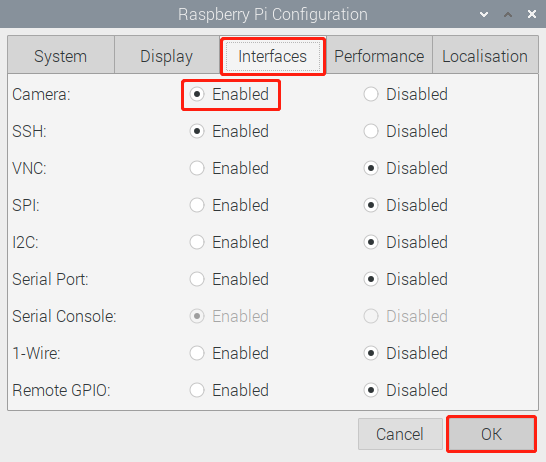
In the Interfaces option, Enable the Camera, and then click OK.

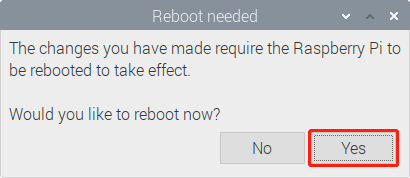
In the pop-up prompt box, choose to restart now.

After the restart is complete, use the following command line to check whether the camera is available.
If the camera screen appears it means that the camera is installed successfully. Otherwise the FFC cable needs to be unplugged and plugged in again.
raspivid -o vid.h264