HARDWARE DESCRIPTION
Features
Resolution: 1024x576
Plug & Play
5-point Touch Capacitive Screen
Power Input: DC 12V/1.5A
Power Output: USB Type A 5V/3A
Aspect Ratio: 16:9
Consumption: 7W
LCD Type: IPS
Speaker: 8Ω/2W
Back

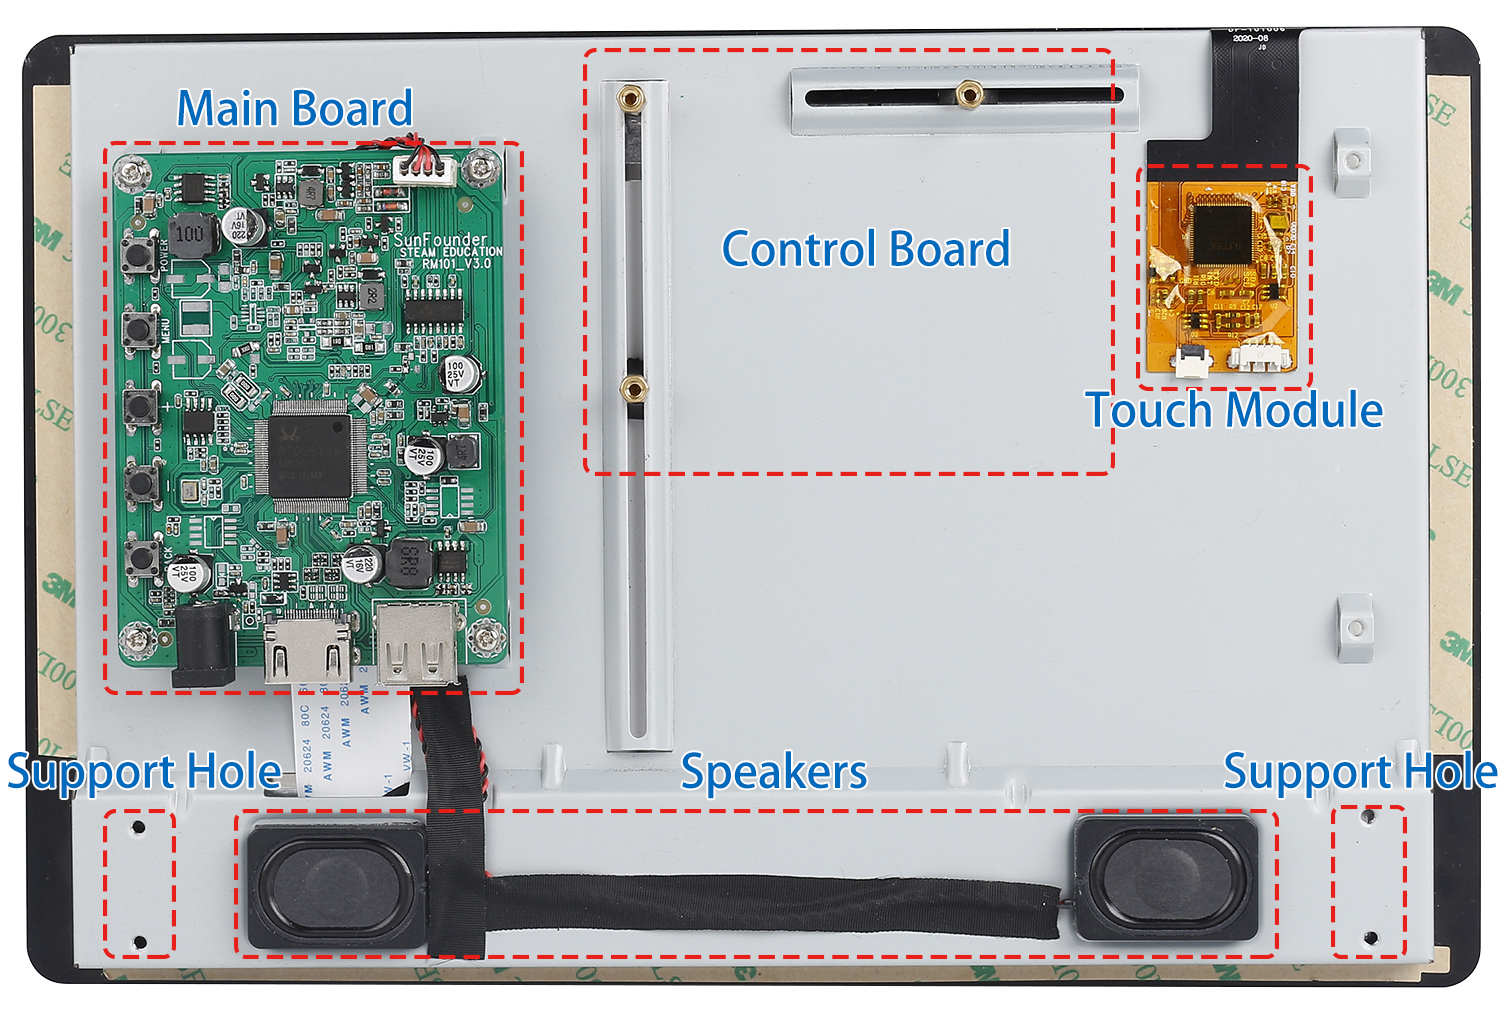
This is the back of it, with the main board, touch module pre-installed. To use it, just attach the speaker and your control board to it and connect all the wires.
Touch Module

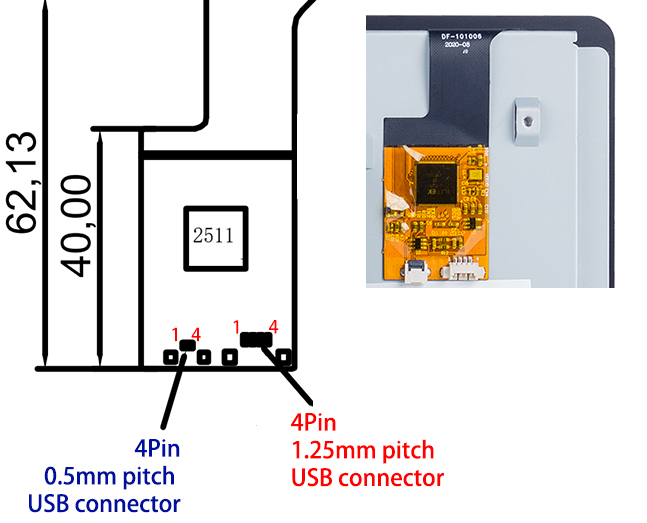
There are two types of 4pin connector on the touch module, with the pin serial number shown on the figure.
Here are the definitions of the pins:
Pin 1: VDD(5V)
Pin 2: D-
Pin 3: D+
Pin 4: GND
LED Indicators

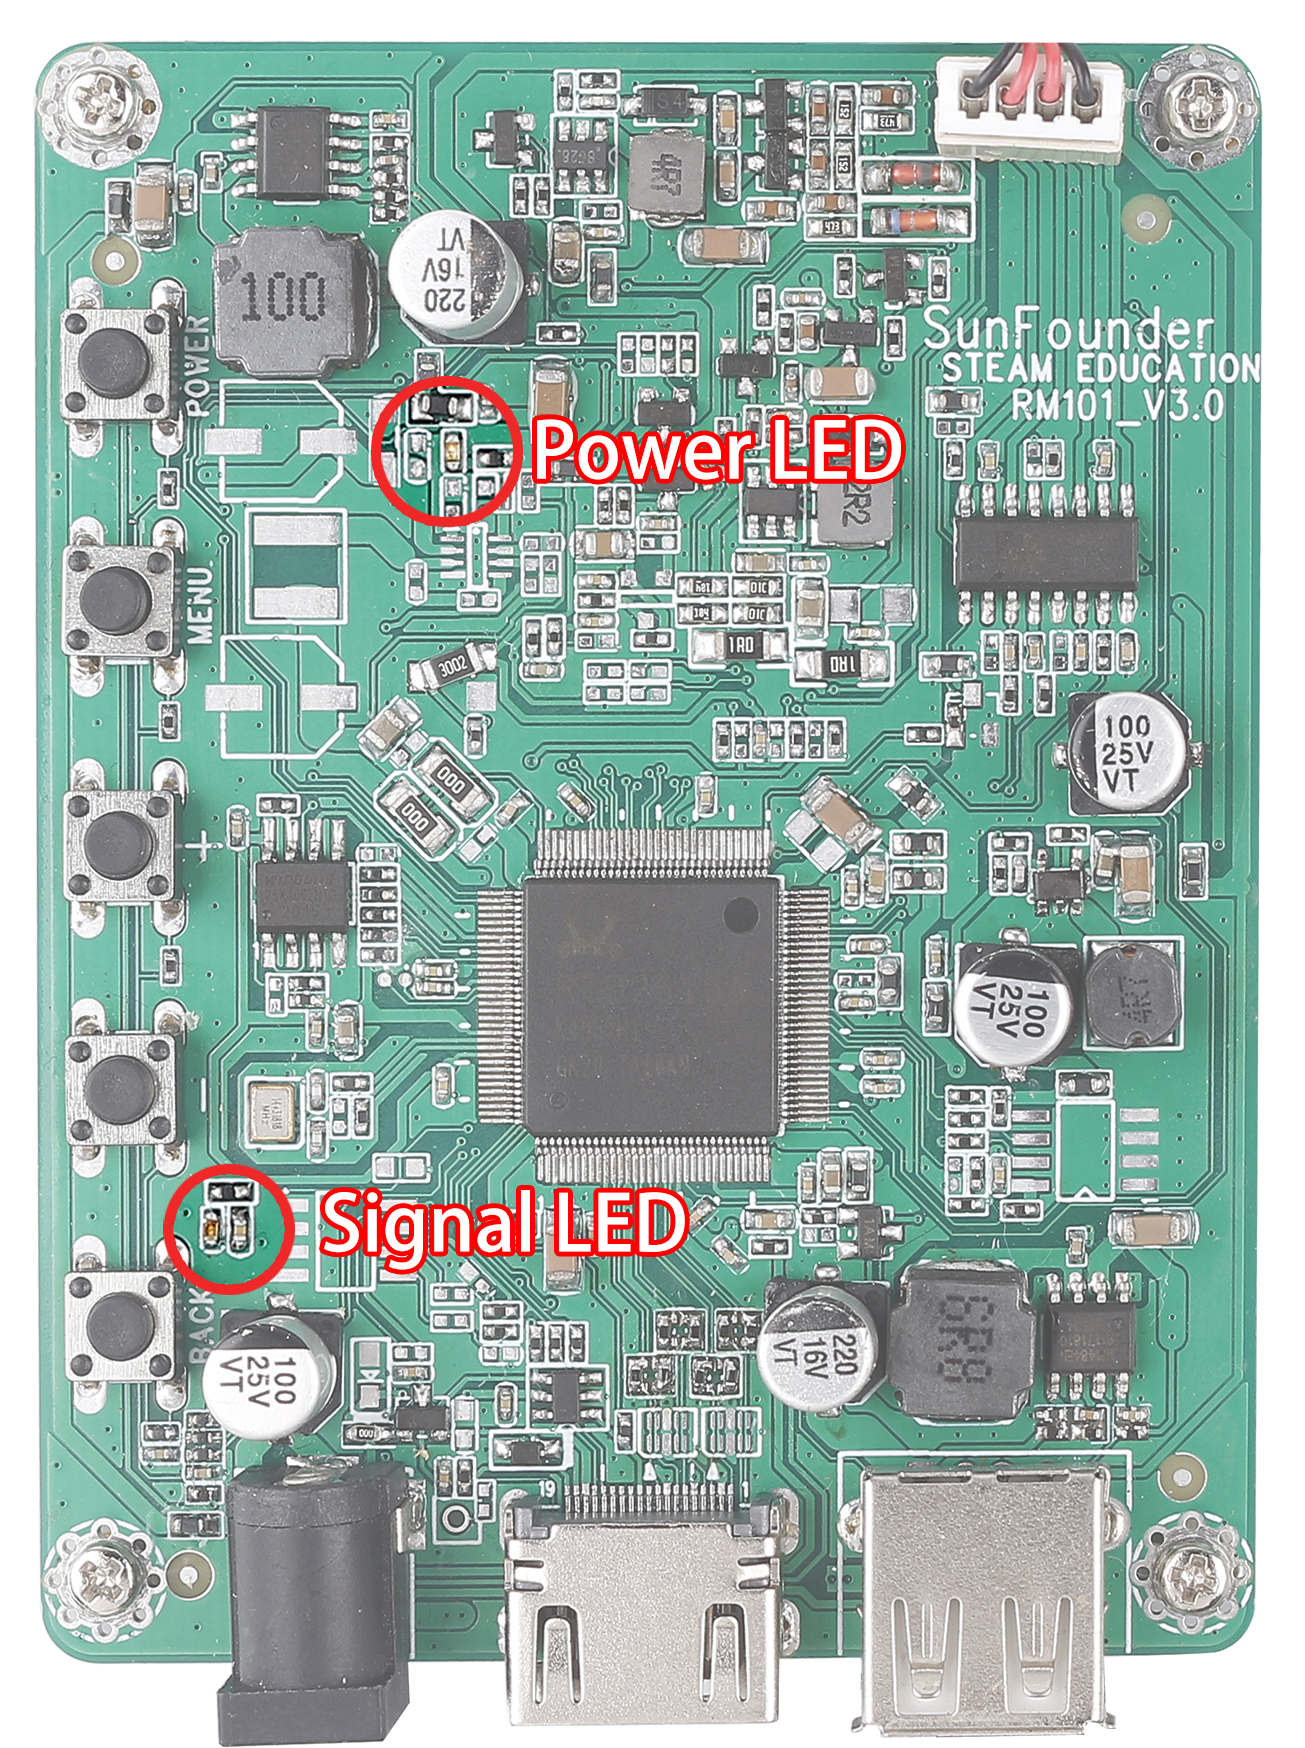
Power on the screen, after the Signal LED flashes one time, it lights on continuously; and the Power LED lights on immediately.
If there’s no HDMI signal, only the Power LED will turn on.
If there’s an HDMI signal, these two LEDs will turn on.
If you press the power button, the Signal LED will turn off and the Power LED will keep turning on.
If you remove the power adapter, both of the two LEDs will turn off.
Buttons

Buttons on the main board and their functions:
Working |
Sleep |
Menu |
Volume Adjust |
Brightness Adjust |
|
|---|---|---|---|---|---|
Power |
Enter Sleep state |
Enter Working state |
Enter Sleep state |
Enter Sleep state |
Enter Sleep state |
Menu |
Open the Menu |
Confirm |
|||
“+” |
Increase Volume |
“+” |
Increase Volume |
Increase Brightness |
|
“-” |
Decrease Volume |
“-” |
Decrease Volume |
Decrease Brightness |
|
Back |
Open the Brightness adjust |
back |
back |
back |
Ports

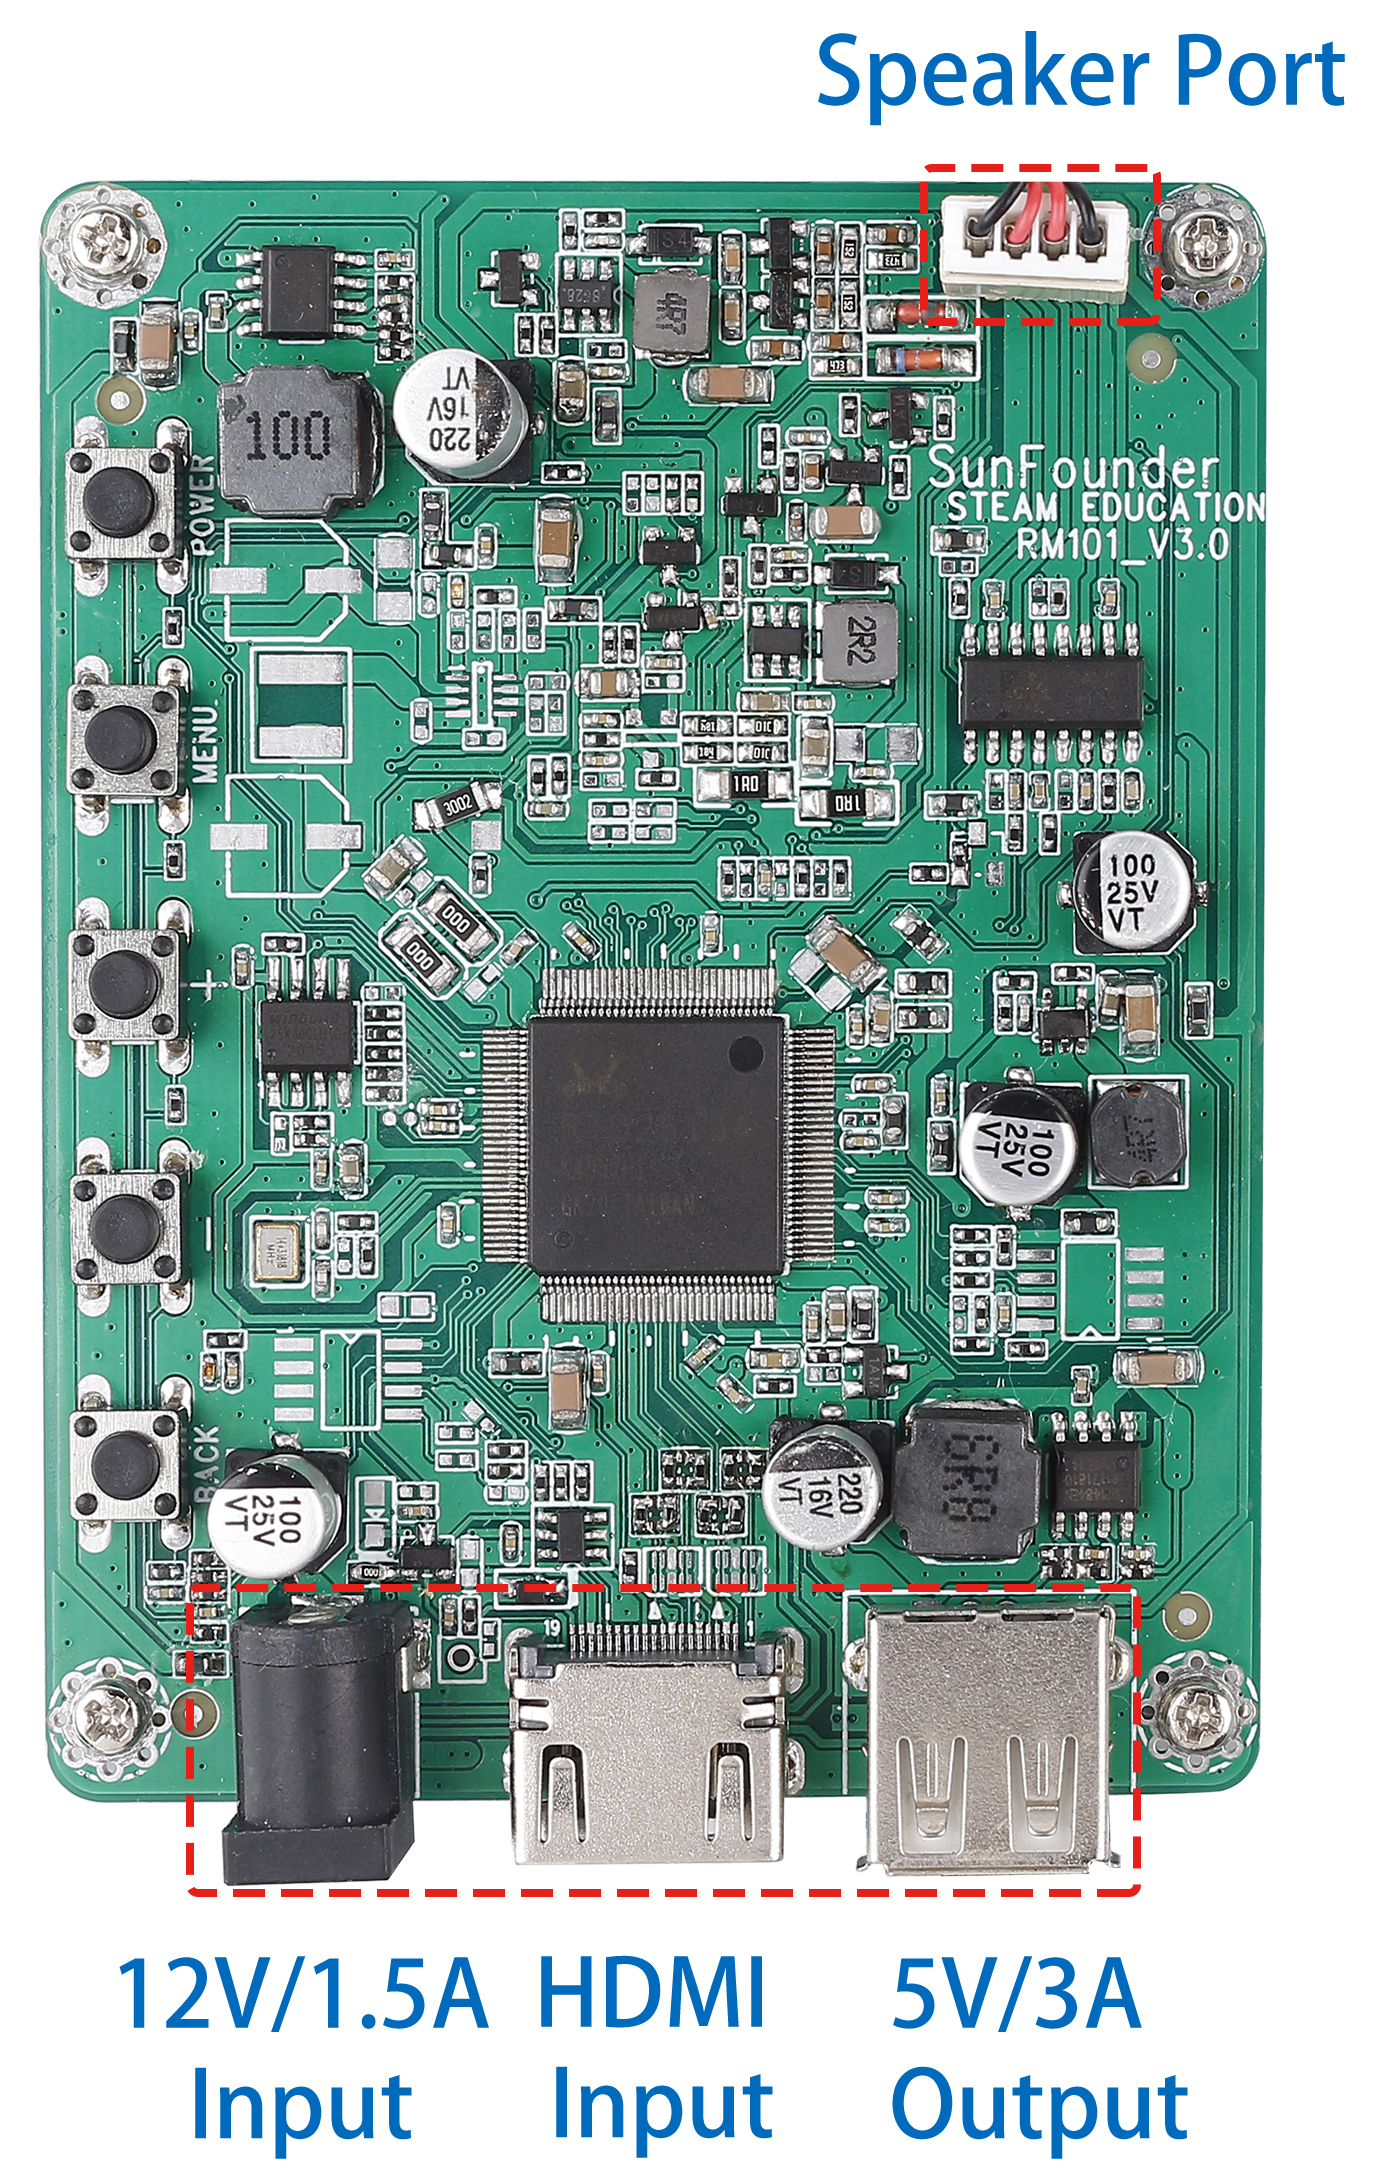
On one side of the main board there are ports of HDMI input, 12V power input, and 5V/3A USB power output and Speaker Port.