Note
Hello, welcome to the SunFounder Raspberry Pi & Arduino & ESP32 Enthusiasts Community on Facebook! Dive deeper into Raspberry Pi, Arduino, and ESP32 with fellow enthusiasts.
Why Join?
Expert Support: Solve post-sale issues and technical challenges with help from our community and team.
Learn & Share: Exchange tips and tutorials to enhance your skills.
Exclusive Previews: Get early access to new product announcements and sneak peeks.
Special Discounts: Enjoy exclusive discounts on our newest products.
Festive Promotions and Giveaways: Take part in giveaways and holiday promotions.
👉 Ready to explore and create with us? Click [here] and join today!
Getting Started with Arduino
Arduino is an open source platform with powerful software and hardware features.
Even if you are a beginner, you can master it in no time. It provides an integrated development environment (IDE) for code compilation that is compatible with various control boards. In fact, the Arduino IDE supports almost all hobbyist microcontrollers, including the Raspberry Pi Pico. Therefore, all you need to do is download the Arduino IDE, upload the sketches (i.e. code files) to the control board, and then you can see the relative experimental phenomena.
For more information, refer to Arduino Website.
Install Arduino IDE
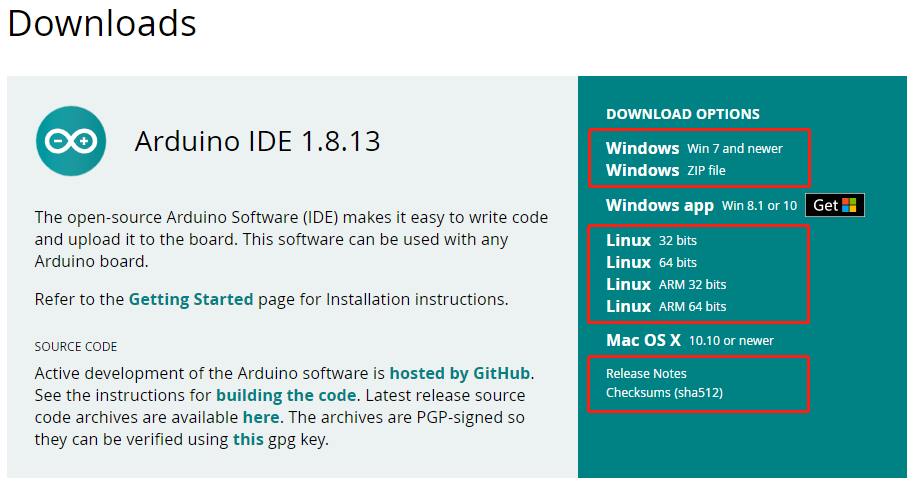
The first thing we need to do is to download the IDE from the Arduino software page <https://www.arduino.cc/en/software>. The Raspberry Pi Pico is a newly released control board and may not be compatible on older versions of the Arduino IDE, so it is recommended that you download the latest version of the IDE, at least version 1.8.13 or higher.
If you are more explorative, you can also download Arduino IDE 2.0. This version is still in beta, so you may encounter some strange problems, but it is faster and even more powerful!
Choose the version that suits your system. You don’t have to make a donation to download the software, but if you are a casual user and can afford it, this is a good way to help make sure it continues to get upgraded.
Introduction the Arduino Software (IDE)
Double-click the Arduino icon (arduino.exe) created by the installation process. Then the Arduino IDE will appear. Let’s check details of the software.
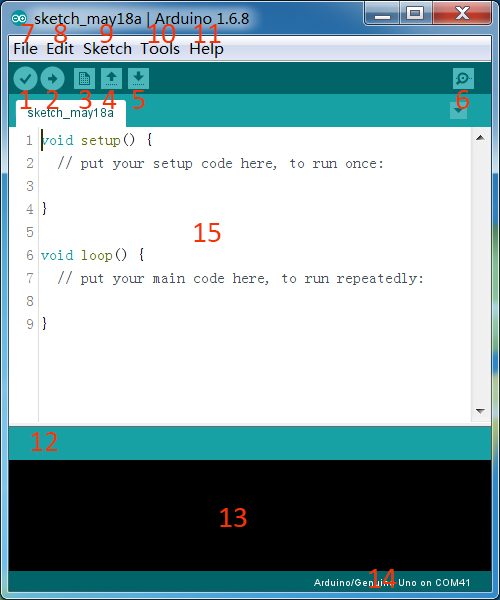
Verify: Compile your code. Any syntax problem will be prompted with errors.
Upload: Upload the code to your board. When you click the button, the RX and TX LEDs on the board will flicker fast and won’t stop until the upload is done.
New: Create a new code editing window.
Open: Open an .ino sketch.
Save: Save the sketch.
Serial Monitor: Click the button and a window will appear. It receives the data sent from your control board. It is very useful for debugging.
File: Click the menu and a drop-down list will appear, including file creating, opening, saving, closing, some parameter configuring, etc.
Edit: Click the menu. On the drop-down list, there are some editing operations like Cut, Copy, Paste, Find, and so on, with their corresponding shortcuts.
Sketch: Includes operations like Verify, Upload, Add files, etc. More important function is Include Library – where you can add libraries.
Tool: Includes some tools – the most frequently used Board (the board you use) and Port (the port your board is at). Every time you want to upload the code, you need to select or check them.
Help: If you’re a beginner, you may check the options under the menu and get the help you need, including operations in IDE, introduction information, troubleshooting, code explanation, etc.
In this message area, no matter when you compile or upload, the summary message will always appear.
Detailed messages during compile and upload. For example, the file used lies in which path, the details of error prompts.
Board and Port: Here you can preview the board and port selected for code upload. You can select them again by Tools -> Board / Port if any is incorrect.
The editing area of the IDE. You can write code here.
Setup the Raspberry Pi Pico
Once it’s installed, open the application, we need to install the extra package that makes the Raspberry Pi Pico work.
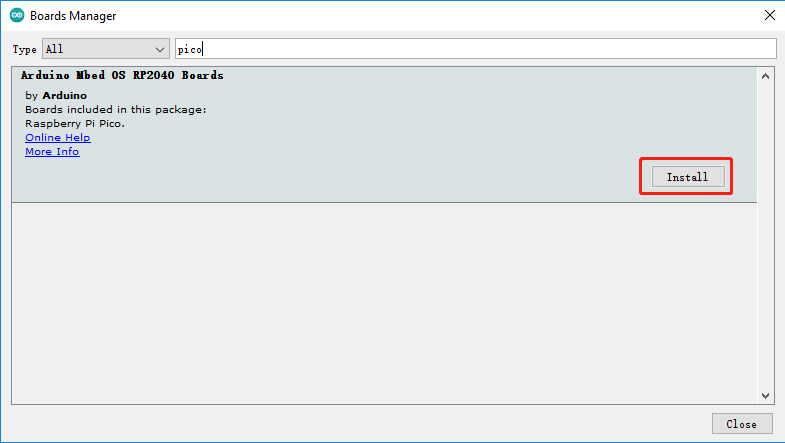
Open the Boards Manager by clicking Tools -> Board -> Boards Manager.
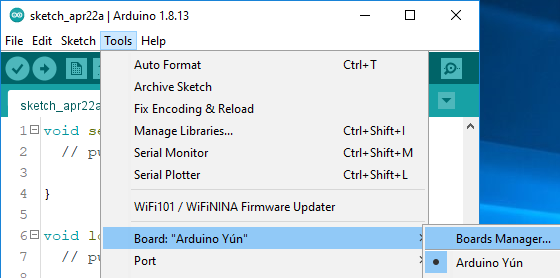
Search for Pico(Arduino Mbed OS RP2040 Boards) and click install button.
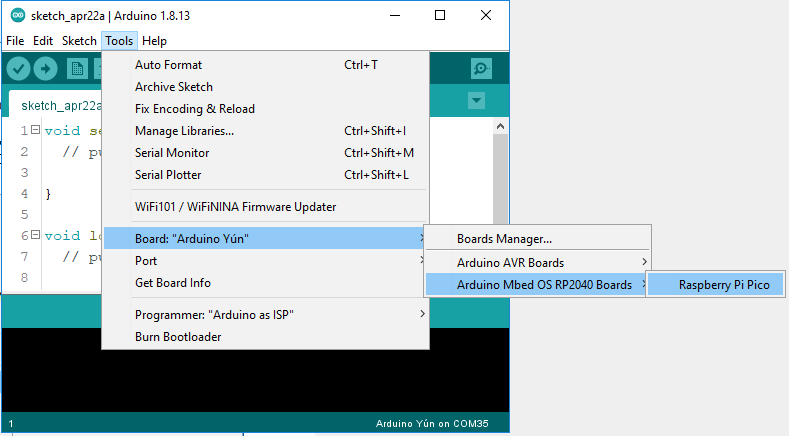
Once the installation is complete, you can select the board as Raspberry Pi Pico.
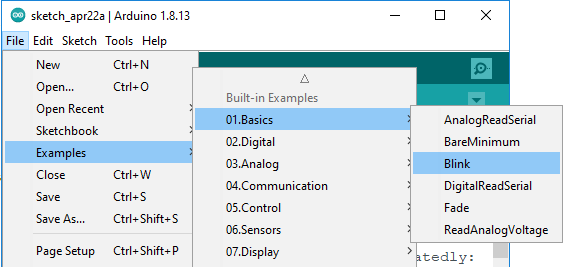
Now open a example - blink.
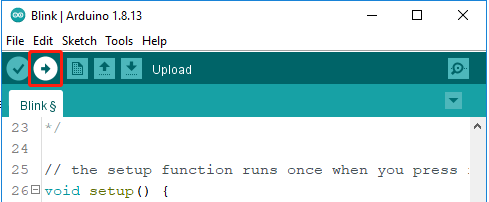
Click on the upload icon to run the code
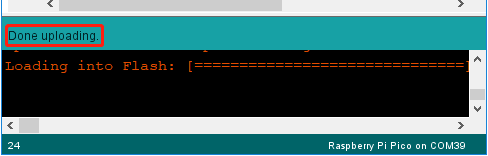
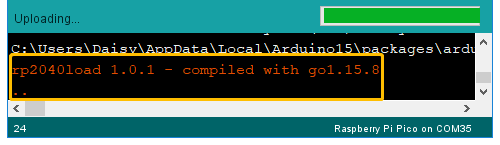
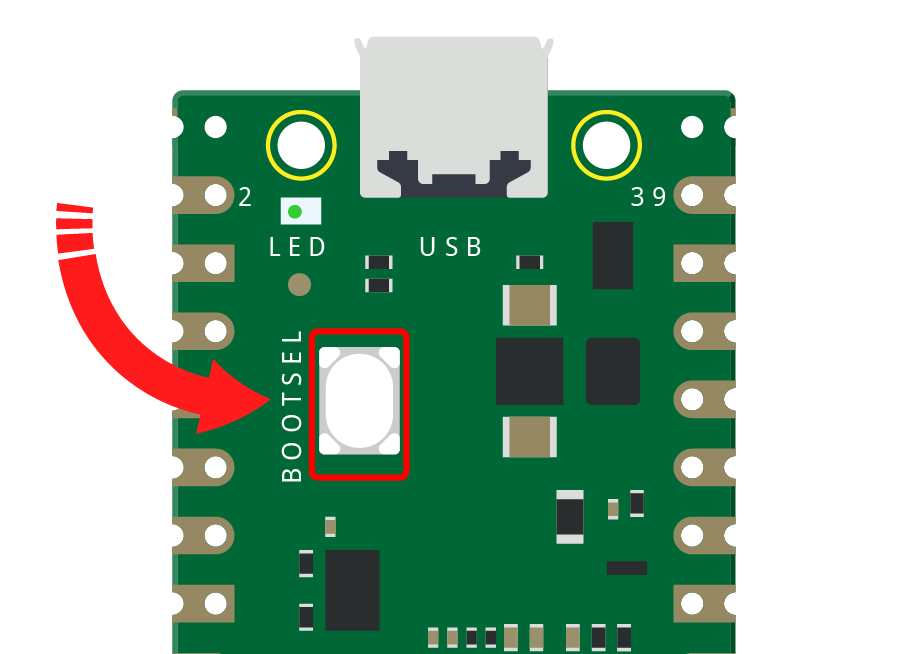
When the compiling message shown in the figure below appears, press BOOTSEL immediately and connect Pico to the computer with a Micro USB cable.
Note
This step is very important and only necessary for the first use on the Arduino IDE, otherwise your code will upload unsuccessfully.
After the upload is successful this time, Pico will be recognized by the computer as COMxx (Raspberry Pi Pico).
You only need to plug it into the computer the next time you use it.
After the Done Uploading appear, you will see the LED on the Pico blinking.