Note
Hello, welcome to the SunFounder Raspberry Pi & Arduino & ESP32 Enthusiasts Community on Facebook! Dive deeper into Raspberry Pi, Arduino, and ESP32 with fellow enthusiasts.
Why Join?
Expert Support: Solve post-sale issues and technical challenges with help from our community and team.
Learn & Share: Exchange tips and tutorials to enhance your skills.
Exclusive Previews: Get early access to new product announcements and sneak peeks.
Special Discounts: Enjoy exclusive discounts on our newest products.
Festive Promotions and Giveaways: Take part in giveaways and holiday promotions.
👉 Ready to explore and create with us? Click [here] and join today!
Servo Adjust
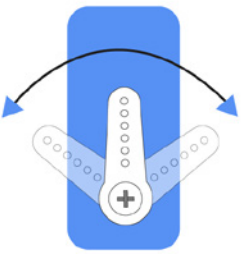
To ensure that the servo has been properly set to 0°, first insert the rocker arm into the servo shaft and then gently rotate the rocker arm to a different angle.
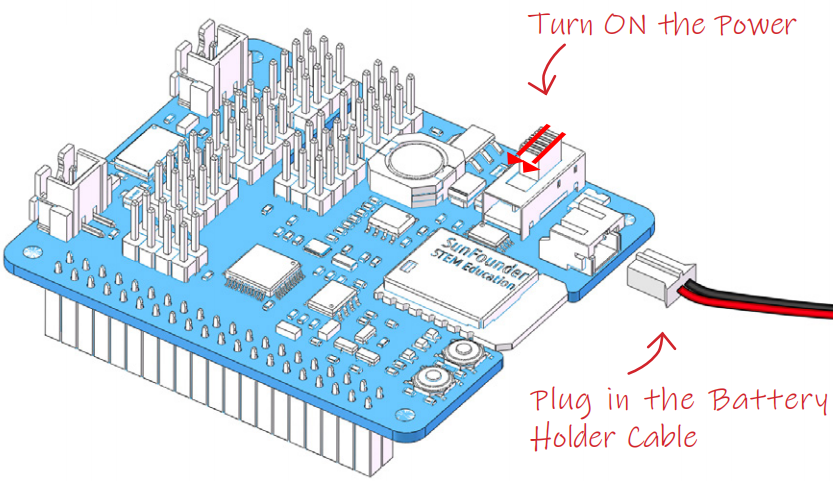
Follow the instructions on the assembly foldout, insert the battery holder cable and turn the power switch to the ON. Wait for 1-2 minutes, there will be a sound to indicate that the Raspberry Pi boots successfully.
Now, run servo_zeroing.py in the examples/ folder.
cd /home/pi/piarm/examples
sudo python3 servo_zeroing.py
Note
If you get an error, try re-enabling the Raspberry Pi’s I2C port, see: I2C Configuration.
Next, plug the servo cable into the P11 port as follows.
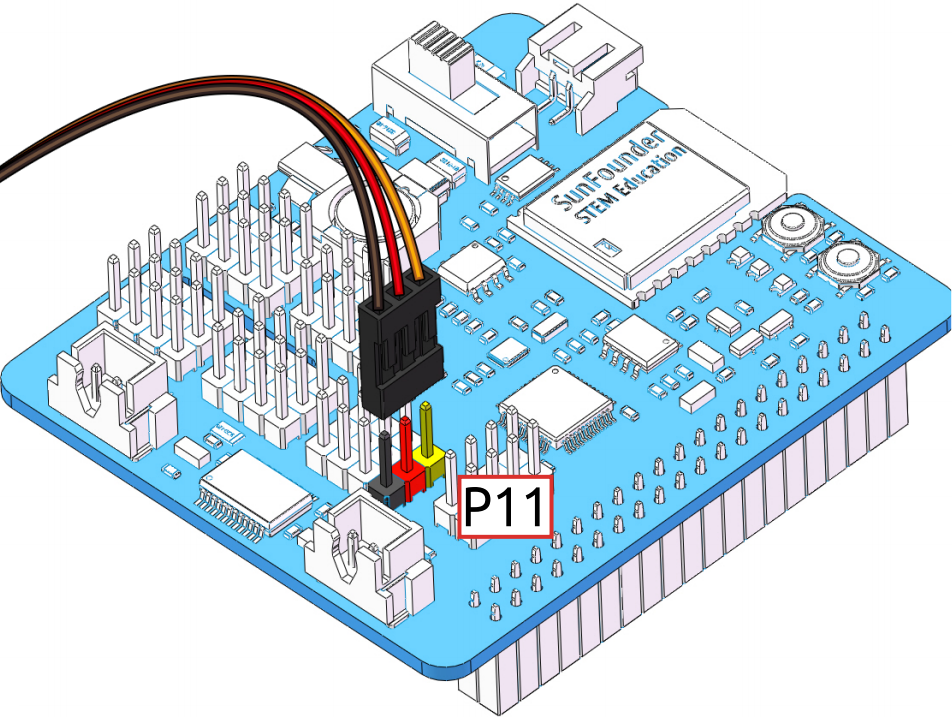
At this point you will see the servo arm rotate to a specific position (0°). If the servo arm does not return to 0°, press the RST button to restart the Robot HAT.
Now you can continue the installation as instructed on the assembly foldout.
Note
Do not unplug this servo cable before fixing it with the servo screw, you can unplug it after fixing it.
Do not rotate the servo while it is powered on to avoid damage; if the servo shaft is not inserted at the right angle, pull the servo out and reinsert it.
Before assembling each servo, you need to plug the servo cable into P11 and turn on the power to set its angle to 0°.