Note
Hello, welcome to the SunFounder Raspberry Pi & Arduino & ESP32 Enthusiasts Community on Facebook! Dive deeper into Raspberry Pi, Arduino, and ESP32 with fellow enthusiasts.
Why Join?
Expert Support: Solve post-sale issues and technical challenges with help from our community and team.
Learn & Share: Exchange tips and tutorials to enhance your skills.
Exclusive Previews: Get early access to new product announcements and sneak peeks.
Special Discounts: Enjoy exclusive discounts on our newest products.
Festive Promotions and Giveaways: Take part in giveaways and holiday promotions.
👉 Ready to explore and create with us? Click [here] and join today!
8.5 Cloud Calling System with @MQTT
Message Queuing Telemetry Transport (MQTT) is a simple messaging protocol. It is also the most common messaging protocol for the Internet of Things (IoT).
MQTT protocols define the way IoT devices transfer data. They are event-driven and interconnected using the Pub/Sub model. The sender (Publisher) and the receiver (Subscriber) communicate via Topics. A device publishes a message on a specific topic, and all devices subscribed to that topic receive the message.
In this section, a service bell system will be made using Pico W, HiveMQ (a free public MQTT broker service), and four buttons. The four buttons mean four tables in the restaurant, and you will be able to see which table’s guests need service on HiveMQ when the customer presses the button.
1. Required Components
In this project, we need the following components.
It’s definitely convenient to buy a whole kit, here’s the link:
Name |
ITEMS IN THIS KIT |
LINK |
|---|---|---|
Kepler Kit |
450+ |
You can also buy them separately from the links below.
SN |
COMPONENT |
QUANTITY |
LINK |
|---|---|---|---|
1 |
1 |
||
2 |
Micro USB Cable |
1 |
|
3 |
1 |
||
4 |
Several |
||
5 |
4(10KΩ) |
||
6 |
4 |
||
7 |
1 |
||
8 |
Power Pack |
1 |
|
9 |
Battery Holder |
1 |
2. Build the Circuit
Warning
Make sure your Li-po Charger Module is connected as shown in the diagram. Otherwise, a short circuit will likely damage your battery and circuitry.

3. Visit HiveMQ
HiveMQ is an MQTT broker and client-based messaging platform that enables fast, efficient and reliable data transfer to IoT devices.。
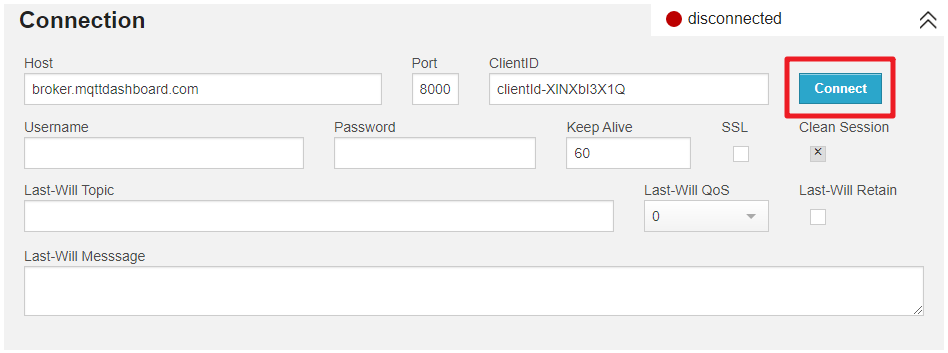
Open HiveMQ Web Client in your browser.
Connects the client to the default public proxy.
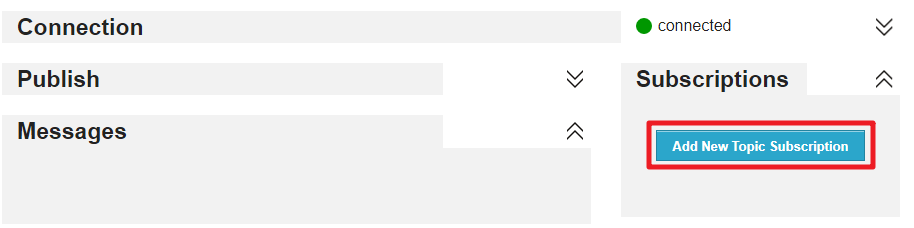
Click on Add New Topic Subscription.
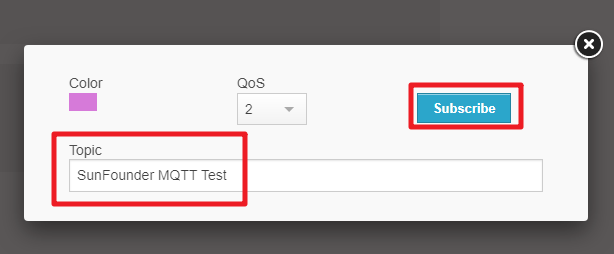
Fill in the topics you want to follow and click Subscribe. The topics set here should be more personal to avoid getting messages from other users, and pay attention to case sensitive.
4. Install the MQTT Module
Before we can start the project, we need to install the MQTT module for Pico W.
Connect to the network by running
do_connect()in the Shell, which we wrote earlier.Note
Type the following commands into the Shell and press
Enterto run them.If you don’t have
do_connect.pyandsecrets.pyscripts in your Pico W, please refer to 8.1 Access to the Network to create them.
from do_connect import *
do_connect()
After a successful network connection, import the
mipmodule in the shell and usemipto install theumqtt.simplemodule, which is a simplified MQTT client for MicroPython.import mip mip.install('umqtt.simple')
You will see that the
umqttmodule is installed under the/lib/path of Pico W after completion.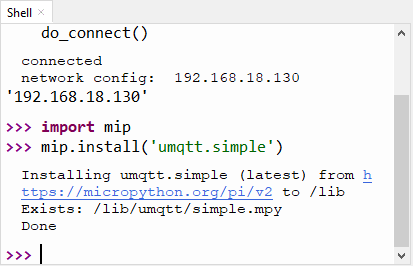
5. Run the Script
Open the
5_mqtt_publish.pyfile under the path ofkepler-kit-main/iot.Click the Run current script button or press F5 to run it.
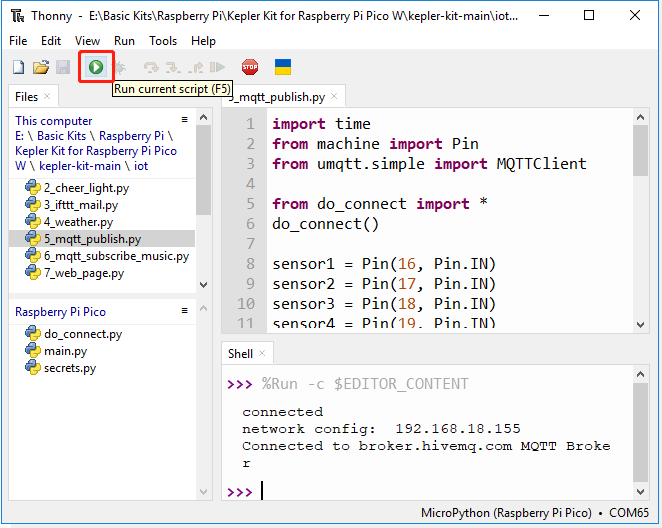
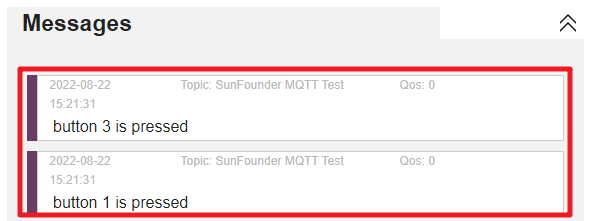
Go back to HiveMQ Web Client again and when you press one of the buttons on the breadboard, you will be able to see the Messages prompt on HiveMQ.
If you want this script to be able to boot up, you can save it to the Raspberry Pi Pico W as
main.py.
How it works?
The Raspberry Pi Pico W needs to be connected to the Internet, as described in 8.1 Access to the Network. For this project, just use it.
from do_connect import *
do_connect()
Initialize 4 button pins.
sensor1 = Pin(16, Pin.IN)
sensor2 = Pin(17, Pin.IN)
sensor3 = Pin(18, Pin.IN)
sensor4 = Pin(19, Pin.IN)
Create two variables to store the URL and client ID of the MQTT broker we will use to connect to it.
Since we are using a public broker, our client ID will not be used, even if one is required.
mqtt_server = 'broker.hivemq.com'
client_id = 'Jimmy'
Connect to the MQTT agent and hold for one hour. If it fails, reset the Pico W.
try:
    client = MQTTClient(client_id, mqtt_server, keepalive=3600)
    client.connect()
    print('Connected to %s MQTT Broker'%(mqtt_server))
except OSError as e:
    print('Failed to connect to the MQTT Broker. Reconnecting...')
    time.sleep(5)
    machine.reset()
Create a variable topic, which is the topic that the subscriber needs to follow. It should be the same as the topic filled in step 4 of 2. Visit HiveMQ above.
Incidentally, b here converts string to byte, because MQTT is a binary based protocol were the control elements are binary bytes and not text strings.
topic = b'SunFounder MQTT Test'
Set interrupts for each button. When a button is pressed, a message is posted under topic.
def press1(pin):
    message = b'button 1 is pressed'
    client.publish(topic, message)
    print(message)

sensor1.irq(trigger=machine.Pin.IRQ_RISING, handler=press1)