2.5 Drum Kit
For this project, let’s make a drum kit with three buttons and a slide switch. Now, play your own drums.
Wiring
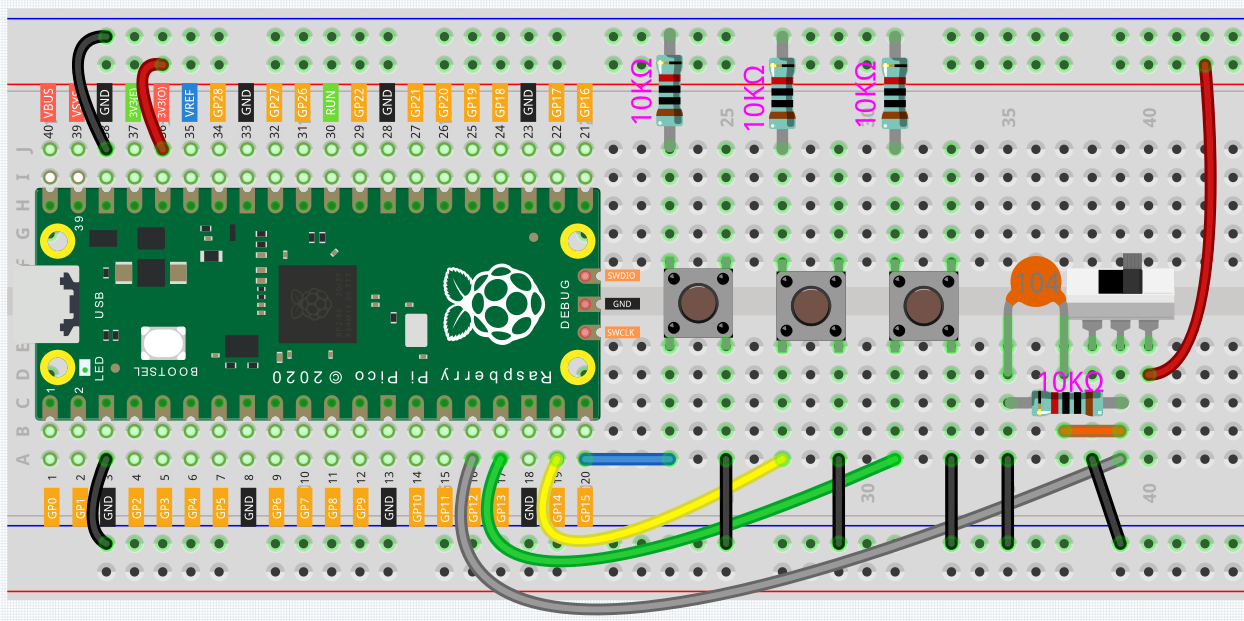
When the slide switch is toggled to the right, GP12 is high; when toggled to the left, GP12 is low.
Each of the three buttons is connected to a pull-down resistor, GP13~GP15 are low by default; when the button is pressed, GP13~GP15 are high.
Code
Note
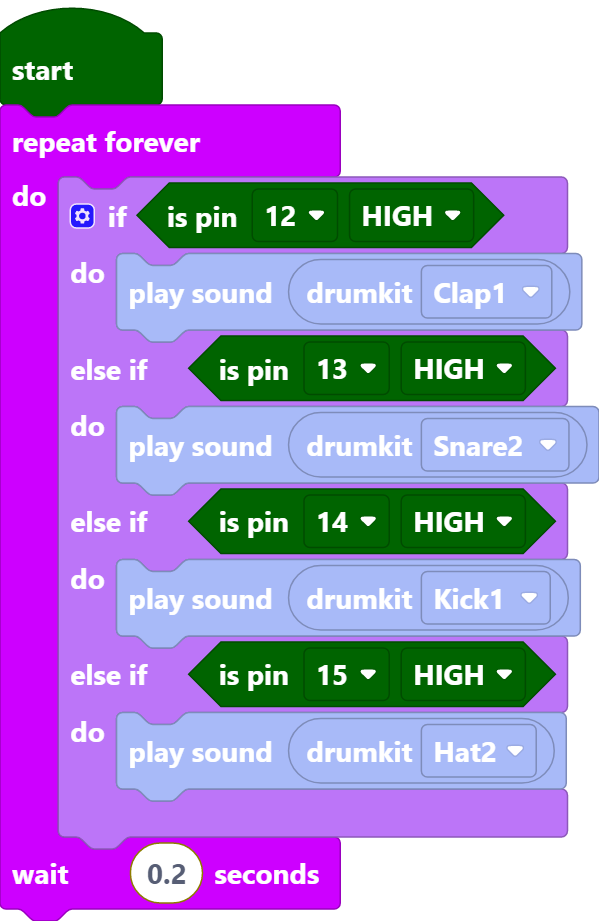
You can refer to the image below to write code by dragging and dropping.
Import
2.5_drum_kit.pngfrom the path ofeuler-kit\piper. For detailed tutorials, please refer to Import the Code.
After connecting Pico, click the Start button and the code starts to run. Pressing different buttons or toggling the slide switch will produce different drum sounds, just like a drum kit.
Note
If you are using a computer, you will need to plug in headphones or audio to your computer to hear the sound emitted.

