Note
Hello, welcome to the SunFounder Raspberry Pi & Arduino & ESP32 Enthusiasts Community on Facebook! Dive deeper into Raspberry Pi, Arduino, and ESP32 with fellow enthusiasts.
Why Join?
Expert Support: Solve post-sale issues and technical challenges with help from our community and team.
Learn & Share: Exchange tips and tutorials to enhance your skills.
Exclusive Previews: Get early access to new product announcements and sneak peeks.
Special Discounts: Enjoy exclusive discounts on our newest products.
Festive Promotions and Giveaways: Take part in giveaways and holiday promotions.
👉 Ready to explore and create with us? Click [here] and join today!
Note
If you are using the pre-installed “Raspberry Pi OS with AI Fusion Lab Kit” image, you can skip this section. This image already includes all the software installations, environment configurations, and example code deployments described in this chapter.
Configure Power & Install Software
In this chapter, you’ll install the related software, configure audio, set up safe power management and learn how to handle shutdowns.
Download Sample Code
Download the complete set of example code for the kit:
cd ~/
git clone https://github.com/sunfounder/ai-lab-kit.git --depth 1
Install fusion-hat module
For this kit, all GPIO functionalities are managed through the Fusion HAT+. Therefore, you need to use the accompanying fusion-hat library to access and control them.
Run the command in terminal to install fusion-hat module.
curl -sSL https://raw.githubusercontent.com/sunfounder/sunfounder-installer-scripts/main/install-fusion-hat.sh | sudo bash
Note
For the detail of fusion-hat, please refer to the Fusion HAT+.
After installation completes, reboot the Raspberry Pi. Then execute the audio setup script:
sudo /opt/setup_fusion_hat_audio.sh
This completes the software installation process for the Fusion HAT+.
Configure and Use Safe Shutdown
The Fusion HAT+ relies on the Raspberry Pi’s shutdown signal to fully manage system power. To ensure a safe and reliable power-off process, you need to configure the shutdown behavior according to your Raspberry Pi model and then use the power button correctly.
For Raspberry Pi 5 and 4B
These models support complete power-off after shutdown. The Fusion HAT+ monitors the 3.3V line to detect the Pi’s power state.
Place the jumper on RPI_STATE → Pi3V3.

Edit the EEPROM configuration manually:
sudo raspi-config
Navigate to Advanced Options → A12 Shutdown Behaviour.
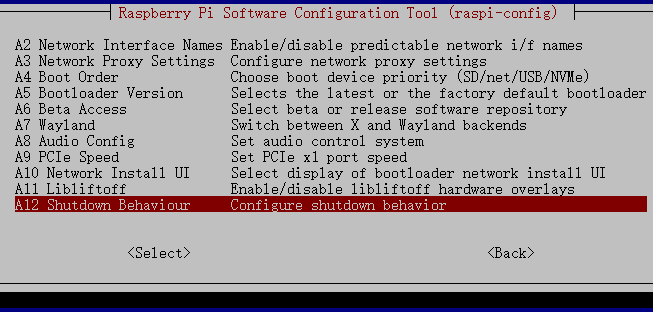
Select B1 Full Power Off.
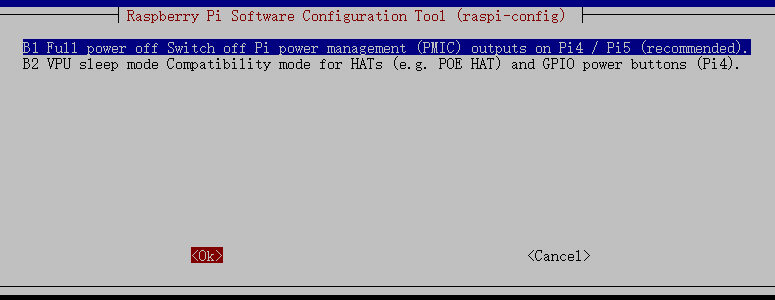
Save the changes. You will be prompted to reboot for the new settings to take effect.
For Raspberry Pi Zero 2W, 3B, 3B+
These models do not support full power-off using 3.3V. Instead, GPIO26 must be configured as a shutdown state indicator.
Place the jumper on RPI_STATE → IO26.

Edit the
/boot/firmware/config.txtfile:sudo nano /boot/firmware/config.txt
Add the following line at the end to set GPIO26 as low on shutdown and high on power-up:
dtoverlay=gpio-poweroff,gpio_pin=26,active_low=1
Reboot to apply changes:
sudo reboot
Using the Power Button for Safe Shutdown
After the shutdown configuration is completed, you can safely power off the PiCar-X using the Fusion HAT+ power button.
Soft Shutdown (Recommended)
Press and hold the power button for 2 seconds.
The two power LEDs will flash rapidly.
Release the button → Fusion HAT+ triggers Raspberry Pi shutdown.
Once the shutdown is complete, Fusion HAT+ will cut power automatically.
This protects your SD card and files.
Hard Shutdown (Emergency Only)
If the system becomes unresponsive, press and hold the power button for 5+ seconds.
Fusion HAT+ will force power-off.
Warning: This may corrupt the SD card or system files. Use only when necessary.