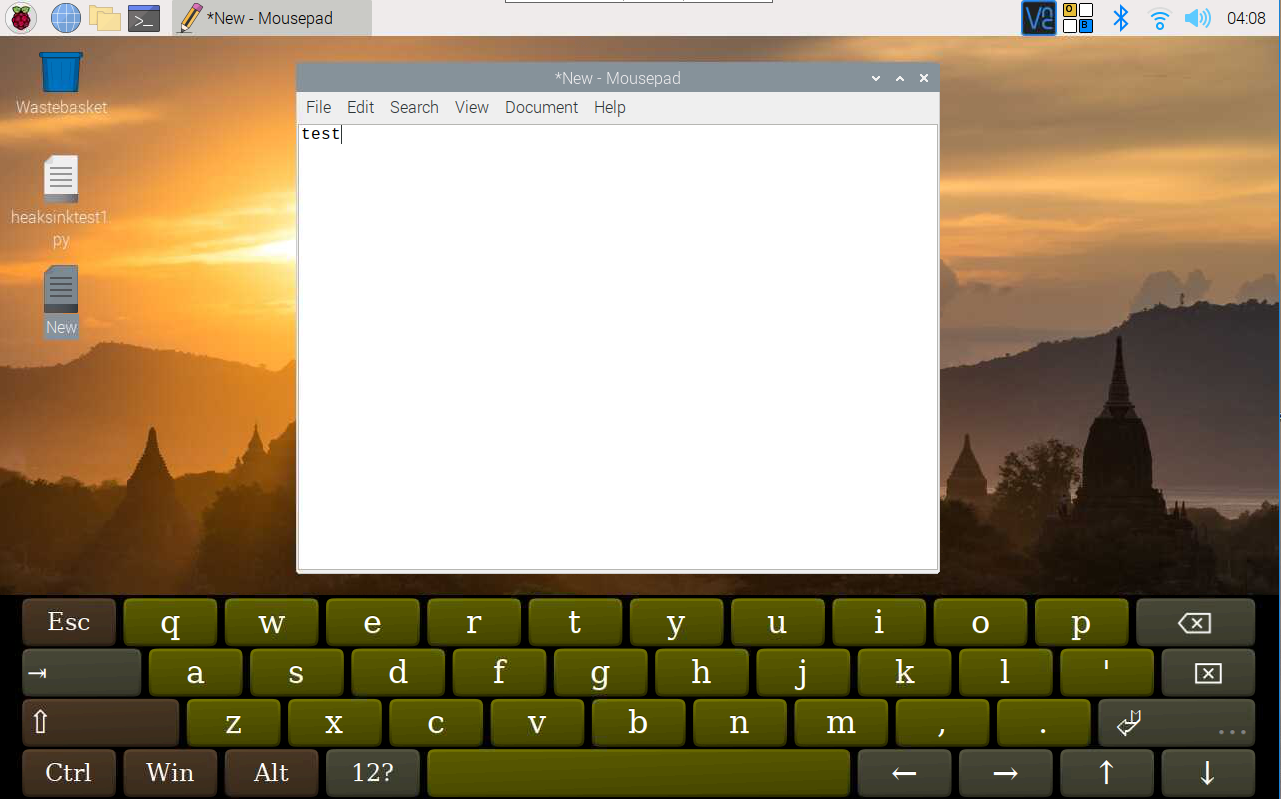
Install Virtual Keyboard on Raspberry Pi
When you use a touch panel, you can connect an external keyboard to help you do a text input operation, but it is best to install a virtual keyboard.
Install the required software with the following command.
sudo apt install onboard
sudo apt install at-spi2-core
In order to make the virtual keyboard have a better effect, you need to do further settings.
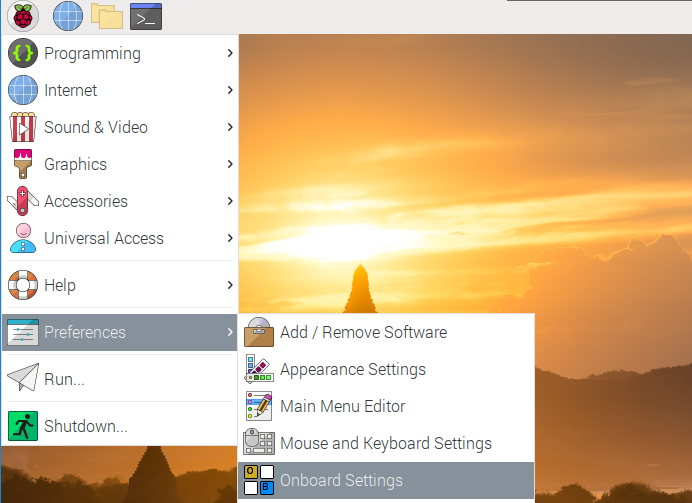
Click the Raspberry Pi icon in the upper left corner and select Preferences -> Onboard Settings.
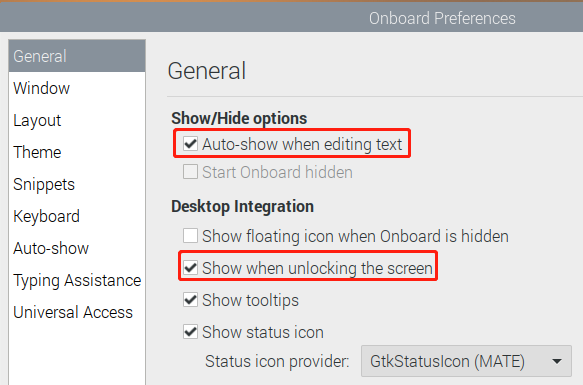
In the General option, check the following 2 items. When you check Automatically display when editing text, you will be prompted to reboot, you can reboot after all settings are complete.
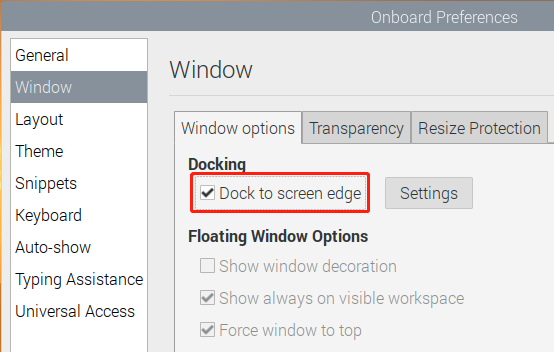
In the Window option, check Dock to screen edge.
And in Auto-show option, check Auto-show when editing text again.
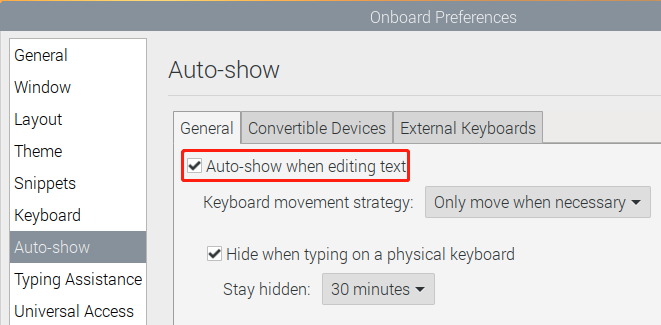
The next 2 items are optional, the ones checked in the picture are recommended by us, you can also check other ones.
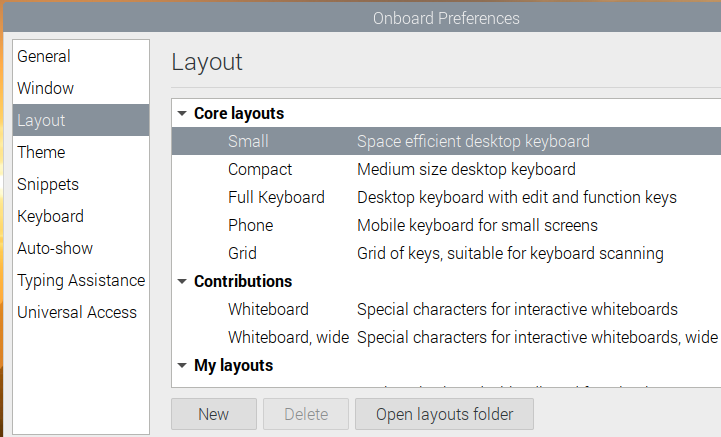
In Layout option, Small is recommanded.
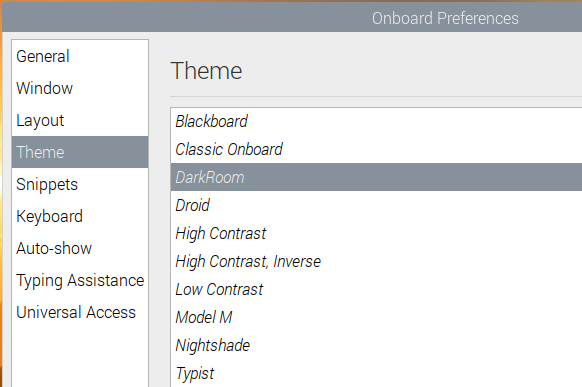
In Theme option, DarkRoom is recommanded.
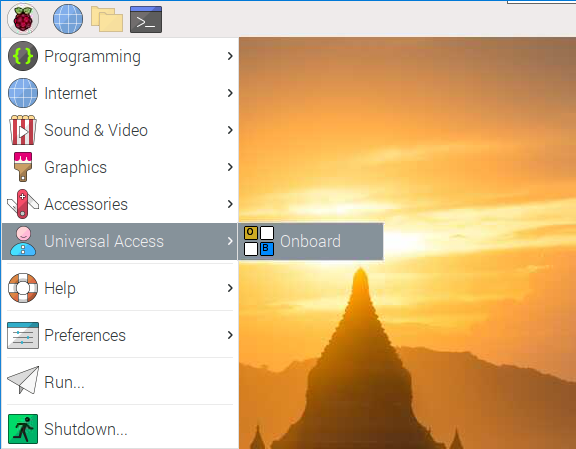
After the setting is complete, restart Raspberry pi. Every time you restart Raspberry pi, you need to click General Access -> Onboard to enable the virtual keyboard.
Now you can use this keyboard to edit your files or codes.
