QUICK USER GUIDE
Adjust the Resolution
For the Raspberry Pi 3 and the lower versions, you need reset the resolution ratio as follows. As for Raspberry Pi 4, when you start up it, the resolution is optimum. If you want to change its resolution, please refer to the next part.
For Raspberry Pi 3 or Lower Version
Step 1: Open config.txt.
sudo nano /boot/config.txt
Step 2: Modify the /boot/config.txt file.
Define a custom CVT mode (since Raspberry Pi uses the standard rate when 1024x600 is not included, you need to set the aspect ratio close to 16:9) and add the following lines below #hdmi_force_hotplug=1.
hdmi_cvt=1024 600 60 3 0 0 0
hdmi_cvt=<width> <height> <framerate> <aspect> <margins> <interlace>
value |
Default |
Description |
width |
(required) |
width in pixels |
height |
(required) |
height in pixels |
framerate |
(required) |
framerate in Hz |
aspect |
3 |
aspect ratio 1=4:3, 2=14:9, 3=16:9, 4=5:4, 5=16:10, 6=15:9 |
margins |
0 |
0=margins disabled, 1=margins enabled |
interlace |
0 |
0=progressive, 1=interlaced |
rb |
0 |
0=normal, 1=reduced blanking |
Find the following lines, delete the “#” mark and modify the value like this:
hdmi_group=2
hdmi_mode=87
....
hdmi_drive=2
hdmi_group=2 means DMT (Display Monitor Timings, the standard typically used on monitors) hdmi_mode=87 indicates we create a new hdmi mode named 87. hdmi_drive=2 selects the Normal HDMI mode.
After the modification is done, save and exit. For more details about configuring config.txt, refer to Raspberry Pi official website: https://www.raspberrypi.org/documentation/configuration/config-txt.md.
Step 3: Reboot Raspberry Pi.
Reboot the Raspberry pi with the command sudo reboot.
sudo reboot
For Raspberry Pi 4
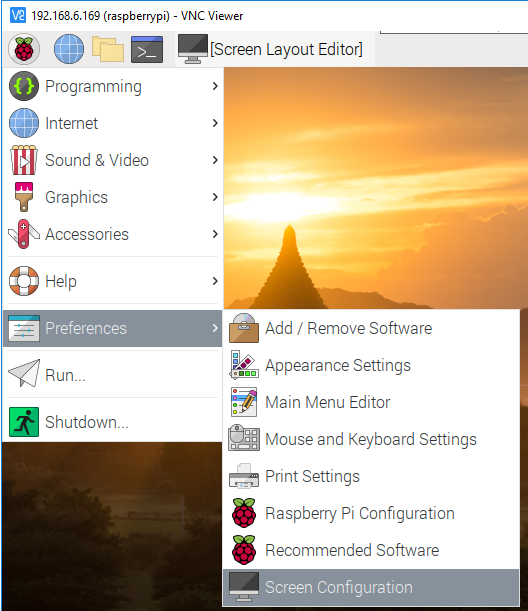
Click the Raspberry Pi icon -> Preferences -> Screen Configuration.

Then choose Configure -> Screens -> HDMI-1 -> Resolution -> choose the resolution that you want.
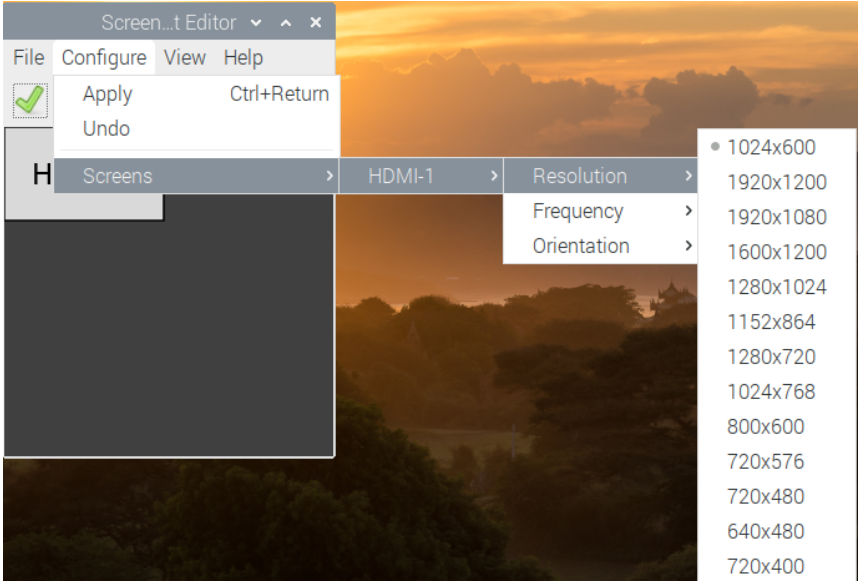
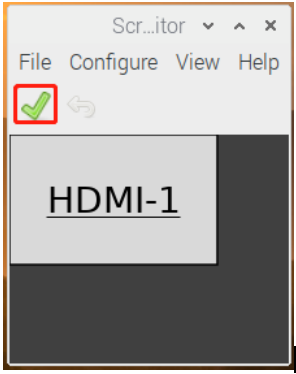
After that you need to click the tick icon to save your configure.
Install Virtual Keyboard on Raspberry Pi
Warning
If you have installed the latest system - Debian Bookworm, then this feature will be unavailable.
When you use a touch panel, you can connect an external keyboard to help you do a text input operation, but it is best to install a virtual keyboard.
Install the required software with the following command.
sudo apt install onboard
sudo apt install at-spi2-core
In order to make the virtual keyboard have a better effect, you need to do further settings.
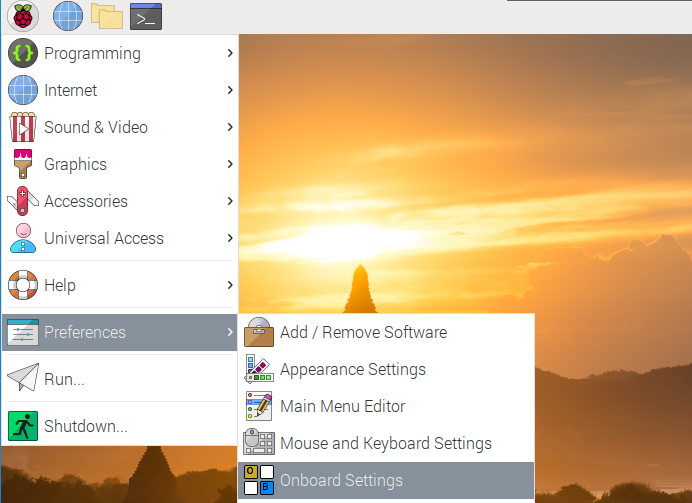
Click the Raspberry Pi icon in the upper left corner and select Preferences -> Onboard Settings.
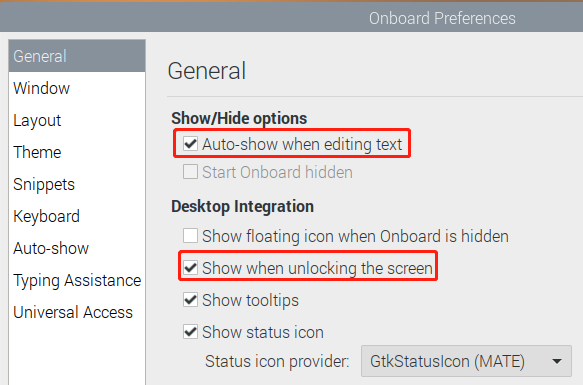
In the General option, check the following 2 items. When you check Automatically display when editing text, you will be prompted to reboot, you can reboot after all settings are complete.
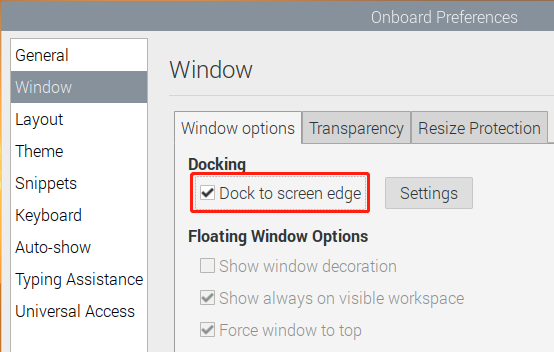
In the Window option, check Dock to screen edge.
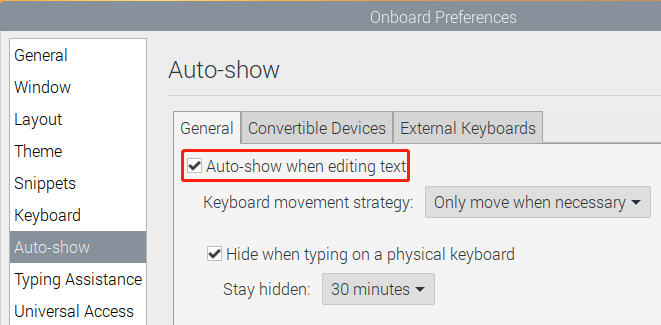
And in Auto-show option, check Auto-show when editing text again.
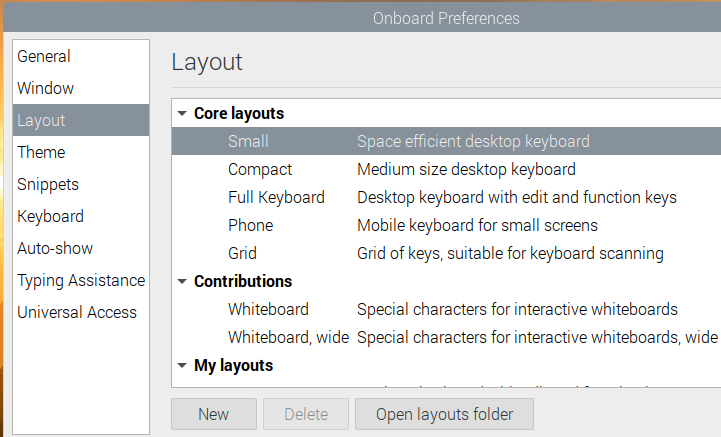
The next 2 items are optional, the ones checked in the picture are recommended by us, you can also check other ones.
In Layout option, Small is recommanded.
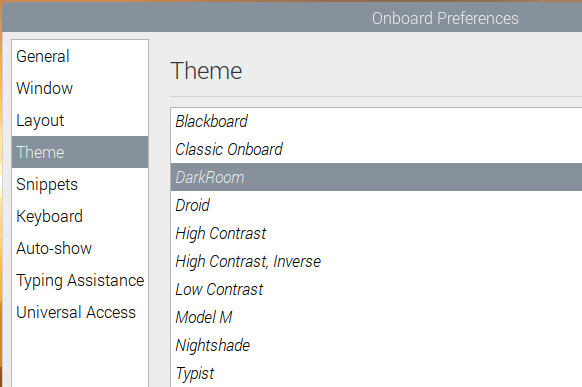
In Theme option, DarkRoom is recommanded.
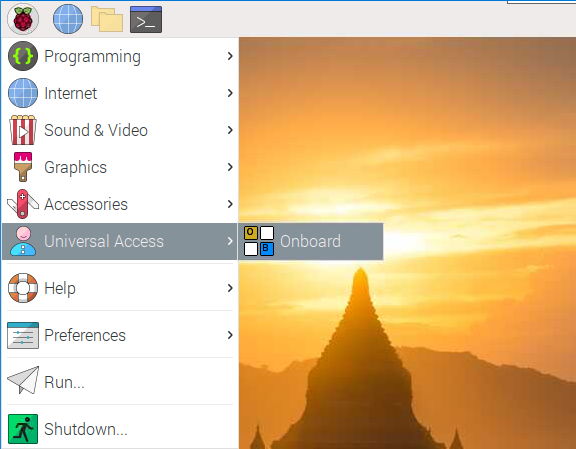
After the setting is complete, restart Raspberry pi. Every time you restart Raspberry pi, you need to click General Access -> Onboard to enable the virtual keyboard.
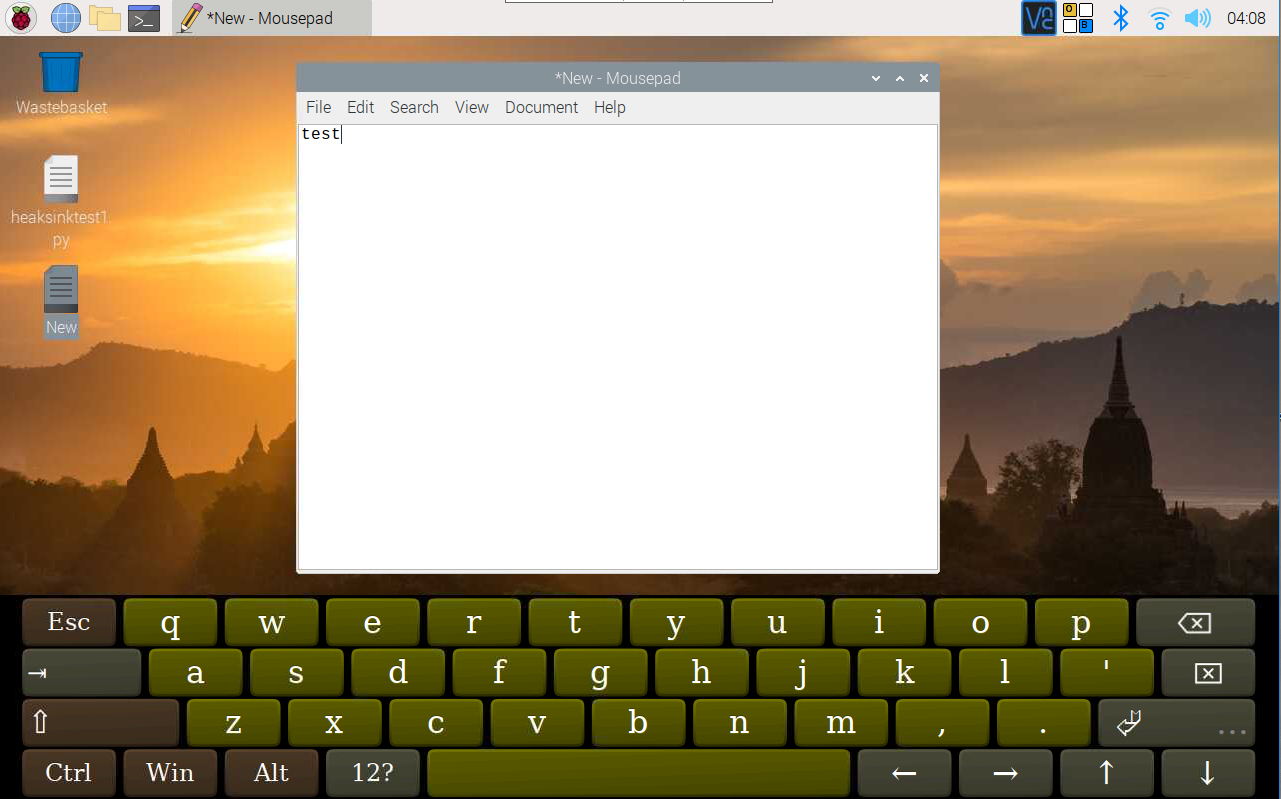
Now you can use this keyboard to edit your files or codes.
Right Click on Raspberry Pi
Warning
If you have installed the latest system - Debian Bookworm, then this feature will be unavailable.
The touchscreen makes it easy to perform simple navigation tasks with your finger or stylus, but you may want to be able to use the context menu (right-click menu).
Then you will need to download a Touchégg. Enter the following command to install it.
For 32-bit OS:
wget https://github.com/JoseExposito/touchegg/releases/download/2.0.14/touchegg_2.0.14_armhf.deb
sudo apt install ./touchegg_2.0.14_armhf.deb
For 64-bit OS:
wget https://github.com/JoseExposito/touchegg/releases/download/2.0.14/touchegg_2.0.14_arm64.deb
sudo apt install ./touchegg_2.0.14_arm64.deb
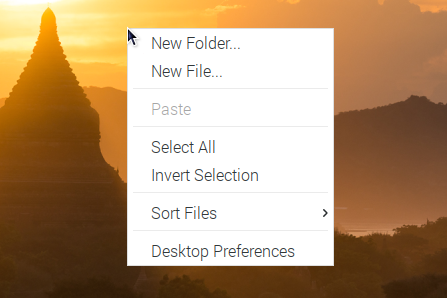
After restarting, you can double-tap the screen to bring up the context menu.
sudo reboot
Note
The product is not compatible with some of Touchégg’s gestures, such as three-finger zoom in/out.
Rotate the Display and Touch Angle
Warning
If you have installed the latest system - Debian Bookworm, then this feature will be unavailable.
After the Raspberry Pi is turned on, if you find that the display or touch angle is not correct, or you need to rotate to other angles during use, you can follow the tutorial below to achieve them.
Rotate the Display Angle
There are two ways to rotate the display angle, one way is from the Raspberry Pi desktop, and the other way is using the command line.
1. Set from the Raspberry Pi Desktop
Click the Raspberry Pi icon -> Preferences -> Screen Configuration.
Then click Configure -> Screens -> HDMI-1 -> Orientation, then select the angle you want to rotate.
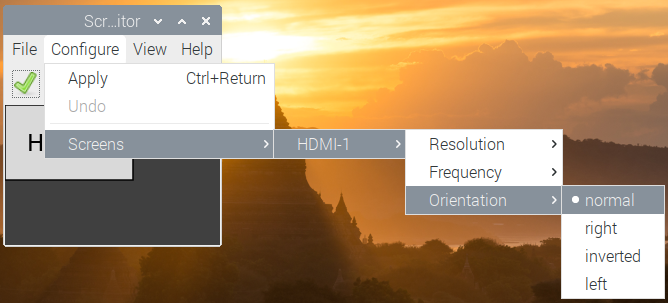
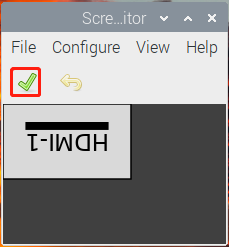
Click the green checkbox to take effect.
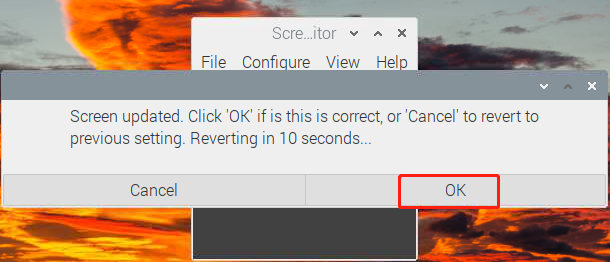
Note
After checking the box, you need to confirm the changes by clicking OK within 10 seconds, otherwise it will go back to the previous angle.
For Debian Bullseye system, there is only one option - Inverted, if you want to rotate to another angle, you need to set it from command line.
2. Using the Command Line
To make this change stay after a reboot, do the following to rotate your display.
Open the autostart file.
sudo nano /etc/xdg/lxsession/LXDE-pi/autostart
Add the following line to the end.
@xrandr --output HDMI-1 --rotate right
rightrepresents the direction of rotation, and there are 4 directions to choose from:normal,right,leftandinverted.
After restarting the Raspberry Pi, you will see the effect of rotation.
sudo reboot
Rotate Touch Angle
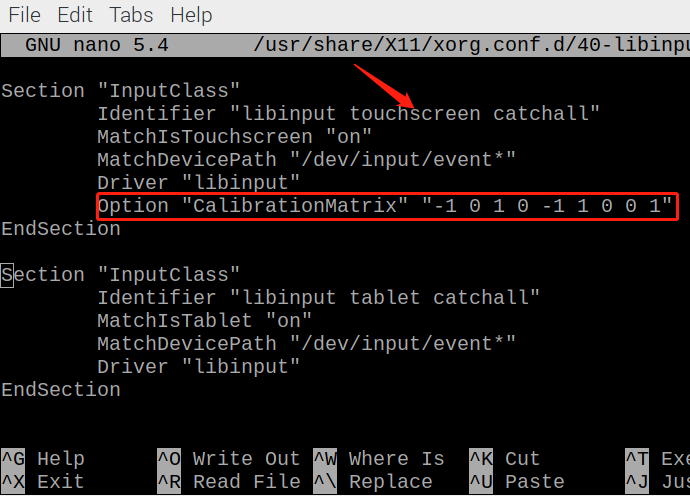
Run the following command to open the 40-libinput.conf file.
sudo nano /usr/share/X11/xorg.conf.d/40-libinput.conf
Find the touchscreen section and add the corresponding rotation angle to it.
0 degrees:
Option "CalibrationMatrix" "1 0 0 0 1 0 0 0 1"90 degrees:
Option "CalibrationMatrix" "0 1 0 -1 0 1 0 0 1"180 degrees:
Option "CalibrationMatrix" "-1 0 1 0 -1 1 0 0 1"270 degrees:
Option "CalibrationMatrix" "0 -1 1 1 0 0 0 0 1"
Note
For some Raspberry Pis, you may set the rotation angle of touch to 90°, but eventually you find that it is not 90° and you need to manually alternate these 4 sets of values.
After restarting the Raspberry Pi, you will see the effect of rotation.
sudo reboot