计算机视觉
本项目将正式进入计算机视觉领域!
运行代码
cd /home/pi/picrawler/examples
sudo python3 display.py
查看图像
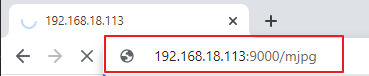
代码运行后,在浏览器中输入 http://<your IP>:9000/mjpg 来查看视频画面。如: https://192.168.18.113:9000/mjpg
按照根据终端的信息提示,按下键盘上的按键来查看相应的功能。
q: 拍照
1: 颜色检测:红色 : red
2: 颜色检测:橙色色 : orange
3: 颜色检测:黄色 : yellow
4: 颜色检测:绿色 : green
5: 颜色检测:蓝色 : blue
6: 颜色检测:紫色 : purple
0: 关闭颜色检测
r:扫描二维码
f: 开/关人脸检测
s: 显示检测的目标信息
拍照
在终端中输入
q并按下回车。 相机当前看到的图片会被保存(如果开启颜色检测功能,保存的图片中也会出现标记框)。你可以从目录/home/pi/Pictures/PiCrawler/看到这些照片。 然后用 Filezilla 软件 之类的工具将照片发送到你的电脑上。颜色检测
人脸检测
输入
f来打开人脸检测。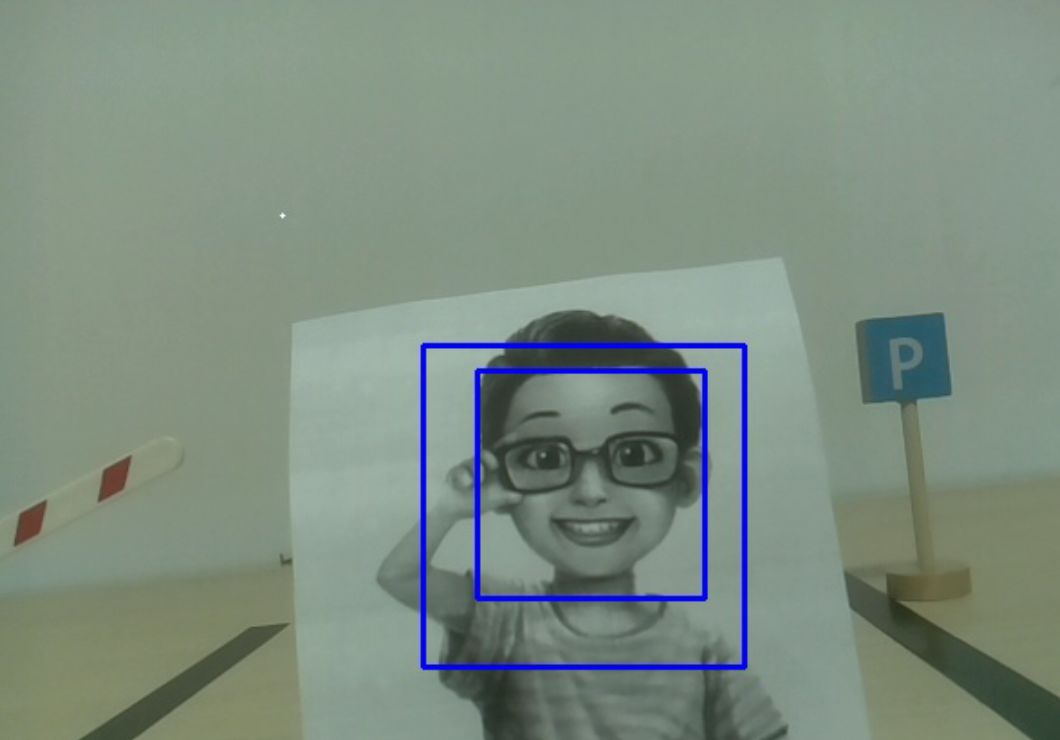
二维码检测
输入
r来打开二维码检测。在识别二维码之前,不能进行其他操作。二维码的解码信息将打印在终端中。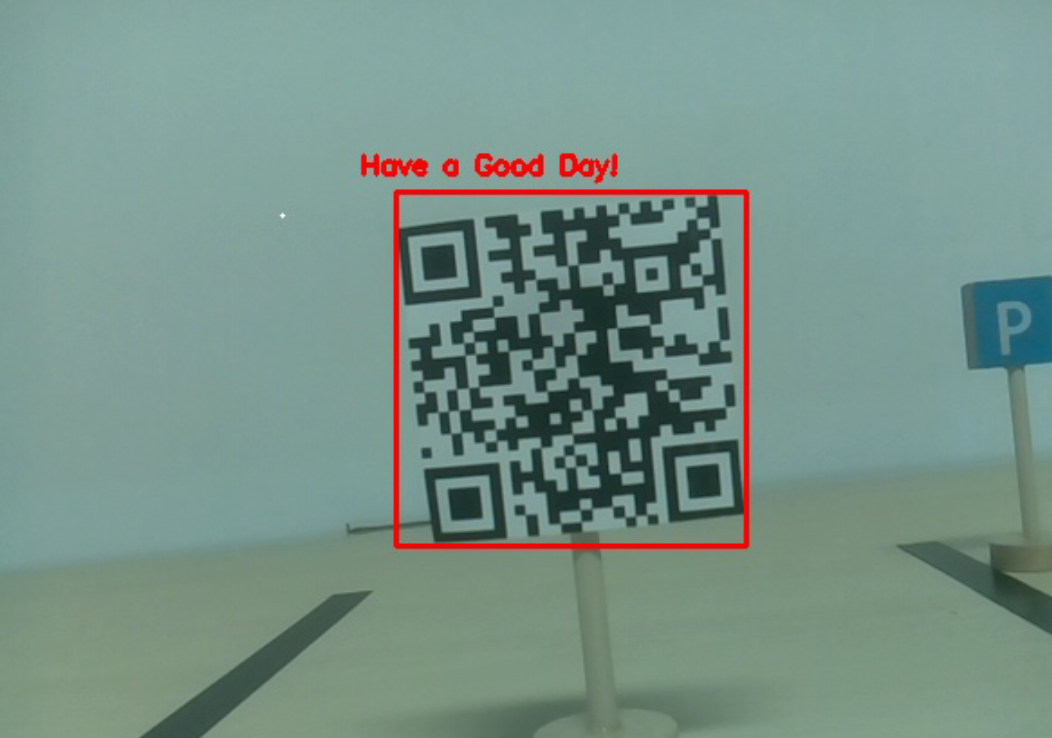
显示信息
输入
s会在终端打印人脸检测(和颜色检测)目标的信息。包括被测物体的中心坐标(X,Y)和尺寸(重量,高度)。
代码
from pydoc import text
from vilib import Vilib
from time import sleep, time, strftime, localtime
import threading
import readchar


flag_face = False
flag_color = False
qr_code_flag = False

manual = '''
Input key to call the function!
    q: Take photo
    1: Color detect : red
    2: Color detect : orange
    3: Color detect : yellow
    4: Color detect : green
    5: Color detect : blue
    6: Color detect : purple
    0: Switch off Color detect
    r:Scan the QR code
    f: Switch ON/OFF face detect
    s: Display detected object information
'''

color_list = ['close', 'red', 'orange', 'yellow',
        'green', 'blue', 'purple',
]

def face_detect(flag):
    print("Face Detect:" + str(flag))
    Vilib.face_detect_switch(flag)


def qrcode_detect():
    global qr_code_flag
    if qr_code_flag == True:
        Vilib.qrcode_detect_switch(True)
        print("Waitting for QR code")

    text = None
    while True:
        temp = Vilib.detect_obj_parameter['qr_data']
        if temp != "None" and temp != text:
            text = temp
            print('QR code:%s'%text)
        if qr_code_flag == False:
            break
        sleep(0.5)
    Vilib.qrcode_detect_switch(False)


def take_photo():
    _time = strftime('%Y-%m-%d-%H-%M-%S',localtime(time()))
    name = 'photo_%s'%_time
    path = "/home/pi/Pictures/PiCrawler/"
    Vilib.take_photo(name, path)
    print('photo save as %s%s.jpg'%(path,name))


def object_show():
    global flag_color, flag_face

    if flag_color is True:
        if Vilib.detect_obj_parameter['color_n'] == 0:
            print('Color Detect: None')
        else:
            color_coodinate = (Vilib.detect_obj_parameter['color_x'],Vilib.detect_obj_parameter['color_y'])
            color_size = (Vilib.detect_obj_parameter['color_w'],Vilib.detect_obj_parameter['color_h'])
            print("[Color Detect] ","Coordinate:",color_coodinate,"Size",color_size)

    if flag_face is True:
        if Vilib.detect_obj_parameter['human_n'] == 0:
            print('Face Detect: None')
        else:
            human_coodinate = (Vilib.detect_obj_parameter['human_x'],Vilib.detect_obj_parameter['human_y'])
            human_size = (Vilib.detect_obj_parameter['human_w'],Vilib.detect_obj_parameter['human_h'])
            print("[Face Detect] ","Coordinate:",human_coodinate,"Size",human_size)


def main():
    global flag_face, flag_color, qr_code_flag
    qrcode_thread = None

    Vilib.camera_start(vflip=False,hflip=False)
    Vilib.display(local=True,web=True)
    print(manual)

    while True:
        # readkey
        key = readchar.readkey()
        key = key.lower()
        # take photo
        if key == 'q':
            take_photo()
        # color detect
        elif key != '' and key in ('0123456'):  # '' in ('0123') -> True
            index = int(key)
            if index == 0:
                flag_color = False
                Vilib.color_detect('close')
            else:
                flag_color = True
                Vilib.color_detect(color_list[index]) # color_detect(color:str -> color_name/close)
            print('Color detect : %s'%color_list[index])
        # face detection
        elif key =="f":
            flag_face = not flag_face
            face_detect(flag_face)
        # qrcode detection
        elif key =="r":
            qr_code_flag = not qr_code_flag
            if qr_code_flag == True:
                if qrcode_thread == None or not qrcode_thread.is_alive():
                    qrcode_thread = threading.Thread(target=qrcode_detect)
                    qrcode_thread.setDaemon(True)
                    qrcode_thread.start()
            else:
                if qrcode_thread != None and qrcode_thread.is_alive():
                # wait for thread to end
                    qrcode_thread.join()
                    print('QRcode Detect: close')
        # show detected object information
        elif key == "s":
            object_show()

        sleep(0.5)


if __name__ == "__main__":
    main()
这个怎么运作?
这里首先需要注意的是下面的函数。这两个函数可以帮助您启动相机。
Vilib.camera_start()
Vilib.display()
与"物体检测"相关的函数:
Vilib.face_detect_switch(True): 开启/关闭人脸检测Vilib.color_detect(color): 对于颜色检测,只能同时检测一种颜色。可以输入的参数有:"red","orange","yellow","green","blue","purple"Vilib.color_detect_switch(False): 关闭颜色检测Vilib.qrcode_detect_switch(False): 开启/关闭二维码检测,返回二维码的解码数据Vilib.gesture_detect_switch(False): 打开/关闭手势检测Vilib.traffic_sign_detect_switch(False): 开启/关闭交通标志检测
目标检测到的信息将存储在 detect_obj_parameter = Manager().dict() 字典中。
在主程序中,您可以像这样使用它:
Vilib.detect_obj_parameter['color_x']
字典的键及其用途如下表所示:
color_x:检测到的色块中心坐标的x值,范围0~320color_y:检测到的色块中心坐标的y值,范围0~240color_w:检测色块的宽度,范围0~320color_h:检测到的色块高度,范围0~240color_n: 检测到的色块数量human_x:检测到的人脸中心坐标的x值,范围0~320human_y:检测人脸中心坐标的y值,范围0~240human_w:检测到的人脸宽度,范围0~320human_h:检测到的人脸高度,范围0~240human_n:检测到的人脸数量traffic_sign_x:检测到的交通标志的中心坐标x值,范围0~320traffic_sign_y:检测到的交通标志的中心坐标y值,范围0~240traffic_sign_w:检测到的交通标志的宽度,范围0~320traffic_sign_h:检测到的交通标志的高度,范围0~240traffic_sign_t: 检测到的交通标志的内容,取值列表为 ['stop','right','left','forward']gesture_x:检测到的手势的中心坐标x值,范围0~320gesture_y:检测到的手势的中心坐标y值,范围0~240gesture_w:检测到的手势宽度,范围0~320gesture_h:检测到的手势高度,范围0~240gesture_t:检测到的手势内容,值列表为 ["paper","scissor","rock"]qr_date: 正在检测的二维码内容qr_x:待检测二维码的中心坐标x值,范围0~320qr_y:待检测二维码的中心坐标y值,范围0~240qr_w:要检测的二维码宽度,范围0~320qr_h:要检测的二维码高度,范围0~320