Servo Adjust(Important)
The angle range of the servo is -90~90, but the angle set at the factory is random, maybe 0°, maybe 45°; if we assemble it with such an angle directly, it will lead to a chaotic state after the robot runs the code, or worse, it will cause the servo to block and burn out.
So here we need to set all the servo angles to 0° and then install them, so that the servo angle is in the middle, no matter which direction to turn.
To ensure that the servo has been properly set to 0°, first insert the servo arm into the servo shaft and then gently rotate the rocker arm to a different angle. This servo arm is just to allow you to clearly see that the servo is rotating.

Now, run
servo_zeroing.pyin theexample/folder.cd ~/picar-x/example sudo python3 servo_zeroing.py
Next, plug the servo cable into the P11 port as follows, at the same time you will see the servo arm rotate to a position(This is the 0° position, which is a random location and may not be vertical or parallel.).
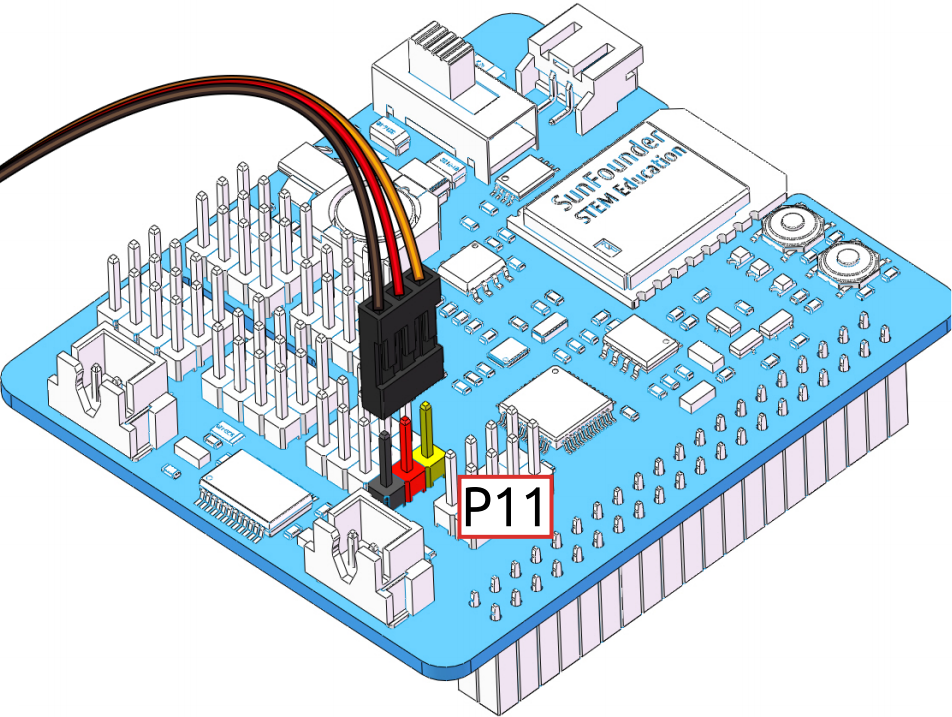
Now, remove the servo arm, ensuring the servo wire remains connected, and do not turn off the power. Then continue the assembly following the paper instructions.
Note
Do not unplug this servo cable before fixing it with the servo screw, you can unplug it after fixing it.
Do not rotate the servo while it is powered on to avoid damage; if the servo shaft is not inserted at the right angle, pull the servo out and reinsert it.
Before assembling each servo, you need to plug the servo cable into P11 and turn on the power to set its angle to 0°.