0. Calibrating the PiCar-X
Calibrate Motors & Servo
Some servo angles may be slightly tilted due to possible deviations during PiCar-X installation or limitations of the servos themselves, so you can calibrate them.
Of course, you can skip this chapter if you think the assembly is perfect and doesn’t require calibration.
Run the
calibration.py.cd ~/picar-x/example/calibration sudo python3 calibration.py
After running the code, you will see the following interface displayed in the terminal.
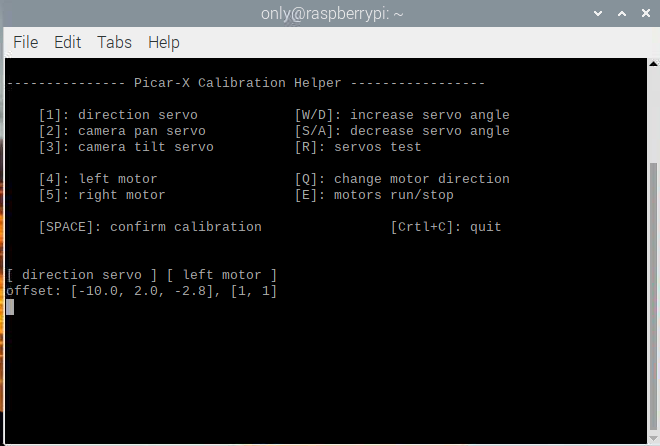
The
Rkey is used to test if the 3 servos are working properly. After selecting a servo with the1,2or3keys, then press theRkey to test that servo.Press the number key
1to select the front wheel servo, and then press theW/Skey to let the front wheel looks as forward as possible without skewing left and right.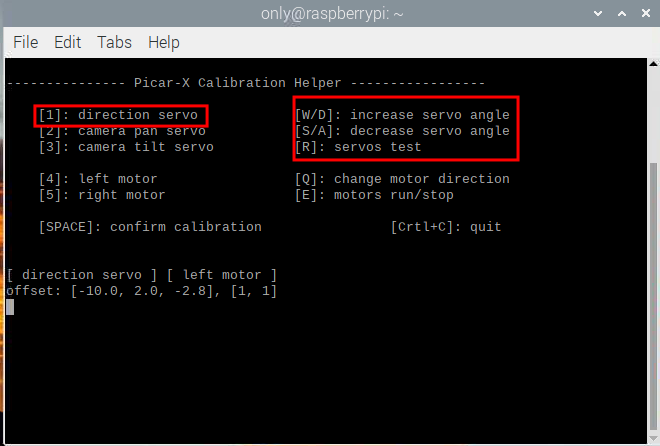
Press the number key
2to select the Pan servo, then press theW/Skey to make the pan/tilt platform look straight ahead and not tilt left or right.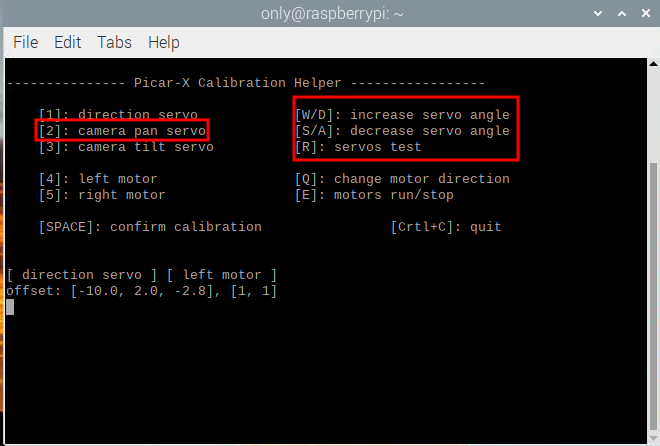
Press the number key
3to select the tilt servo, then press theW/Skey to make the pan/tilt platform look straight ahead and not tilt up and down.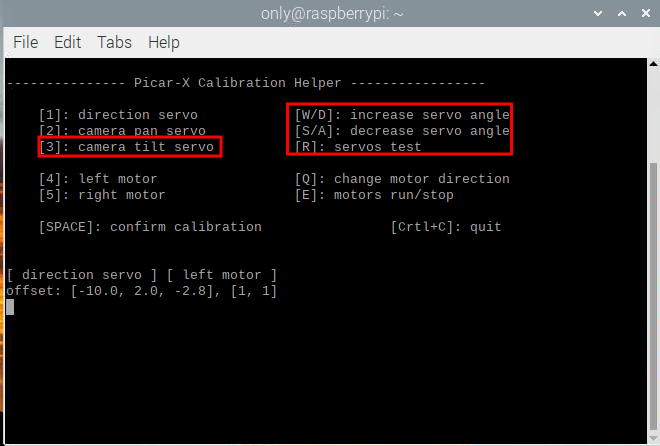
Since the wiring of the motors may be reversed during installation, you can press
Eto test whether the car can move forward normally. If not, use the number keys4and5to select the left and right motors, then press theQkey to calibrate the rotation direction.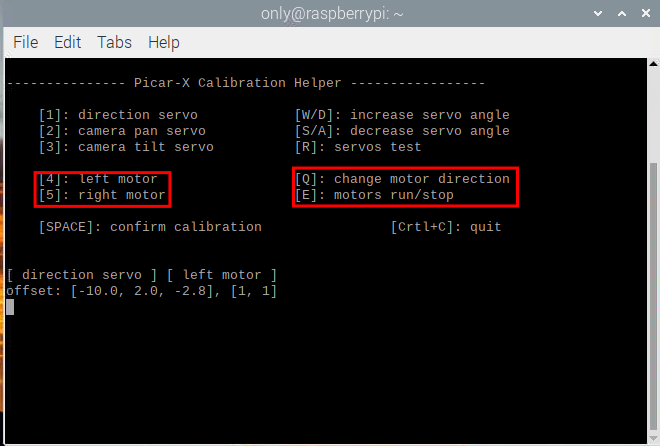
When the calibration is completed, press the
Spacebarto save the calibration parameters. There will be a prompt to enteryto confirm, and then pressCtrl+Cto exit the program to complete the calibration.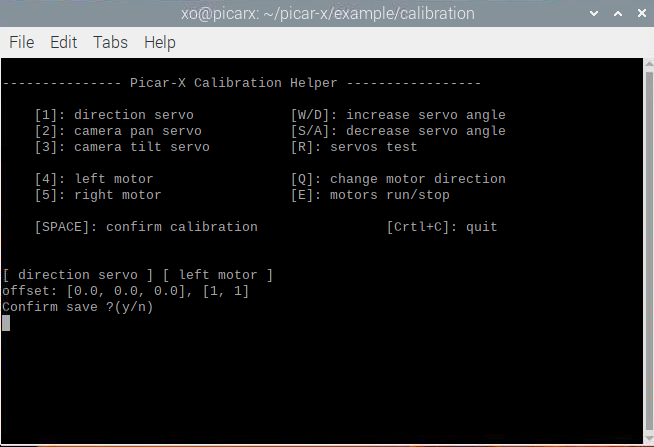
Calibrate Grayscale Module
Due to varying environmental conditions and lighting situations, the preset parameters for the greyscale module might not be optimal. You can fine-tune these settings through this program to achieve better results.
Lay down a strip of black electrical tape, about 15cm long, on a light-colored floor. Center your PiCar-X so that it straddles the tape. In this setup, the middle sensor of the greyscale module should be directly above the tape, while the two flanking sensors should hover over the lighter surface.
Run the
grayscale_calibration.py.cd ~/picar-x/example/calibration sudo python3 grayscale_calibration.py
After running the code, you will see the following interface displayed in the terminal.
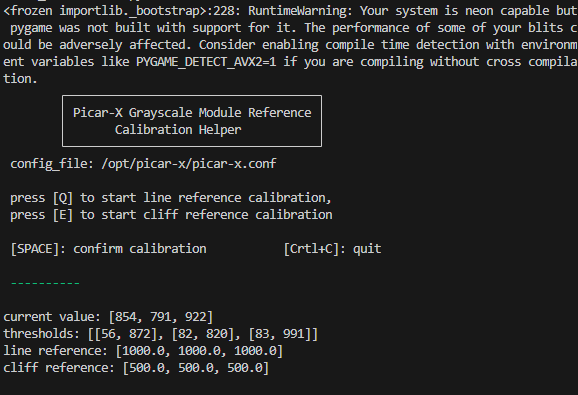
Press the “Q” key to initiate the greyscale calibration. You’ll then observe the PiCar-X make minor movements to both the left and the right. During this process, each of the three sensors should sweep across the electrical tape at least once.
Additionally, you will notice three pairs of significantly different values appearing in the “threshold value” section, while the “line reference” will display two intermediate values, each representing the average of one of these pairs.
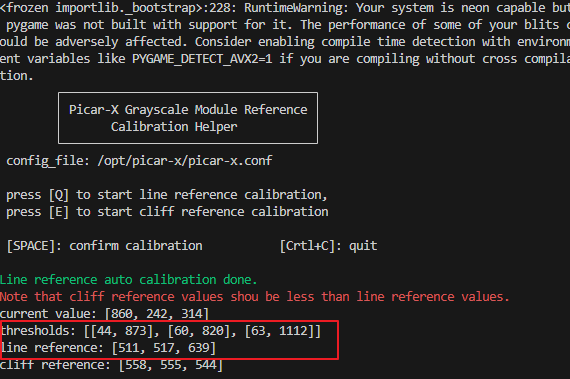
Next, suspend the PiCar-X in mid-air (or position it over a cliff edge) and press the “E” key. You’ll observe that the “cliff reference” values are also updated accordingly.
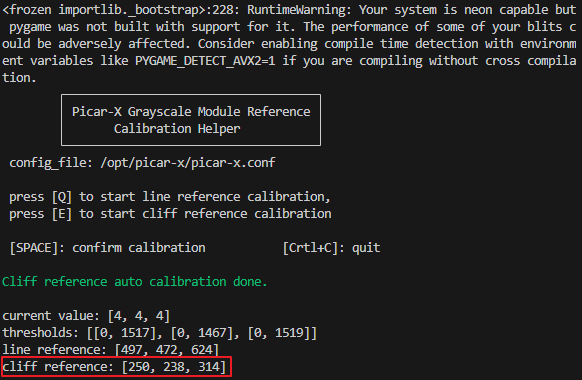
Once you’ve verified that all the values are accurate, press the “space” key to save the data. You can then exit the program by pressing Ctrl+C.