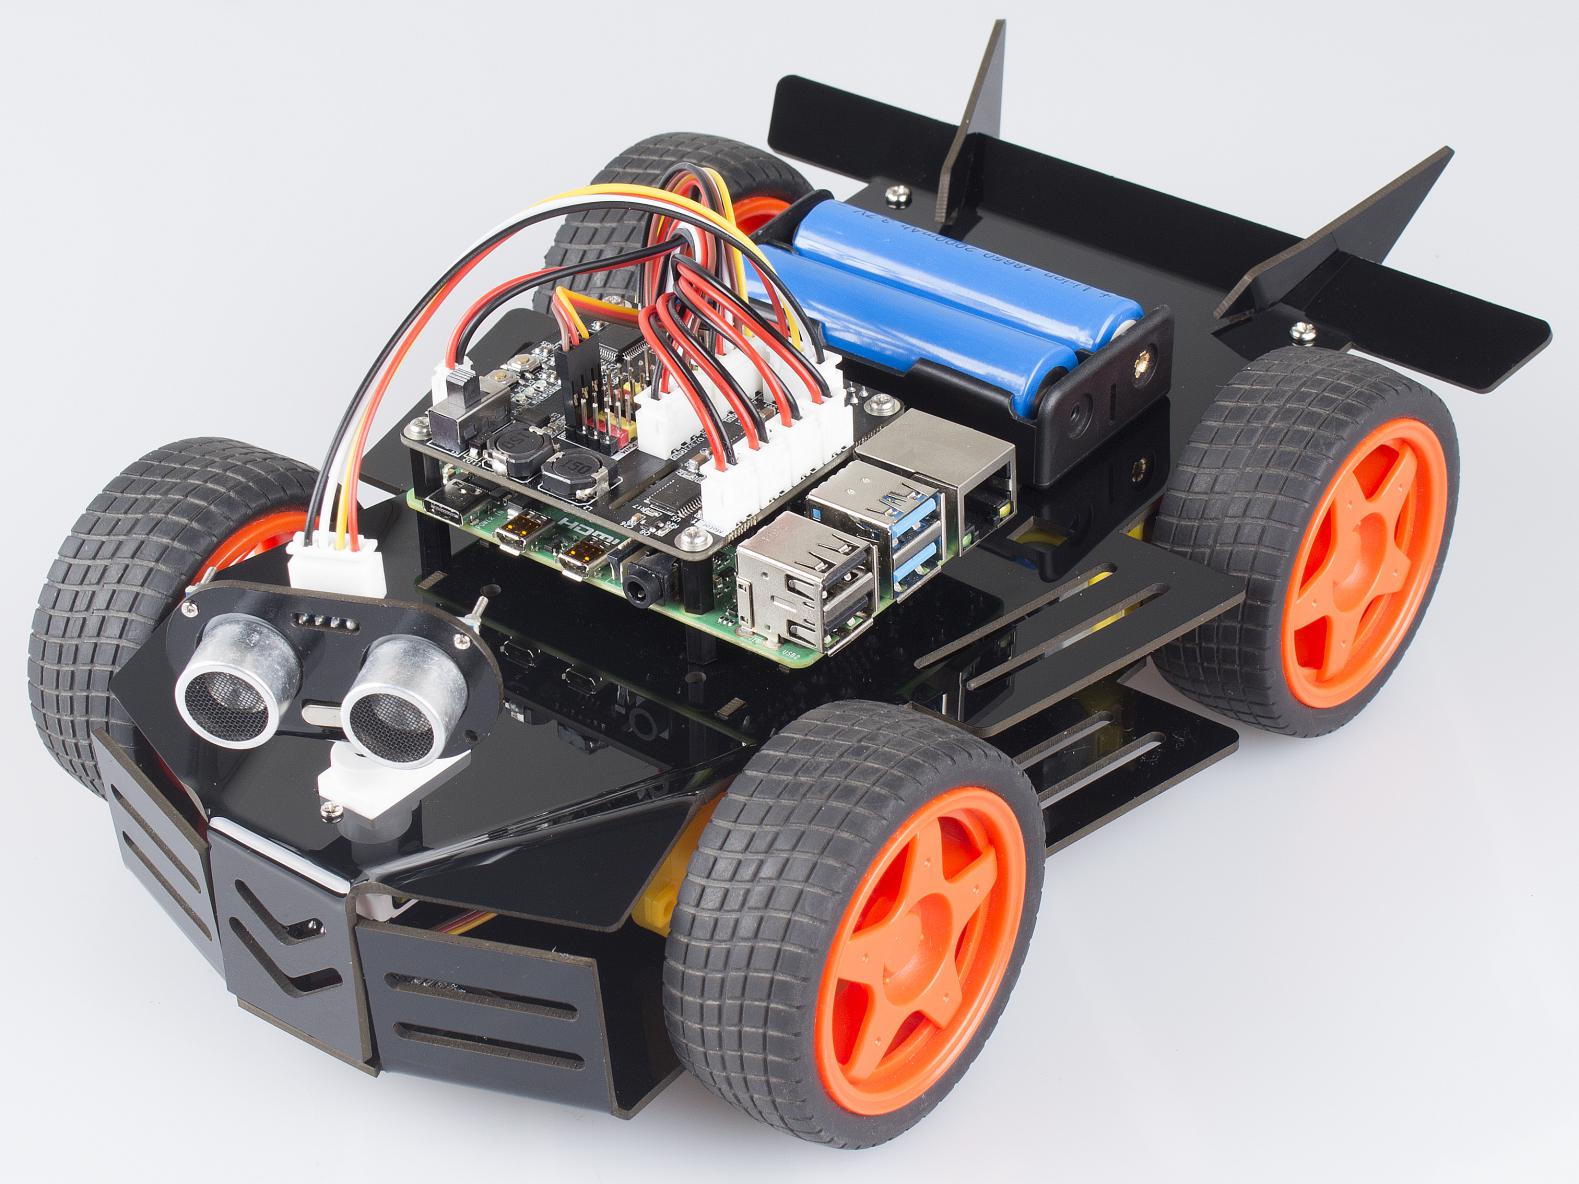
Hardware Assembling
Assembling Motor
Assemble 4 motor to the bottom plate.
Note
Keep the vertex angle of the triangle sticking upward.
For the convenience of later assembly, please mark the number(1, 2, 3, 4) on the socket of the 4 motors.
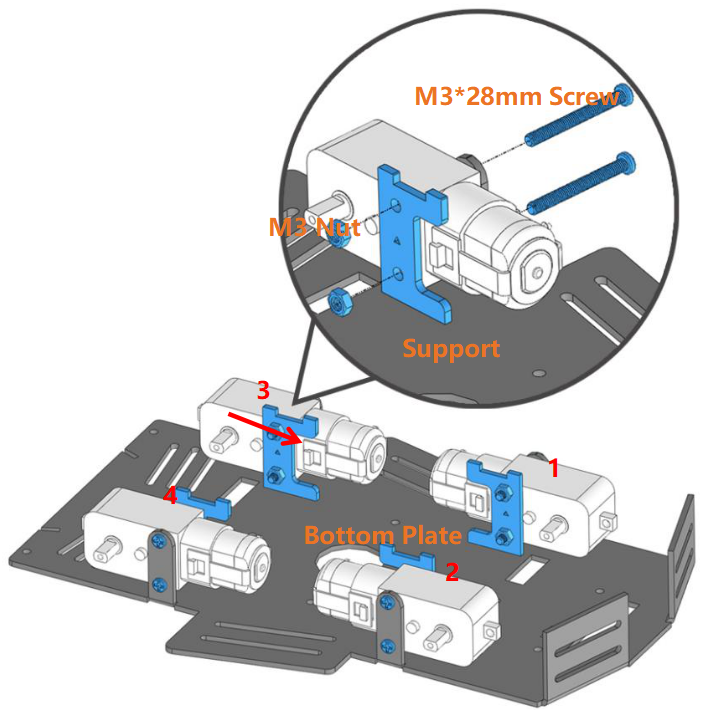
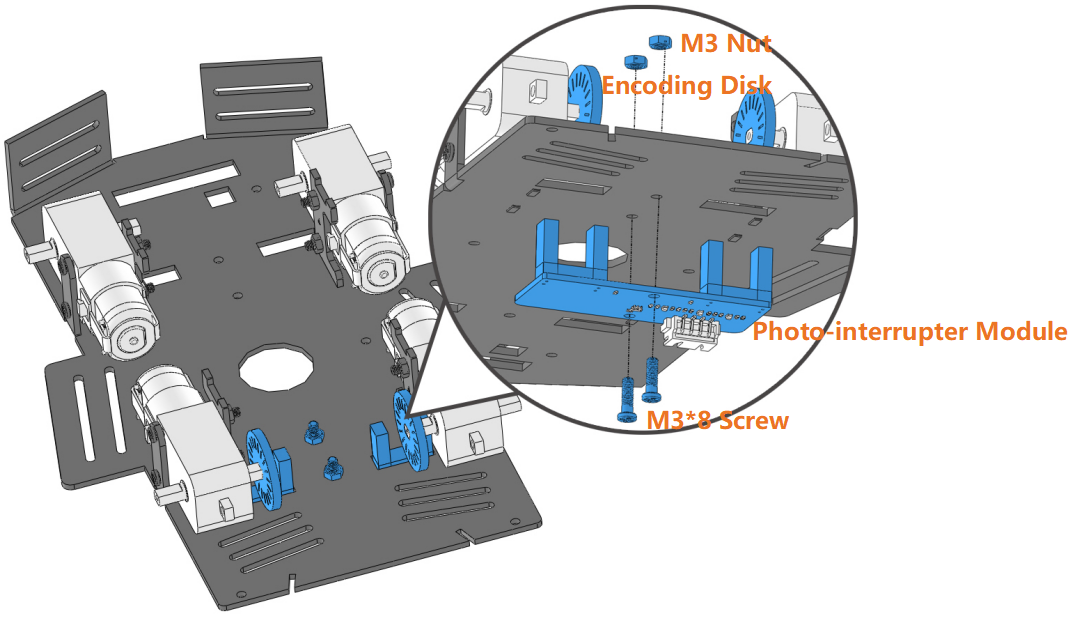
Photo-interrupter Module + Encoding Disk
Insert the Encoding Disk into the motor, then assemble the Photo-interrupter module from bottom to top.
Note
Keep the Encoding Disk on the motor away from the Photo-interrupter module to avoid the potential abrasion.
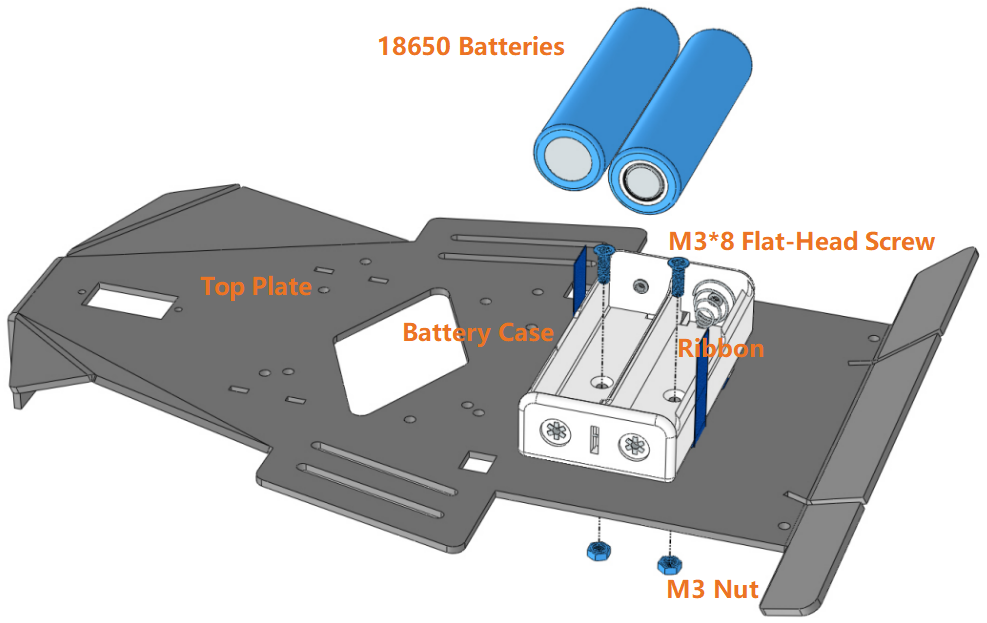
Assembling Battery Holder
Assemble the battery holder to the top plate and put the battery in.
Note
To get the battery out of the holder easily, you can wind the battery with ribbon like this.
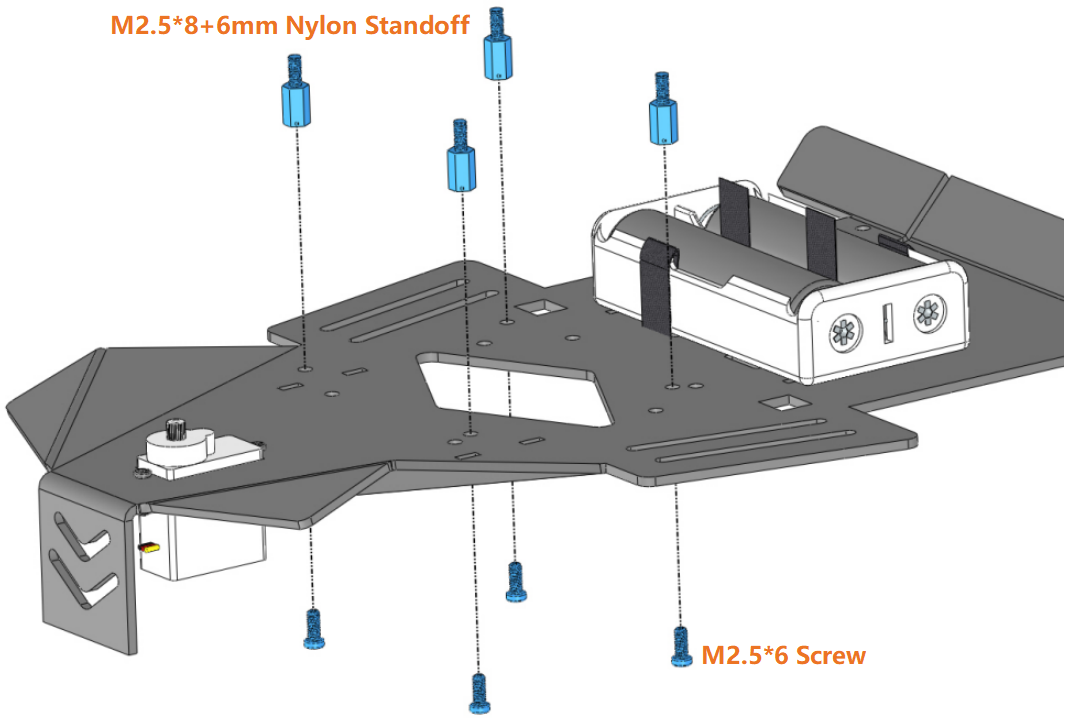
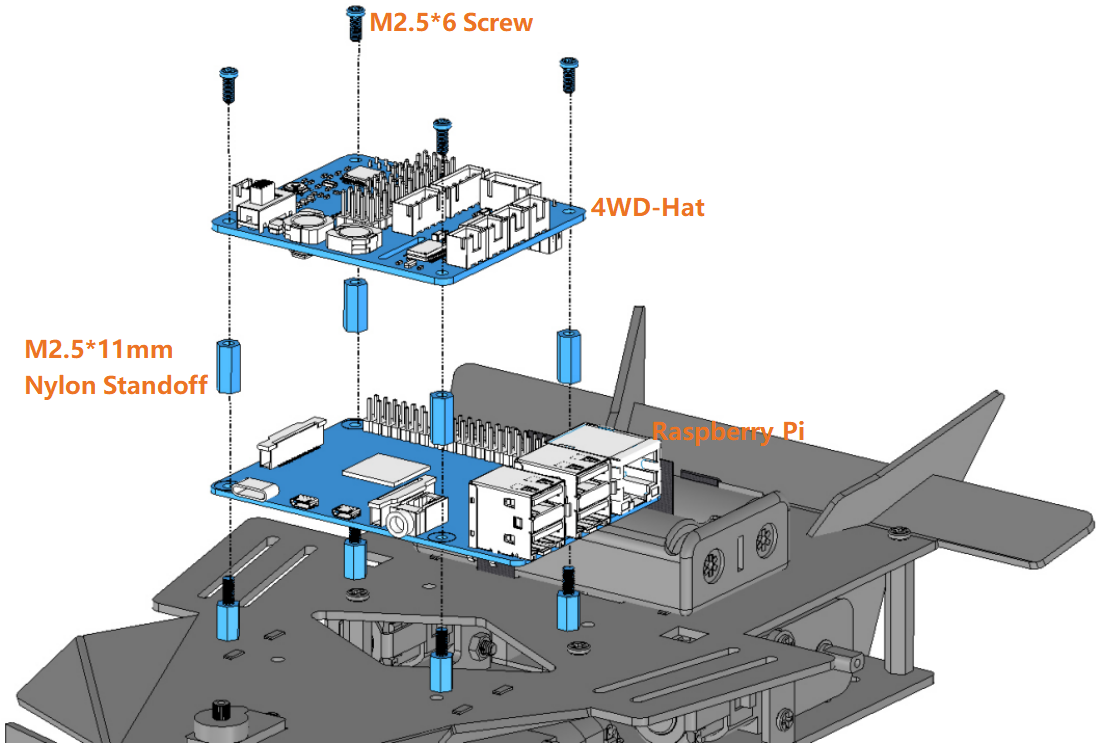
Assembling Nylon Standoffs
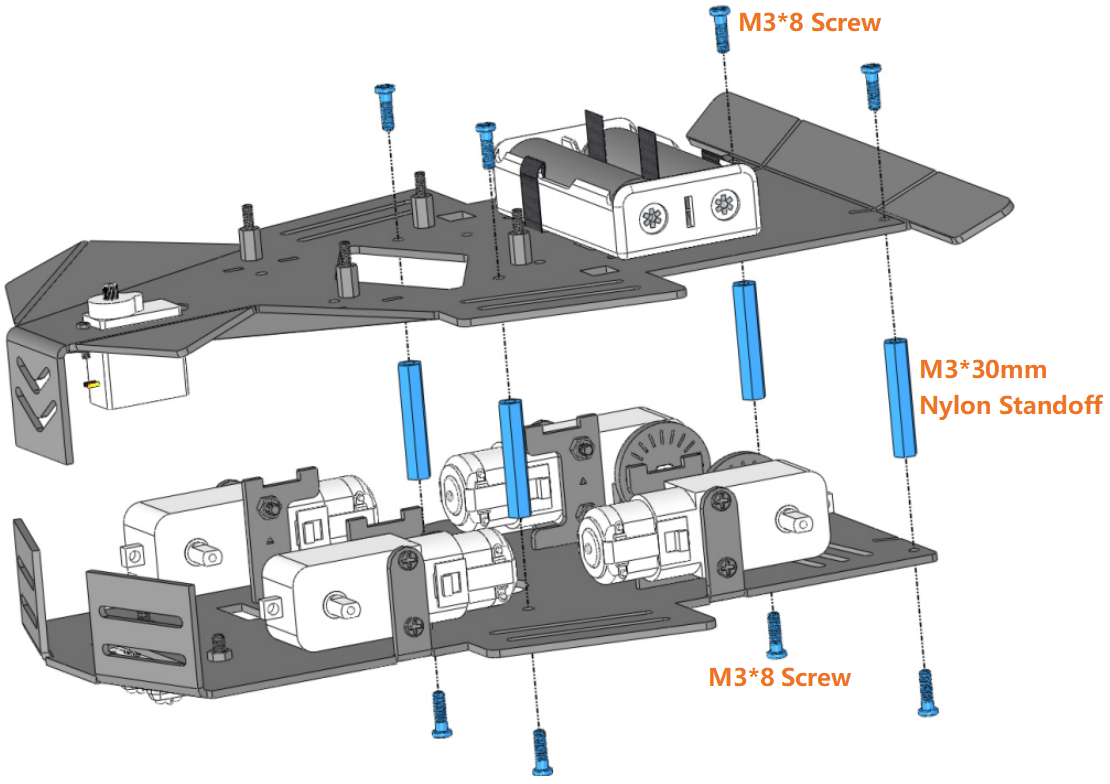
Assembling Top Plate and Bottom Plate
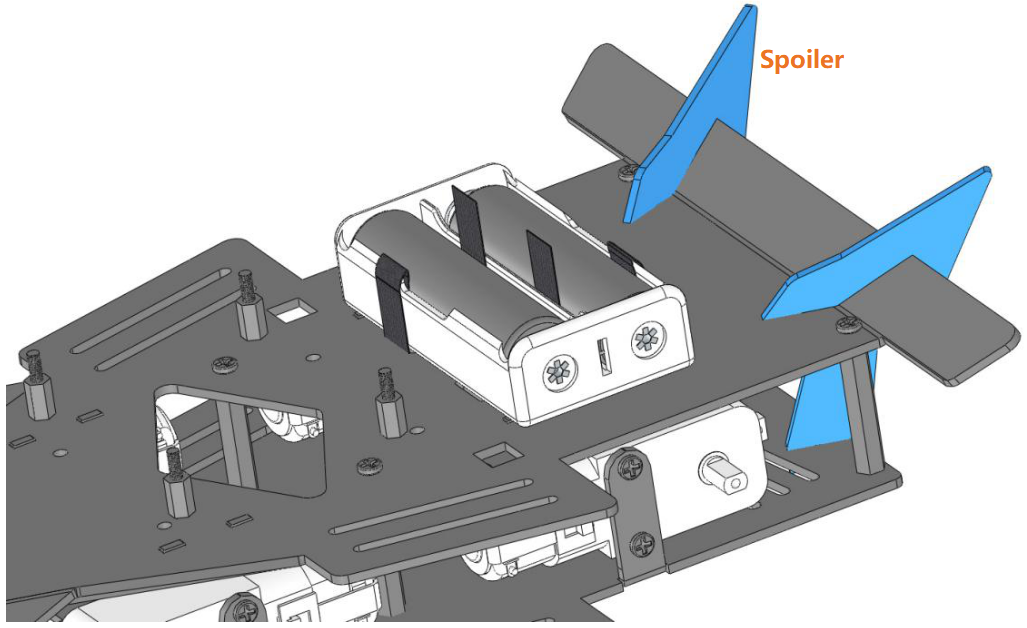
Assembling Spoiler
Assembling Control Board
Connect Wires
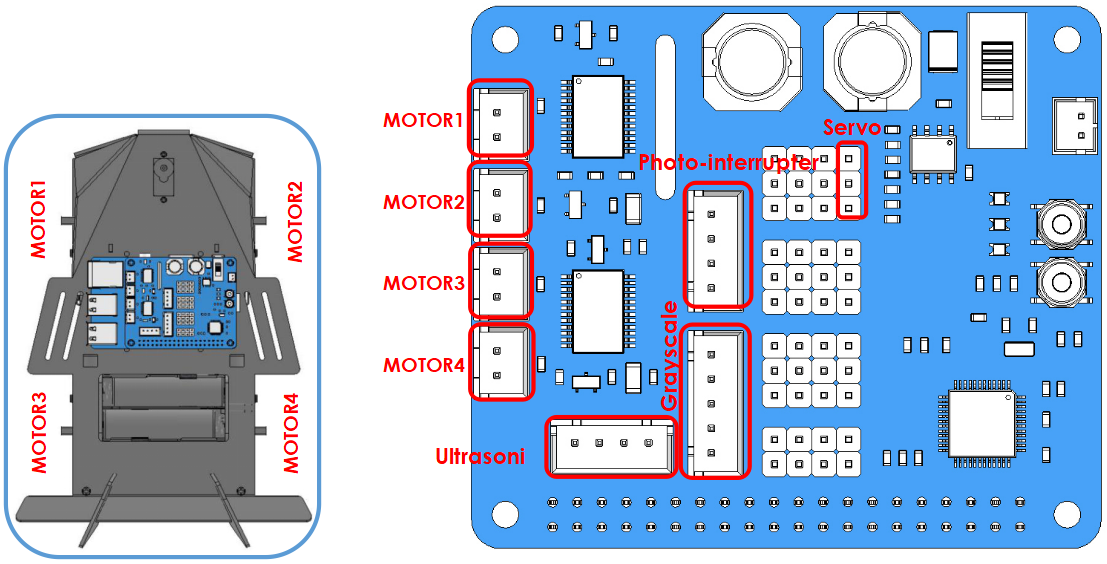
Connect the modules properly with the guidance of the marks on the 4WD-Hat board.
Note
For good appearance, you need to make sure that all the wires go through the bottom plate of the car to the HAT on the upper plate of the car.
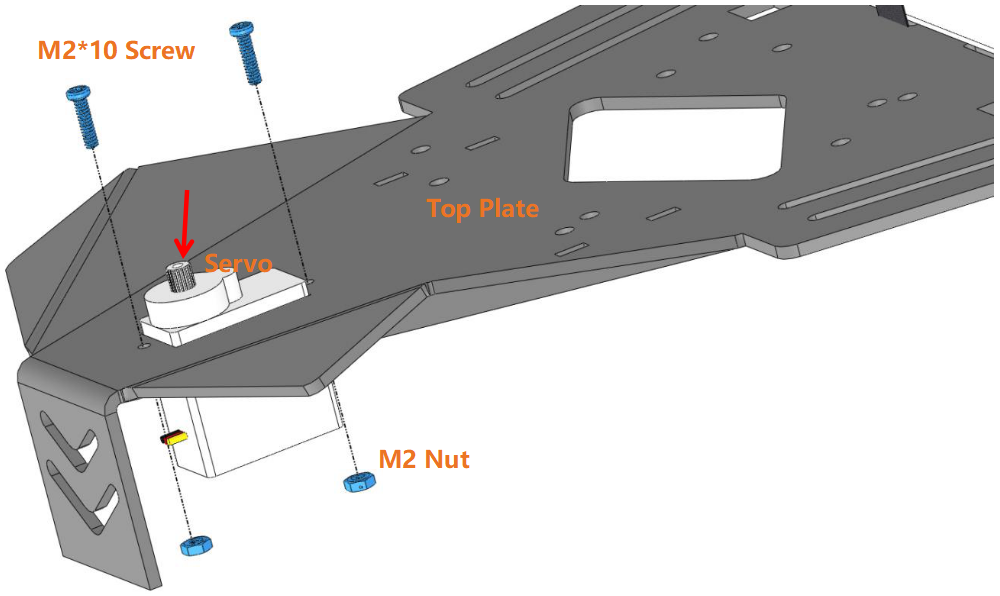
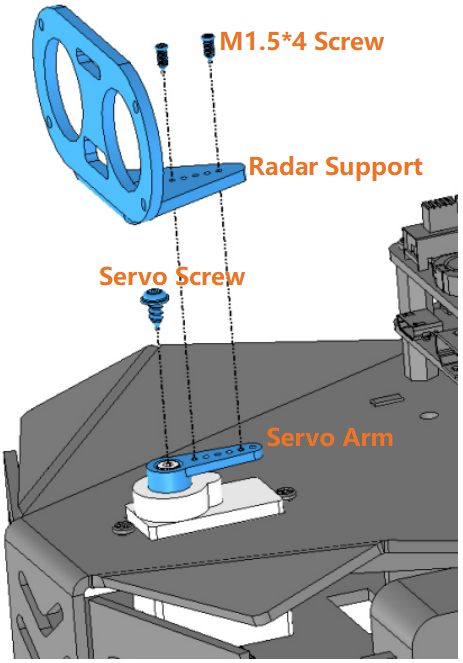
Assembling Radar Support
Note
Assemble the servo arm only when the Raspberry Pi is energized and the command 「picar-4wd test servo」is running.
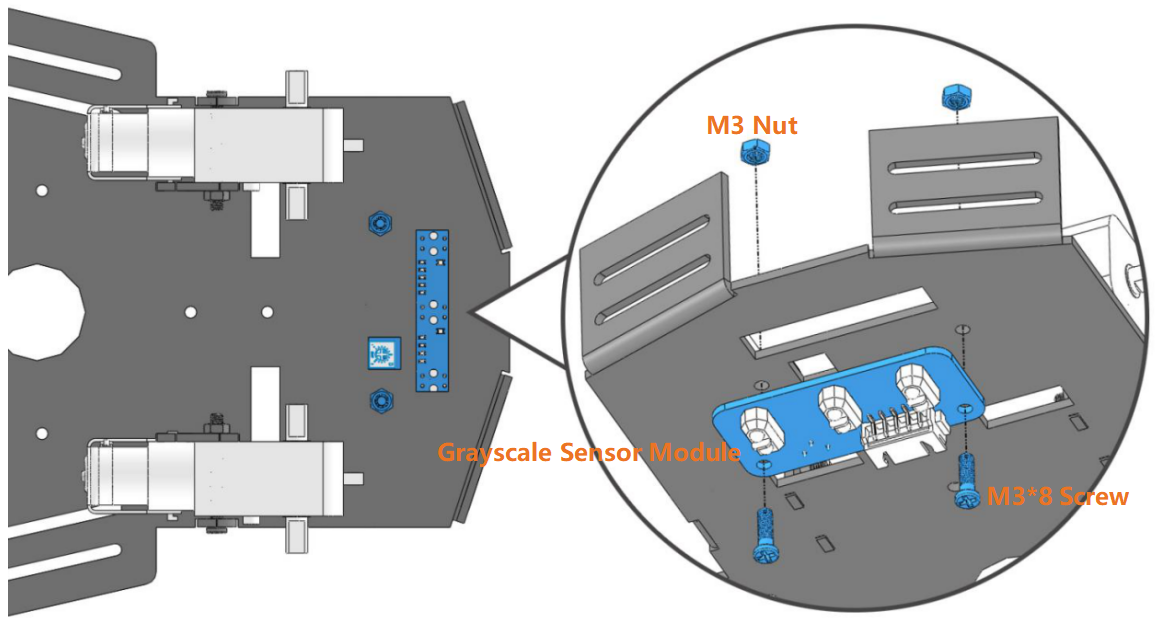
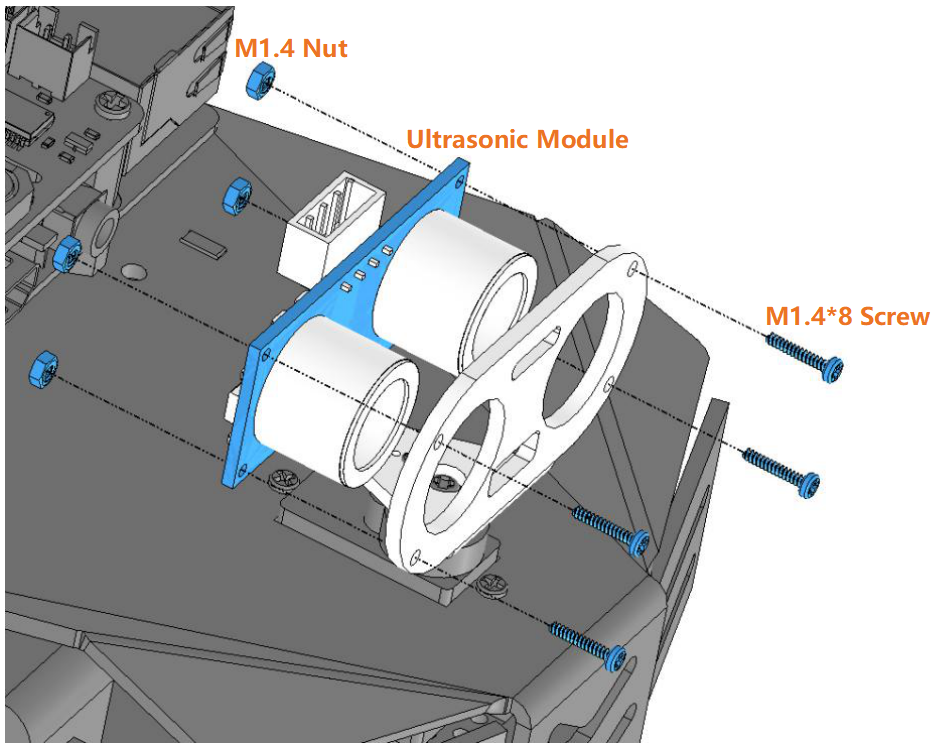
Assembling Ultrasonic Sensor Module
Assembling Wheels(finished)