Record Video
This example will guide you how to use the recording function.
Run the Code
cd /home/pi/picrawler/examples
sudo python3 record_video.py
After the code runs, the recording function will start. You can input w to pause recording, input q to start/continue recording, and input e to stop recording.
View the Image
After the code runs, the terminal will display the following prompt:
No desktop !
* Serving Flask app "vilib.vilib" (lazy loading)
* Environment: production
WARNING: Do not use the development server in a production environment.
Use a production WSGI server instead.
* Debug mode: off
* Running on http://0.0.0.0:9000/ (Press CTRL+C to quit)
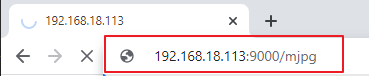
Then you can enter http://<your IP>:9000/mjpg in the browser to view the video screen. such as: https://192.168.18.113:9000/mjpg
Code
from os import pardir
from time import sleep
from vilib import Vilib

def main():
    Vilib.camera_start()
    Vilib.display()

    Vilib.rec_video_set["path"] = "/home/pi/video/test/"
    vname = "vtest"
    Vilib.rec_video_run(vname)
    print('start rec ...')
    while True:
        if input() == 'q':
            Vilib.rec_video_start()
            print('continue')
        if input() == 'w':
            Vilib.rec_video_pause()
            print('pause')
        if input() == 'e':
            Vilib.rec_video_stop()
            print('stop')
            print("The video saved as",Vilib.rec_video_set["path"],vname)

if __name__ == "__main__":
    main()
How it works?
Functions related to recording include the following:
Vilib.rec_video_run(video_name): Started the thread to record the video.video_nameis the name of the video file, it should be a string.Vilib.rec_video_start(): Start or continue video recording.Vilib.rec_video_pause(): Pause recording.Vilib.rec_video_stop(): Stop recording.
Vilib.rec_video_set["path"] = "/home/pi/video/test/" sets the storage location of video files.