Note
Hello, welcome to the SunFounder Raspberry Pi & Arduino & ESP32 Enthusiasts Community on Facebook! Dive deeper into Raspberry Pi, Arduino, and ESP32 with fellow enthusiasts.
Why Join?
Expert Support: Solve post-sale issues and technical challenges with help from our community and team.
Learn & Share: Exchange tips and tutorials to enhance your skills.
Exclusive Previews: Get early access to new product announcements and sneak peeks.
Special Discounts: Enjoy exclusive discounts on our newest products.
Festive Promotions and Giveaways: Take part in giveaways and holiday promotions.
👉 Ready to explore and create with us? Click [here] and join today!
6.5 Interfacing RFID
In this lesson, we’ll explore how to use Radio Frequency Identification (RFID) technology with the Raspberry Pi Pico 2. RFID allows for wireless communication between a reader and tags, which can be used for identification, authentication, and data storage.
What You’ll Need
In this project, we need the following components.
It’s definitely convenient to buy a whole kit, here’s the link:
Name |
ITEMS IN THIS KIT |
LINK |
|---|---|---|
Newton Lab Kit |
450+ |
You can also buy them separately from the links below.
SN |
COMPONENT |
QUANTITY |
LINK |
|---|---|---|---|
1 |
1 |
||
2 |
Micro USB Cable |
1 |
|
3 |
1 |
||
4 |
Several |
||
5 |
1 |
Understanding RFID
RFID technology uses electromagnetic fields to automatically identify and track tags attached to objects. The tags contain electronically stored information, which can be read from a distance without direct line-of-sight.
RFID Reader (MFRC522): A device that emits radio waves to communicate with RFID tags.
RFID Tag: A small object, such as a card or key fob, that contains a microchip and antenna. It can be passive (no battery) or active (battery-powered).
Circuit Diagram

Wiring Diagram

Writing the Code
We’ll write two programs that initializes the MFRC522 RFID reader, listens for RFID tags, and reads their unique identifiers (UID).
Note
The
MFRC522library is used here, you can install it from the Library Manager.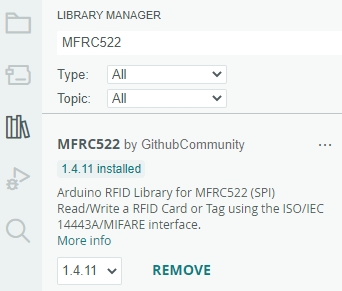
Writing Information to RFID Tags:
Note
You can open the file
6.5_rfid_read.inofromnewton-lab-kit/arduino/6.5_rfid_read.Or copy this code into Arduino IDE.
Select the Raspberry Pi Pico 2 board and the correct port, then click “Upload”.
#include <SPI.h>
#include <MFRC522.h>

// Define the connection pins for the RFID module
#define SS_PIN 17    // SDA pin connected to GPIO 17 (SPI SS)
#define RST_PIN 9    // RST pin connected to GPIO 9

MFRC522 mfrc522(SS_PIN, RST_PIN); // Create MFRC522 instance

void setup() {
  // Initialize serial communication
  Serial.begin(115200);
  while (!Serial); // Wait for serial port to connect

  // Initialize SPI bus
  SPI.begin();

  // Initialize RFID reader
  mfrc522.PCD_Init();
  Serial.println("RFID Writer Initialized!");

}

void loop() {
  // Check if data is available in the serial buffer
  if (Serial.available() > 0) {
    String data = Serial.readStringUntil('#'); // Read until '#' is received
    data.trim(); // Remove any trailing whitespace

    // Wait for a new RFID card
    Serial.println("Place your RFID tag near the reader...");
    if ( ! mfrc522.PICC_IsNewCardPresent()) {
      return;
    }

    // Select one of the cards
    if ( ! mfrc522.PICC_ReadCardSerial()) {
      return;
    }

    // Authenticate using key A
    MFRC522::MIFARE_Key key;
    for (byte i = 0; i < 6; i++) {
      key.keyByte[i] = 0xFF;
    }

    byte block = 4; // Example block to write to
    byte sector = mfrc522.PICC_GetUid()->uidByte[0] % 32; // Calculate sector

    MFRC522::StatusCode status;
    status = mfrc522.PCD_Authenticate(MFRC522::PICC_CMD_MF_AUTH_KEY_A, block, &key, &(mfrc522.uid));
    if (status != MFRC522::STATUS_OK) {
      Serial.print("Authentication failed: ");
      Serial.println(mfrc522.GetStatusCodeName(status));
      return;
    }

    // Prepare data to write (16 bytes)
    byte buffer[18];
    data.getBytes(buffer, sizeof(buffer));
    buffer[16] = 0x00; // Padding
    buffer[17] = 0x00; // Padding

    // Write data to the block
    status = mfrc522.MIFARE_Write(block, buffer, 16);
    if (status != MFRC522::STATUS_OK) {
      Serial.print("Write failed: ");
      Serial.println(mfrc522.GetStatusCodeName(status));
      return;
    }

    Serial.println("Data written successfully!");
  }
}
After uploading the code, the following occurs:
In the Serial Monitor, you will see:
RFID Reader Initialized!
Place your RFID tag near the reader...
Input the data you want to write to the RFID tag, ending with the
#character. For example:Hello World#
Place the RFID tag near the reader. Observe the confirmation message in the Serial Monitor:
Data written successfully!
Reading RFID Tags:
Note
You can open the file
6.5_rfid_read.inofromnewton-lab-kit/arduino/6.5_rfid_read.Or copy this code into Arduino IDE.
Select the Raspberry Pi Pico 2 board and the correct port, then click “Upload”.
#include <SPI.h>
#include <MFRC522.h>

// Define the connection pins for the RFID module
#define SS_PIN 17    // SDA pin connected to GPIO 17 (SPI SS)
#define RST_PIN 9    // RST pin connected to GPIO 9

MFRC522 mfrc522(SS_PIN, RST_PIN); // Create MFRC522 instance

void setup() {
  // Initialize serial communication
  Serial.begin(115200);
  while (!Serial); // Wait for serial port to connect

  // Initialize SPI bus
  SPI.begin();

  // Initialize RFID reader
  mfrc522.PCD_Init();
  Serial.println("RFID Reader Initialized!");
}

void loop() {
  // Look for new RFID cards
  if ( ! mfrc522.PICC_IsNewCardPresent()) {
    return;
  }

  // Select one of the cards
  if ( ! mfrc522.PICC_ReadCardSerial()) {
    return;
  }

  // Read the UID of the card
  Serial.print("UID tag :");
  String content= "";
  byte letter;
  for (byte i = 0; i < mfrc522.uid.size; i++) {
     content.concat(String(mfrc522.uid.uidByte[i] < 0x10 ? " 0" : " "));
     content.concat(String(mfrc522.uid.uidByte[i], HEX));
  }
  Serial.println(content);

  // Print the associated user data
  if (userData.length() > 0) {
    Serial.print("Associated Data: ");
    Serial.println(userData);
  } else {
    Serial.println("No data associated with this UID.");
  }
}
After uploading the code, the following occurs:
In the Serial Monitor, you will see:
RFID Reader Initialized!
Place an RFID tag (e.g., a key fob or card) near the MFRC522 RFID module. The Serial Monitor should display both the UID and the data stored on the tag:
UID tag : 04 A3 1B 7C 3E
Data on tag: HelloWorld
Troubleshooting
No Readings Displayed:
Check all wiring connections, especially the SPI lines (SCK, MOSI, MISO, SS).
Ensure the RFID module is receiving power (VCC and GND connections).
Verify that the correct GPIO pins are defined in the code.
Incorrect Readings:
Ensure that the RFID tags are compatible with the MFRC522 module.
Use a different RFID tag to rule out tag-specific issues.
Write Failures:
Ensure the RFID tag is not locked or write-protected.
Verify that the authentication key matches the tag’s key.
Check that the data buffer is correctly formatted and does not exceed 16 bytes.
Signal Interference:
Avoid placing the RFID module near other electronic devices that might cause interference.
Ensure there are no physical obstructions blocking the RFID tag’s communication with the reader.
Further Exploration
Access Control Systems:
Implement door lock mechanisms controlled by RFID tags.
Inventory Management:
Track and manage inventory items using RFID tags for automated counting and monitoring.
RFID-Based Authentication: Create secure authentication systems for user login or device access.
Combining with Other Sensors:
Integrate RFID with other sensors like temperature or motion sensors for comprehensive monitoring systems.
Conclusion
In this lesson, you’ve learned how to interface an RFID system using the MFRC522 RFID module with the Raspberry Pi Pico. By leveraging the SPI communication protocol and the MFRC522 library, you can effortlessly read and write data to RFID tags, enabling a wide range of applications such as access control systems, inventory management, and interactive projects.