Preparations
Before you start using the kit, you will need to complete the following steps.
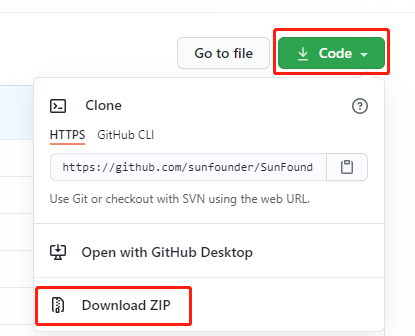
Download the ESP-4WD Package
Click here to download the ESP-4WD codes. After unzipping the zip file you have downloaded, you will see all the relevant files for the ESP-4WD.
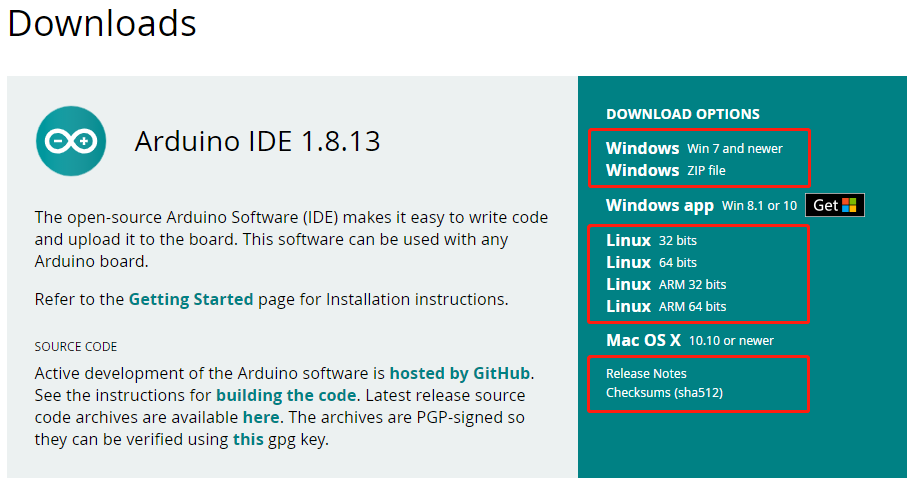
Install Arduino IDE
Go to Arduino Software Page to download the Arduino IDE accordingly to your operating system,then follow the instructions to install it.
Add Libraries
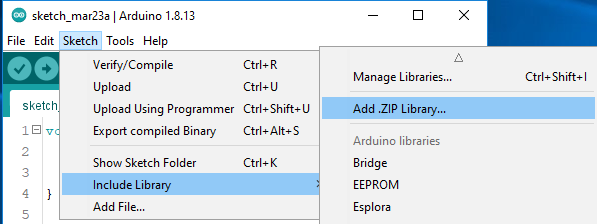
Add esp_rdp
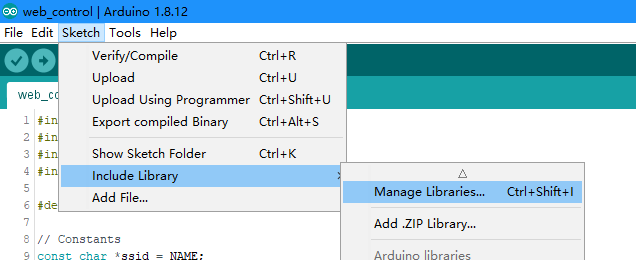
Click Sketch -> Include Library -> Add .ZIP Library.
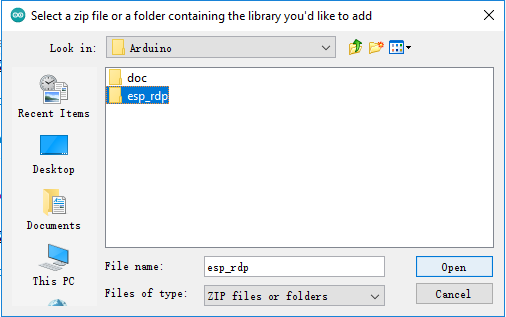
Select the esp_rdp library in the path of esp-4wd/Arduino, which you have downloaded before(https://github.com/sunfounder/esp-4wd), then click OK. After that you can call the functions in this library to control the esp-4wd car.
Add Adafruit NeoPixel
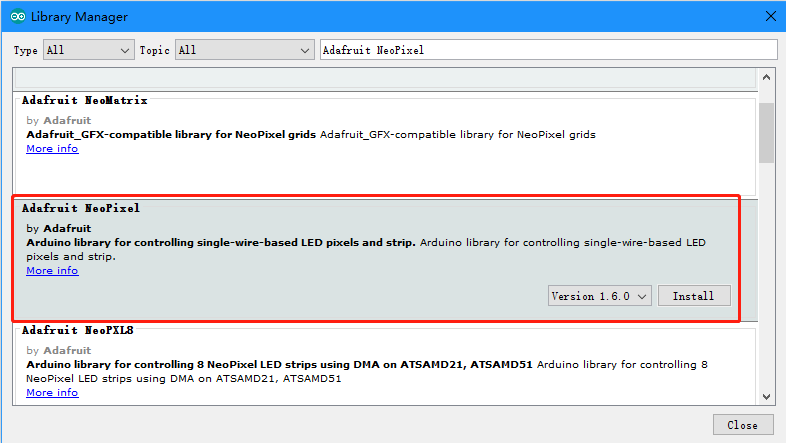
Click Sketch -> Include Library -> Manage Libraries.
Type in Adafruit NeoPixel, find it on the scroll down page and click Install. When using the 8-bit RGB board, you will need to call the functions in this library.
Add WebSockets
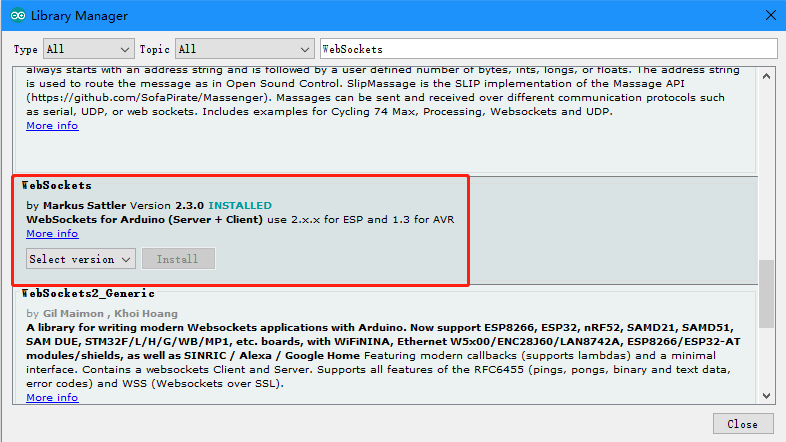
Continue to add the WebSockets library from the Library Manage page. This library is used to open the APP control service.
Add ArduinoJson
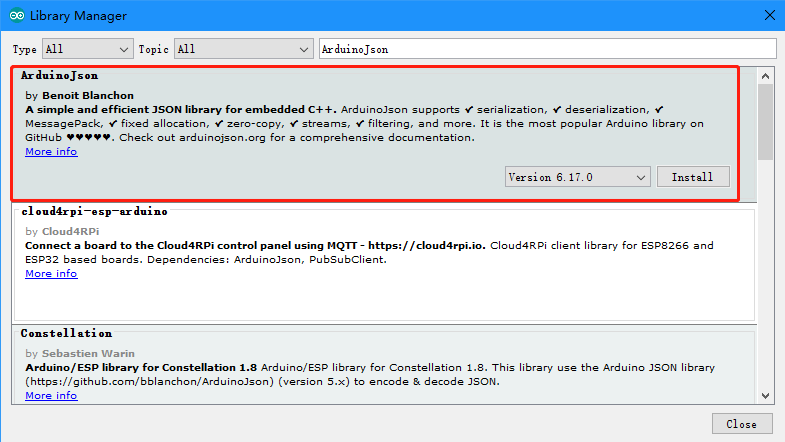
Continue to add the ArduinoJson library from the Library Manage page. This library is used for communication between the APP and the ESP-4WD car.
Installing ESP32 Add-on in Arduino IDE
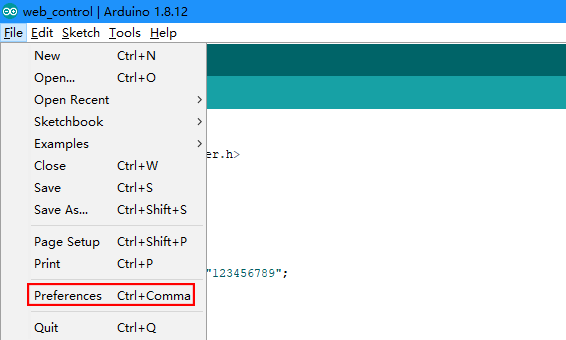
In your Arduino IDE, go to File -> Preferences.
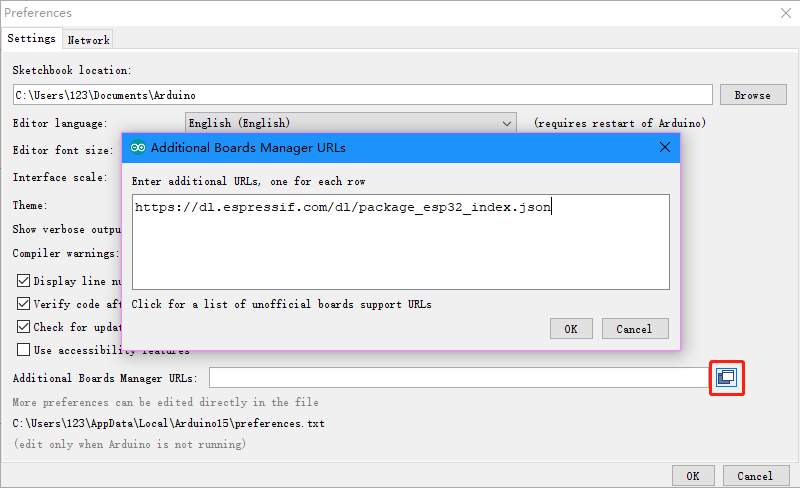
In the Preferences interface, click the Upload icon, and type in this URL, https://dl.espressif.com/dl/package_esp32_index.json, click OK.
Note
If you already have the ESP8266 boards URL, you can separate the URLs with a comma as follows:
https://dl.espressif.com/dl/package_esp32_index.json, http://arduino.esp8266.com/stable/package_esp8266com_index.json
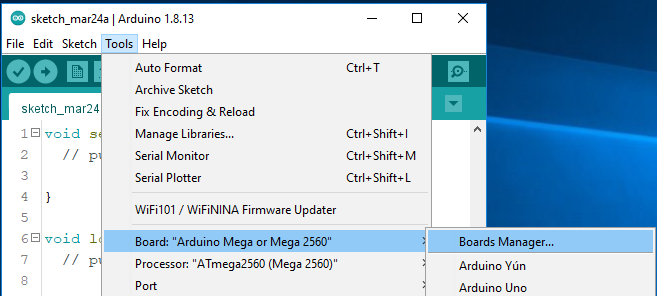
Open the Boards Manager by clicking Tools -> Board -> Boards Manager.
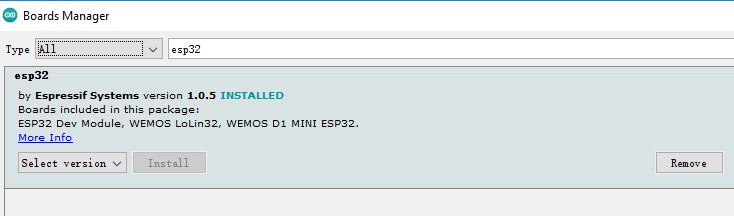
Search for ESP32 and press install button for the ESP32 by Espressif Systems:

That’s it. If your network is poor, errors may be reported during the installation process, please click Install button again until the installation is successful.
Install Driver
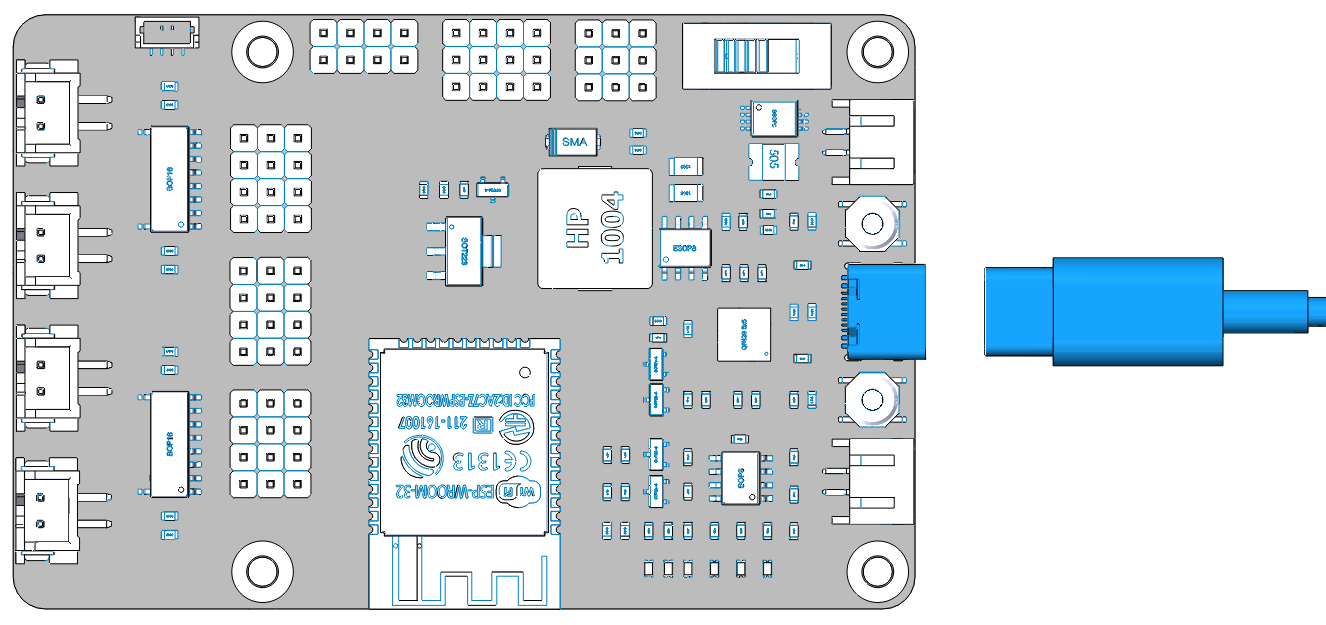
When you connect the ESP32 RDP board to the computer with a Type-C USB cable, the computer may not be able to recognize it. In this case, you need to install the driver manually.
Right-click the This PC icon, and then click Properties -> Device Manager -> Ports to check the COM port information.

If the COM port(COMxx) does not appear, you need to download CP210x USB to UART Bridge VCP Drivers and install it.

Check the COM port information again. If the COM port(COMxx)can be displayed, the driver installation is successful.
