Remote Desktop
If you are not satisfied with using the command window to control the Raspberry Pi, you can also use the remote desktop function, which can help us manage the files in the Raspberry Pi easily. There are two ways to control the desktop of the Raspberry Pi remotely : VNC and XRDP.
VNC
You can use the function of remote desktop through VNC.
Enable VNC Service
The VNC service has been installed in the system. By default, VNC is disabled. You need to enable it in config.
Step 1
Input the following command:
sudo raspi-config

Step 2
On the config interface, select “Interfacing Options” by the up, down, left and right keys on the keyboard.

Step 3
Select VNC.

Step 4
Select Yes -> OK -> Finish to exit the configuration.

Login to VNC
Step 1
You need to install the VNC Viewer on personal computer. After the installation is done, open it.
Step 2
Then select “New connection”.

Step 3
Input IP address of Raspberry Pi and any Name.

Step 4
Double click the connection just created:

Step 5
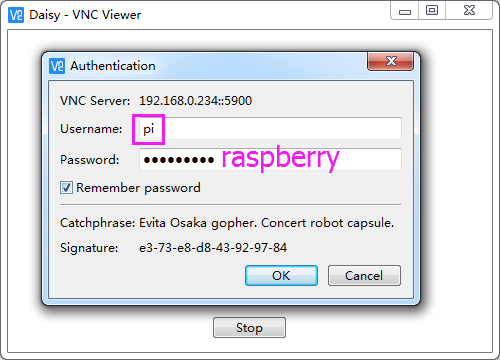
Enter Username (“pi”) and Password (“raspberry” by default).

Step 6
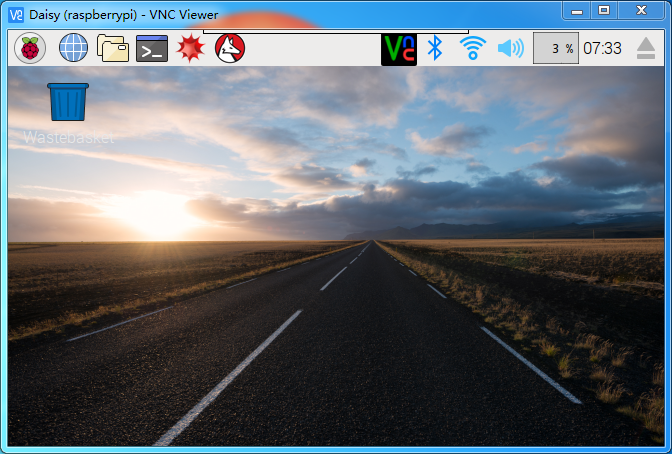
Now you can see the desktop of the Raspberry Pi:

XRDP
XRDP provides a graphical login to remote machines using RDP (Microsoft Remote Desktop Protocol).
Install XRDP
Step 1
Login to Raspberry Pi by using SSH.
Step 2
Input the following instructions to install XRDP.
sudo apt-get update

sudo apt-get install xrdp
Step 3
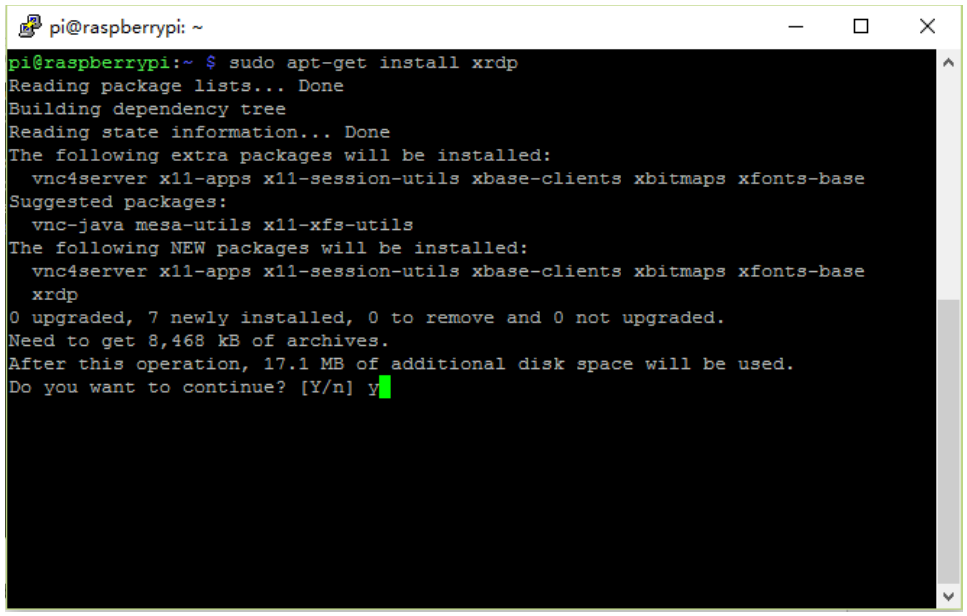
Later, the installation starts.
Enter “Y”, press key “Enter” to confirm.

Step 4
Finished the installation, you should login to your Raspberry Pi by using Windows remote desktop applications.
Login to XRDP
Step 1
If you are a Windows user, you can use the Remote Desktop feature that comes with Windows. If you are a Mac user, you can download and use Microsoft Remote Desktop from the APP Store, and there is not much difference between them. The next example is Windows remote desktop.
Step 2
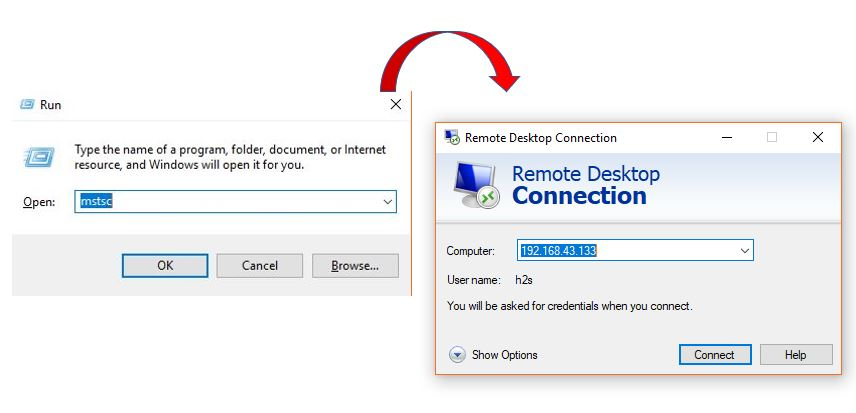
Type in “mstsc” in Run (WIN+R) to open the Remote Desktop Connection, and input the IP address of Raspberry Pi, then click on “Connect”.

Step 3
Then the xrdp login page pops out. Please type in your username and password. After that, please click “OK”. At the first time you log in, your username is “pi” and the password is “raspberry”.

Step 4
Here, you successfully login to RPi by using the remote desktop.
